To avoid these ads, REGISTER NOW!

Stooge's Longer term car projects, Part 2

OP
S

Stooge

Well-known member
Joined
Mar 24, 2013
Messages
3,533
Location
South Shore, MA
Hey you guys leave me alone and let me be a lazy POS! Lots of dogs over the last few weeks, but I got a cortisone shot a few weeks ago so I've been trying to sneak off and get some stuff done.

Edsel news is I dug out the neglected front fender that I never finished and have been tinkering with the finishing edge/ corner of that bodyline, I didn't take any pictures but im going there tonight so maybe i'll remember. Supposedly the engine and trans will be finished in June :headscrat , im not particularly holding my breath but getting that back should provide a little motivation for him. Also started looking at the steering, suspension and brakes and what we want to do as far as any upgrades. Stock drums all around, all of the lines will be replaced, so im thinking at minimum, 2 pot master cylinder, im assuming there will be some yr mustang that people use on ford fairlanes or something for it, and possibly a front disc set up from Scarebird that supposedly lets you keep 15" wheels. He also needs to buy the engine swap mounts and transmission crossmember or if im going to be making a new crossmember for the trans.

Buick, I've just been sanding, and figuring out what needs to be done still as far as some sheet metal areas on the exterior that I discovered. I did buy more rectangular tubing to finish making the running boards for the passenger side, so im going to try and get to that this week some night. I would have done it months ago when I did the other side but I had to use the tubing I had for something else and then I just procrastinated :lol_hitti

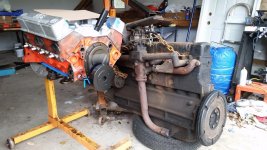
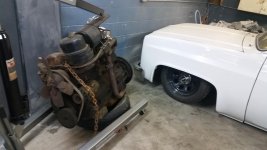
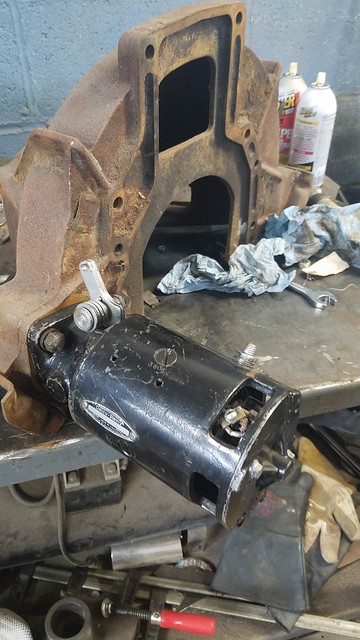
truck, I've been having some timing issues, and I had to pull the carb off and swap on another after it was full of gummed up stale gas. Unfortunately, it's been pretty consistently raining for the last 2months so matching up my free time with nice weather and not much traffic hasn't been easy.

2019-05-28_08-03-15 by Dan Haas, on Flickr
 
To avoid these ads, REGISTER NOW!

Kev442

Well-known member
Joined
Jan 15, 2009
Messages
5,386
Location
Wi
I've been comparing those pictures for 5 solid minutes, and it sure seems like there is some "photoshop" going on with the factory brochure featuring a slightly chopped top...

As for laziness, I've got the market cornered, I haven't touched a project car in two months.
I did extend the overhang on the pole building 3 feet to protect things better, does that count?
 
Last edited:

IndyGarage

Well-known member
Joined
Apr 29, 2010
Messages
9,684
Location
Indy
I've been comparing those pictures for 5 solid minutes, and it sure seems like there is some "photoshop" going on with the factory brochure featuring a slightly chopped top...

As for laziness, I've got the market cornered, I haven't touched a project car in two months.
I did extend the overhang on the pole building 3 feet to protect things better, does that count?

The top one is not a picture. It's an artist rendering. Which means the artist could have been good enough to make the car look a little better by chopping the top, making the driver's door longer and extending the trunk.

Or, one other possibility - Often in those days they would make 2 or 3 different wheelbase vehicles. It is possible that the artist rendering is a 120 inch wheelbase model, whereas the actual car is a 112 or 116.
 
OP
S

Stooge

Well-known member
Joined
Mar 24, 2013
Messages
3,533
Location
South Shore, MA
I've been comparing those pictures for 5 solid minutes, and it sure seems like there is some "photoshop" going on with the factory brochure featuring a slightly chopped top...

As for laziness, I've got the market cornered, I haven't touched a project car in two months.
I did extend the overhang on the pole building 3 feet to protect things better, does that count?

Im sure theres some deviation between the artist rendering for the brochure and a real car, but im also sure my car looks a little more out of proportion without the 1100lbs of engine and transmission that is letting it sit 8 inches higher than it should be

a link to the brochure, actually kind of cool to see
https://www.uniquecarsandparts.com.au/brochures_1937_buick

nice old picture showing a '38, (different grille) sitting a little more level


Kev442

Well-known member
Joined
Jan 15, 2009
Messages
5,386
Location
Wi
All the "hat height" is missing from the rendering. The distance from the rain rail to the top of the roof disappeared. How was Al Capone supposed to wear his fedora? :)
 
OP
S

Stooge

Well-known member
Joined
Mar 24, 2013
Messages
3,533
Location
South Shore, MA
Kev, I need all the height I can get, im 6'1 and these cars are deceptively small inside!

Tinkering with the Edsel fender last night, and I might remake the edge/ corner of the bodyline as Im not that happy with the first attempt and I also changed the way I was doing the panel around that piece after I made the bodyline piece so it doesn't fit that well anymore. I still have the wooden buck I made for it, but I might tweak it a bit. Also was approached about doing some work on someone's '65 el camino, seems like its mostly the floors but floors usually turn into door sills, rockers, etc but the pictures of it look ok. She seems serious about it, so we'll see if that pans out, but im also not really looking for another project right now and kind of just want to work on my stuff, especially after being slowed way down with back issues for the last year

The story of a clapped out 1958 Edsel Villager station wagon front fender :lol_hitti

IMG_20190529_190046_222 by Dan Haas, on Flickr

IMG_20190529_190046_223 by Dan Haas, on Flickr

20180818_091445 by Dan Haas, on Flickr

20180820_180431 by Dan Haas, on Flickr

20180825_161803 by Dan Haas, on Flickr

20181013_124812 by Dan Haas, on Flickr

20181013_132558 by Dan Haas, on Flickr

20181013_141210 by Dan Haas, on Flickr

Screenshot_20190530-074722_Gallery by Dan Haas, on Flickr

Screenshot_20190530-074733_Gallery by Dan Haas, on Flickr

IMG_20190529_190046_187 by Dan Haas, on Flickr

IMG_20190529_190046_182 by Dan Haas, on Flickr
 
Last edited:

xtremek

Well-known member
Joined
Apr 13, 2012
Messages
11,603
Location
St. Johns, Mi
Thanks for the update. I love robbing ideas from guys who know more than me. I know, that doesn't leave anyone out.
 

Kev442

Well-known member
Joined
Jan 15, 2009
Messages
5,386
Location
Wi
Thanks for the update. I love robbing ideas from guys who know more than me. I know, that doesn't leave anyone out.

If I did time for all the things I've learned on GJ that I would never have thought of, I would be at multiple life sentences by now.

I also am quite proud that I have never said "I told you so" about '58 Edsels headlight buckets when bought north of I-80.
Oh, ****... :)


I think I would be a bit hesitant about the El Camino when that GTO took up space for years longer than anticipated too. Somehow it is OK for our own stuff to crowd us to death, but other peoples stuff, Grrr.
 
OP
S

Stooge

Well-known member
Joined
Mar 24, 2013
Messages
3,533
Location
South Shore, MA
Thanks guys!

The edsel fender is coming along but that convex to concave bodyline edge/corner is a real *******. Im trying to get my buddy the edsel owner a little motivated to make some progress or if he wants to work something out to do some of the work on it passed sheet metal/helping with the rest of it, but i also dont want to take away from him working on his first project car and learning everything about every piece of it. But he also has 3 kids, his own business/ works long days, etc.

El camino is pretty preliminary, the handful of pictures she sent me, it didnt LOOK too bad. Sills and rockers looked solid but atleast the driver side footwell is junk, trans tunnel looked ok but i coukdnt really see the pass side floor too well. She said she had ordered floor pans, not sure if that means a whole floor or footwell patches. I also dont know if theyre going to do the mechanical work or thats something they wanted me to do but i would probably pass on doing that. A floor i could bang out in a weekend, but i have no desire to rebuild a 65 el camino for someone, maybe a 59 or 60!
 

Jay H 237

Well-known member
Joined
Apr 24, 2005
Messages
1,994
Location
Torrington, CT
I think this is the Buick you bought! Scroll to the bottom of the page http://relicrecyclery.com/entrance.htm

I've followed his site for years, plus learned many tricks like **** welding from him. I followed his Mustang LE600 restoration closely.


EDIT: I just read through the whole thread, it is! I'll leave the link up as others may want to follow the progress and see the work he's done on the other vehicles.
 
Last edited:
OP
S

Stooge

Well-known member
Joined
Mar 24, 2013
Messages
3,533
Location
South Shore, MA
I think this is the Buick you bought! Scroll to the bottom of the page http://relicrecyclery.com/entrance.htm

I've followed his site for years, plus learned many tricks like **** welding from him. I followed his Mustang LE600 restoration closely.


EDIT: I just read through the whole thread, it is! I'll leave the link up as others may want to follow the progress and see the work he's done on the other vehicles.

yup, that's where I found the pictures from that I posted a few pages back. Kind of curious about what year those pictures were taken, if they know of any history of the car, what was with the car when they had it, etc. but I guess not curious enough to bother emailing them. Thanks for taking/ wasting! :lol_hitti the time to read through all of my ramblings!
 
OP
S

Stooge

Well-known member
Joined
Mar 24, 2013
Messages
3,533
Location
South Shore, MA
A few things I've been working on the last few days have been trying to get the frame brackets made for the passenger side running board and finally made a rough throttle linkage bracket to start figuring out how the 4 carburetors will function
I had bought a few little bits that looked like they could be useful from McMaster Carr and started from there. Probably 16ga sheet metal, cut to about the angle I need, and a fold over tab to capture the carburetor's throttle linkage and act as an anti-rotation device so the bracket I made doesn't start to twist. . I didn't want to modify the carburetor at all incase I need to replace one, it will just be swapping the carb over, not having to modify, drill, cut, etc.

I just cut a piece of all thread to a short length to try it out, obviously the final rendition will be long enough to cover all 4. There is a video sort of showing how it all works on my instagram here https://www.instagram.com/p/ByvPQQ0FrGL/

I'd like to make the final ones out of polished stainless or something, but for a test one, this was fine. Also need to get some misalignment spacers for the heim joints
20190615_121335 by Dan Haas, on Flickr

20190615_121344 by Dan Haas, on Flickr

20190615_121349 by Dan Haas, on Flickr

20190615_124147 by Dan Haas, on Flickr

20190615_124152 by Dan Haas, on Flickr

20190615_124156 by Dan Haas, on Flickr


48080333666_903a274b2f_z.jpg
[/url]2019-06-17_12-28-21 by Dan Haas, on Flickr

The running board brackets are basically just some rectangular tubing and some coincidentally perfect sized right angle brackets that will act as the frame brackets . 2 different lengths as the front of the running board is much wider than the end. these will stick out from the frame and fasten to the underside of the step itself with some weldnuts

20190609_111836 by Dan Haas, on Flickr

Im sure theres a better way to get round'ish rectangular holes, but drilling out the corners and zipping off the material between seemed most reasonable for me

20190609_112536 by Dan Haas, on Flickr

20190609_115721 by Dan Haas, on Flickr

then I welded one of them backwards :lol_hitti

20190609_151354 by Dan Haas, on Flickr

20190609_151422 by Dan Haas, on Flickr

then cut it apart and rewelded it. the slots in the one side, are to allow for a little adjustability when aligning the running board to the body. I still need to get the bracing welded to the underside of the step and get the holes drilled for the weldnuts, but I'll get to that sometime this week.

Screenshot_20190615-221039_Gallery by Dan Haas, on Flickr

My back is still a little iffy if i over do it, so i was taking it easy sunday and did some painting. An old sheet metal machine cover from work that's been sitting in my scrap pile for a few years, cut it down to rectangular shape and rattle bombed it white. Sort of like the old 60s cartoons where the characters all had big hips, funny little legs and the background was just colored blocks and panels. a little different than what i normally paint and draw, but it was a fun one. about 30"x12"

20190616_194559 by Dan Haas, on Flickr

20190616_194627 by Dan Haas, on Flickr
 

Kev442

Well-known member
Joined
Jan 15, 2009
Messages
5,386
Location
Wi
Now that there is some pretty nifty work accomplished. That oval tubing was worth every penny, it looks great. I don't pretend to have an artistic bone in my body, but I like the 60's painting too.

I thought I was going to be completely rained out this past weekend, but Saturday turned out really nice. That parts car I bought last Fall finally got the repairs needed to see how the drivetrain condition is after not being started in 10+ years. I got it to fire off the points last year and run for 3-5 minutes before it died and would not restart. Changing out everything in the points distributor and the coil accomplished nothing.
So last Fall it got fuel hoses, fuel pump, points, coil.
Saturday it got an HEI stabbed in there, along with plugs and wires. Success. Fired up and sounded good again. Plugged off the leaky rear brake line, bled the master cylinder and got enough brakes to yard drive. It has first and second gear, I need to get it on a road to see about third.
Anyway, it looks like I have my drivetrain for the car I've posted pictures of the floorboard work I'm doing. Another 10-15 years and I'll be driving it!:rolleyes:
 

MP&C

Well-known member
Joined
Oct 21, 2009
Messages
4,403
Location
Leonardtown, MD
Dan, beautiful work on that intake, the oval tubing really sets it off. Is that the stainless stuff McMaster sells?
 
OP
S

Stooge

Well-known member
Joined
Mar 24, 2013
Messages
3,533
Location
South Shore, MA
Dan, beautiful work on that intake, the oval tubing really sets it off. Is that the stainless stuff McMaster sells?

Thanks, I appreciate it! I was on the fence about doing a log style intake since they seem to look a little hokey, but I really like how the oval tubing looks in there. The tubing came from Summit, Vibrant makes it and they are pretty proud of it, I think it was in the $150-160 range for 5ft. Summit has their own brand for less but where its something that will be visible and I didn't want to have to buy twice incase the cheaper one had seams, dimples, defects, etc. The intake runner tubing came from Columbia River Mandrel, the head flanges came from Hells Gate Hot rods, who make a lot of intake and exhaust flanges for fabrication, and I made the carburetor flanges out of 3/16. Heim joints, rod ends, etc all came from McMaster.

Now I just need to figure out how to sync it all together and make it work, but theres a mountain of things to get and to do before the engine will be fired up, (along with needing the earlier front motor mount plate, sourcing all of the clutch stuff, $500+ worth of rubber mounts, and figuring out how to mount a dual master cylinder off the transmission where a single is supposed to go...and build a set of headers for it).

A buddy who owns a paint and powdercoating shop wants to powdercoat it copper, but while it will look cool, might be a little too vulgar for the traditional route im going with.

2019-06-18_08-15-18 by Dan Haas, on Flickr
 

Kev442

Well-known member
Joined
Jan 15, 2009
Messages
5,386
Location
Wi
When the engine stand has a built in workbench, you know you are working with some serious iron. I also never really noticed the sheer size of that fan belt before.
 
OP
S

Stooge

Well-known member
Joined
Mar 24, 2013
Messages
3,533
Location
South Shore, MA
When the engine stand has a built in workbench, you know you are working with some serious iron. I also never really noticed the sheer size of that fan belt before.

Im not even sure what that was originally for, but its a pretty big pallet. Eventually ill need to cough up the money to either buy a diesel one, or cobble something together to work as a real engine stand. The weight isnt as much of an issue as leverage force from hanging off the end of a stand.

Next a 327 sbc andthe white truck :lol_hitti
 

Attachments

  • Screenshot_20190618-210814_Gallery.jpg
    Screenshot_20190618-210814_Gallery.jpg
    155.6 KB · Views: 52
  • Screenshot_20190618-210841_Gallery.jpg
    Screenshot_20190618-210841_Gallery.jpg
    84.8 KB · Views: 49
  • Screenshot_20190618-210919_Gallery.jpg
    Screenshot_20190618-210919_Gallery.jpg
    101.4 KB · Views: 53

Kev442

Well-known member
Joined
Jan 15, 2009
Messages
5,386
Location
Wi
Get the carb sorted out on the truck yet? It's cruising season!
 
To avoid these ads, REGISTER NOW!
OP
S

Stooge

Well-known member
Joined
Mar 24, 2013
Messages
3,533
Location
South Shore, MA
Get the carb sorted out on the truck yet? It's cruising season!

Im venturing a guess that its a distributor issue from letting it sit outside over the winter, the hei might not have liked that. Carb will be adjusted, timed right in the driveway, revs up fine without hesitating, idles nice, etc but the last 2 times ive taken it out for a test drive, it starts running rough pretty quickly and will stall out around the neighborhood and i have to play with the idle speed and timing on the side of the road to limp it home. Trying to get to the shop to get some buick stuff done, needing to work on my increasingly unreliable daily driver, and whatever else, getting to my parents house to work on the truck has been falling lower on the list.
 

Kev442

Well-known member
Joined
Jan 15, 2009
Messages
5,386
Location
Wi
Cap and rotor ae cheap and easy. Might change the coil in the cap too to be sure of a strong spark. Check the engine to firewall groundstrap also. You did remember to install one?
 
OP
S

Stooge

Well-known member
Joined
Mar 24, 2013
Messages
3,533
Location
South Shore, MA
.... Check the engine to firewall groundstrap also. You did remember to install one?

If i had feelings, id almost be insulted by that. Running and driving car that i ignored for a yr, its not surprising it needs a bit of a tune up, i just havent had the Want to work on it. Im imagining condensation and freezing temps outside probably made for some less than ideal terminals. Its moving to the garage at my house soon so i can tinker with it a little more regularly.
 

xtremek

Well-known member
Joined
Apr 13, 2012
Messages
11,603
Location
St. Johns, Mi
I like the intake, love the painting, and hate that the truck isn't running and being used as a back while you sort out your DD. Keep up the good work.
 

Kev442

Well-known member
Joined
Jan 15, 2009
Messages
5,386
Location
Wi
If i had feelings, id almost be insulted by that. Running and driving car that i ignored for a yr, its not surprising it needs a bit of a tune up, i just havent had the Want to work on it. Im imagining condensation and freezing temps outside probably made for some less than ideal terminals. Its moving to the garage at my house soon so i can tinker with it a little more regularly.

Not an insult. More thinking along rhe lines of the trend to have perfectly smooth firewalls these days without a wire visible anywhere in the engine compartment.
I often wonder how they get good grounds when there are 10 coats of paint on the frame and firewall on those magazine cars.


There has been a lot of money thrown at cars over the decades trying to solve an issue that was just a bad ground. A friend once bought an british built car cheap because almost nothing electrical worked, but it did run. After asking around, he spent two days removing and cleaning every ground on the car: dash, engine compartment, trunk. Everything started working again, maybe installed 2 bulbs. Drove it two years and sold it for more than he paid.
 

Kev442

Well-known member
Joined
Jan 15, 2009
Messages
5,386
Location
Wi
Was moving things around today and found the HEI guts I replaced in one of the project cars last year.
Mounts under the rotor and has a condenser bolted to a little black doohickey. Car started out running really rich when moving it around. Then developed a miss/ kinda backfire. Finally car just refused to fire at all. Food for thought.
 
OP
S

Stooge

Well-known member
Joined
Mar 24, 2013
Messages
3,533
Location
South Shore, MA
Was moving things around today and found the HEI guts I replaced in one of the project cars last year.
Mounts under the rotor and has a condenser bolted to a little black doohickey. Car started out running really rich when moving it around. Then developed a miss/ kinda backfire. Finally car just refused to fire at all. Food for thought.

Maybe, I haven't looked, its not really a priority. The truck is currently at my parents house, but is moving to my house and will be in the garage next to the Edsel. For the time being, I don't want to be a ******** to my parents neighbors by starting and winding the loud truck up to set the timing in the evening after work or on the weekend when their new next door neighbors are spending time with their kids in the yard.

Running boards are 'done', still going to add a lip on the front and rear fender facing sides to kind of clean it up a bit and make them look a little more finished, as well as add a few little extra braces to the step just for added measure though they are functional and support my stout self.
Cut apart and rewelded the frame bracket that I welded backwards, got the step supports tacked in place, holes for the weldnuts drilled and tacked them in. figured out where I could fit the frame brackets without intruding on anything, and also where they would fit as half way up the frame, there are sections that have a round bulge and kicks out a bit so I had to trim the frame brackets a bit. The holes in the frame brackets, as well as the holes for the steps are all slotted to allow for some maneuvering as the body and fenders aren't perfectly aligned and there are no rubber body mounts in place so I wanted to be able to get it right when I get to that point.

20190620_190715 by Dan Haas, on Flickr

20190620_190901 by Dan Haas, on Flickr

from the underside of the step so it makes a little more sense with how the mounting works

20190620_191459 by Dan Haas, on Flickr

20190620_191818 by Dan Haas, on Flickr

20190623_125838 by Dan Haas, on Flickr

20190623_130043 by Dan Haas, on Flickr

a 17ft long coupe really makes the garage look small

20190623_131219 by Dan Haas, on Flickr

While I was spraying primer on the running boards to keep the surface rust at bay, I sanded down the front and backside of the dash and gave that some primer as well. Before I go too far with bodyworking the dash, i need to figure out where im going to mount the choke cable, and a sort of hidden starter button. Doesnt really make sense to try and cobble together the stock starter pedal vacuum switch and i have heard of enough issues with people grinding up their ring gear with the starter accidentally engaging while driving. Im still going to use the column key and switch but it will mostly act as an interrupter or to power the coil, and will just mount a small momentary switch under the dash to engage the starter. I also wouldnt hate mounting a small tach somewhere but i might put it down floor or something to keep it from looking out of place.....of course its only a 2speed trans so its probably not necessary aside from tuning.

20190623_113616 by Dan Haas, on Flickr

A buddy owns a finishing company who does paint, powder coating and hydrographics, was asking if I wanted to do hydrographic wood grain to make it like it would have been from the factoy, but im thinking I might just do gloss black like the body will be

20190623_125757 by Dan Haas, on Flickr
 

xtremek

Well-known member
Joined
Apr 13, 2012
Messages
11,603
Location
St. Johns, Mi
Sounds like you're being really nice. Wait a month and then fire up the truck at 2 am. JUST KIDDING. That is a really big boat. It'll llok cool when it's done.
 

Kev442

Well-known member
Joined
Jan 15, 2009
Messages
5,386
Location
Wi
I put my momentary starter button where the lighter was on my old '74 Hurst Olds. I should have modified the lighter itself to be the button, that would have been cool!
It certainly was a decent anti theft deterrent with the car having T Tops. The look on peoples faces when they would go to start it at the column switch was comical. That dead silence was unnerving to them.

Glad to hear the truck might get under cover at home. It's kinda sad to hear about a custom vehicle sitting outside all winter.
 
OP
S

Stooge

Well-known member
Joined
Mar 24, 2013
Messages
3,533
Location
South Shore, MA
Glad to hear the truck might get under cover at home. It's kinda sad to hear about a custom vehicle sitting outside all winter.

could use a bath, but its still looking alright

2019-06-26_07-03-46 by Dan Haas, on Flickr

im thinking just an old style push button mounted on the bottom of the dash, facing down so its hidden a bit, like this one (remember im only using parts that were available pre 1950) https://www.ebay.com/itm/Vintage-NO...Switch-Hot-Rat-Rod-Pick-up-SSB-3/223480003552

And I think for the choke cable, Im going to utilize the hand throttle knob to the left of the steering wheel so I don't have to put any new holes in the dash face, and I wont have a dead knob on the dash since im not using a hand throttle

IMG_0065_thumb_JPG_4ccaaa7870c929456416ec6daf60c1dd by Dan Haas, on Flickr
 
Last edited:

Kev442

Well-known member
Joined
Jan 15, 2009
Messages
5,386
Location
Wi
Yep, that is very close to what I had mounted in the lighter hole. I picked mine out of a box of **** a friend gave me when he went to an auction and couldn't resist the $5 "mystery boxes". It was probably from the 50's or 60's as I installed it around '86 or so.
 
OP
S

Stooge

Well-known member
Joined
Mar 24, 2013
Messages
3,533
Location
South Shore, MA
Spent the other morning freeing up a few of the W-1 carbs that were stuck, and cut out some quick and rough throttle brackets to try out the possible linkage. With the exception of some changes im going to make with the hardware, finding a few more carburetor cores and figuring out some sort of bell crank to hook to a pedal, but for probably under $30 with the choke and throttle so far, it should work pretty well. Still have to make up some spring returns and brackets and how i'll route the fuel lines, then ill break it down for final welding. Also need to find a front engine mounting plate, or modify the '47 engine plate to fit the frame, so i can eventually start the header with the engine in place.
Not sure how to link a video of the choke and throttle linkage moving, (there should be more travel but the stops on the carbs arent all adjusted the same) , I did the flickr link but I don't think it works, but i have a quick video on my instagram

https://www.instagram.com/p/BzlSoTilMnY/?igshid=7f5igswg9azi

(VIDEO I think )
20190706_124816 by Dan Haas, on Flickr

2019-07-09_07-40-12 by Dan Haas, on Flickr

20190706_123221 by Dan Haas, on Flickr

20190706_122824 by Dan Haas, on Flickr

20190706_123213 by Dan Haas, on Flickr

1940's and early '50s is the time period that I'm sort of building the car to, with trying to use only parts that were available during that time period and what hot rodders were doing, so in keeping with that, I'd like the engine to reflect that as well. im not sure how far i'll go into building the engine since it came out of a running car and im on a budget, but getting it cleaned up, replace whats worn and a cam regrind should be doable. Of course when there are people like Don Montgomery, who unfortunately passed away earlier this year and was a member over on the HAMB, who were setting records with Buick straight 8's back in the 40s and 50s, it doesnt do alot to encourage keeping it simple.

File0008 by Dan Haas, on Flickr

2019-07-09_07-27-45 by Dan Haas, on Flickr

I like the fuel log he used here, and it would sort of simplify things rather than having individual fuel blocks ran in a line feeding each carburetor and connected with fuel line, but mounting it inboard of the intake seems safer so its not sitting quite so directly above where the exhaust manifold will be . Now I just need to find/ make a fuel log that's 3ft long!

hrdp_9901_05_-don_rockerhead_montgomery-rodder_engine by Dan Haas, on Flickr

2019-07-09_07-45-18 by Dan Haas, on Flickr
 
OP
S

Stooge

Well-known member
Joined
Mar 24, 2013
Messages
3,533
Location
South Shore, MA
Me too, with some aspects of the car and engine starting to take shape, and along with my screwy back being mostly cooperative lately, it's been a great motivator. Unfortunately, there are some things coming up with the car that are going to be a bit spendy and i'll have to budget for, like some engine machine shop work, getting the bumpers fixed up and rechromed unless I can find some usable ones for sale, but the ones that came with the car are pretty rough, figure out which way im going with the wiring, either a modified stock harness or a universal one but either way it will be 6volt, body is probably coming off the frame so it can be blasted and painted, getting the seat upholstered, etc. Only a few big ticket things, but a bunch of $500'ish things. Fortunately, the time period im sort of building it to, will keep it fairly modest.

Realistically, i'm shooting for a drive next fall

one of the 3 car shows I go to ever year is this weekend, so probably wont be getting much done, but its a great show with a lot of different cars and should get some ideas moving. My picture thread from last year's show https://www.garagejournal.com/forum/showthread.php?t=395645
 
Last edited:

Ohmthis

Well-known member
Joined
Jan 20, 2013
Messages
3,009
Location
Outside of Louisville KY
I follow along, but don’t post on your build too much. The body is really taking shape and I’m really digging the carb setup. Keep up the great work and I hope the back gets much better. I had a back injury when I was in my twenties and I pray I never have to deal with that again.
 
OP
S

Stooge

Well-known member
Joined
Mar 24, 2013
Messages
3,533
Location
South Shore, MA
I follow along, but don’t post on your build too much. The body is really taking shape and I’m really digging the carb setup. Keep up the great work and I hope the back gets much better. I had a back injury when I was in my twenties and I pray I never have to deal with that again.

Hey thanks, I appreciate it! back's been doing much better, I don't really have to plan around it as much but still try and be more aware of how im standing or if im bending over to do something for a bit, maybe i'll grab a chair instead, along with wearing more supportive sneakers. Maybe not proper PPE, but as bad as it sounds, i'll take a burn on my foot once in a while from wearing sneakers, over a jacked up, debilitating back from wearing safety shoes.

Took a chance and ordered a 3ft piece of aluminum extrusion fuel rail from Ross Machine this morning, (for $30 it's worth a look), and putting together an order of fittings and NiCopp/ Cunifer nickel copper tubing for the fuel lines. hopefully I can keep it looking neat, but with each carburetor getting 2 fuel lines with the idle fuel supply, it might look a little crowded. I'll also be on the look out for a period correct looking fuel pressure gauge at the car show/ swap meet this weekend to mount to the rail.
 

Kev442

Well-known member
Joined
Jan 15, 2009
Messages
5,386
Location
Wi
Was digging around on a transmission adapter site for something else and found a Buick 8 to S10 T5 adapter. You are probably already aware of it, but I found that kinda neat.
 

1953mercury

Well-known member
Joined
Nov 25, 2012
Messages
701
Location
Steamboat Springs CO
The Buick is looking great. Might want to consider an interior hand hold to accommodate brandishing a Thompson while standing on the running board at drive by speeds. Cheers, Mike
 
OP
S

Stooge

Well-known member
Joined
Mar 24, 2013
Messages
3,533
Location
South Shore, MA
Plugging along! I've been doing some quicky jobs on a few other cars, bought a new reliable daily driver so I can stop futzing around with late model electrical gremlins so i can get home from work, and treated the buick to some attention.

not the most important, but something I've been keeping an eye out for are the front fender lights, saw these pop up on ebay and luckily won them. much better condition than I thought they would be in

1 by Dan Haas, on Flickr

2 by Dan Haas, on Flickr


Also took a chance on a '40's starter for a Roadmaster since it needs to spin the bigger engine, so far it fits and im hoping I don't run into clearance issues somewhere when I mount a solenoid to and the bellhousing is in place.

3 by Dan Haas, on Flickr

Something I had been thinking was to run either several fuel blocks in line to reach the 3'ish feet of carburetors, along with hoses, or figure out some sort of fuel rail. The fuel blocks would would have entailed either buying or making several fuel blocks, figuring out where to mount them, keep the hoses from looking too cluttered, etc. and the fuel rail would be the same but also could look out of place pretty easily with the intake tubing, figuring out where/ how to mount it, etc. Sort of impulse made some small brackets to mount to the intake runners and guessed through the rest. I had an idea to somehow also run a vacuum line through it from the carburetors but it wouldn't have really made sense. with this, i wanted the rail semi hidden so it didn't look too out of place so it is mounted low and behind the intake tube. i still need to tap the ends of the piece to mount a regulator, gauge, etc.

4 by Dan Haas, on Flickr

5 by Dan Haas, on Flickr

Nickel Copper- NiCopp 5/16" line, and inverted flare fittings. I'll end up bending the lines again at some point when I get a better tube bender as i was having a time trying to get the corners as tight as i would have wanted. Also still need to make the rest of the carburetor throttle brackets to replace the real rough cut ones i made a while back to see if they would work.

6 by Dan Haas, on Flickr

7 by Dan Haas, on Flickr
8 by Dan Haas, on Flickr

As a little birthday present to myself, ( turned the ripe old age of 32 over the weekend!), i decided i wanted to look at something shiny, plus i wanted to test and narrow down which black i wanted to use for the body, so i thought the dash would be a good place to start. Ordered a quart of Boulevard Black single stage from TCP global, and used to some primers and sealers i already had from other cars.

The starting point when i first brought the '37 home. the tags on the speaker grille and glove compartment, (along with most of everything else that came with the car) were from when a previous owner was parting it out and was trying to sell every little piece before i guess someone just bought the whole car and i eventually ended up with it. this also helps explain why i am missing so many parts to this car.

9 by Dan Haas, on Flickr

10 by Dan Haas, on Flickr

11 by Dan Haas, on Flickr

i like the black a lot, but it shows every little fingerprint and smudge from handling it. i didn't have any clean microfiber towels and didn't want to risk scratching the new paint so i just left them for the pictures. i was planning on getting new dash knobs, but i kind of like the idea of using the originals.

12 by Dan Haas, on Flickr

13 by Dan Haas, on Flickr

14 by Dan Haas, on Flickr

theres a good amount of not so grear work on the tailpan of the buick, so that will be the next big project. i just need to shuffle some cars around to move it into a better spot in the shop since the trunk is up against the wall now so hopefully i'll get those moved this week sometime so i can start making a new one. If you can see at the corners where the rear fenders end, there is a decent gap where the tailpan ends, ( i can adjust some of it away with loosening/ tightening up the fender bolts) and when the trunk lid is down, is even more noticeable.

16 by Dan Haas, on Flickr

17 by Dan Haas, on Flickr

18 by Dan Haas, on Flickr
 
To avoid these ads, REGISTER NOW!
Top Bottom