To avoid these ads, REGISTER NOW!

Suburban Detroit 3 Car Makeover

Joined
Jan 9, 2012
Messages
20
Location
Sterling Heights, MI
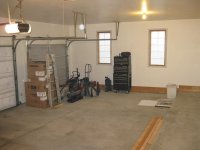
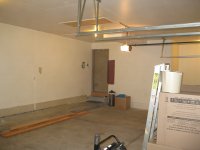
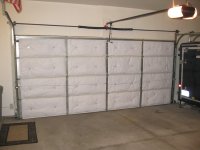
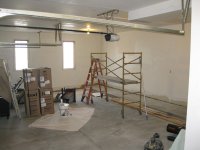
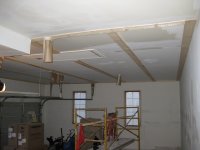
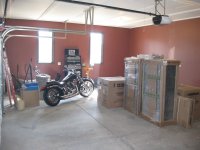
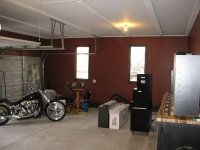
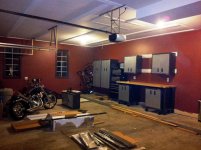
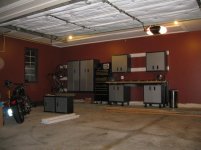
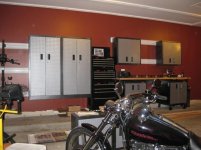
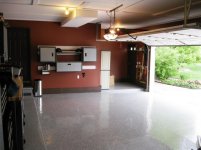
New to the site, thought I would share progresss on my garage makeover. Goal is to re-finish 14 year old builder special drywall, darker theme wall paint color with Gladiator Storage systems, bright light and some type of flooring (TBD). Step 1 is complete, clean, organize and design.
 

Attachments

  • My garage Jan 9 2012 001.jpg
    My garage Jan 9 2012 001.jpg
    63.4 KB · Views: 343
  • IMG_2156.JPG
    IMG_2156.JPG
    96.1 KB · Views: 227
  • IMG_2155.JPG
    IMG_2155.JPG
    99.8 KB · Views: 237
  • IMG_2158.JPG
    IMG_2158.JPG
    93.8 KB · Views: 244
  • IMG_2144.JPG
    IMG_2144.JPG
    107.2 KB · Views: 272
  • My garage Jan 9 2012 004.jpg
    My garage Jan 9 2012 004.jpg
    61.4 KB · Views: 259
  • My garage Jan 9 2012 003.JPG
    My garage Jan 9 2012 003.JPG
    134.5 KB · Views: 282
To avoid these ads, REGISTER NOW!

d0nk3y

Active member
Joined
Jan 9, 2012
Messages
25
I am really jealous of you guys with 3-car & larger garages. :D Should be killer when you're done!

BTW, I'm a n00b too! Welcome to the site - plenty of things to look to here; whether it is for ideas or just to drool over!
 
Last edited:
OP
H
Joined
Jan 9, 2012
Messages
20
Location
Sterling Heights, MI
A weekend full of drywall mud, sanding and priming... progress
 

Attachments

  • IMG_2165.JPG
    IMG_2165.JPG
    121.8 KB · Views: 144
  • IMG_2161.JPG
    IMG_2161.JPG
    125.6 KB · Views: 130
  • IMG_2164.JPG
    IMG_2164.JPG
    114.4 KB · Views: 126
  • IMG_2163.JPG
    IMG_2163.JPG
    107.5 KB · Views: 126
OP
H
Joined
Jan 9, 2012
Messages
20
Location
Sterling Heights, MI
Yes, the 1 car door will be insulated same as the 2 car after paint... check out the option (pictures) I decided for getting rid of drywall sag with 24" centers over garage truss system. Three years ago we put up a sub floor and drop dow ladder for summer storage with 5/8 compressed roofing ply upstairs, the long run drywall seams eventually split with the weight... now clean looking and will add 3D effect to bright white ceiling. Should spray nice tomorrow and compliment the end result with everything going on and darker wall color.
 

Attachments

  • IMG_2167.JPG
    IMG_2167.JPG
    94.6 KB · Views: 166
  • IMG_2166.JPG
    IMG_2166.JPG
    88.4 KB · Views: 168
  • IMG_2168.JPG
    IMG_2168.JPG
    90.7 KB · Views: 182
  • IMG_2169.JPG
    IMG_2169.JPG
    121.4 KB · Views: 195
OP
H
Joined
Jan 9, 2012
Messages
20
Location
Sterling Heights, MI
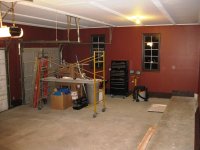
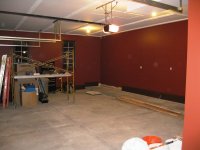
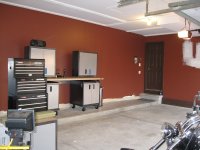
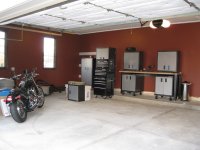
Latest Drywall and Paint progress, hoping to make a timeline dent in Gladiator Wall Gear Track System and hanging some of the Gladiator cabinets this weekend. I know the color is not your "typical" Hot Rod / Chopper garage theme, but serching for different finished product look after everything is said and complete. Let me know what you think?
 

Attachments

  • IMG_2170.JPG
    IMG_2170.JPG
    132.5 KB · Views: 260
  • IMG_2173.JPG
    IMG_2173.JPG
    126.7 KB · Views: 211
  • IMG_2172.JPG
    IMG_2172.JPG
    124.2 KB · Views: 244
  • IMG_2171.JPG
    IMG_2171.JPG
    121.6 KB · Views: 229

info2x

Well-known member
Joined
May 2, 2011
Messages
716
Location
Berkley, MI
I see more lights in your future.

Did you consider staining the boards to match the other wood in there? I'm just trying to imagine how that would have looked.

Still looks way better than it did!
 

flybefree

Well-known member
Joined
May 18, 2008
Messages
1,111
Location
Ohio/Kentucky
Good choice on the color combination...really looks unique. +1 on the light absorbition, but I think you can easily add more "firepower" to your lighting and the results will be unique and very user friendly. Good work.

Shaun
 
OP
H
Joined
Jan 9, 2012
Messages
20
Location
Sterling Heights, MI
Thanks for all the positive post...

I'm shooting pic's with old Canon point and click at night, have plans for adding Florecent, Spot and LED lighting. The garage doors face east, while open will be lit directly by the sun during the day.

Stay tuned, only at phase 2 of 6... long way to go!
 
OP
H
Joined
Jan 9, 2012
Messages
20
Location
Sterling Heights, MI
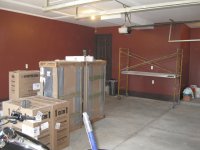
Picked up all the Gladiator Stuff this morning from my local Sears.

FYI, if you are interested in Gladiator Garage Works for your project, Sears has sale prices and they carry the welded construction "Premier Series", no assemby required, but bulky to haul (delivery is expensive). Lucky for me I have the 8x10 Trailer.

Found that most internat sales and Lowe's carry's "assembly required" bolt together type. Decided to spend time and little extra dough putting "Gear Track" up to hang all cabinets off of, if I decide to move someday, the cabinets will go with!
 

Attachments

  • IMG_2181.jpg
    IMG_2181.jpg
    69.1 KB · Views: 132
  • IMG_2180.JPG
    IMG_2180.JPG
    123.2 KB · Views: 110
  • IMG_2178.JPG
    IMG_2178.JPG
    119.8 KB · Views: 120
  • IMG_2177.JPG
    IMG_2177.JPG
    140.4 KB · Views: 122
  • IMG_2176.JPG
    IMG_2176.JPG
    124.6 KB · Views: 125
OP
H
Joined
Jan 9, 2012
Messages
20
Location
Sterling Heights, MI
Latest Progress... Long day when your doing this by yourself. 65+ Degrees and major sunshine today in Detroit, no takers for help!

Took the Deuce for quick ride, checked out the neighbors new Hot Rods, back to work in the morning...

Need to find Gladiator Wall Mount kits for the 30" Cabinets, anyone have a lead on part number GABK301PRS?
 

Attachments

  • IMG_2189.JPG
    IMG_2189.JPG
    109.4 KB · Views: 142
  • IMG_2182.JPG
    IMG_2182.JPG
    124 KB · Views: 185
  • IMG_2188.JPG
    IMG_2188.JPG
    114.2 KB · Views: 173
  • IMG_2187.JPG
    IMG_2187.JPG
    125.8 KB · Views: 167
  • IMG_2186.JPG
    IMG_2186.JPG
    128.8 KB · Views: 189
  • IMG_2184.JPG
    IMG_2184.JPG
    119.6 KB · Views: 174

Conor

Well-known member
Joined
Apr 20, 2007
Messages
189
it seems like a waste of workbench space to have those upper cabinets sitting 2" off the workbench.

otherwise keep up the updates
 
To avoid these ads, REGISTER NOW!
OP
H
Joined
Jan 9, 2012
Messages
20
Location
Sterling Heights, MI
Caught a few hours after long day at work and hung cabinets over workbench. Baby steps M-F... hoping for some major progress this weekend if I can stay away from the Green Beer!:drink:
 

Attachments

  • 20120315_201115.jpg
    20120315_201115.jpg
    107.8 KB · Views: 136
  • 20120315_202257.jpg
    20120315_202257.jpg
    103.3 KB · Views: 141

tmac0329

New member
Joined
Mar 12, 2012
Messages
3
Looks great. I am about to hang my cabinets above the work bench as well. What is the distance from top of workbench to top of lower gear track channel?
 
OP
H
Joined
Jan 9, 2012
Messages
20
Location
Sterling Heights, MI
tmac... thanks for feedback, top of bottom gear track is 22 5/8 off bench, puts the bottom of cabinet at 14 1/2. I'm about to start the second wall next to entry door, bought the "drop down fold away work station" for wife with 24" gear locker on each side to store all her gardning supplies.

Four walls will be done in Gladiator Gear Track, stay tuned... enjoy the pics including my rides!

Question to all... looking for suggestions, to finish floor to compliment my look. Leaning towards a rustic cement stain, but also considered epoxy with flakes and/or rubber coin matting? Feedback would be appreciated!
 

Attachments

  • IMG_2198.jpg
    IMG_2198.jpg
    58.8 KB · Views: 65
  • IMG_2197.jpg
    IMG_2197.jpg
    96.6 KB · Views: 57
  • IMG_2191.jpg
    IMG_2191.jpg
    84.6 KB · Views: 68
  • IMG_2195.jpg
    IMG_2195.jpg
    99.8 KB · Views: 68
  • IMG_2192.jpg
    IMG_2192.jpg
    71.6 KB · Views: 55
OP
H
Joined
Jan 9, 2012
Messages
20
Location
Sterling Heights, MI
Sunday progress, few more walls done. Its starting to look like a garage again, still need feedback for some floor ideas.
 

Attachments

  • IMG_2208.jpg
    IMG_2208.jpg
    84.1 KB · Views: 68
  • IMG_2207.jpg
    IMG_2207.jpg
    83.3 KB · Views: 45
  • IMG_2206.jpg
    IMG_2206.jpg
    85 KB · Views: 56
  • IMG_2202.jpg
    IMG_2202.jpg
    78.5 KB · Views: 48
  • IMG_2201.jpg
    IMG_2201.jpg
    74.7 KB · Views: 54
OP
H
Joined
Jan 9, 2012
Messages
20
Location
Sterling Heights, MI
Floor is finally done, decided to go with 2 Part Epoxy System Med Grey with Anti-slip, White, Black and Red Chips. Thinking about some additional Gladiator Track and few more Gear Lockers on walls with a Fridge by the service door. Time to get everything out of basement and put back together.
 

Attachments

  • IMG_2234.jpg
    IMG_2234.jpg
    100.7 KB · Views: 68
  • IMG_2238.jpg
    IMG_2238.jpg
    106.8 KB · Views: 70
  • IMG_2237.jpg
    IMG_2237.jpg
    91.8 KB · Views: 69
  • IMG_2236.jpg
    IMG_2236.jpg
    92.5 KB · Views: 67
  • IMG_2239.jpg
    IMG_2239.jpg
    89.4 KB · Views: 70
  • IMG_2235.jpg
    IMG_2235.jpg
    95.6 KB · Views: 80

IGO2XS

Well-known member
Joined
Apr 24, 2012
Messages
1,425
Location
Sarasota, FL
Floor is finally done, decided to go with 2 Part Epoxy System Med Grey with Anti-slip, White, Black and Red Chips. Thinking about some additional Gladiator Track and few more Gear Lockers on walls with a Fridge by the service door. Time to get everything out of basement and put back together.

Wow the floor looks great!! I like those 2 part epoxy floor paints. I have used the water based ones because they repel just about all of the solvents. Wall mount boxes look nice too.
 

Thedoc14

Well-known member
Joined
Mar 4, 2012
Messages
259
Location
Melb, Australia
That floor looks great, every time I see one i know I will be doing that in my place when i finally get back.

I like the way you have put the cabinets off the floor also.
 

NewShockerGuy

Well-known member
Joined
Oct 12, 2010
Messages
2,482
Location
Northern Virginia / DC
Looks great!!

For the gladiator cabinets and wall I take it the tracks must be screwed into the studs, then you can hang the cabinets ANYWHERE on the track or does it have to be some what even.. IE: Balanced with one cabinet on one side and then another on the other side.etc. I have two gladiator cabinets but they are mounted side by side on the wall studs... was thinking about getting the tracks but have no experience with them.

Thanks,
-Nigel
 

ChristopherLutz

Well-known member
Joined
Jun 17, 2010
Messages
270
Location
Flower Mound, TX (DFW)
HD - such a cool look. I too am working with Gladiator Products in my garage - here are a couple of early pics:

http://www.garagejournal.com/forum/showthread.php?t=151851

I really like the way you painted - the rich colors look fantastic. You can see from above, I went with tan/dark Brown and a black stripe.

I'm trying to determine what I should do with my work bench set up. I have the same step you do, which is nice for "level"; but, limiting in terms of standing.

I built my previous bench to be the depth of the step, so I would stand off the step. This has turned out to be too deep...and I now want to move to a 22'' - 23'' deep workbench.

I like the gladiator setup...but, have a couple of questions for you (if you don't mind indulging):

1) what is the height measurement under the workbench (to ground?) I want to see if I can get rolling tool chests under there.

2) Can the top of the Gladiator bench be trimmed to be less deep? I looked online and they are 24''....I'd like to trim the back - can this be done? (My sears doesn't have one set up as an example)

Thanks for the pics, I'm jealous of the man door/offset you have - lots of flexibility there. The ceiling "fix" you did, looks fantastic - very nice touch.

Appreciate you documenting
 
OP
H
Joined
Jan 9, 2012
Messages
20
Location
Sterling Heights, MI
Looks great!!

For the gladiator cabinets and wall I take it the tracks must be screwed into the studs, then you can hang the cabinets ANYWHERE on the track or does it have to be some what even.. IE: Balanced with one cabinet on one side and then another on the other side.etc. I have two gladiator cabinets but they are mounted side by side on the wall studs... was thinking about getting the tracks but have no experience with them.

Thanks,
-Nigel
Yes, the Gear Track is very flexible, just need to make sure and hit every stud dead center. I used 2.5" drywall screws, do not overtorqe or you will split the Gear Track, there is a groove for starting screws. After I found all studs and mocked up the measurments, we pencil transferred marks on to Track. Level and parallel is the key, takes two to mount. Thanks, Mark
 
OP
H
Joined
Jan 9, 2012
Messages
20
Location
Sterling Heights, MI
HD - such a cool look. I too am working with Gladiator Products in my garage - here are a couple of early pics:

http://www.garagejournal.com/forum/showthread.php?t=151851

I really like the way you painted - the rich colors look fantastic. You can see from above, I went with tan/dark Brown and a black stripe.

I'm trying to determine what I should do with my work bench set up. I have the same step you do, which is nice for "level"; but, limiting in terms of standing.

I built my previous bench to be the depth of the step, so I would stand off the step. This has turned out to be too deep...and I now want to move to a 22'' - 23'' deep workbench.

I like the gladiator setup...but, have a couple of questions for you (if you don't mind indulging):

1) what is the height measurement under the workbench (to ground?) I want to see if I can get rolling tool chests under there.

2) Can the top of the Gladiator bench be trimmed to be less deep? I looked online and they are 24''....I'd like to trim the back - can this be done? (My sears doesn't have one set up as an example)

Thanks for the pics, I'm jealous of the man door/offset you have - lots of flexibility there. The ceiling "fix" you did, looks fantastic - very nice touch.

Appreciate you documenting
The bottom of butcher block workbench is 36" off ground. You could get another 1" from leveling pads if needed. The top cannot be modified, underside is pre drilled for assembly of legs and back brace, very robust design from Gladiator. I'm going to build a portable platform 18"x 36" for front of my step and trim in diamond plate. Hope this helps, Thanks for positive feedback.
 

ODIS

Well-known member
Joined
Apr 30, 2012
Messages
2,111
Location
Pacific Northwest
Great color and build out. This looks like a nice place to hang out and to have fun in your garage. Thanks for sharing all your hard work here. Nicely done!

Ody.
 
To avoid these ads, REGISTER NOW!
Top Bottom