To avoid these ads, REGISTER NOW!

Suggestions on welding cart build welcome

katit

Well-known member
Joined
May 5, 2006
Messages
862
Location
St. Louis, MO
As a first welding project I am going to build welding cart. Stopped by HF today hoping their Vulcan cart will work but it won't :(

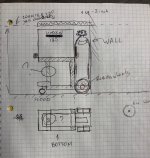
I have pretty tight space requirements. I want to "park" my setup under work bench in garage. So, I have to work with 34.5 inch floor clearance. This bench is 26 inch deep (goes across garage wall), so it's another thing to consider.
This is why I got 60qft bottle for welder. Also, I want to save every inch on side of cart.

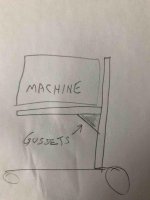
Sooo... Here is what I came up with. See drawing. Top shows how my welder (Lincoln 180) will sit on top, bottle behind. I need to put bottle as low as possible to fit under counter. I want to move rear wheels inside to stay withing ~10-11 inch wide.

Very minimalistic. I am going to add hooks on one side and thats about it. All I need is space below to put hood and box with consumables, gloves

Picture shows 2 inch tubing, just because I scales drawing to 2 inch per square. In reality I may use smaller tubing.

Any suggestions on smallest tubing I can get away with? Any ideas? Suggestions?
 

Attachments

  • IMG_1637.jpg
    IMG_1637.jpg
    133.2 KB · Views: 126
To avoid these ads, REGISTER NOW!

sberry

Banned
Joined
Jun 18, 2005
Messages
35,747
Location
Brethren, Michigan
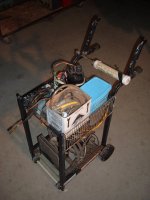
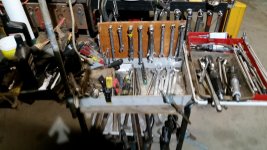
Old bbq cart, lots of bends to work with. These are not welder carts but whipped them up when needed. Easy to modify, not invested in them.
 

Attachments

  • refrig cart.jpg
    refrig cart.jpg
    79.5 KB · Views: 105
  • tool cart b.jpg
    tool cart b.jpg
    151 KB · Views: 88
  • 20191211_110309.jpg
    20191211_110309.jpg
    150.3 KB · Views: 85
Last edited:

Chevy-SS

Well-known member
Joined
Feb 11, 2010
Messages
1,497
Location
Rhode Island
I had similar dilemma. I couldn't find a cart anywhere that would work, and I don't have all the metal working tools to fab one up. It HAD to fit under the workbench.

So I made one out of wood. Works great!

tigcart25.JPG


tigcart23.JPG


tigcart24.JPG
 

sberry

Banned
Joined
Jun 18, 2005
Messages
35,747
Location
Brethren, Michigan
Cut the arms off one side of the fridge cart, flipped them over for handles on the other side. One of the great things about this type of welder is salvage, contrary to popular belief not every project needs to start at a steel yard with a check and new steel. So many ready made pieces, take advantage of pre bends, pre finish, easy to cut, big free supply.
The fridge cart was made to fit space requirements.
 
Last edited:

lilredex

Well-known member
Joined
Apr 29, 2006
Messages
5,956
Location
Toronto
Here's mine, made mainly from bed rails. A HF ring roller formed the tank straps. Two side hooks handle the cables.
 

Attachments

  • Miller135 - 2009-2.jpg
    Miller135 - 2009-2.jpg
    47.5 KB · Views: 100
  • Miller135 - 1.jpg
    Miller135 - 1.jpg
    104.4 KB · Views: 105
  • Miller 135  + Cover.jpg
    Miller 135 + Cover.jpg
    104.9 KB · Views: 91
Last edited:

sberry

Banned
Joined
Jun 18, 2005
Messages
35,747
Location
Brethren, Michigan
I know they are everywhere but I really try to avoid bed rails. The shape is great but I can't hardly recall a time I didn't regret it after the fact as they are about impossible to drill. May not matter sometimes but it's just a habit to keep them out of the place.
 
OP
K

katit

Well-known member
Joined
May 5, 2006
Messages
862
Location
St. Louis, MO
Guys, it has to fit square I defined. Can you criticize my design? This is what I need but I wonder if I missed something obvious
 

BD1

Well-known member
Joined
Mar 18, 2007
Messages
4,602
Location
north side
Guys, it has to fit square I defined. Can you criticize my design? This is what I need but I wonder if I missed something obvious


Your not talking much weight. As for tubing size, 1" would even work. I would get material prices and go from there. You may consider 1 1/4" or 1 1/2" tube to. I would base size on what supplier has. The uprights can be larger than the horizontals.
As for your design, I would have the uprights at machine back extend to your set height.
You didn't mention width but appears to be 10". Going full height in rear will allow the front upright with ? To be deleted. You can add gussets from the uprights to the horizontals.
Another consideration is all Swivel wheels.
Sometimes two fixed can require numerous movements to get in position.


Sent from my iPhone using Tapatalk
 
OP
K

katit

Well-known member
Joined
May 5, 2006
Messages
862
Location
St. Louis, MO
BD1,

Gussets is good idea. Why not add them from a botom as supports? If add them on top the side of welder with swing up door will be blocked
 

BD1

Well-known member
Joined
Mar 18, 2007
Messages
4,602
Location
north side
Gussets would below machine. From uprights to Bottom of horizontals that machine is in. You only need like a 6"x6" plate cut on a 45 corner to corner.


Sent from my iPhone using Tapatalk
 
OP
K

katit

Well-known member
Joined
May 5, 2006
Messages
862
Location
St. Louis, MO
You said to extend uprights to set hight which I read as taking gussets down so the cover machine sides. Even 6x6 will block door
 
OP
K

katit

Well-known member
Joined
May 5, 2006
Messages
862
Location
St. Louis, MO
Got it, but why do I need to extend uprights then? They don’t add any strength from what I understand..
 

BD1

Well-known member
Joined
Mar 18, 2007
Messages
4,602
Location
north side
Got it, but why do I need to extend uprights then? They don’t add any strength from what I understand..


This would provide securing the tank higher up . Clips could be added to hold framing squares, hooks for cables, a clip to hold grinders. You could tack short pipe pieces to the back side as sleeves and make a drop in shelf with pins that fit pipe.
Or make shelf with pins and drop into uprights.
I'm sure you'll find a use for them. Even a drop in tool holder. You'll find a use for it. Go through the welding cart postings. Lots of ideas there.


Sent from my iPhone using Tapatalk
 
OP
K

katit

Well-known member
Joined
May 5, 2006
Messages
862
Location
St. Louis, MO
Ok, this is no go idea. Will be changing design to bottle on a side. Otherwise it won’t fit
Will thinnest 1in square tubing be strong enough? Will it be real problem to weld for newbee like me?
 
To avoid these ads, REGISTER NOW!
OP
K

katit

Well-known member
Joined
May 5, 2006
Messages
862
Location
St. Louis, MO
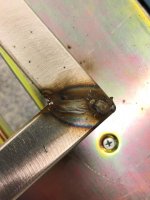
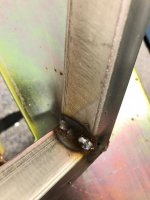
Not cart but welding questions. I started to work on making "squares". Not sure if welder not dialed in correctly or if it's my technique. When I run straight beads weld look good, I see penetration on other side. Gas mix pressure is at about 30. This is 16GA and I have 035 wire so it's set to 3C

When I weld tacks - works good. When I try to join with a gap - it's disaster, burns through. The only way I can weld joins is with tacks. Picture shows one join which didn't have gap and I had to run real fast to not burn through.

So, it feels like on straight piece I have to go pretty fast but it's manageable. when joining with a gap - it's really quick on burning.

Another problem - square pieces became "warped". Any hints on those?
 

Attachments

  • IMG_1660.jpg
    IMG_1660.jpg
    133.9 KB · Views: 49
  • IMG_1661.jpg
    IMG_1661.jpg
    85.8 KB · Views: 46
  • IMG_1662.jpg
    IMG_1662.jpg
    84.6 KB · Views: 54
  • IMG_1663.jpg
    IMG_1663.jpg
    65 KB · Views: 55
OP
K

katit

Well-known member
Joined
May 5, 2006
Messages
862
Location
St. Louis, MO
Nobody? I watched bunch of youtube videos and looks like it's "normal" to have blow bys when there is a gap in metal. Another thing I will try is to use 0.025 instead of 0.025 wire. I have 2lb roll that came with a welder. Probably good for this thin gauge.
 

sberry

Banned
Joined
Jun 18, 2005
Messages
35,747
Location
Brethren, Michigan
There are some tricks. Turn the machine down, weld toward tacks and you can learn to kind of float the arc on top of the puddle vs burning in at the root. Kind of make it hang with some surface tension. It takes a little to make it instinctual.
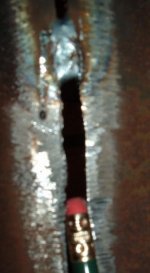
On heavier some gap may be good, can control the burn thru and penetration, leaves room for the filler. The sheet in these pics is 10 ga, could run about 3 inches without turning the machine down before the puddle fell thru. I move to another spot I could reach, a minute cool and hit it again, took less a minute or so weld time.
 

Attachments

  • wire gap back.jpg
    wire gap back.jpg
    56.8 KB · Views: 41
  • wire pencil.jpg
    wire pencil.jpg
    45.8 KB · Views: 40
  • wire gap pencil.jpg
    wire gap pencil.jpg
    45.4 KB · Views: 42

ez-duzit

Well-known member
Joined
Jun 24, 2013
Messages
5,105
Location
Marina del Rey
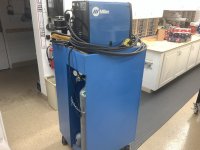
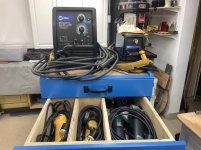
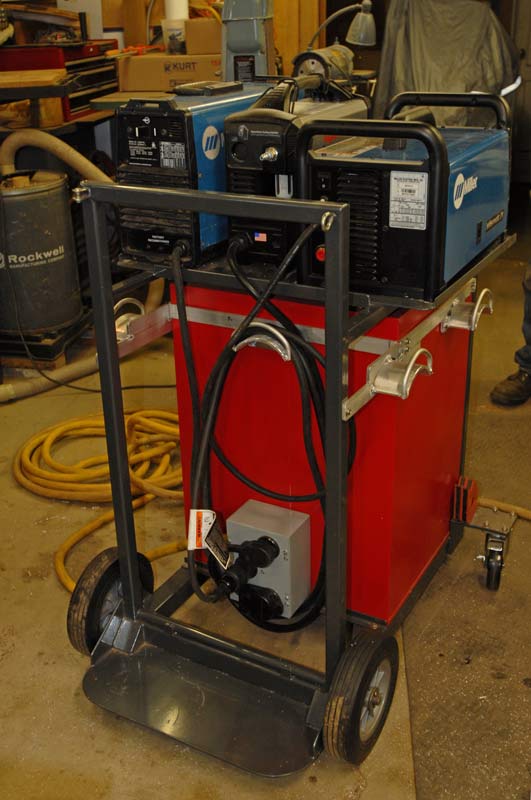
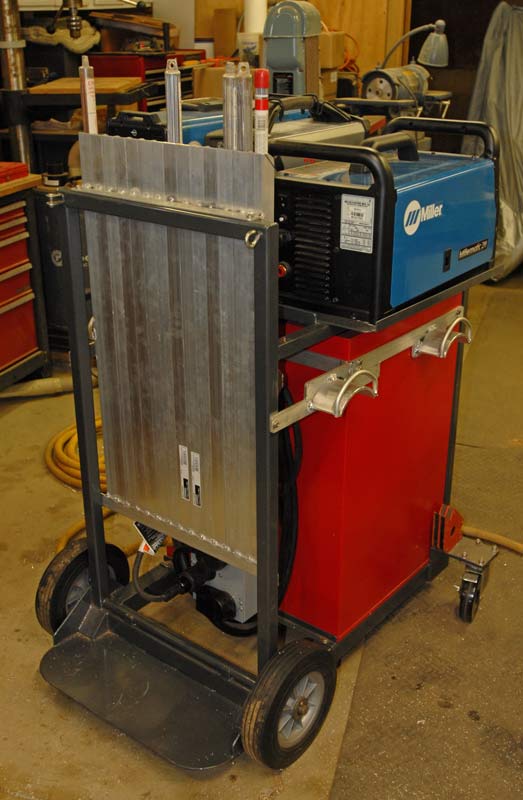
Mine holds my mig and tig welders, tanks, plus plasma cutter. Rack for welding rods, hangars for cables, chest for storing all other related accessories and supplies. Has ~50' power cord with outlets for machines.


OP
K

katit

Well-known member
Joined
May 5, 2006
Messages
862
Location
St. Louis, MO
There are some tricks. Turn the machine down, weld toward tacks and you can learn to kind of float the arc on top of the puddle vs burning in at the root. Kind of make it hang with some surface tension. It takes a little to make it instinctual.
On heavier some gap may be good, can control the burn thru and penetration, leaves room for the filler. The sheet in these pics is 10 ga, could run about 3 inches without turning the machine down before the puddle fell thru. I move to another spot I could reach, a minute cool and hit it again, took less a minute or so weld time.

Ok. I see. So I did nothing wrong. It's just a nature of a beast! Penetration is good, I just hate how those look. But hopefully I won't have to make "cosmetic" welds on thin metal in a future ha :)
 
OP
K

katit

Well-known member
Joined
May 5, 2006
Messages
862
Location
St. Louis, MO
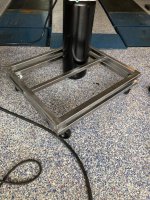
Ok. The way I changed design - I will have top/bottom and narrow shelf inside for welder (4 on picture). All 3 shelfs and wheels ready, welded, all look good.

Now I'm trying to understand what will be the best way to attach all of them together.

So far I came up with idea on placing 3 posts (1,2,3) both will go to the sides of middle shelf and between top and bottom.

Do you think it will make it rigid enough?? I will put more vertical posts on left side of #4 to hold bottle(s). But I like to keep it "open"

#4 will hold welder and because it will be 1in "in" one right side - I will put hooks on this shelf for wires.

This cart is 24 deep and 21 wide.
 

Attachments

  • IMG_1664.jpg
    IMG_1664.jpg
    154.4 KB · Views: 34
  • IMG_1665.jpg
    IMG_1665.jpg
    64.3 KB · Views: 32

BukitCase

Well-known member
Joined
Apr 11, 2017
Messages
1,075
Location
Oregon
One of the "rules of thumb" I tend to design by (doesn't ALWAYS work) is same as framing carpentry - "If gravity was the only force working on it (and it's sitting on a level floor) would it STAY there if you put all the pieces together WITHOUT any nails/screws/welding?

If the answer's NO, change the design.

Welds -
1 - if that "gas mix at 30" is CFH, drop it somewhere around 16-20 and see what that does. 30 is just wasting gas and cooling the weld too fast.

2 - If there's more than a barely visible gap, usually a small but quick "whip" ACROSS the gap will help - better NOT to have a gap, of course.

3 - with anything but flux core, you PUSH - meaning if you lean the torch AWAY from travel direction slightly. PULL is what you do for stick and flux core.

4 - Stay at the FRONT of the puddle - you want to actually SEE the arc touch the METAL, NOT the PUDDLE. NOT doing this can make pretty welds, but don't bet your LIFE on 'em staying together.

5 - Dissimilar thicknesses, change the % of time on a weave, more time on the thicker part. I use .035 hard wire in both my migs, and can weld 14 ga. fence wire to EMT conduit (start on conduit, "flick" to wire and back, STOP) up to 3/4" plate (multi-pass, jigs for 20 ton press) - only changes are wire speed and voltage. If outdoors and a SMALL amount of wind, I'll turn up gas (C25) to about 25, NO FURTHER.

Get hold of some metal scraps, and practice on THOSE before you build a cart to hold something you DON'T want broken. Also, GUSSETS are your friend.

HTH... Steve

BTW, I agree with ez-duzit - try something else...
 
Last edited:
OP
K

katit

Well-known member
Joined
May 5, 2006
Messages
862
Location
St. Louis, MO
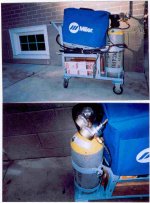
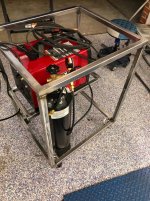
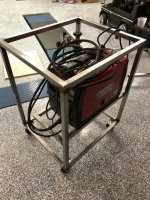
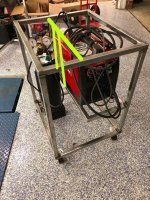
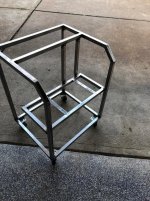
Ok. Getting closer to completion. I took advice above and just made a "box".
I changed to 0.025 wire I had with welder and it did help I think. I can weld this thin walled tubing much more predictable. Welds got much better.

Now I know everything fits. Box is as strong as it can be, no gussets needed for sure, wheels will break off sooner than this box folds.

NOW. I got shelf for welder held with 2 stitches on top only. Shelf just mount on side of posts. It holds. I will add more.

Here is what I plan to have on this cart:
1. Bottle. Question, do you think I will need 2nd bottle at any time? Maybe argon if I plan to weld aluminum so I can plan on mounting second bottle next to this one.

2. Welder will be on shelf, it works perfectly now. I will probably have just 2 strips of 1/8 metal under "legs" and just bolt it on through 2 holes I see when open side door. This way no dirt under welder. Nice and open.

3. I will put one more cross-member on top (drawn) and drop 2 1x1 down to welder's shelf. This will give welder shelf support and create more rigidness.
I will use 2 vertical posts to tie bottle to as well.

4. Bottom will be open, I will just lay piece of plywood and call it done. It's going to be less than 2x2 and bottom shelf will only support bottle and random stuff like hood, gloves, small box with consumables.

5. Seems like I can put wire hanger right in front, about where coiled wires is right now.

6. Top. No top for now, but I made it with idea of placing sheet of 1/4-5/16 steel on top to create small welding surface in future. For now it will be just open like this.

Anything else I am forgetting?

As you see it's pretty light and manuverauble. 21x24
 

Attachments

  • IMG_1673.jpg
    IMG_1673.jpg
    73.3 KB · Views: 43
  • IMG_1672.jpg
    IMG_1672.jpg
    153.6 KB · Views: 45
  • IMG_1670.jpg
    IMG_1670.jpg
    152.3 KB · Views: 47
  • IMG_1669.jpg
    IMG_1669.jpg
    154.5 KB · Views: 47

BukitCase

Well-known member
Joined
Apr 11, 2017
Messages
1,075
Location
Oregon
Looks strong; both my Miller migs (even the smaller one) would NOT allow the side door to open all the way with that upper bar there, because the door hinges INBOARD of the outside corner (door is L shaped) -

If your mig is the same (can't tell for sure, but looks like it is) you might wanna figure that out NOW.

One possible change might be to INSET the bar that would interfere with complete opening of the side door - that would keep 99% of the strength and eliminate all that "blue air" when changing wire (might contaminate your red paint :thumbup: )
Only downside is it'd make the top you might add a little bit narrower.

Also - I would run perpendiculars (more of the tubing) from those UN-SUPPORTED inside corners, either UP to the upper cross bar or DOWN to the lower, whichever is less objectionable -

NOT tryin' to pick on you, just BTDT, got the T shirt... Steve

Re-think; maybe that's what you meant by pic #1 - if so, cool...
 
Last edited:
OP
K

katit

Well-known member
Joined
May 5, 2006
Messages
862
Location
St. Louis, MO
NOT tryin' to pick on you, just BTDT, got the T shirt... Steve

Steve, I WANT you to pick on me NOW before I painted it :)

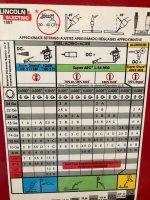
I did of course wanted door to open so I can change wire. And yes, you are correct, it won't open all way up which *****. But at the same time I didn't think too much of it. It does open to change wire not a problem. But I forgot about chart with settings. Now I do worry as want to look at those charts.. :(

Adding table will be a problem later, correct... Unless I make it removeable.
 
OP
K

katit

Well-known member
Joined
May 5, 2006
Messages
862
Location
St. Louis, MO
Re-think; maybe that's what you meant by pic #1 - if so, cool...

Yes. I want them to go up. Which is debatable but will leave bottom open. There will be 2 verticals about 2-3 inch apart and closer to the back. This way I can also use them to tie bottle.
 

BukitCase

Well-known member
Joined
Apr 11, 2017
Messages
1,075
Location
Oregon
Having those verticals do double duty as tank support is good, but I would still put another one at the inner front corner - also, because of the TWO reasons you mentioned I would cut the tube that's in the way of full door operation and simply move it INBOARD the couple inches it'd take so you don't swear every time you use it.

If you want to see an entirely different approach to a weld cart (and get some ideas you might like, as well as an insight into the mind of a crazy person :=) go here
https://www.tractorbynet.com/forums/build-yourself/387658-container-weld-shop-build-20.html

Read that entire page and enlarge all the pics - Yeah, you'll probably never build something that nuts but it'll give you an idea of how many different "features" it's possible to incorporate in a design... Steve
 

Oregonredford

Well-known member
Joined
Mar 3, 2019
Messages
46
Location
Oregon
I think the biggest issue I find with all of the welding carts I’ve come across is those stupid little pivot wheels in the front. Why does everyone do that? You have grit, metal chunks, cords, ground cables and all sorts of things on the floor and those stupid tiny wheels get caught up on all of it.
Use some bigger wheels for the pivots.


Sent from my iPhone using The Garage Journal mobile app
 

tarbellb

Well-known member
Joined
Apr 17, 2011
Messages
5,779
Location
Oregon
Welds are looking better!

btw you couldve gotten away with that cantilevered design no problem, not many forces at play here.
 
OP
K

katit

Well-known member
Joined
May 5, 2006
Messages
862
Location
St. Louis, MO
Getting close. Welds work better. During welding I have 2 symptoms when it's not going well. If somebody can comment on those I will appreciate:

1. Starts making sound and throw glowing balls. It happened when I was welding metal strips for welder mount. I guess it's metal bars from Home Depot have different metal? Not chromed or anything..

2. When I weld instead of familiar "Bacon" sound it starts to stop and hiss. Stop and hiss. I feel like it's when not enough "heat".

Other then that I'm getting hang of welding.

Almost done. I moved welder shelf all the way up. Since now I can load welder in from a top - it will work just fine. This way I can even fit plasma below welder.

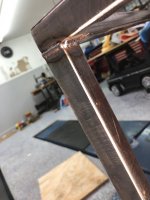
Those 45 degree corners were PITA but I got them done! Need few more weld, some checks and ready for paint.

I got 2 holes already drilled for welder mounting. There will be no shelf, just those 2 metal strips.

Small wheels: I got 4 of those small wheels :) I have flat floor, don't plan to move welder out of garage. And I mostly do car work. So, for me - making it compact and maneuverable is number one goal.
 

Attachments

  • IMG_1677.jpg
    IMG_1677.jpg
    62.1 KB · Views: 32
  • IMG_1678.jpg
    IMG_1678.jpg
    147.7 KB · Views: 32
  • IMG_1679.jpg
    IMG_1679.jpg
    149.3 KB · Views: 31
  • IMG_1680.jpg
    IMG_1680.jpg
    148.6 KB · Views: 29

BukitCase

Well-known member
Joined
Apr 11, 2017
Messages
1,075
Location
Oregon
1 - No telling what you're getting at HD for "metal"

2 - Might wanna check feed roll tension, may be loose. What gas flow are you set at?

Lead holders - I've seen all kinds of ways, some cool and some not. Last 3-4 carts I used these

https://www.amazon.com/gp/product/B00EOMCKJO/?tag=atomicindus08-20

Clean paint/powder off, weld (or don't, screws work too) - I am NOT a fan of narrow hooks; a replacement 20' torch for my PM45 is around $400, so is a cable for my 30A spool gun, even regular 15' mig guns run a couple hundred or more.

Small radius hangers can put more bend stress on cables; it isn't obvious til it doesn't WORK anymore. Makes a $15 hanger look pretty reasonable :thumbup:

If I had my 50" powered slip roll modded and back together I'd just MAKE lead holders, would only be about half as wide as those hose holders...

Only about 100 projects behind atm :confused: ... Steve
 
OP
K

katit

Well-known member
Joined
May 5, 2006
Messages
862
Location
St. Louis, MO
1 - No telling what you're getting at HD for "metal"

2 - Might wanna check feed roll tension, may be loose. What gas flow are you set at?

1 - Solved. I didn't dial in to compensate for thickness of material.
2 - I run 20 on red scale, is that correct?. Had it happen again a few times. All of those times it was in a corner weld.

This 025 spool that came with welder went quick! Didn't have enough to make last stitch.

So, now I have experience with 025, definitely the best for sheet metal. And I have spool of 035 which worked OK to finish work especially that I had some experience with 025. I think I need to have 025 and won't need 030 at all. Between 025 and 035 I can do pretty much all I need.

Cart primed, will paint tomorrow. Almost there! Proud of myself :)
 

Attachments

  • IMG_1684.jpg
    IMG_1684.jpg
    139.6 KB · Views: 23
  • IMG_1690.jpg
    IMG_1690.jpg
    85.2 KB · Views: 29

BukitCase

Well-known member
Joined
Apr 11, 2017
Messages
1,075
Location
Oregon
1 - that'll do it :=)

2 - Yup, red on that gauge is CFH (the "S" in scfh stands for "standard"...

Constantly changing wire thickness can be a real PITA, I tend to run .035 all the time. With thin stuff, you sometimes need to be quick :lol_hitti

I get away with it 'cause probably 95% of what I do is .120 wall or thicker, but I have done 16 gauge with .035 wire, you just can't be slow. If I ever get where I do more thin stuff, I'll probably change the MM211 over to .023.

Not REAL likely tho, check the price difference on a 8" spool of each size... Steve
 
To avoid these ads, REGISTER NOW!
Top Bottom