

You are using an out of date browser. It may not display this or other websites correctly.
You should upgrade or use an alternative browser.
You should upgrade or use an alternative browser.
Support for making concrete countertops
- Thread starter Kaizen
- Start date
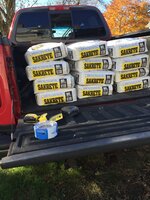
Well I am ready to mix. Was waiting on Lowes to get my quickcrete countertop mix at 23 bucks a bag for a month and they failed. Couldn't wait any more so found a local supplier of sacrete 5000. Only 8 bucks a bag and if I need more it's ten minutes away. Cheng powder color calls for one bag per 120 pounds of mix. As they are 80 pounds each I cut a bag in half. I was going to measure by weight and then remembered how much I hate handling bags of concrete. Bought this specifically for this job as you should dry mix the color for ten to fifteen min before water. God I love my hf mixer.

Oy going to be a lot of work

First batch I mixed as directed exactly and it was fairly dry. As I was told this will make stronger but it didn't flow well so next batch I made wetter to allow it to flow better.
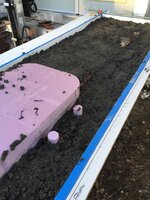
Did the first form and laid rebar in it but as I started vibrating with a bladeless sawzall I began to worry if the rebar would settle through and be seen in final product. Should have tied it off. Oh well no going back so upwards and onward.


Had some help on the second and third forms which was soooo much better as they squished and patted while I got the next batch going. My inexperience with concrete got seperate results on each batch. All in all came out ok with nice extraction of air pockets and a nice layer of paste. All the forms stayed together and on one I slapped so two foot clamps on it for insurance. Found using the sawzall to vibrate had some sweet spots that really got the bubbles rising while other areas barely did anything. Did about fifteen minutes of vibrating on each table. Covered it with plastic and prayed to the concrete gods that I didn't have a disaster. Used eight eighty pound bags for these pieces. Even though I sealed the edges I had some leaks between the table and form joint. Hoped it didn't absorb too much water and deform the edge. Poured on a nice 70 degree indian summer day in late October. Was lucky it stayed above 50 for the rest of the week so no need to worry about it freezing. kept it covered and wet for 4 days.
Oy going to be a lot of work
First batch I mixed as directed exactly and it was fairly dry. As I was told this will make stronger but it didn't flow well so next batch I made wetter to allow it to flow better.
Did the first form and laid rebar in it but as I started vibrating with a bladeless sawzall I began to worry if the rebar would settle through and be seen in final product. Should have tied it off. Oh well no going back so upwards and onward.
Had some help on the second and third forms which was soooo much better as they squished and patted while I got the next batch going. My inexperience with concrete got seperate results on each batch. All in all came out ok with nice extraction of air pockets and a nice layer of paste. All the forms stayed together and on one I slapped so two foot clamps on it for insurance. Found using the sawzall to vibrate had some sweet spots that really got the bubbles rising while other areas barely did anything. Did about fifteen minutes of vibrating on each table. Covered it with plastic and prayed to the concrete gods that I didn't have a disaster. Used eight eighty pound bags for these pieces. Even though I sealed the edges I had some leaks between the table and form joint. Hoped it didn't absorb too much water and deform the edge. Poured on a nice 70 degree indian summer day in late October. Was lucky it stayed above 50 for the rest of the week so no need to worry about it freezing. kept it covered and wet for 4 days.
Last edited:
I managed to let the slabs dry for four full days before I couldn't resist looking. Needed to grind the top which is really the bottom. Had some slumping due to the support bending under the weight and I couldn't seem to get it back perfect. Highly recommend having a bundle of shingles on hand for this leveling as well as seperate go the slabs from the table. This diamond wheel goes on a normal grinder and takes off the high spots quickly. Forty bucks at hd .
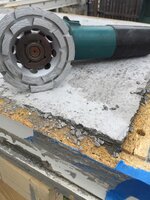
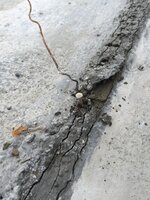
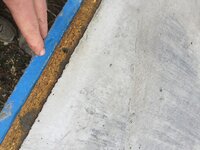
Also ground down tops of rails to get the clear. Blue tape over the screws is a great tip to make removing easy
Drum roll......

http://images.tapatalk-cdn.com/15/11/11/0d40d7304b73b7bfe64eb3f13c6744ec.jpg[/IMG
Hell lots of pinholes....
[ATTACH=full]1238410[/ATTACH]
[ATTACH=full]1238411[/ATTACH]
Flipping over the two smaller pieces clearly showed the drier mix vs the wet one.
[ATTACH=full]1238412[/ATTACH]
[ATTACH=full]1238413[/ATTACH]
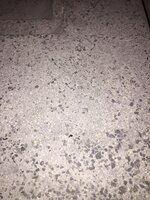
I knew there would be pinholes but this is more then I expected. The piece with the bowl I hit with some hand sanding with 400 grit paper and it felt like soapstone.
Here's the bowl vision
[ATTACH=full]1238414[/ATTACH]
[ATTACH=full]1238415[/ATTACH]
And the square recesses
[ATTACH=full]1238416[/ATTACH]
Hmm what fits there....
[ATTACH=full]1238417[/ATTACH]
Perfect! Now with some water on it
[ATTACH=full]1238418[/ATTACH]
Sent from my iPhone using Tapatalk
Also ground down tops of rails to get the clear. Blue tape over the screws is a great tip to make removing easy
Drum roll......
http://images.tapatalk-cdn.com/15/11/11/0d40d7304b73b7bfe64eb3f13c6744ec.jpg[/IMG
Hell lots of pinholes....
[ATTACH=full]1238410[/ATTACH]
[ATTACH=full]1238411[/ATTACH]
Flipping over the two smaller pieces clearly showed the drier mix vs the wet one.
[ATTACH=full]1238412[/ATTACH]
[ATTACH=full]1238413[/ATTACH]
I knew there would be pinholes but this is more then I expected. The piece with the bowl I hit with some hand sanding with 400 grit paper and it felt like soapstone.
Here's the bowl vision
[ATTACH=full]1238414[/ATTACH]
[ATTACH=full]1238415[/ATTACH]
And the square recesses
[ATTACH=full]1238416[/ATTACH]
Hmm what fits there....
[ATTACH=full]1238417[/ATTACH]
Perfect! Now with some water on it
[ATTACH=full]1238418[/ATTACH]
Sent from my iPhone using Tapatalk
Last edited:
Going to need to slurry in the holes so next day got some help turning over the big boy. It was really stuck to the table as most of it had silicon between the sink and other pieces. Inserted cedar shingle pieces and 
slowly it came loose. As bad as I expected...

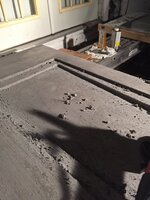
Ugly big time

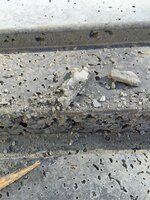
Unmasking the cut outs show I have it at least set up correct. Love the soap dish

Mixed up the last of my color with the concrete I had. Spread the slurry for two hours...sucked.... then let it sit for two days. Knew I would need more color and am going to get a really thin overlay mix next time. Ordered wet grinder off amazon for 170 and hit it with a 50grit pad

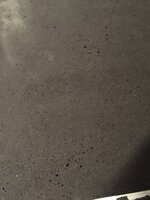

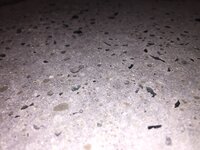
Some aggregate showed and the black glass chips look deceiving like holes. Ordered more color and will do one more slurry and grind off. Almost done!!
Sent from my iPhone using Tapatalk
slowly it came loose. As bad as I expected...
Ugly big time
Unmasking the cut outs show I have it at least set up correct. Love the soap dish
Mixed up the last of my color with the concrete I had. Spread the slurry for two hours...sucked.... then let it sit for two days. Knew I would need more color and am going to get a really thin overlay mix next time. Ordered wet grinder off amazon for 170 and hit it with a 50grit pad
Some aggregate showed and the black glass chips look deceiving like holes. Ordered more color and will do one more slurry and grind off. Almost done!!
Sent from my iPhone using Tapatalk
Last edited:
I remember my buddy having to do a slurry mix as well. When he got done, it damn near looked perfect and was very smooth. Don't give up! Looks good! Like the bottle holder
Thanks. No giving up now. Waiting on the dye to slurry again.
Also ordered the epoxy and poly to finish it off. In the home stretch now


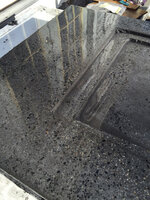


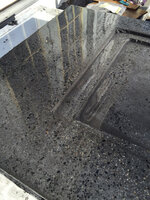

Don't underestimate the **** factor of sanding concrete where the diamond wheel won't reach
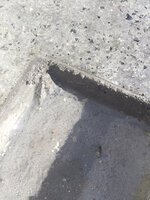

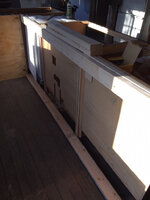
Next task was adding support to my handmedown cabinets. I inserted plywood and screwed it down

Also 2x was used and made stud wall on back. This was the start. I was seriously scared this weight would crush them and the sleeping dog
Sent from my iPhone using Tapatalk
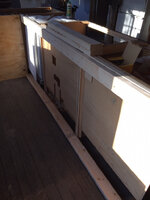
Next task was adding support to my handmedown cabinets. I inserted plywood and screwed it down
Also 2x was used and made stud wall on back. This was the start. I was seriously scared this weight would crush them and the sleeping dog
Sent from my iPhone using Tapatalk
Attachments
-
 e908136d3a08ffed3e358c29f8819f29.jpg635.3 KB · Views: 0
 -
 760f654277011450cd9570e51f3097ce.jpg690.3 KB · Views: 0
 -
 fe1a9e64d87556b7a05d2df1200ef914.jpg910.1 KB · Views: 0
 -
 05f47ee69cd8aca42f388de6d5ea55c5.jpg844.6 KB · Views: 0
 -
 1df7c691f285f1f88f94bc0c86adb5cb.jpg906.2 KB · Views: 0
 -
 2ea1cefaf34def83927b95bd75e30361.jpg854.9 KB · Views: 0
Last edited:
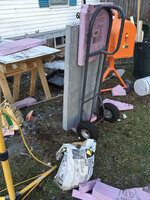
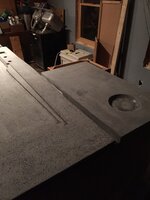
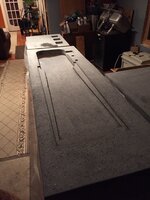
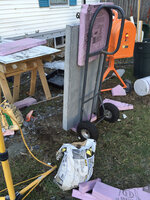
Next task moving them thirty feet. The two smaller ones at about 150 pounds and 200 I did myself with a dolly. The big one took three neighbors and lots of octoberfest
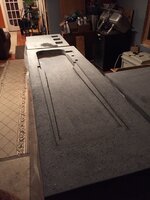
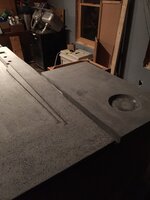
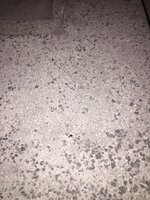


Love the soap dish for sponges

Sent from my iPhone using Tapatalk
Love the soap dish for sponges
Sent from my iPhone using Tapatalk
Attachments
-
 8dc2457ff085dee3865941b490a65fd7.jpg332.9 KB · Views: 0
 -
 1fa9b5c8d7e837e06e2d5763b978b05e.jpg391.9 KB · Views: 0
 -
 1c3b426a8a518d4cad3f56b757286622.jpg1 MB · Views: 0
 -
 fe55fc5c5f3bfefd5e9eaed06632e1c3.jpg629.4 KB · Views: 0
 -
 15558f0f4ddb1adba65746ab718b4e08.jpg366.5 KB · Views: 0
 -
 3f92d4e18530218c2f99a3b9d1dca34d.jpg733.5 KB · Views: 0
 -
 4a38c6ed663038a90b78a2acabfd9fb0.jpg341.2 KB · Views: 0
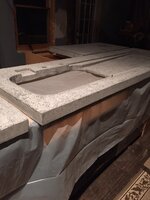
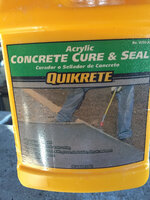
Sealing and putting on a finish of epoxy took me out of my element. Well more then any steps up till now. I was getting grief from the moochers (kids) that it stunk. And it did. It was freezing out so couldn't use a fan in the window. Should have sealed with two more coats and a better sealer. I ran into bubble city and ran short on epoxy so not nice and smooth on last piece


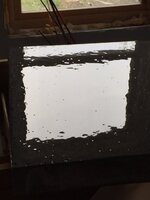
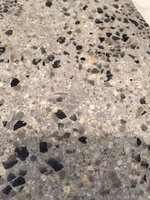
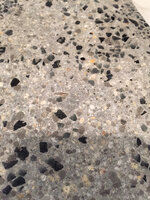
I was really liking the look. Next epoxy. Note I put plastic down before putting them in place to keep the epoxy off the cabinets. Also shimmed them up till it dried so they did not stick. I did this at night and had drips over the bottom edge so leave time to keep checking and sponging off drips. They don't come off easy after dry


Sent from my iPhone using Tapatalk
I was really liking the look. Next epoxy. Note I put plastic down before putting them in place to keep the epoxy off the cabinets. Also shimmed them up till it dried so they did not stick. I did this at night and had drips over the bottom edge so leave time to keep checking and sponging off drips. They don't come off easy after dry
Sent from my iPhone using Tapatalk
Attachments
-
 070484b39fe8087bcb325fefd01a3a56.jpg828.3 KB · Views: 0
 -
 0d517273f6e635d2a5031cf084312ad5.jpg940.8 KB · Views: 0
 -
 a1fcec2d6011b9e91d55888aa6f75482.jpg796.2 KB · Views: 0
 -
 97aeae135122cdfe3ad90074e2c2ea4f.jpg789.6 KB · Views: 0
 -
 71020a6ce7cf499d52e1b79e8e45866a.jpg630.9 KB · Views: 0
 -
 388273ac88f6f8d74332178b33aa332d.jpg842.1 KB · Views: 0
 -
 de9893a6f070c6b31499b34071c66c9c.jpg899 KB · Views: 0
Last edited:
Next is sink install. It's big enough for two six gallon carboys of nutritional beverage so wanted more then the usual caulk and stick. Prices online were ridiculous so out to weld up my own. They screw to the side of the cabinet and bolts screw up through nuts pinching the rim up to the concrete

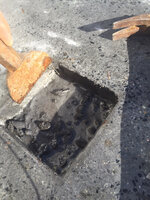
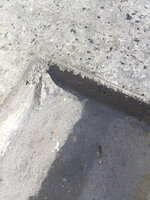
Saw this issue. Left side of sink piece was floating free. So that was the top of my form and this corner was that much higher causing this. I had to shim it and adjoining piece

Setting the sink
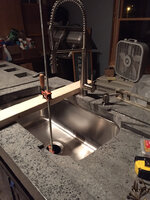
Final leak test

Two years later and all is holding up well. I have not added more epoxy yet. I got a cutting board for the tray area.
all told about 800 in materials and tools. Another 250 for sink and faucet. It's definitely impressive when people first see it but most people prefer the thin perfect granite over this. While doing it I had all kinds of ideas...bathroom molded sink...hall table...patio cook center. Uh uh I still have had my fill of concrete for now.
Sent from my iPhone using Tapatalk
Saw this issue. Left side of sink piece was floating free. So that was the top of my form and this corner was that much higher causing this. I had to shim it and adjoining piece
Setting the sink
Final leak test
Two years later and all is holding up well. I have not added more epoxy yet. I got a cutting board for the tray area.
all told about 800 in materials and tools. Another 250 for sink and faucet. It's definitely impressive when people first see it but most people prefer the thin perfect granite over this. While doing it I had all kinds of ideas...bathroom molded sink...hall table...patio cook center. Uh uh I still have had my fill of concrete for now.
Sent from my iPhone using Tapatalk
Attachments


Stuart in MN
Well-known member
Nice work! You can see why having someone build them for you would be expensive, there's a ton of labor involved.
Nice work! You can see why having someone build them for you would be expensive, there's a ton of labor involved.
oh yea. and because each is unique i'd guess there is a lot of people that would not want the end product as its not the same hue or pattern as they imagined. guessing this is a money up front business. Also you need a lot of manpower to safely move large pieces so even though one guy can make it you need more on the payroll. I wouldn't want to be in any form of concrete business. just lifting the bags wears me out.