To avoid these ads, REGISTER NOW!

Above 1200 Sq/FT The Action Sports Garage

Wokspaces above 1200 squarefeet.
OP
G

Grant Gunderson

Well-known member
Joined
May 17, 2013
Messages
2,330
Location
Bellingham, WA
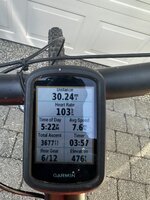
I've been hanging out with a new lady friend, she's a former WC xc racer and former Single Speed world champion, so I've been getting my *** handed to me while trying to play keep up on the bike.
IMG_3268.jpeg
So I've been doing a bunch of super long XC rides on Galbraith trying to get in better shape. That also means more bike maintenance is needed. On one of our rides, I snapped my XX1 chain in two spots.
IMG_3401.jpeg
Pretty unusual for a chain break as they usually just snap in one spot. Heck I haven't had a chain break in years!
IMG_3402.jpeg
Thats some force too. The chain only had 800 miles on it. Something isn't right in my drive train.
IMG_3374.jpeg
That derailed has a ton of miles on it now. Probably pushing 3K plus. I tore my AXS XX1 detailer down for cleaning and tossed all of the drive train into my ultrasonic cleaner. I usually dont put the pull wheels in as they have bearings in them, but I am pretty sure at least one of them is shot anyways.
70580238428__784BD739-0B82-42DE-8981-8F221AE741C9.jpeg
The ultrasonic makes very quick work of cleaning the drive train. I am using a water and Dawn Profesional soap solution in it. Notice the wear on the derailleur cage. The bully wheels were shot! The rear cassette is done as well. That XX1 cassette isn't cheap either! So it's time for all new drive train Componets.
IMG_3380.jpeg
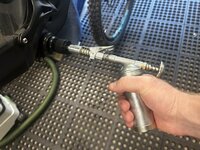
With the cranks off of the bike, it's a perfect time to lube up the Chris King ceramic bottom bracket. Their BB's are expensive but last for ever. I got 10 years out of my last one, so on this bike I put a Ceramic bearing one on it when I originally built it up.
IMG_3378.jpeg
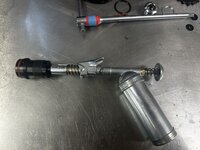
The Chris King grease injector lives on this Dulco grease gun with a lockNlube connector. Its a very rigid and more importantly mess free way of injecting the BB.
IMG_3184.jpeg
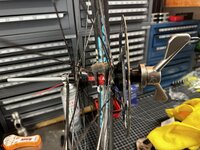
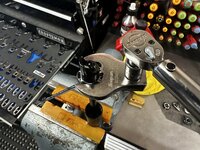
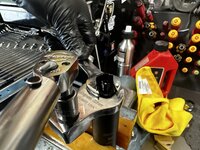
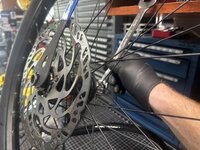
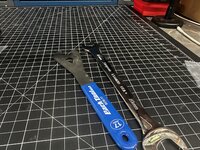
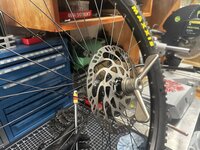
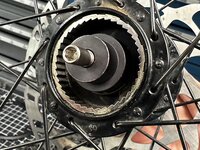
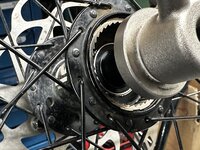
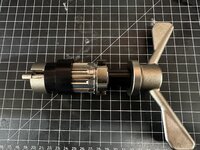
Next up was servicing my DT Swiss hubs. I love their hubs. They roll super fast, last forever and are very easy to maintain with just a few tools. The hub side gear for their famous star ratchet does require a special tool to remove. They make newer tools that dont go into a vise, but I find I have so much torque on these from pedaling I need it in a vise, unless I get a newer tool that I can put into an impact gun.
IMG_3185.jpeg
 

Attachments

  • IMG_3183.jpeg
    IMG_3183.jpeg
    712 KB · Views: 24
To avoid these ads, REGISTER NOW!
OP
G

Grant Gunderson

Well-known member
Joined
May 17, 2013
Messages
2,330
Location
Bellingham, WA
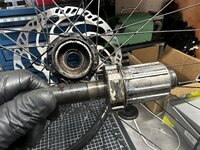
All of the parts get a quick wash in the ultrasonic, and I gave the bearings a good inspection. No need to replace them as I just did that last year. I am running he high-engagement star ratchets in these hubs. It does make a big difference!
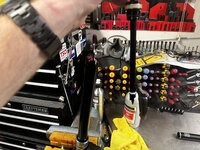
IMG_3195.jpeg
IMG_3186.jpeg
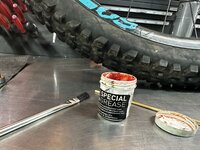
DT Swiss sells this "special grease" for their hubs. This came with the star ratchet upgrade. All it is, is a standard red tacky grease. Classic bike industry marketing ********.
IMG_3188.jpeg
I have both an Abbey Bearing Press and the Park Stool suspension bearing press kit. I like the cups on the Park one better. The Abbey one has a better made press, but they are not compatible with each other. In order to make the Park one more versatile, I bought a section of M6-1.25 all thread so that I can also use it to press hub bearings back in, as I hate tapping bearings in with a hammer.
IMG_3194.jpeg
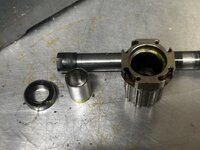
With the bearings in, and the Strar ratchet lock ring installed, this special drift presses in the seal.
IMG_3196.jpeg
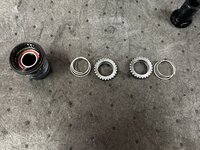
Star ratchet gears and springs installed. The cassette body then just presses on by hand.
IMG_3199.jpeg
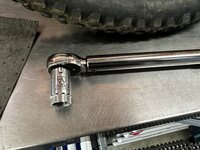
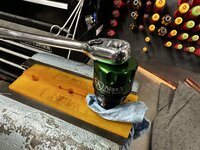
I have Abbey's chrombie for removing cassettes and love it. For installation I have their Chrombie socket so I can make sure the cassettes are properly torqued to 40NM
 

Attachments

  • IMG_3191.jpeg
    IMG_3191.jpeg
    763.8 KB · Views: 11
OP
G

Grant Gunderson

Well-known member
Joined
May 17, 2013
Messages
2,330
Location
Bellingham, WA
Next it's time for a lower fork service. I am running a Push AC3 coil conversion on this fork, but the service is the same.
IMG_3200.jpeg
I remove the brake line holder and the brake caliper. I use a rubber band to keep the hardware for the brake all together. Then I remove the nuts from the lowers.
IMG_3201.jpeg
I have the Fox factory tools for servicing the lowers. Totally not needed as you can just use a socket instead, but it is nicer than hitting my nice Snapon sockets with a hammer.
IMG_3204.jpeg
Once the lowers finish draining, they just slide off.
IMG_3209.jpeg
A Pedro's tire lever is the best tool I have found for removing the fork seals / dust wipers.
IMG_3211.jpeg
I use some forceps to soak the foam rings in new suspension oil.
IMG_3214.jpeg
I have full set of the Abbey seal drivers. They are very nice. I slide the seal on the the driver followed by the foam ring.
IMG_3215.jpeg
For those that dont know, Slick Honey is just rebranded Slickoleum. So I buy Slickoleum as it's cheaper. I give the bork bushing and dust seals a good coating of it.
IMG_3217.jpeg
I use a syringe to add the proper amount of fork oil to each leg. It is totally mess free.
IMG_3218.jpeg
Everything then gets torqued down.
IMG_3216.jpeg
The rubber band makes the caliper reinstallation a breeze.
 
OP
G

Grant Gunderson

Well-known member
Joined
May 17, 2013
Messages
2,330
Location
Bellingham, WA
Since I already had all of the suspension tools out, I decided to also do a service on the Ebike's Zeb. It's the same process as the Fox. On the Ebike I am running a Vorspring Smashpot coil conversion. I like it better than the Push AC3. A bonus of it is that you can easily change the Fork's travel without having to order new parts.
IMG_3219.jpeg
This is the Vorspring fully torn down. I am reducing the travel from 180 to 170 as I feel like it will make the bike better balanced for all around riding.
IMG_3221.jpeg
The wrench flats on the shaft are too small for a Crowfoot wrench to fit. So you have to use cone wrenches.
IMG_3222.jpeg
Most people dont know this ,but those funny looking cutouts in the Park cone wrenches, are actually there for putting them onto a torque wrench.
IMG_3282.jpeg
I am a fan of the Push 11.6 and run it on all of my bikes, They wont tune one for the Repeater however. So I had them tune it for a Transition Patrol. Its the same kinematics and same eye to and stroke as the repeater.
IMG_3303.jpeg
Problem is, the Patrol uses a 30mm mounting spec. As you can see here the Repeater uses a 25mm. F#cking bike industry and its constant changing "standards".
IMG_3315.jpeg
The nice thing about owning a Bridgeport mill is the bike industry and its standards can kiss my ***. I placed the 30mm shock mounting hardware into the mill vise using two Starrett V-blocks so they both have the same height.
IMG_3317.jpeg
I then machined 2.5mm off, so they each measured 12.5mm
IMG_3322.jpeg
I then deburred all of the edges and installed the mounting hardware back into the shock.
IMG_3323.jpeg
I now have a Repeater with a fully custom tuned coil setup on it.

I am a big fan of the E-bike and find its still a good cardio workout, but it doesn't give you any leg strength, so I tend to do big rides on the analog, and then for what would normally be a rest day I hop on the E-bike and use it for doing multiple laps on the bigger steeper lines around the area. Different tool for a different job.

IMG_3250.jpeg
Oh, it was also ew bike day for my son, I just got hime a new 20" commencal. Here he is testing it out for the first time. Once he got used to it, I took him over to Galbraith. Its nice he can ride most trails these days.
 
OP
G

Grant Gunderson

Well-known member
Joined
May 17, 2013
Messages
2,330
Location
Bellingham, WA
My Reverb AXS post on the E-bike has been acting up. It's only got 400 hours on it, but 4700 miles. So I'm going to give it a full 600 hour service, as it's not much more work than the 200 hour service. Also, if you haven't heard of the app ProBikeGarage, I highly recommend it. It will pull your ride data from Strava, so you can track mileage and hours not only on each bike, but also for each component, and set up service reminders, etc. It will also log all of your service too.

IMG_3085.jpeg
While, the standard Reverb posts may be the worst dropper posts ever made (I've owned every version since an original prototype) the Reverb AXS is a completely different animal and is one of the, if not the most reliable dropper post available. It better be for the price too. One thing I like about it, is you can remove the seat without having the seat angle adjustment change. Just ended a T25. I really like these Nepros ¼ drive sockets I ordered to test. They are way nicer than my Snapon ones. Someday I might upgrade all of my non-PBSwiss ones to these.
IMG_3086.jpeg
With the seat off, I then use a 9mm socket to remove the air cap and bleed all of the air out of the post.
IMG_3088.jpeg
A Snapon Crowfoot socket can remove the base plate by hand.
IMG_3089.jpeg
The retaining clip then comes out easily with the help of a pick.
IMG_3092.jpeg
With the head of the post in my soft jaws, I then use a larger Crowfoot to remove the seat post collar.
IMG_3094.jpeg
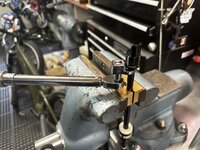
Whenever possible when working on seat posts or suspension I like to use my Snapon Low-torque wrenches. These are much slimmer than a Standard Snapon wrench and they dont have the flank drive on them, so they wont damage soft parts. Here I am removing the inner lower nut from the post.
IMG_3095.jpeg
The outer tube now just slides right off of the post. Here you can see the lower bushing, as well as the brass keys. You are supposed to replace the brass keys every 50 hours as they are a wear item and will cause play in the post and for it to bind once they wear. I find I can usually get closer to 100 hours before I have to replace them.
IMG_3096.jpeg
You can see the lower seal head bushing has a bunch of wear on it too. Time for it to get replaced.
IMG_3097.jpeg
The brass keys all have a set of rings on them indicating the size. Truth be told, I have never seen a post that didnt use the Size 3 keys. That would be it if I was just doing the 50 hour service.
IMG_3098.jpeg
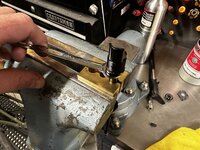
I then use a 23mm Crowfoot to remove the lower seal head. I have these polyurethane soft jaws from Wilton. I'd recommend them. I use them a ton!
 
OP
G

Grant Gunderson

Well-known member
Joined
May 17, 2013
Messages
2,330
Location
Bellingham, WA
IMG_3101.jpeg
You can now pull the inner assembly out of the post. That sharp point is the end of the vent rod assembly sticking through.
IMG_3102.jpeg
The seat post collar can now be removed. It also has an inner bushing it in, and was quite worn on mine. The 600 hour kit comes with a new one in silver. I have figured out over the years, these are pretty interchangeable, so I am replacing mine with a black collar out of a reverb service kit for an older style post.
IMG_3103.jpeg
Next I need to remove the lower air head from the inner assembly. I am using the RockShoks factory service shaft clamps for this. I have a full set of bike shaft clamps, but I use these for this process as they are brass and wont damage the soft aluminum shafts. Once Again I am using a Snapon Low-torque wrench for this.
70409162357__E98C2936-542E-43B9-A8AC-4C09DB1088F8.jpeg
Ok here are all of the parts so far laid out. the vent valve rod is attached to the lower air head that I just removed from the inner shaft assembly. You can also see here that I slid the inner seal head off of that shaft as well.
IMG_3110.jpeg
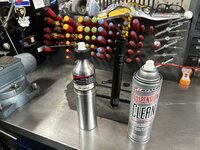
For cleaning the dropper post internals or suspension parts I use two items. 1st is a refillable sprayer filled with denatured alcohol that I can charge with my air compressor. The second item is the Maxxima suspension clean. If you are not going to be re-using any of the existing seals, brake cleaner can also work too.
IMG_3113.jpeg
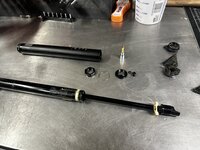
The main piston poppet valve seal gets removed using a brass o-ring pick. You want to make sure you only use brass or plastic so you dont damage the seal surfaces. The white PTFE backup ring doesn't need to be replaced.
IMG_3114.jpeg
In the past, Rockshocks always specked Slickhoney or their own branded version. That stuff was just rebranded Slickoleum. They are now speccing this new dynamic seal grease. It's a lot thicker than Slickoleum. No idea what grease they are remanding now, but I'd bet good money slikoleum would still work for these applications.
IMG_3116.jpeg
The new lower sealed assembly also gets bunch of grease and then reinstalled, along with a new foam washer and rubber bottom out ring.
IMG_3117.jpeg
IMG_3118.jpeg
The vent valve rod then gets reinserted
 
OP
G

Grant Gunderson

Well-known member
Joined
May 17, 2013
Messages
2,330
Location
Bellingham, WA
IMG_3120.jpeg
Notice when I am torquing it down with a Crowfoot I have the wrench upside down, so that I dont scratch anything. Thats it for the 200 hour service. For the 600 hour service we need to replace the IFP and replace all of the hydraulic fluid.
IMG_3121.jpeg
Now the inner shaft of the IFP gets removed. Its cross drilled, so you can pull it out with wither a plastic or brass O-ring pick
IMG_3509.jpeg
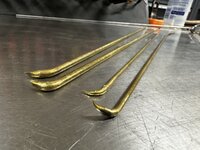
Sram specs inserting a bunch of zipties to remove the IFP so you dont scratch the post. That wouldn't work for me, since my IFP was stuck all the way against the bottom of the post assembly. Years ago I made a set of very long 18" brass picks out of some brass rod in ⅛ and ¼ diameters. They are perfect for this case and they will not scratch the inner surfaces.
IMG_3127.jpeg
With the IFP out. I can then install the new post collar, this black one is from a different posts service kit, but they are all interchangeable. I hate how Sram only sells the Reverbs with a silver collar.
IMG_3129.jpeg
I dunk the inner tube in Reverb oil so it's fully coated. I then gets dropped back into the main post and pressed down till it clicks into place.
IMG_3130.jpeg
I then wrap a PIG matt around the post and hold it there with some painters tape as we are going to spill some hydraulic fluid in the next step.
IMG_3131.jpeg
The whole tube assembly gets completely filled with the Reverb hydraulic fluid until it is over flowing. This is critical as you do not want any air in it.
IMG_3134.jpeg
The new IFP gets caked with the dynamic seal grease. I even fill in the seal lips on both sides of it. You cant put too much grease on it.
IMG_3135.jpeg
It then gets pressed into the post by hand until the top is flush with the inner IFP tube. Next the IFP height needs to get set. This is very critical or you wont have full range of the post. They have a chart for the various heights, on my 170 dropper I need to set the IFP to 175
IMG_3136.jpeg
The old IFP height derive tool vs the newer longer one. You could easily just mark a section of copper pipe instead of using the factory tool too.
 
OP
G

Grant Gunderson

Well-known member
Joined
May 17, 2013
Messages
2,330
Location
Bellingham, WA
IMG_3140.jpeg
I cover the assembly with a microfiber rag to keep from splashing hydrolic fluid everywhere and use a mallet to tap the IFP down to the specified height.
70413685541__A16C0B6D-5D4C-456B-97E2-07AD7C89EC20.jpeg
Sram specifies using a syringe to **** the fluid out of the IFP tube. I dont bother and just let it spill onto the PIG when I remove the height tool. You want the inner shaft tube completely filled with fluid for the next step or your post will not work properly. I've learned that lesson the hard way and have had to go. back and repeat my steps. Not a good use of time, so just let it spill over.
IMG_3145.jpeg
The poppet vale of the inner post assembly then gets inserted into the inner IFP tube until the seals just clear the lip of the tube. Once again, more grease the better here.

IMG_3146.jpeg
I then torque the lower seal head down using a Crowfoot.
IMG_3151.jpeg
Next, I fill all 3 slots for the brass pins with grease. I then slide the outer post tube over the inner. I can then slide the 3 brass pins into place and the outer post helps keep them there. I then liberally coat them with more grease before fully sliding the outer tube on.
IMG_3153.jpeg
The post head goes into the soft jaws and the collar gets torqued down using a Crowfoot.
IMG_3156.jpeg
With the post in the soft jaws the inner lower nut gets torqued on. and then slid into the outer post fully. I then reinstall the retaining ring, followed by torquing down the outer lower nut.
IMG_3159.jpeg
Posts gets pressurized to 250 PSI and its good as new.
IMG_3171.jpeg
Here are the service tools all laid out.

IMG_3164.jpeg
I finished the day off by smoking some asian style ribs in the Traeger and making dinner for my lady friend.
 

ronin158

New member
Joined
Jul 5, 2017
Messages
2
The detail you put into these posts are awesome.

I've just recently started riding (<2 years) and have started assembling my own tools to fix and upgrade my bikes and have book marked a lot of your posts and pictures for tools to purchase down the road. I just recently purchased Abbey's chrombie socket tool and I can't believe the difference. The fit and engagement in even my cheap NX/GX cassette is way better than the Sram and ParkTool ones I was using.

70580238428__784BD739-0B82-42DE-8981-8F221AE741C9.jpeg
The ultrasonic makes very quick work of cleaning the drive train. I am using a water and Dawn Profesional soap solution in it. Notice the wear on the derailleur cage. The bully wheels were shot! The rear cassette is done as well. That XX1 cassette isn't cheap either! So it's time for all new drive train Componets.

What size ultrasonic cleaner do you use? I'd love to just drop my cassette and drive train inside and let it work its magic.
 
OP
G

Grant Gunderson

Well-known member
Joined
May 17, 2013
Messages
2,330
Location
Bellingham, WA
The detail you put into these posts are awesome.

I've just recently started riding (<2 years) and have started assembling my own tools to fix and upgrade my bikes and have book marked a lot of your posts and pictures for tools to purchase down the road. I just recently purchased Abbey's chrombie socket tool and I can't believe the difference. The fit and engagement in even my cheap NX/GX cassette is way better than the Sram and ParkTool ones I was using.

I have found that a lot of the new Park stuff isn't really all that great. I think they are riding on the coat tails of their reputations from years past. Granted they still make some tools that no one else does, and they still do something better than others.
In general tho I think they're abetter tool supplies out there. Abbey tends to be top notch, Unior has some stuff thats nicer than Park and cheaper too. For example I really like there chain link pliers and the Parks have been retired to my travel bag. VAS also makes some cool stuff as does Pedro. When you can, its also best to avoid the bike tool brands for more mainstream tools such as Knipex for pliers, Felco for cable cutters, PBSwiss / Wera or NEPROS for hex and troll drivers, etc.


What size ultrasonic cleaner do you use? I'd love to just drop my cassette and drive train inside and let it work its magic.


I picked this one up from Grizzly industrial. There are a bunch on Ebay, etc that all look the same with different brand names. They are all the same Chinese units rebranded. It does work very well, especially for the cost.
IMG_3514.jpeg
IMG_3515.jpeg
 
OP
G

Grant Gunderson

Well-known member
Joined
May 17, 2013
Messages
2,330
Location
Bellingham, WA
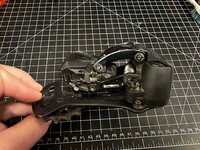
Ever since I snapped my chain I have been having intermittent issues with my XX1 AXS derailleur. It seems to just loose all power, I put a new batter on, give it a wiggle and it comes back to life. Something is up with it. I got it when these first come out, so its has a ton of mileage on it. Let's tear it down and see if we can find the issue. Its only a $800 unit, so what do I got to loose.

IMG_3458.jpeg

The main body is held in place by 3 SHCS, two on the bottom side and one near the battery compartment thats shorter.
IMG_3459.jpeg
With those out, the main body is still held together by the detailers parallel cage. The cage is held together by pins with external retaining rings on them.
IMG_3461.jpeg
These Wiha A0 series external retaining ring pliers make quick work of removing those. I really like the Wiha's over other brands as they have notched tips that keep the rings from going flying.
IMG_5284.jpeg
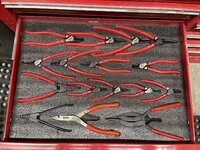
I have full set of the Wiha's as well as some specialty ones from Knipex and some Wilde ones who is the OEM for Snapon, Porto, etc.
IMG_3474.jpeg
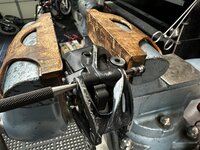
With the retaining rings out of the way, I then use a starter punch to tap the pins part way out. Note they each have a set of plastic bushings.
IMG_3476.jpeg
A long pin punch gets them the rest of the way out.
IMG_3477.jpeg
These pins have a shoulder on them so will only go in one direction. Also they very in length with each pivot location, so keep track of them.
IMG_3485.jpeg
The mid arm pin, is pressed into one side (pries off) the other side it is threaded in. It will unscrew with a 2mm hex. The pin with the spring on it, and that side of the cage doesn't need to get removed.
IMG_3467.jpeg
That spring is under constant tension, so if you do remove that pin, it's going to be a pain in the *** to get it back in. Sadly I know from a previous experience with other derailleurs.
IMG_3493.jpeg
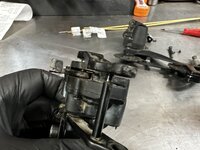
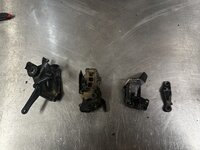
Here I the main body torn down, with the main casting, the electronic drive unit, the Limit screw housing and the limiting arm.
 
OP
G

Grant Gunderson

Well-known member
Joined
May 17, 2013
Messages
2,330
Location
Bellingham, WA
IMG_3496.jpeg
6 self tapping screws hold the electronic housing together. a T6 driver removes them.
IMG_3497.jpeg
The contacts are retained by two T5 screws.
IMG_3499.jpeg
And here is the guts of it.
IMG_3506.jpeg
It's pretty simple actually. Its just a wireless servo step motor that drives a gear chain.
IMG_3504.jpeg
The wire leads for power are soldered to the board with the battery pins. That all looks good. I didnt get a pic of the connector on the board side of the motor unit, but it was partially disconnected. I seated it. Re-assembled the unit and tested it. Good to go.
IMG_3516.jpeg
 

wasfast

Well-known member
Joined
Apr 10, 2014
Messages
874
Location
San Diego CA
I have found that a lot of the new Park stuff isn't really all that great. I think they are riding on the coat tails of their reputations from years past. Granted they still make some tools that no one else does, and they still do something better than others.
In general tho I think they're abetter tool supplies out there. Abbey tends to be top notch, Unior has some stuff thats nicer than Park and cheaper too. For example I really like there chain link pliers and the Parks have been retired to my travel bag. VAS also makes some cool stuff as does Pedro. When you can, its also best to avoid the bike tool brands for more mainstream tools such as Knipex for pliers, Felco for cable cutters, PBSwiss / Wera or NEPROS for hex and troll drivers, etc.


I picked this one up from Grizzly industrial. There are a bunch on Ebay, etc that all look the same with different brand names. They are all the same Chinese units rebranded. It does work very well, especially for the cost.
IMG_3514.jpeg
IMG_3515.jpeg
Great info to have, found the info for yours here: https://www.gtsoniccleaner.com/sale...ne-high-frequency-ultrasonic-cleaner-13l.html. I have one of small ultrasonic cleaners that is just ok for cassettes and chains like this https://www.harborfreight.com/25-liter-ultrasonic-cleaner-63256.html I'd love to have the size for a crank with 34-50 rings to drop in and more heating power. What are you using for cleaning agent?
 
OP
G

Grant Gunderson

Well-known member
Joined
May 17, 2013
Messages
2,330
Location
Bellingham, WA
I’ve lost track on how many times I’ve sheen ****** cable end cap crimps. Especially on kids bikes.
IMG_3544.jpeg
VAR tools out of France made these years ago. Tough to find but cheap when you do as most people have no idea what they are. Problem is they are large and can be difficult to use in tight places like remote dropper levers.
IMG_3542.jpeg
Park tool finally came out with a set. No idea why they didn’t do this decades ago, or why they waited for everything to go wireless. Anyways they are nice and compact plus can be used end on or sideways. So should be ideal for dropper remotes etc.

Since all of my bikes are fully wireless I’m going to have to wait till the kid or lady friend needs a new cable to test them out.
 
OP
G

Grant Gunderson

Well-known member
Joined
May 17, 2013
Messages
2,330
Location
Bellingham, WA

GirchyGirchy

Well-known member
Joined
Nov 14, 2011
Messages
9,944
Location
Central Indiana
I haven't read a thread this good since the infamous F40 restoration: http://build-threads.com/build-threads/ferrari-f40-lm-restoration/
That's a great one, here's the link to the actual thread on FC. Unfortunately it devolved into a mess at the end and the owner disappeared from the site. BTW, I have one of the 40 sets of the build books he had made.

 
To avoid these ads, REGISTER NOW!
OP
G

Grant Gunderson

Well-known member
Joined
May 17, 2013
Messages
2,330
Location
Bellingham, WA
Been a bit busy with family stuff. It was my son Stian's 6th Bday yesterday.
IMG_3594.jpeg
Did a Father son ride with him and had a stranger snap this for me on my phone after I set the shot up. Told Stian we will have to do the reverse the photo in a year or two.

IMG_3616.jpeg
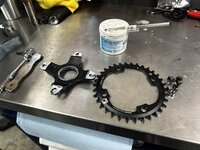
The E-bike drive train is also done. Note how worn the webbing on the front sprocket is here.
IMG_3615.jpeg
Compared to a new ring here.
IMG_3603.jpeg
While Im at it I will replace the bearings in my one up pedals. These are super easy to service, you just need a cassette tool to open them up,
IMG_3601.jpeg
Then the seal bushing and seal pull off. You can then pull the spindle off and the bearing slides right off. It's a standard sized suspension bearing too. I think I have those on hand even. I gotta run to the store to pick up a new steel cassette and chain tho.

In the mean time I organized the back corner of the garage.
IMG_3651.jpeg
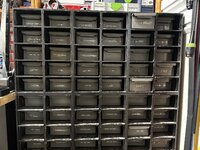
The bank deposit boxes that have been replaced mostly by the Lista cabinets for the hardware storage got repurposed for storing metal drops, as well as cut pieces of tube, rod and all thread. It's all organized by diameter or width.
IMG_3650.jpeg
I re-organized and labeled the rack I made previously to store the full length rods and all thread, etc.
IMG_3652.jpeg
And organized all of my long heat shrink tubing by size. Doesn't look like much but that project took me like 5 hours!
70682660392__A64E04DC-8F05-4728-898E-541CCAA37E26.jpeg
I picked some mint from my herb garden and then made a batch of mint chocolate chip ice cream for my son and my lady friends daughter.
IMG_3518.jpeg
And picked a bunch of Lilac flowers and made a batch of Lilac ice cream for me and the Lady Friend. Both ice creams turned out amazing. I think I got this cream herb infusion thing down. Going to experiment with more herbs and more flowers from the garden.
 

ebarker9

Well-known member
Joined
Oct 1, 2010
Messages
85
Whoa, not sure how I missed this thread. I do a lot of mountain biking as well and have just started going off the deep end of collecting nicer tools. Interestingly, I haven't really liked the way that the Nepros T25 socket fits the majority of bolts that I've tried it on, at least in comparison to the way that my other PB Swiss bits do. Especially with road bikes, I feel like the bolt head is extremely shallow so it's really easy to cam the bit out accidentally. As an alternative, I'm going to try PB Swiss 1/4" bits in a Ko-Ken bit holder.

I'm also going to have to go back and measure my Magura and Shimano olives just to make sure that I've been keeping them separate...
 
OP
G

Grant Gunderson

Well-known member
Joined
May 17, 2013
Messages
2,330
Location
Bellingham, WA
I haven't really liked the way that the Nepros T25 socket fits the majority of bolts that I've tried it on, at least in comparison to the way that my other PB Swiss bits do. Especially with road bikes, I feel like the bolt head is extremely shallow so it's really easy to cam the bit out accidentally. As an alternative, I'm going to try PB Swiss 1/4" bits
IMG_3701.jpeg
All of these are T25 L to R is PBSwiss ¼ hex drive, PB Swiss ⅜ socket drive, Nepros, Snapon
The ¼ hex drive PBSwiss has the thickest web and thus seems to fit the tightest, The ⅜ socket drive, has a tapered web, so it seems to grip more the further it fits into the bolt head. The Nepros has the thinest webs. I haven't had an issue with a sloppy fit on typical MTB fasteners, but it doesn't fit as well as the PBSwiss ones, but it's more convent in the ¼ socket drive. The snapon is total garbage.
IMG_3705.jpeg
My Wera torque limiting screwdriver can be really useful for a lot of bike tasks, especially with the PBSwiss hex drive bits. HoweverI actually use it the most when mounting ski bindings.
IMG_3702.jpeg
I also had some new tools from Abbey arrive today. The socket adapter to remove the newer DUB cranks, the pre-HAG tool for quickly checking deraileur hanger alignment with the derailed still installed on the bike, and the new Shimano Steps BB tool for the Shimano E-bike motors.

IMG_3704.jpeg
I've been using the Park tool for this, but hated it as it didnt have a ⅜ socket drive on it, so it was a pain in the *** having to use it with a socket as well. The Park one is well made as it is steel.
IMG_3703.jpeg
However the Abbey one is deeper, so it better engages the lock rings and fits the lock rings way tighter. The center recess all perfectly fits over the E-bike motor crank shafts, so it perfectly aligns the lock ring so no chance of cross fitting. Its a way nicer tool than the Park.

IMG_3695.jpeg
I picked a bunch of Honeysuckel in the garden after my am ride today.
IMG_3698.jpeg
3 cups of heavy whipping cream a 1.5 cups of whole milk
IMG_3697.jpeg
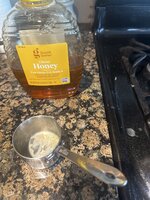
and a ½ cup of honey and I'll have a batch of zero sugar Honeysuckle ice cream ready for a post ride treat next time I ride with the lady friend.
 

ronin158

New member
Joined
Jul 5, 2017
Messages
2
IMG_3702.jpeg
I also had some new tools from Abbey arrive today. The socket adapter to remove the newer DUB cranks, the pre-HAG tool for quickly checking deraileur hanger alignment with the derailed still installed on the bike, and the new Shimano Steps BB tool for the Shimano E-bike motors.
How is the pre-HAG tool? I was tempted to get that as I have yet to really need to get the HAG but just haven't pulled the trigger yet. Is it plastic or aluminum?
 
OP
G

Grant Gunderson

Well-known member
Joined
May 17, 2013
Messages
2,330
Location
Bellingham, WA
How is the pre-HAG tool? I was tempted to get that as I have yet to really need to get the HAG but just haven't pulled the trigger yet. Is it plastic or aluminum?
Haven’t had a chance to use it. I never bother with the HAG. If I’m suspecting a bad hanger I always just replace the hanger. They are cheap enough. I figure if this does a quick job of checking that everything is parallel it could save some time and for $25 I’ll try it. It is printed out of plastic. I’d prefer it being actual metal, as I bet it will wear needing to be replaced eventually.
 
OP
G

Grant Gunderson

Well-known member
Joined
May 17, 2013
Messages
2,330
Location
Bellingham, WA
IMG_3658.jpeg
I finally got around to picking up the parts for the e-bike drive train today. While I’m at it I’m going to service the rear hub. These Nocatec hubs are held together by an axle with a threaded cone. Old school style.
IMG_3657.jpeg
You need two 17mm wrenches to tear it down. A cone wrench on one end and my Snapon low-torque on the other side.
IMG_3660.jpeg
The driver body and axle then slide out.
IMG_3661.jpeg
They are in definite need of new grease and bearings. You can see water had made its way in and the bearings have started to rust.
IMG_3670.jpeg
A park bearing drift and my hope service tube along with the arbor press made quick work of pressing the shaft out of the driver body along with the inner bearing.
IMG_3671.jpeg
The inner bearing spacer drops out, flip it over and the other bearing presses out.
IMG_3675.jpeg
The cassette body, pedals (torn down) cranks and front sprocket adapter all get a quick wash in the ultra sconic.
IMG_3679.jpeg
I then press the bearings out of the hubs with my Park suspension bearing press. I really like this unit. It’s got all of the proper bearing drifts and also serve as cups to catch the bearings.
IMG_3681.jpeg
This properly setup ensures the bearings always get pressed in / out totally square. I have t found another system that does this as well or is as versatile. As shown here it even works on hubs so no need to order the specific hub kit.
 

Attachments

  • IMG_3674.jpeg
    IMG_3674.jpeg
    291.7 KB · Views: 2
OP
G

Grant Gunderson

Well-known member
Joined
May 17, 2013
Messages
2,330
Location
Bellingham, WA
IMG_3686.jpeg
To press the bearing out from the other side a set of internal spaces come with the kit to give it the reach. Works really well.
IMG_3706.jpeg
I keep a selection of the most common suspension and hub bearings on hand in a festoon sortainer along with other suspension parts
IMG_3708.jpeg
These Park drifts have a shoulder machined into one side to perfectly center the bearings
IMG_3709.jpeg
The correct sized cup perfectly fits the bore on the other side of the hub to make sure everything is square.
IMG_3710.jpeg
With a liberal coat of green water proof grease they get pressed in. With this system they go imperfectly square every time. I’ve used other systems and with those you always run the risk of a bearing getting started off axis and damaging the bore.
IMG_3751.jpeg
While I could press the new bearings into the FreeHub body with the arbor press the park tool makes quick work of it and it keeps everything aligned square. You can see how a large bearing cup centers the press over the FreeHub body.
IMG_3755.jpeg
And reversed for the otherside
IMG_3757.jpeg
Instead of FreeHub oil I tend to use red tacky grease. It’s the same stuff DT Swiss specs as their “special “ grease. The recess for the pawls get a good coating of it.
IMG_3760.jpeg
The springs go in next.
IMG_3762.jpeg
I then use a small pick to compress the springs to get the pawls in.
 
OP
G

Grant Gunderson

Well-known member
Joined
May 17, 2013
Messages
2,330
Location
Bellingham, WA
IMG_3765.jpeg
The hub side gets a light coating of the grease. Too much and the pawls won’t engage.
IMG_3768.jpeg
Dust seal goes back on the body and the whole assembly drops back In with a slight counter clockwise twist.
IMG_3771.jpeg
I like to coat the driver body with a liberal coat of Tef-gel to keep the cassette from seizing to it. This stuff works way better than antifreeze and holds up better to moisture too.
IMG_3775.jpeg
Cassette then gets torqued down to 40NM using the Abbey socket crombie
IMG_3712.jpeg
I also use the Tef-Gel on the baiting surface for the front sprocket and it’s 4 bolts.
IMG_3713.jpeg
A Park chainring bolt wrench is a big help for making sure the chain ring bolts are fully torqued.
IMG_3716.jpeg
These have a bad tendency to loosen on e-bikes. When that happens it’s quite common for the chainrings to fold in half stranding you mid ride. So I like to use torque seal on them. Yellow on the backside and black on the front.
IMG_3720.jpeg
More Tef-Gel goes in all of the mating surfaces.
IMG_3727.jpeg
I then use the new Abbey- Esteps socket to properly torque down the lock ring.
IMG_3778.jpeg
New chain on and I give it a quick inspection with the new pre-hag. Derailleur looks reasonable parallel to the cassette.
 

turbowoodworker

Well-known member
Joined
Mar 18, 2012
Messages
3,548
Location
Apex NC
Man, bikes have come a long way. Waiting for you to put playing cards in the spokes!
Loving your shop and projects. Durango was my dream town. Keep sharing as your story is fantastic.
Rick
 
OP
G

Grant Gunderson

Well-known member
Joined
May 17, 2013
Messages
2,330
Location
Bellingham, WA
Starting last winter anytime my furnace would kick on I'd get a squealing noise. It sure sounded like a typical bad bearing. Not wanting to deal with it until ski season was over, I crossed my fingers hoping my 19 year old furnace wouldn't go out until summer.

With ski season wrapped up and temps in the mid to up 70's for the extended forecast I figured there was no time like the present to tear into it. Sure I could call a local Hvac company, but after talking to a few of my neighbors, the consensus is they typically charge $250 just to look at it, and if its a bad blower its going to be $1250+. That seems awfully steep IMOP. But hey, I can be cheap. So with more balls than brains I decided to see if I can do it myself.

IMG_3738.jpeg
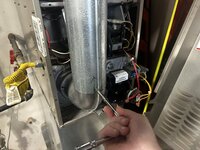
The furnace lives in my garage behind a hanging wall of skis and where I store extra plywood sheets and my homemade MFT table for wood working.
IMG_3740.jpeg
It gets plenty of airflow with the skis hanging there, but not much room to access it.
IMG_3741.jpeg
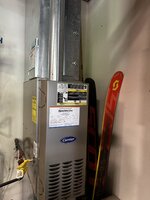
After moving 30+ pairs of skis I now have access to the furnace. First thing to notice, this unit was installed upside down from most installations. Only guess is that was easier. with the gas line being on the left hand side.
IMG_3743.jpeg
With the front panel removed, I immediately noticed a bunch of rust / ash in the bottom of it. Interesting.
IMG_3747.jpeg
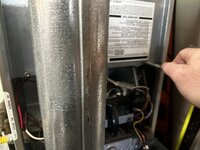
I then removed the two self tapping sheet metal screws and the access panel to the brains of the unit.

IMG_3835.jpeg
The exhaust pipe is blocking access to it, so I marked its orientation and the removed the 6 self tapping sheet metal screws (3 up top 3 at the bottom)
IMG_3836.jpeg
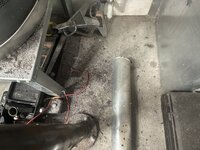
When I pulled the exhaust pipe I was greeted to a shower of rust. Backstory several winners ago I came home and noticed the exhaust pipe rain cover had blown off. I replaced it back then but I'm sure it collected a fair amount of water.
IMG_3837.jpeg
The section of exhaust pipe that is at a 45 angle between the furnaces vertical section and the vertical that up through the house was rusted all the way through in multiple spots. I will have to replace it!
IMG_3838.jpeg
And here is the pile of **** that has collected at the 90 degree elbow where the exhaust meets the furnace.
IMG_3844.jpeg
Cleaning that out it looks to be in reasonable shape. The draft safe guard switch is under that metal panel. I need to remember to remove it and clean it.
 
OP
G

Grant Gunderson

Well-known member
Joined
May 17, 2013
Messages
2,330
Location
Bellingham, WA
IMG_3839.jpeg
IMG_3840.jpeg
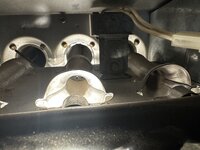
The gas manifold and heat exchangers look to be reasonably clean.
IMG_3841.jpeg
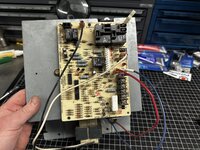
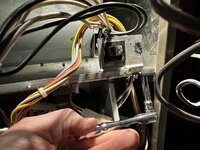
The guy that last served this was a bit lazy and left tape over the blower door safety switch. Ok, nothing looks like a major issue so far (or I'm too dumb to know), let's keep proceeding. I need to remove the control board next.
IMG_3842.jpeg
This large connector gets discounted first.
IMG_3853.jpeg

I then removed and labeled the 3 white wires connected to the board here, along with a motor lead wire
IMG_3855.jpeg
I marked the orientation and removed this connector
IMG_3856.jpeg
And then removed the thermostat wires, they are color coded, but I labeled them anyways since I had the label maker out.
IMG_3848.jpeg
This motor lead wire got removed and labled
IMG_3863.jpeg
As did these 3
IMG_3860.jpeg
2 self tapping sheet metals screws are all that holds the control panel in place, they get removed next
 
OP
G

Grant Gunderson

Well-known member
Joined
May 17, 2013
Messages
2,330
Location
Bellingham, WA
IMG_3867.jpeg
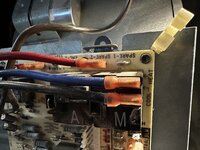
The control board looks to be in pretty good shape. No obvious sings of any bad Componets.
IMG_3869.jpeg
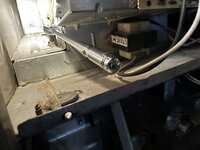
The blower door switch is held in place by two sheet metal screws, it gets removed next.
IMG_3870.jpeg
The blower unit is then held in place by two larger sheet metal screws.
IMG_3857.jpeg
There is very little room to access these. So a short snapon socket and my long ¼ drive Nepros ratchet saved my *** here. No way you could do this with the old craftsman ratchets I grew up with.
IMG_3872.jpeg
Blower unit slides right out. It's not very heavy either. Its pretty damn dusty tho!
IMG_3873.jpeg
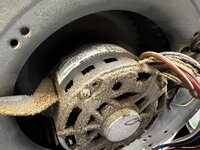
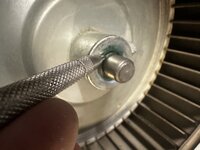
You can visibly see where there is an oily residue thats seeped out of the motor. These motors do not have any grease ports for lubrication.
IMG_3885.jpeg
I gave it a good blowout in the driveway.
IMG_3897.jpeg
On the fan side, I then marked the shaft with the fans location and then removed the set screw that holds it on.
IMG_3900.jpeg
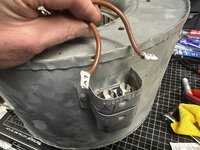
I then labeled and removed the starter capacitor leads
IMG_3899.jpeg
The motor is held in place by 3 bolts with vibration isolating rubber washers. They rubber is in bad shape so I'll order some replacements from McMaster. Not her where I removed the endocarp from the motor. Thats some funny looking grease in there.
 
OP
G

Grant Gunderson

Well-known member
Joined
May 17, 2013
Messages
2,330
Location
Bellingham, WA
IMG_3905.jpeg
With the motor out, I could feel what to me feels like excessive endplay on the motor shaft. I then removed the front press on cover using a bike tire lever.
IMG_3906.jpeg
IMG_3908.jpeg
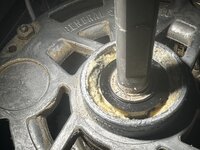
I'm not sure if thats grease thats hardened or some kind of packing material they used, but its bone dry and looks like its decomposed.
IMG_3903.jpeg
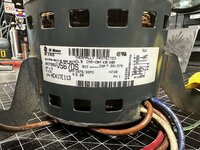
Here is the motor tag

A new identical GE Replacement on Amazon is $245. Or I can get one by Regal Beloit for $127 I'm tempted to just order the GE, unless anyone has any reason to go with the Regal brand.
IMG_3874.jpeg
With the blower unit out. I can now look down at the heat exchanger. It all looks to be in pretty good shape with no obvious issues that I can see. I'll give it a good blow out with compressed air and wipe it all down.
 
OP
G

Grant Gunderson

Well-known member
Joined
May 17, 2013
Messages
2,330
Location
Bellingham, WA
While I am waiting for the new furnace parts to arrive, I decided it was time to tackle a project that I've been thinking about doing for years.

I use a lot of soft jaws and various shaft clamps when working on bike suspension and seat posts, etc. The problem is none of them stay in place in the vise jaws, even with magnets. Plus I always have to take the copper jaw covers off to use them. Many times when you are using the shaft clamps, you often wish you had a third hand to hold the part, shaft clamps and then turn the vice handle. It's a pain in the *** I tend to deal with a lot.

So the plan is to cut some new primary jaws with a dovetail and ball detents and then cut corresponding dove tails on all of my existing soft jaws / shaft clamps. My vise is a 6-½" Wilton tradesman. The vice is a nice size for what I do, but with this project, the 6.5" jaws are a bit of a pain as I can't just buy one 12" piece of stock material.

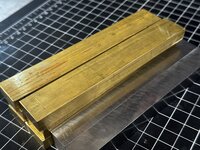
So I went down to the local hardware store and south two 12" ¾ x ¾ sections of mild steel key stock, and a 3 piece of ½ x ¾ brass bar. I'd like to have copper for a set of the soft jaws, but copper bar is stupid expensive, so I'll have to wait until I find some for a price I am willing to pay. The nice thing about this idea, is I can always make new jaws for it easily down the road.

IMG_3938.jpeg
I started by using my abrasive saw to rough cut the key stock to size.
IMG_3939.jpeg
My 14" ridged woodcutting bandsaw with a bi-metal blade made quick work of rough cutting the brass bar down.
IMG_3950.jpeg
70804084615__A7D74D00-9BA1-4773-B3EA-31CA16A0A0A8.jpeg
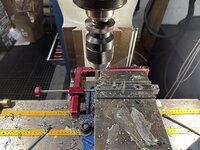
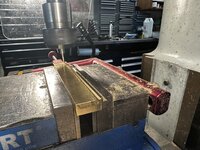
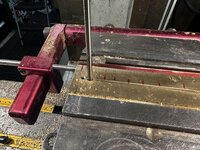
I then faced the ends to the correct length. Using a work stop on the vise made quick work of getting everything to the correct length, and serves as a reference for future operations. I then faced all of the sides of the key stock. I probably could have skipped on facing the key stock, but I figured I should just do it the correct way the first time.
IMG_3946.jpeg
I then machined a ¼ b ¼" grove in the center of the machine stock. I need to make a space for the dove tail shaft to move when it does its operation next.
IMG_3951.jpeg
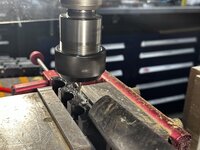
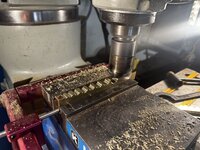
The dove tail is going to get cut by a ½" 45 degree cutter. This will be a very big cut for that size of cutter and it has to happen in one pass. So I filled the channel with anchor lube to keep things cool.
IMG_3954.jpeg
I set the X-axis feed on the mill to the lowest setting possible and crossed my fingers the cutter wouldn't break!
IMG_3958.jpeg
An hour latter and I had each dove tail channel cut.
IMG_3963.jpeg
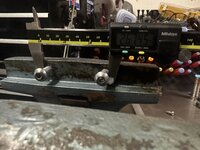
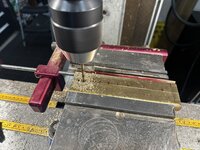
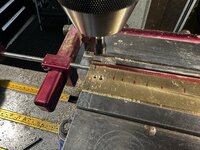
I then needed to determine the spacing for the mounting bolts. I just measured the outside of the bolts, then subtracted 5/16" (bolt size) from it.IMG_3964.jpeg
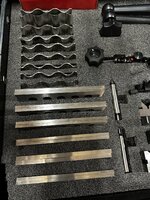
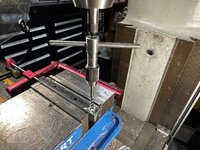
For hole drilling operations I like to use a wavy parallel instead of my expensive starrett ones incase I hit it with the through holes.
 
OP
G

Grant Gunderson

Well-known member
Joined
May 17, 2013
Messages
2,330
Location
Bellingham, WA
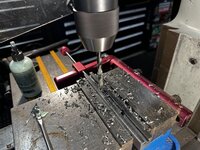
IMG_3967.jpeg
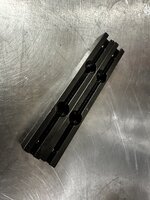
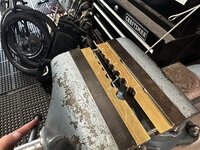
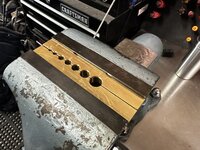
5/16" mounting holes get through drilled.
IMG_3971.jpeg
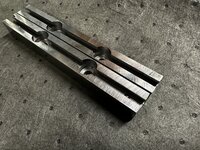
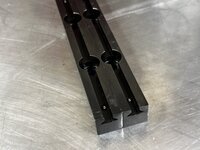
I then counter bored the holes using a ⅝" end mill. I am using hex button head screws as they are lower profile than a SHCS, so a typical counter bore bit wouldn't work.
IMG_3972.jpeg
IMG_3975.jpeg
Test fit worked. ⅝" bar stock would have been the perfect size here, but no one had it in stock in town. I don think the lower gap will be an issue for the type of work I typically do.

In order to keep the soft jaws and shaft clamps from sliding out of the dovetails ends I need to add some ball detents. I am going to use a 3/16" ball bearing, and a ¼-20 set screw and some springs to make these. It's all stuff that I had on hand.
IMG_3976.jpeg
The first step is to blind drill all of the holes for the tap, using the quill stop on the mill. You want to stop as close to breaking though as possible without actually breaking through.
IMG_3977.jpeg
Each hole then gets tapped. I like using a tap guide and my Starrett tap handle for this.
IMG_3978.jpeg
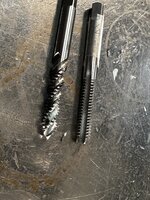
I am a really big fan of these spiral taps as they remove the chips from the hole, cut nicer and are way less likely to break. Since these are blind holes, I then followed that tap with a bottoming tap.
IMG_3980.jpeg
Finally I drilled a through hole with a #13 drill so the ball will just poke through.

IMG_3142.jpeg
Having an absolutely complete set of drills in every size is really nice for projects like this! I dont use the number or letter bits that often, but when you need them, you need them.
IMG_3981.jpeg
And here is the parts of the ball detents. I had to cut a longer spring down to fit this application, but it should work fine.
 
OP
G

Grant Gunderson

Well-known member
Joined
May 17, 2013
Messages
2,330
Location
Bellingham, WA
IMG_3987.jpeg
You can adjust the ball detent pressure by how far to screw in the set screw in the back, or by changing the spring out for a stiffer or lighter one. I think I have them set for a firm but easy to remove pressure.
IMG_3991.jpeg
I then broke all of the edges with a file, and then buffed them with my Baldor buffer.
IMG_3992.jpeg
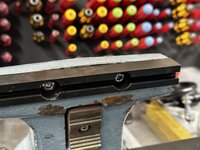
I then blued them to help prevent corosrsion. Here you can see the set screws holding the ball detents in the back side.
IMG_3993.jpeg
IMG_3995.jpeg
I might need to do another coating of the blueing acid to even out the finish at some point, but I think this is acceptable.
IMG_3999.jpeg
IMG_3997.jpeg
IMG_4001.jpeg
Thats enough for one day. Its finally raining here, so tomorrow is going to be really good bike conditions, so cutting the male dovetail into the rest of the parts will have to wait for another day.
 
OP
G

Grant Gunderson

Well-known member
Joined
May 17, 2013
Messages
2,330
Location
Bellingham, WA
IMG_4030.jpeg
With the steel mounting blocks done, next up is working on the brass jaw inserts. I need more room in my garage!
IMG_4057.jpeg
After facing all of the Jaw inserts so they are nice and square, I then used an ⅛" end mill to cut a receive groove for the dovetails. I was going to cut all of my existing shaft clamps too, but I broke my last ⅛" mill, so gotta wait for more to arrive.
IMG_4060.jpeg

I then used a ½" 45 degree dovetail cutter to cut the dove tails.
IMG_4065.jpeg
In order to fine tune th fit, I used a red Sharpe on them and then inserted it into the steel jaw holders to see where and how much material needed to get taken off for the final pass. I do not want any play.
IMG_4079.jpeg
I then drilled one 3/16" under sized hole and one over sided hole in the face of each of the shaft clamp jaws.
IMG_4078.jpeg
I then pressed in some 3/16" stainless alignment pins.
IMG_4081.jpeg
With the pins holding the alignment of the jaws together, I then clamped them back In the mill and proceeded to drill under sized holes for each shaft clamp size.
IMG_4082.jpeg
I then chamfered both sides of each hole, so there will be no sharp edges.
IMG_4083.jpeg
Finally I reamed each hole to the correct size. I then removed the alignment pins and milled .030 off of each jaw face.
IMG_4088.jpeg
 
OP
G

Grant Gunderson

Well-known member
Joined
May 17, 2013
Messages
2,330
Location
Bellingham, WA
IMG_4090.jpeg
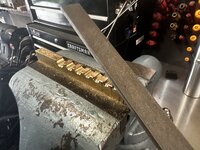
The main edges all got knocked down with a non-ferris specific file.
IMG_4091.jpeg
I then rounded the edges of each shaft bore.

IMG_4094.jpeg
I chamfered the edges of the corresponding holes for the alignment pins.
IMG_4095.jpeg
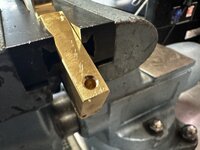
And drilled the recess for the ball detent stops. and test fit them.
IMG_4092.jpeg
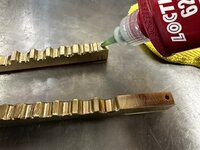
Retaining compund gets added and the alignment pins get pressed in.
IMG_4098.jpeg
The alignment pins ensure that you always clamp each shaft square in the clamps.
IMG_4096.jpeg
IMG_4169.jpeg
I'm now set to service some new suspension componets after fox switched from a 9mm under shaft to a ⅜ during covid production.
IMG_4163.jpeg
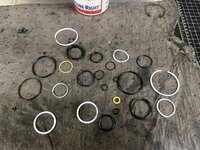
This x2 shock only had me changing 25 seals!
IMG_4172.jpeg
 
OP
G

Grant Gunderson

Well-known member
Joined
May 17, 2013
Messages
2,330
Location
Bellingham, WA
Its been a busy summer so far of fixing ****, yet I still haven't had a chance to get to any of the shop projects I had actually planed for this summer.
IMG_4371.jpeg
The Grip 2 damper on my fox 36 badly needed a rebuild. I haven't finished all of my shaft clamp conversions yet, but the Wilton soft jaws worked for opening it up.
IMG_4372.jpeg
The compression valving assembly just unscrews out of the top of the pressure chamber. Dump the oil out, flip it over
IMG_4373.jpeg
and then unscrew the rebound assembly. I didnt have a wrench in this size, but I do have a crowfoot, so that worked well.
IMG_4377.jpeg
I then clamped the damper section in my (not yet finished) copper soft jaws so I could unscrew the valve assembly
IMG_4379.jpeg

The compression valving is dead nuts simple. Left to right is the check valve shim, the port unit, and then the compression valve stack. I am very tempted to order a selection of valve shims and start playing around with some custom valving options.
IMG_4385.jpeg
The rebound assembly is a bit more complicated. The adjust rotates to not only control what valve ports are open, but it rides on a ramp that then determines the fulcrum point for the valve stack, so the valve shims actually adjust a bit as you change the dial. This is a better system in my mind then the compression stack valving.
IMG_4388.jpeg
Once the clamp bolt is removed, it can then be unscrewed.
IMG_4394.jpeg
And there is the Grip 2 damper cartridge fully laid out.
IMG_4398.jpeg
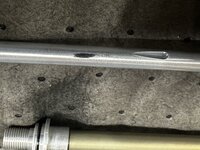
And if you look at the top shaft, notice the wear just bellow the tear drop oil passage. Thats what I get for not replacing the seals sooner. Should still be fine to run with new seals. The only thing tricky about the damper, is the rebound gets preloaded at 1.2NM with a .030 shim inserted, so I had to order some new WERA torque limiting screw drivers that go that low!
 
To avoid these ads, REGISTER NOW!
Top Bottom