To avoid these ads, REGISTER NOW!

Above 1200 Sq/FT The Action Sports Garage

Wokspaces above 1200 squarefeet.
OP
G

Grant Gunderson

Well-known member
Joined
May 17, 2013
Messages
2,330
Location
Bellingham, WA
IMG_7708.jpeg
The rubber seal gets inserted, and I use a splunger tool to make sure its under the outer lip.
IMG_7710.jpeg
The snapping then gets inserted to hold the seal in. Next I prep the BB threads with Ultra Ted-Gel its the best anti-seize I've found for bikes and is super water proof too.
IMG_7713.jpeg
The BB then gets torqued to 40NM using a CK BB socket.
IMG_7716.jpeg
To grease the bearings now that they have been fully flushed, I use a Chris King grease injection tool. I instal it onto a Dulco grease gun with a lockNlube couple. This is a very rigid and leak proof setup.
IMG_7718.jpeg
The grease then gets injected into the BB bearing on each side
IMG_7719.jpeg
The left hand crank with the spindle attached gets some grease on the spindle then installed.
IMG_7725.jpeg
I then rebuild the drive side crank using the Ultra Ted-Gel as an anti seize.
IMG_7727.jpeg
I use a syringe to inject the anti-seize into the threaded bolt holes.
IMG_7729.jpeg
Cleaned up, the 3 Ti bolts that hold the chain ring on get torqued down.
IMG_7730.jpeg
and I can then reinstall on the bike.
 
To avoid these ads, REGISTER NOW!
OP
G

Grant Gunderson

Well-known member
Joined
May 17, 2013
Messages
2,330
Location
Bellingham, WA
A while ago I tested the idea of using shrink wrap to color code my hex sockets. I found that it sped up my work quite a bit.
2FCE0609-7B18-4D00-9592-CD8BBC771224.jpeg
So today I color coded all of my hex tooling plus my T25 ( most used torx)
611C9769-72CB-43FC-81D9-0EFD4D33DC93.jpeg
Unlike my test batch, this time I used the double wall heat shrink that also has a heat activated adhesive built in. We will see how it lasts.
 
OP
G

Grant Gunderson

Well-known member
Joined
May 17, 2013
Messages
2,330
Location
Bellingham, WA
The machine built wheel set on my current E-bike is nothing but a pain in the ***, especially after riding custom made wheel sets the last 15+ years. With the spokes coming loose just about every other ride. After having a spoke snap on yesterday's ride I decided to do something about it.
image.jpeg
I like to use my Festool Impact to zip the rotors off. I also use it on the torque limiting setting to install, followed by a Torque wrench.
image.jpeg
I have an Abbey universal truing stand adapter. It works well, but at some point, I need to cut a longer section of all thread to use with it, as what is supplied is a bit short.
image.jpeg
I like to use Boiled linseed oil on my spoke threads. I find that it really helps to keep them from loosening. I use an small syringe to apply it.
image.jpeg
Each spoke gets a drop. I then wipe away the excess.
 
OP
G

Grant Gunderson

Well-known member
Joined
May 17, 2013
Messages
2,330
Location
Bellingham, WA
On my ride last night, I ended up completely loosing my rear brake right in the middle of a super steep chute. No matter how much I pumped the brake lever, it would just go to the bar. Ended up having to hike a bike down hill for 2K vert. Not fun. Looking at the lever and caliper there was zero sign of leaking fluid. So there must be a leak in the hose.
IMG_7814.jpeg
This bike uses an Acros internal cable routed headset....its quite possible it would win an award for the worst designed bike part of all time. Notice how the heat shrink on the brake housing is all torn up.... its also wet. So pretty sure this is my leak.
IMG_7808.jpeg
I used my park brake line wrench to remove the line from the lever.
IMG_7816.jpeg
I then used my jag wire, brake line cutter to cut the olive and ****** off of the end. This cutter works really well for the price. There are nicer ones available, but I dont have any complaints with this one.
IMG_7817.jpeg
I then attached a Park internal cable routing line to the end of the brake line. With E-bikes if you dont do this, it is nearly impossible to route the brake housing ( or seat post / shifter ) lines between the frame and the motor. A little forethought will save hours of time later.
IMG_7821.jpeg
I unscrewed the bajo fitting from the caliper.
IMG_7828.jpeg
I then pulled the main pivot.
IMG_7833.jpeg
This gives access to where the brake line and the speed control wire enter the main triangle right above the motor.
IMG_7837.jpeg
I could then pull the brake housing from the bike. Notice how it is cut! WTF?
IMG_7847.jpeg
I then pulled the headset apart to see what caused the line to get cut. This plastic spacer sits between the steerer tube and the top headset bearing. Notice the crack! It turns out both sides have one. Pretty sure thats what sliced my housing open mid ride.
 
OP
G

Grant Gunderson

Well-known member
Joined
May 17, 2013
Messages
2,330
Location
Bellingham, WA
IMG_7850.jpeg
This is what the top headset bearing cup and the space assembly looks like. Notice there is a hell of a lot of material missing where the steer tube isn't supported by the bearing. This is idiotic. Not surprising at all that those thin webs cracked. This is actually and updated assembly from Acros. They replaced the frame side cup with metal instead of the original plastic, but that doesn't fix the issues with it.
IMG_7852.jpeg
I packed the slots full of silicone. This will hopefully add some additional support. Once it dries, I will create holes just large enough for the brake line and the control wire to pass through.
IMG_7855.jpeg
Speaking of the control wire, I added some double wall heat shrink to it to protect it where it goes through the headset.
IMG_7843.jpeg
The new brake line also gets the heat shrink treatment, but I added two layers of it. Once the silicone dries, I will press in the new headset.
 
OP
G

Grant Gunderson

Well-known member
Joined
May 17, 2013
Messages
2,330
Location
Bellingham, WA
image.jpeg
I used the Park RT-2 to remove the old head set top assembly.
IMG_7862.jpeg

The frame then gets prepped with Tef-Gel
image.jpegAnd the new top assembly gets pressed in. I dont know if it's just me the the centering mandrills for the Park head-set press dont fit for a ****. They are oversized so they dont really help to line anything up. Once my lathe is done, I'm going to turn them down for a better fit.
image.jpeg
Cables then get routed up through the center of the headset and threw the center plastic cup that I filled with silicone. I used way more of the supplied headset grease than normal, as thats all thats going to keep water out. The rest of the assembly is like normal headset install.

Next step was to finish hooking up the new brake line to the levers.
image.jpeg
There is a difference between the Shimano and Magura olives. The Shimano's are 6.75mm in Dia. and the Maguras are 7.00 on the dot. So its best to sue the correct olive for the lever you are using. The dust cap gets slide on the line, then the retaining nut, followed by the olive and then finally the bradded ****** needs to get pressed into the line.
image.jpeg
I use a Jagwire tool for this. It's cheap and works well enough. It also has a reversible drive tip for Sram / Shimano Magura etc styles. I then torque the brake line down using an 8mm Flarenut Crowfoot. The spec on the Maguras is 4NM or 35in/lbs. This torque is critical as the olive needs to be compressed enough to seal, but if you over tighten it, it will leak.
 

bugnut

ALLIANCE MEMBER
Joined
Jul 14, 2012
Messages
3,974
Location
Central Ohio
Grant, thank you for sharing. Many great ideas to be gleaned and your photography and writing make for pleasurable reading! Love the tool organization!
 

Toolfool

Well-known member
Joined
Aug 22, 2011
Messages
4,982
Location
Tallahassee, FL
The hell with a boring engineering job, looks like you made a great career choice. Your shop set-up and your craftsmanship is top notch. If I was still living on Whidbey Island I'd be knocking on your door. Curious what equipment you shoot with. I was a camera repair tech in my first career (pre-digital). Worked with a lot of pro's (Nikon, Hasselblad, Canon, Mamiya, Bronica,...).
 
OP
G

Grant Gunderson

Well-known member
Joined
May 17, 2013
Messages
2,330
Location
Bellingham, WA
The hell with a boring engineering job, looks like you made a great career choice. Your shop set-up and your craftsmanship is top notch. If I was still living on Whidbey Island I'd be knocking on your door. Curious what equipment you shoot with. I was a camera repair tech in my first career (pre-digital). Worked with a lot of pro's (Nikon, Hasselblad, Canon, Mamiya, Bronica,...).
I have no complaints with the career choice, and actually feel quite lucky that I still get to do what I love to do. Especially as a lot of the industry has moved towards photographers having to become video guys as well.... luckily my clients prefer to have me focusing on what I do best, instead of trying to do two things half ***. That also saves my back from having to carry a tripod too!

Back in college I did a lot of camera repair, and am really grateful I learned those skills. While most of that is obsolete these days, it has saved my bacon numerous times on shoots over the years... Especially being able to fix a lens on a shoot. A lot of those skills transfer over to other things, and I seem to be using a lot of what I learned working on cameras with my lathe rebuild.

These days I exclusively shoot with the Canon 1DXmk3 bodies and own just about every Canon lens from 14mm all the way up to a 400 with a bunch of specialty stuff such as tilt shifts and a handful of very fast primes tossed in. Back in the film days I owned and shot with everything from Hasselbad, to Linhoff 617's including the occasional Leica M series. I made some pretty good beer money in college, on the side buying Hasselblad's (especially the 500 series) fixing them and flipping them. I wish I would have held on to a few of those, but I just cant imagine dealing with the hassle of traveling with film, let alone the cost of having it developed these days.

I was a bit late to switch from film to digital, as I had a handful of clients that actually paid me to not switch over (mind blowing in hindsight) When I did switch in the 1Dmk2 days, it was at the point that every click of the shutter cost $1 wether it was a good frame or not. Not being able to push/ pull the film and with the limited processing available to the files at the time, forced me into doing a lot of special flash work in the backcountry, where we would drag these very large Elinchrom 1100WS battery packs into the mountian to do action shots. Looking back at that now, its insane I was able to talk the athletes into carrying 50lb flashes into the mountains, but it produced some really memorable imagery and helped to propel my career to where it is now.

Now, of days the photo world has turned into a more of a volume business where way more imagery is needed for all of the various uses, especially digital usage, so instead of shooting 30~40K frames a year in the film days, we are shooting 150~200K frames a year... I couldn't image having to cover that level of film costs.
 
OP
G

Grant Gunderson

Well-known member
Joined
May 17, 2013
Messages
2,330
Location
Bellingham, WA
I attempted to bleed the Maguras today after replacing the hose last night.
image.jpeg
I have been pretty happy with the Park brake bleeder kits. They are expensive, but with having both the Mineral Oil and DOT kit, I have every brake on the market covered with all of the adapters they make for it. The syringe holder is nice too.
image.jpeg
Even after numerous attempts I couldn't get a good bleed. WTF? I cleaned everything with Isporople and blew it dry with the air gun. I then pulled the lever a few times, to hopefully find any obvious leaks. Turns out the master cylinder is leaking. Argh.
image.jpeg
In order to get access to the master cylinder, you need to remove the brake lever. On the Maguras this is simple. I just used a Starrett pin punch and a Starrett bench block to push the pin through. That bench block makes it a hell of a lot easier any time you need to remove a pin.
image.jpeg
Lever is now separated from the lever body. Note the screws with the wood thread that Magura uses for the bar clamps. I have my doubts how long those last until they strip out.
image.jpeg
The master cylinder is just held in place by a T10 screw. Note the wear on it from the lever.
image.jpeg
Cylinder is out. Notice the small nick in the seal. I expect the seal failed after the hose got cut by the headset, and I kept trying to pump the brakes to get any breaking out of them before I gave up and hike a biked out the other night. ****.

A quick look on a few websites and none of the local bike shops listed them for sale. I did see them on E-bay for less than $5 a piece but with 3-4 weeks shipping from China. So I headed down to the LBS and talked to a new kid at the front counter. Told him exactly what I needed, and told him I know its not an inventory part, but most likely a service item that they usual have in stock in the back ( Local shop is really good for this stuff and I know the owners pretty well) Kid just looks on shop website and says nope dont have. Argh, I'm perfectly capable of checking a website myself, but we all know they are not always accurate with stock, and service kit items are almost never on them. Wouldn't even bother checking with the service guys in the back.....argh **** customer service. I ended up ordering 5 of the parts from the china seller on Ebay. Couldn't find a replacement Magura lever standalone in stock, but did end up finding a set of XTR levers so ordered those, and will be testing out the Shigura setup.
 
Last edited:
OP
G

Grant Gunderson

Well-known member
Joined
May 17, 2013
Messages
2,330
Location
Bellingham, WA
Being stuck on the E-bike repair, I figured it was time to switch gears and get caught up with a few other shop projects. I just got my order in from Moffat, they are based out of Watertown SD (next town over from where my wife grew up), so time to do some upgrades to the mill.
IMG_7925.jpeg
I ordered their LED lights with the flex shafts. There are cheaper options out there, but I wanted something with a quality flex shaft that will actually stay put. Plus all of their stuff is made in the USA and seems to be over built.
IMG_7932.jpeg
Another item that I ordered from them is this magnifier on a flex shaft with a magnetic base. Its 5x and the smaller circle is 10X. I'm lucky in that I still have damn close to perfect vision at my age, but I am noticing that its harder to focus at less than 6". So this will come in handy for working on really small stuff, or for reading that super tiny print on tooling.
IMG_7927.jpeg
Works pretty well!
IMG_7933.jpeg
I used one of my small Starrett squares to layout the mounting holes and marked them with a long tip permanent marker... nice thing about those is they clean right up with isopropyl.
IMG_7935.jpeg
Top hole gets center punched with my Starrett automatic center punch.
IMG_7948.jpeg
I then laid out the tools needed for the job. Tap drill with a stop collar set to 1", The taps are a Spiral flute taper tap (these are amazing as the push the chips out of the hole, so they cut easier and are less likely to break) the second tap is a bottoming tap. ITs nice having two Starrett tap handles in this size, so I don't have to switch them back and forth.
IMG_7942.jpeg
After the first hole gets drilled, I vacuum it out, tap it with the spiral tap, vacuum, tap with the bottoming tap, vacuum.
IMG_7947.jpeg
I then inject some anti-size into the hole. I then mount the light with the top bolt. Then use a transfer punch to mark the hole location for the second hole along the center line I already marked. Then repeat the drill / tap cycle.
IMG_7953.jpeg
The lights made a massive difference. I have a well let shop, but always felt that I wanted more light on the mill. I didnt go with a ring light as those diffuse the light. Having lights on either side allows you to "rake" the light across the surface to better see the surface finish / details. I also ordered these plexiglass Sheilds that are mounted to the flex shafts with magnetic bases. We use these sometime for special effect photos to protect the lenses. I wanted moveable chip shields to cut down on chips flying across the room. This way I can get an idea of where I need to make more of a semi-permanent solution for the mill. When I do that one of these will get moved over to the lathe.
 
OP
G

Grant Gunderson

Well-known member
Joined
May 17, 2013
Messages
2,330
Location
Bellingham, WA
Picked up a few new tools today.
IMG_8088.jpeg
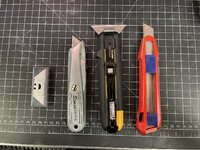
I've had the Snapon utility life for years, and its been my go to knife for most things. A few months ago I picked up the Knipex Olfa style knife and it soon became my new favorite, well made (magnesium body) and takes standard Olfa blades. Its not too light and not too heavy, it also has a blade guide to support the blade for deeper cuts. Today when I was at the local HW store, I grabbed the Toughbuilt utility knife. It does double duty as a scrapper. It seems to be really well made, but its HEAVY, so not sure if I'll be reaching for it over the Knipex. It also requires you to use their blades. Those blades will fit the Snapon but the standard blades wont work in it. The hook on the end and the end shape make me want to hold it the wrong way too. So we will see if I get used to it.

IMG_8105.jpeg
I also picked up this $5 3d printed through axle holder for the bike stand. we will see how it holds up, but if it works and lasts it will be really convent to store axles in when working on the bike.

Finally I picked up some Nepro's stuff to test out, before I commit to ordering sets of sockets from them.
IMG_8110.jpeg
L to R PBSwiss 3mm short, Nepros 2.5mm, Snapon 2.5mm, Snapon 2mm, Nepros 2mm, Snapon T25 short, Nepros T25 short.
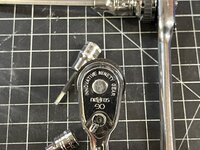
I have a few of their 90 tooth compact head ratchets and I always grab those over my Snapon ones. When it comes to hex and Torx sockets, I use the **** out of them. My PBswiss set is hands down my favorite for hex sockets. However they dont make them in the smaller sizes and the only Torx sockets they make are ⅜ drive. So I have rounded the PBswiss set out with Snapon, and have a full set of Snapon in inch sizes. However I have been less than thrilled with the Snapon hex and Torx sockets. The Snapon hex shafts dont stay in the sockets very well. Plus they tend to bend on the smaller sizes and I have deformed the T25 one quite a few times.

The Nepros seem to be way better made, are more compact and the chrome is way nicer than the Snapon. I am a bit concerned that the business ends are not ground far enough down... Time will tell.
IMG_8119.jpeg
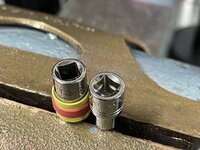
The broaching and the socket retention on the Nepros is way nicer too. Snapon on Left Nepros on Right.
I've swapped the Nepros into the rotation and we will see how the hold up for a few months. If I like them, I think
I am going to buy a set of the long and short ¼ Torx as well as some of their Hex to fill out what PBSwiss doesn't make in ¼ Drive.

I also picked up the ¼ and ⅜ compact spinners for the ratchets.
IMG_8112.jpeg
They add a bit of length, but they do fill nice.
IMG_8113.jpeg
They also dont add too much bulk either.
IMG_8115.jpeg
Time will tell if I find them useful or annoying. We will see if they stay on.
 
OP
G

Grant Gunderson

Well-known member
Joined
May 17, 2013
Messages
2,330
Location
Bellingham, WA
Todays project is the Shigura brake conversion.

Since the master cylinder seal went out on my Magura's and replacement parts are a month out, I ordered a set of Shimano XTR levers to replace them with. Plus the Magura levers being made out of plastic, are in my mind the weakest link in that brake system. Not to mention I'm not the biggest fan of how there lever blades feel, but after 800 miles I did get used to them.

This consists of pairing Shimano levers with Magura calipers. The premise here is that the Shimano (4 piston compatible levers) have a longer but smaller diameter master cylinder bore than the Magura levers. This compared with the very large Magura 4 caliper pistons creates a much more favorable hydraulic ratio. In short, it theoretically gives you more power. I this case I am using the new XTR BL-M9120 Levers. In reality any of the XX2X or XX1X series of levers from Shimano will work as they are all 4 piston capable.

Everything on the Magura Caliper end stays the same.

IMG_8154.jpeg
You must use the Shimano hose barbs and olives. L to R is Magura, Sram and Shimano. The Magura barb has the longest head of the 3, Shimano has the thinest. Plus Shimano olives are a full MM shorter than the Sram and Magura offerings. In a pinch you could probably get by with mixing up the Magura / Sram olives (just dont cross contaminate those fluids), but Shimano needs its only barbs and Olives.

IMG_8140.jpeg
Here is a selection of various hose nuts, L to R matura native, Magura that goes into their lever banjo swivel, Shimano external thread, and Sram. The Magrua, Sram and Shimano internal style all use the same threads and are roughly the same length. These are interchangeabe.

IMG_8152.jpeg
These new Shimano levers are I-spec EV so they are close enough of a fit, you can use them with the Sram matchmaker system, no adapter needed. Thats a Sram match maker nut in the Shimano stock lever mount.

IMG_8162.jpeg
With the proper barb and olive on the hose, the brake line gets torqued to 6NM. I then bled the system, using a syringe at the caliper and a Shimano funnel at the lever, I pushed all new fluid threw the system. Pulled suction with lever, then pushed through and repeated a few times. Closed off the caliper bleed port, and then finished bleeding the lever with the funnel.
IMG_8170.jpeg
To compare the two systems, I left the stock Magura system on the font and went for a ride.

All I can say is WOW, the Shigura system has a stupid amount of power over the stock Magura. The stock Maura's never made me wish for more power, as they where plenty strong enough to stop the E-bike on even the steepest terrain here in Bellingham. However the Shigura setup blows it out of the water. The rear brake is now so strong, it makes the Magura front feel like its useless. The rear Shigura system is so strong, it will full stop the bike on its own, and make you want to catapult over the front. So you need to get comfortable with its power. For reference with the E-bike in trail mode, you can still pedal (with a bunch of resistance) against the stock Magura front brake. You can not pedal against the Shigura rear brake.

The modulation feels great. However, the Shigura setup, has that same vague bite point partway not the lever travel that all Shimano's are known for. I've ridden enough Shimano systems, I am used to it. I do prefer the very firm bite point of the Codes tho, but this system is way stronger than the stock codes, stock Magura,s or even the stock Saints. I will be converting the front next.
 

Southern83

Well-known member
Joined
Jun 15, 2017
Messages
193
Location
North Carolina
For Tap Handles, nothing comes close to Starrett. Use them once and you will never touch a hardware store tap handle again.
I agree. I look forward to using them whenever the need pops up.

I also am using Vidmar cabinets for tool storage. What's the process for getting those mats cut for the drawers? I really like the socket layout.
 
OP
G

Grant Gunderson

Well-known member
Joined
May 17, 2013
Messages
2,330
Location
Bellingham, WA
I agree. I look forward to using them whenever the need pops up.

I also am using Vidmar cabinets for tool storage. What's the process for getting those mats cut for the drawers? I really like the socket layout.
The blue / black ones are by Tool Bed as long as your tools are in their system (all Snapon is, as well as most major brands), you just look your tool up by model number in their layout software, position them however you would like, and then they cut them for you. The all black foam is Kaizen Foam It's from FastCap which is based here in Bellingham. You simply lay your tools out and then cut it out with a Olfa style knife. Its pretty easy to do, but its worth using a fresh blade for each sheet.
 

GirchyGirchy

Well-known member
Joined
Nov 14, 2011
Messages
9,928
Location
Central Indiana
Great stuff! Love the shop and tools, and I'd love to see more about your photography setup/gear, too.

It also reinforces my decision to stick with simplicity on my (now rarely used) mt bike...1x hardtail with normal QR axles, BB, and headset, with mechanical Avid discs. Obviously can't go everywhere with it, but suits my riding around here and requires damn near zero maintenance (even the so far very reliable RS Reba)! :D
 
OP
G

Grant Gunderson

Well-known member
Joined
May 17, 2013
Messages
2,330
Location
Bellingham, WA
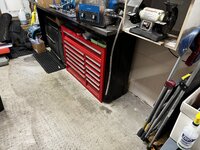
I’ve been busy working on my lathe project, but ended up purchasing a couple of Lista cabinets at auction, so I decided to rearrange the shop a bit.
B6E185D5-CB2B-4A74-8BE5-3C2E0C2B6F1E.jpeg
First I pulled the black tool chest out from under the small adjustable speed grinder.
F0B64ABE-7D0C-4DE5-BE5A-43A21A3CD007.jpeg
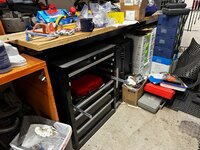
It got moved under the work next to my Kapex. I’ll need to reduce my inventory of Pelican flight cases. I’ll get to that latter. The plan is to use this tool chest to store sawblades, router buys, etc. Not sure where the grinder will end up.
F2A875E2-77F2-4C4A-A3AB-9024904DD636.jpeg
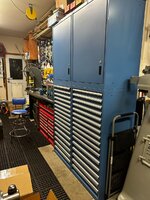
With those items out of the way I had room for the two 16 drawer Listas and their upper cabinets. They are in great shape and I regret not buying the rest of the under workbench ones at auction, but I only had a few days to pick them up before my hand surgery and was concerned I didn’t have enough time to move all of them.
2AB6E1F9-9F17-4962-AB76-C17F027C0FD5.jpeg
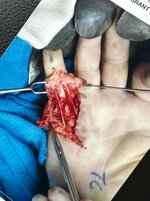
The day after I moved the Listas in I had hand surgery to correct a Dupuytrens contracture that seems to be agrevated by all of the frostbite exposure I’ve had over the years. So I’m now working one handed.
 
OP
G

Grant Gunderson

Well-known member
Joined
May 17, 2013
Messages
2,330
Location
Bellingham, WA
Im not very good at just sitting around doing nothing. So after spending the afternoon recovering from surgery watching tv with the kiddo I went out to the garage after he went to bed to see what exactly was in the cabinets

98146132-3D75-4054-A62F-50DD8DCD8624.jpeg
284F734C-81D3-40AC-BDBA-6A9931F702E0.jpeg8E7EAAB3-5B08-4807-8393-C8FCFA3B8952.jpegBA091984-22D6-4B54-94B2-830BC041BD5C.jpeg
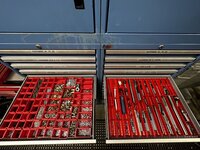
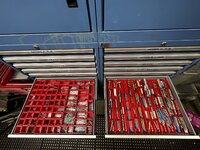
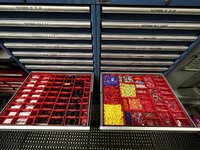
They are packed full of electronics, drawers full of Capacitors, micro switches, potentiometers, amphenol connectors and thermocouples and lots of indicator bulbs. Literally enough to last a hobbiest a lifetime. I’m not an electronics guy so not sure if any of it’s got any value but might try to list it for sale before I dump it all.
58386C8E-39A8-4F60-9B59-1EDFC18D48CF.jpeg
There was also close to a lifetime supply of wire terminals. I’ll probably keep those to add to my collection as they are all good quality Panduit ones.
7705D6C6-BF5E-41A6-BCC5-36A4C677B7A6.jpeg49383409-661C-44A2-B1DD-C76EF7C6D069.jpeg1282A589-6CA2-4512-AF06-2E4EB4A06CAC.jpeg
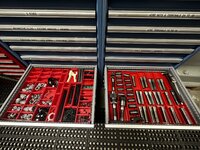
And 5 drawers full of resistors that I have no need for. However I’ll be repurposing those nice Lista trays for some of my machine tooling. Next up is to order a bunch of divider boxes from Schaller
 

Attachments

  • E978838E-F2A8-4126-ACB9-3BCEA833B003.jpeg
    E978838E-F2A8-4126-ACB9-3BCEA833B003.jpeg
    1.1 MB · Views: 23
To avoid these ads, REGISTER NOW!
OP
G

Grant Gunderson

Well-known member
Joined
May 17, 2013
Messages
2,330
Location
Bellingham, WA
EF3913B5-A486-4B85-B094-F9533264DC87.jpeg
And that’s what close to $1k in Schaller boxes look like. Still waiting on another 300 of the smaller 2x2x2 and the 1x4x2 boxes to arrive but that should get me started.
4C582509-EA13-4045-A0FD-13589D1A8795.jpeg
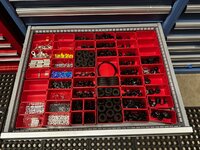
Each row of boxes will be its own thread size. This drawer will be machine screws ⅛ and smaller.
30478C72-5101-4ED0-8C63-E0D22B15FD9A.jpeg
This drawer is my #10 and ¼ drawer
0B74CCF6-3EEE-46F2-848E-394CC1FB3664.jpeg
5/16 to 3/8
B4DF7A59-466F-487F-84CE-6E7BC79DB1A8.jpeg
And 7/16 and up. I’m waiting for more of the small boxes to arrive to start on the metric drawers.
D8D89A17-E420-43A3-A3E6-AB4838BB1B48.jpeg
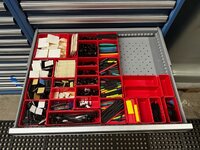
Set screws, rivets, rivet nuts and ezlocks / tnuts.
0256B3F0-FF0C-45FC-880D-90B528E30D95.jpeg
The first of what will be my two drawers of electrical terminals.
1D2C5266-FD22-49D0-900E-E7D128E3A8F1.jpeg
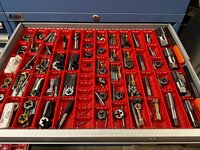
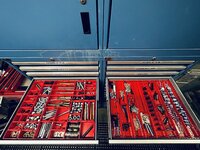
Tap drawer. I like to keep the dies, taps, thread chasers and tap drills together by size. The Lista trays that came with the cabinet are perfect for this.
E7C3B628-4021-47B3-8930-58619710BC2E.jpeg
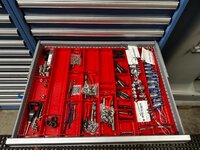
Metric and inch Reamer drawer. I keep the hole reamer and counterbores together by size. I also have my taper pin reamers in here as well as metric (90 degree) and SAE (82 degree) countersinks.

After trying to label a few drawers I decided that was too much for my hand so labels will need to wait till it’s recovered more.

More to follow
 

MadeByMiller

Well-known member
Joined
Dec 29, 2018
Messages
1,230
Location
Rapid City, SD
Those Lista cabinets are beautiful, and nice bonus with the electronics components and the divider trays! I've got several Vidmar's in my shop, but none of them have as many shallow drawers as you have, I'm envious of yours.

What label maker are you using on your dividers?
 
OP
G

Grant Gunderson

Well-known member
Joined
May 17, 2013
Messages
2,330
Location
Bellingham, WA
Those Lista cabinets are beautiful, and nice bonus with the electronics components and the divider trays! I've got several Vidmar's in my shop, but none of them have as many shallow drawers as you have, I'm envious of yours.

What label maker are you using on your dividers?
I ended up paying significantly more for them then what the more common 9 drawer units go for. I needed to maximize my storage efficiency so it was worth it to me to have 20 2” drawers and 12 3” drawers. The upper cabinets are a nice bonus. Quality seems to be about the same if not slightly more refined then the two 5 drawer vidmars I have under the workbench.

The label maker is a Brady 21. It’s served me well and us more efficient with supplies than the ptouch I had before. Plus it’s been really good for the monarch Katie project as I could label all of the wires with shrink tube with it.
 

Southern83

Well-known member
Joined
Jun 15, 2017
Messages
193
Location
North Carolina
I love my Vidmar/Lyon cabinets. I really need to invest in the little trays for a few drawers. I would like to have my tap and dies better organized. I have yet to run into the top cabinets for sale locally.
 

Cdubu52

Well-known member
Joined
Sep 4, 2014
Messages
636
Location
Pittsboro, NC
Cabinets are looking great. As a fellow Dupuytren's sufferer, I feel your pain. Im waiting a little while for my procedure. I have it in both hands, one worse than the other. Did you try the enzyme treatment or opt strictly for the surgical removal?
 
OP
G

Grant Gunderson

Well-known member
Joined
May 17, 2013
Messages
2,330
Location
Bellingham, WA
I love my Vidmar/Lyon cabinets. I really need to invest in the little trays for a few drawers. I would like to have my tap and dies better organized. I have yet to run into the top cabinets for sale locally.
I feel that the Schaller bins and now those Lista trays are what really make the cabinets shine as you can truly maximize the storage density/ organization with them.
Cabinets are looking great. As a fellow Dupuytren's sufferer, I feel your pain. Im waiting a little while for my procedure. I have it in both hands, one worse than the other. Did you try the enzyme treatment or opt strictly for the surgical removal?
Unfortunately I haven’t been a candidate for the enzyme as it only works if you have a thin band. By the time I have the contraction the bands are so thick surgery is the only option. On my right hand I’m now on surgery #3 and they did a skin graft to hopefully act as a buffer. Hopefully that works as the other surgeon I saw just wanted to amputate.
 

Cdubu52

Well-known member
Joined
Sep 4, 2014
Messages
636
Location
Pittsboro, NC
Unfortunately I haven’t been a candidate for the enzyme as it only works if you have a thin band. By the time I have the contraction the bands are so thick surgery is the only option. On my right hand I’m now on surgery #3 and they did a skin graft to hopefully act as a buffer. Hopefully that works as the other surgeon I saw just wanted to amputate.

Good call, and I hope so for you. Good luck with it. Its funny how few people know what it is. My FIL and I both have it and he has had multiple surgeries. But the weird thing is no one on my side of the family has it or has had it as far as I know. I broke my hand a few years ago and didnt notice anything until near the end of my PT. Ever since that injury and the therapy afterwards, it showed up and is progressively getting worse. Now it has just started in my other hand. It only affects the ring finger in both of my hands.
 
OP
G

Grant Gunderson

Well-known member
Joined
May 17, 2013
Messages
2,330
Location
Bellingham, WA
A little more progress
28160B65-AE00-41FF-B328-A4BC9E90A2A5.jpeg
Drivescrews, pins, bushings, machine keys.
18D421F2-E021-4A27-AD91-CCA907DE77C4.jpeg
Retaining rings, internal / external and eclips
CD9EF0DC-A3B0-48A7-B530-3AB36215CA66.jpeg
Ferrels, grommets, strain relief
BDC88430-4442-408B-920D-8D88EE7ECAE8.jpeg
Cable management
2D562D6D-E86E-4B12-A715-F905C6B7E48C.jpeg
Cotterpins

E62148C7-F2AF-4B31-A3BF-9D883E14FEC6.jpeg
Mill collets.
A3542C04-7803-4D12-A971-4B014E3F15E1.jpeg
Stuff to fix fucked up threads
A7202D40-675C-4A28-8ECE-4C88519582BC.jpeg
Lathe tooling.


9F06DE5A-A425-435C-B7DB-2868D05BD427.jpeg
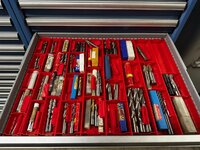
One of 3 endMill drawers. And then I ran out of bins with 6 drawers to go. I ordered a bunch of smaller 2x2 ones as I can then consolidate a bunch of these drawers. Pretty impressive how much **** you can fit into them. Pretty sure I could give a small hardware store a run for the money.
 

Attachments

  • 4AA188BA-B6D1-4FD7-91FC-865352A2D750.jpeg
    4AA188BA-B6D1-4FD7-91FC-865352A2D750.jpeg
    450.5 KB · Views: 28
Last edited:
OP
G

Grant Gunderson

Well-known member
Joined
May 17, 2013
Messages
2,330
Location
Bellingham, WA
Well it was a crazy winter for me to say the least. It's finally starting to wind down, so I can look at getting back to work in the shop for the summer. First oder of business is to get some organization stuff taken care of. Last fall I purchased two 16 drawer Lista cabinets.
IMG_0526.jpeg
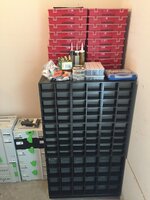
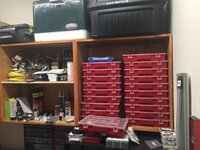
The plan was to use these for all of my small parts storage instead of the old Safety Deposit boxes
IMG_2676.JPG
And the large number of red plastic organizer boxes I was using.
IMG_2842.JPG
This will ideally give me more shelf space for when I redo the garage cabinets..... thats another project for another time.

The Lista cabinets can hold an insane amount of stuff in a very efficient matter. Each drawer is rated for 500Lbs! and they actually feel better with more weight in them. Plus the build quality of Lista makes Snapon look a bit under built.

I purchased a ton of bins from Schaller Mostly the 2x2 and 2x4 sizes to maximize the number of storage options. They also make label holders for the bins. These are what actually lock the bins together. The problem is they are only made for the 2x4 sizes and larger and wont fit the 2x2 bins without trimming.

IMG_2870.jpeg
. Since I had well over 500 label holders that needed to be trimmed, I needed to find an efficient way to do it. I ended up buying these Knipex hose cutters. The V notch in them holds the label holders perfectly.
IMG_2890.jpeg
And the edge of the cutters is the perfect offset to place the label holder next to, to perfectly trim them to size.
That made. really quick work out of what would have been a very difficult task.
IMG_2892.jpeg
Over the years of working on various different projects and everything from automotive to mountain bikes, to furniture building to electronics and machine tool rebuilds I have accumulated a stupid amount of hardware and various small parts. The nice thing about this is that I seldom need to stop mid project to go buy a bolt. When I do need to buy any hardware I always buy it in bulk.
IMG_2900.jpeg
SAE on left Metric on right.
IMG_2901.jpeg
IMG_2902.jpeg
IMG_2903.jpeg
 
OP
G

Grant Gunderson

Well-known member
Joined
May 17, 2013
Messages
2,330
Location
Bellingham, WA
Turns out I had more hardware than I had realized.
IMG_2904.jpeg
My machine tool cutters are also in the right cabinet.
IMG_2905.jpeg
IMG_2910.jpeg
O rings on Left, Wire terminals on Right

IMG_2911.jpeg
Furniture / picture hanging stuff on left, wire terminals on right
IMG_2912.jpeg
IMG_2913.jpeg
Oetiker, Compression and flair fittings on left, grommets on right
IMG_2914.jpeg
Pipe fittings on left, paint supplies on right
IMG_2915.jpeg
IMG_2907.jpeg
retaining rings

IMG_2908.jpeg
machine keys

At some point, I might change the drawer order, but thats okay as the entire system is completely modular.
 

Cdubu52

Well-known member
Joined
Sep 4, 2014
Messages
636
Location
Pittsboro, NC
Grant, wow, Nice work on the organization. Im in awe. Feel free to share some of your pictures from the last few months, Im sure you werent stuck inside working on your shop organization the entire time.
 
OP
G

Grant Gunderson

Well-known member
Joined
May 17, 2013
Messages
2,330
Location
Bellingham, WA
Grant, wow, Nice work on the organization. Im in awe. Feel free to share some of your pictures from the last few months, Im sure you werent stuck inside working on your shop organization the entire time.
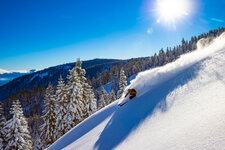
My season started off great.
2211285984-Edit-2.jpg
Baker early season
IMG_0594.jpeg
I found a mine shaft inside the Baker ski area that no-one knew existed. I was able to take my 5 year old son Stian down into it too. He was pretty excited to get to ski to it for a snack break!
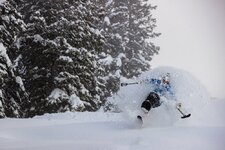
07_2212130595.jpg
I had a fantastic trip to Tahoe.... if you area skier, you might see this shot of Daron Rahlves in Ikon Pass ads on social media.
C8BFF595-4F51-4B3B-ABAD-B1F6EB4FEFAD.jpg
I then had a great trip to Solitude, UT. The highlight was skiing with Trevor Kennison. He's a pretty amazing person and got to see him throw a backflip in his sit ski... he goes far bigger than any able body skier I know... .and thats saying something.
01_2301126431.jpg
That same trip, I spent a day at Deer Valley with Todd Ligare and Amie Engerbretson. Was pretty fun with absolutely perfect conditions.
2023-01-22_PD_LA_GG_IkonPass_8398.jpg
I then went to Japan with my good friends Adam Ü and Kyle Smaine. That trip was amazing up until the end when we had a big avalanche incident, and we lost my good friend Kyle (former world champ) along with the Austrian Freeride champion. That accident made global news, CNN, Fox... Spending 8 hours being interrogated by the Japanese organized crime unit, then having to ID your friends body and hold your phone over it so his newly wed wife could face time her good byes, is about as low as life can get. So I ended up taking all of February off.
20230224_PD_TN_GG_IkonPass_-423.jpg
I then went on a storm chasing trip to CO and Taos, and got mostly skunked by high-winds, but did get this shot of my friend KC Deane at Taos.
20230227_PD_TN_GG_IkonPass_-203.jpg
I had a few really good days back home at Baker with Jess Hotter (she won the world tour last year).
20230316_PD_RB_GG_IkonPass_-365.jpg
I then did a BC road trip (BC seemed to had a really bad year this year) Meredith Eades skiing at Red mountain.
20230331_PD_RB_GG_IkonPass_-442.jpg
Finally on my last trip I went down to Mammoth to see them smash their all time snowfall record. Skier Daron Rahlves.
 

Cdubu52

Well-known member
Joined
Sep 4, 2014
Messages
636
Location
Pittsboro, NC
Thanks for sharing, good lord your photos are awesome! I knew we would not be disappointed with your work. Im terribly sorry about your loss and the frustrations that went along with it.

How's your hand holding up? I still havent had my consultation yet. I love to play golf and I dont want to be down a significant amount of time, so I keep saying Im going to do it in the off season, but I keep putting it off.
 
OP
G

Grant Gunderson

Well-known member
Joined
May 17, 2013
Messages
2,330
Location
Bellingham, WA
The biggest highlight for me this winter was that skiing finally clicked for my son.
IMG_0992.jpeg
I got him new skis for Christmas and those made all of the difference in the world for him. Was a big size jump, but that was actually good for him.
IMG_1065.jpeg
I took him night skiing for the first time and that blew his mind.
IMG_1458.jpeg
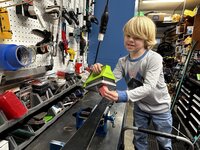
He was even pretty excited to wax his own skis!
IMG_2736.jpeg
I got him skiing all of the chairs at Baker now, and he's even starting to ski the trees a bit.
IMG_2536.jpeg
You know he is hooked when he refuses to go in for hot chocolate and when we finally do head in, he falls asleep on the floor of the lodge.
IMG_2848.jpeg
Here he is hiking for another run after they shut the lifts for the day. He didnt want to quit!
IMG_2859.jpeg
He's even trying to teach himself how to ski backwards... guess he's seen me do it too much. I need to get him some twin tips next year.

IMG_1327.jpeg
Speaking of waxing skis, I've been working a lot with Winterstieger. They have this new Jupiter machine that allows you to do a lot of custom tuning. For example we have been playing around with variable edge bevels on fat skis. So meshing that you previously could only do by hand and was very tedious. Here I am using a digital edge bevel meter to check them.
IMG_1437.jpeg
Another thing thats cool about it, is you can custom program any base structure guide you can think of. I have a diagonal grind on the skis on the left and a thumbprint style on the right. The competition at the WC level is so tight (Except for Mikaela) that when there is a drastic difference in times its most likely do to the difference in the base structures (its got way more of an impact than wax does).
 
OP
G

Grant Gunderson

Well-known member
Joined
May 17, 2013
Messages
2,330
Location
Bellingham, WA
Thanks for sharing, good lord your photos are awesome! I knew we would not be disappointed with your work. Im terribly sorry about your loss and the frustrations that went along with it.

How's your hand holding up? I still havent had my consultation yet. I love to play golf and I dont want to be down a significant amount of time, so I keep saying Im going to do it in the off season, but I keep putting it off.
Thanks.

The hand is not ideal. The first time it got really cold this winter it went right back to where it was pre surgery and it's now stuck there. I'm hopefully the skin graft they inserted will keep it from progressing, but we will see. Unfortunately after 3 surgeries the only two options left are radiation or amputation of the finger.... I'm not too thrilled about either of those. So will just live with it until I'm forced to do something.
 

Trapps

ALLIANCE MEMBER
Joined
Feb 10, 2017
Messages
2,003
Location
The Detroit Zoo
Awesome stories, skiing and super awesome pics!!!

Skiing with my kids has been an incredible journey. Our best family trips all involved skiing and our best conversations have happened on chairlifts or in hot tubs apré. We told him we'd help him on his senior spring break. He asked if I'd take him to Snowbird instead of going to party with friends.

52809841842_9cc5fa36f9_b.jpg

Best trip ever.

Take every opportunity you can to ski with Jr. The days are numbered...
 
OP
G

Grant Gunderson

Well-known member
Joined
May 17, 2013
Messages
2,330
Location
Bellingham, WA
Awesome stories, skiing and super awesome pics!!!

Skiing with my kids has been an incredible journey. Our best family trips all involved skiing and our best conversations have happened on chairlifts or in hot tubs apré. We told him we'd help him on his senior spring break. He asked if I'd take him to Snowbird instead of going to party with friends.

52809841842_9cc5fa36f9_b.jpg

Best trip ever.

Take every opportunity you can to ski with Jr. The days are numbered...
100%. I don’t care whatever he chooses to do in life. My goal is to just make sure he good experiences in the mountains growing up so he will hopefully lead an active healthy lifestyle. after Japan I briefly debated if I still wanted to introduce him to skiing but that thought quickly went away the first chair ride with him as that’s the only time you get to have really good conversations with a 5 year old where they are not being distracted.

Man im so sorry about February. I hope things get better for you and your friends family.
Things are looking up. I never thought I’d say this but I have grown so much mentally and emotionally from the Japan accident that I am a way better person now than I was prior.
 
To avoid these ads, REGISTER NOW!
Top Bottom