To avoid these ads, REGISTER NOW!

The Aerodrome Studio - Machine_Punk

OP
M

machine_punk

Well-known member
Joined
May 14, 2011
Messages
2,540
Location
Napa Valley, California
This is posted a little out of order, from when the events actually happened. I recently attended the inaugural Wine Country Metal Meet, in Cloverdale, California, US. Here is my write-up of the event...

A Tale of One Metal Meet

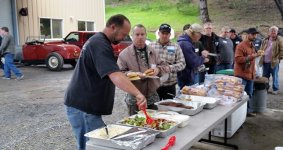
It was the quietest of meets. It was the noisiest of meets. It was the largest of meets. It was the shortest of meets. There were the most-experienced of metal shapers. There were the newest of metal shapers. Some people came from across town. Some people came from across the world. There were those who have been to many metal meets. There were those who had never been to a metal meet before. There were demonstrations on metal shaping. There were demonstrations which had nothing to do with metal shaping. There were breathtakingly-beautiful, rolling hills covered in trees. There was a huge, modern shop. The Inaugural Wine Country Metal Meet was a study in opposites.

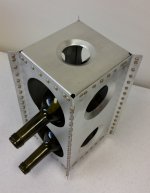
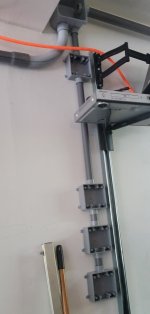
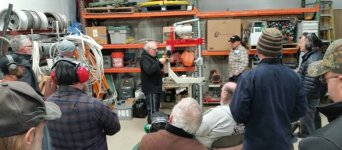
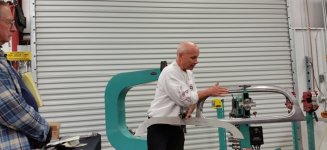
Ben VonBerlo came all the way from Holland, to demonstrate his Mechammer II metal shaping machine. He has them manufactured in the United States and Bill Longyard was kind enough to transport the Mechammer II across the country for the demonstration. The Mechammer II uses a commercial sewing machine motor as a power source. The plans for the machine have been available for years. Ben recently started manufacturing them for the folks who don’t have the skills or resources to make their own. While it is not the quietest way to shape metal, Ben emphatically states that the Mechammer is the one tool in his shop he must have. You could take away just about everything else, but he wouldn’t give up the Mechammer.

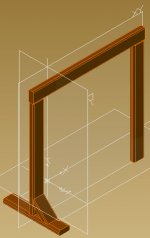
Lazze presented a much quieter demonstration. He shaped the rear window frame for a 33-34, three-window coupe. The trick here is that the glass is flat, but that part of the car has shape. He shared how he uses patterns to figure out the outline you need to cut from the sheet metal to get the shape you want. He brought along some machines for the demonstration: the Lazze English wheel, bead roller, a shrinker and a stretcher.

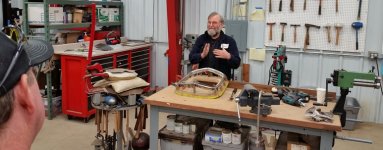
Ron Covell used John’s English wheel and shrinker to make a 32 Ford grill shell. He has a wonderful buck for making this part. It combines solid rod, which actually serves as a hammer form, and a classic plywood buck to guide the rest of the metal shaping. Ron had a tip on picking where to put the joint between two parts of a grill shell. When deciding where to weld a joint, split the middle of the sharpest curve on the buck and share the difficulty between two panels.

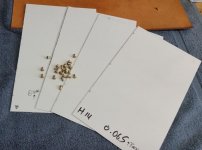
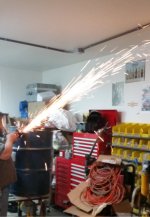
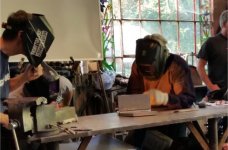
Jere Kirkpatrick demonstrated all-things-oxyacetylene. He showed the benefit of a Henrob torch for thin sheet metal. He also demonstrated hammer welding. He had a tip for getting flat welds in thin sheet metal. Use a ‘zero’ gap, set your torch up to produce a weld three times wider than the thickness of the metal, and use just a little filler rod. This will give you 100% penetration and minimal material to remove in your welded panels.

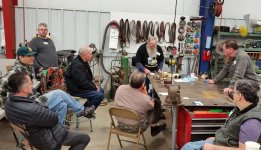
Don Housemen demonstrated the use of Kirksite dies to form panels for a 32-33 Ford roadster pickup cab. Kirksite is a low-melting-temperature metal, based on a zinc alloy. He uses Kirksite to form dies for a Pullmax. He walked through several of the difficulties he had in forming this part and what techniques he developed to overcome those challenges.

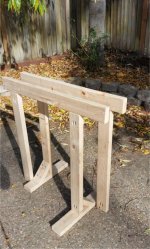
Kevin West [me] demonstrated the tools and techniques used for fastening parts with solid rivets, using the same techniques used to build aircraft. He also showed a couple of recent projects from his studio: A riveted briefcase portfolio for holding large pads of art paper and a stand for a portable bandsaw, made from aluminum crutches which were cut up and brazed back together.

John Alden, aside from being the gracious host of this Metal Meet, demonstrated the TM Technologies air power hammer. John has an encyclopedic knowledge of the people and machines involved in metal shaping.

Lane makes hard-to-find metal shaping educational materials available for purchase, including videos by Peter Tommasini and the book series by Tim Barton and Bill Longyard.

I routinely attend the Cuesta College, Santa Cruz and now, the Wine Country metal meets. One thing I’ve noticed, after years of attending Metal Meets is that there are so many ways to do the same thing. If you list to Paul Bragg, he tells you to always do it this way and never do it that way. Then, listen to Gene Winfield for a while and he will always tell you to do it that way, and never this way. While they may disagree with each other on how it is done, nobody can deny that they both get amazing results. While the first-ever Wine Country Metal Meet was full of opposites and contradictions, it was clear that we were all there for one reason…to learn and share more about this mysterious thing we call metal shaping.

Kev
 

Attachments

  • WCMM 2017 Ben Mechammer 2 a.jpg
    WCMM 2017 Ben Mechammer 2 a.jpg
    124.9 KB · Views: 110
  • WCMM 2017 Jere welding b.jpg
    WCMM 2017 Jere welding b.jpg
    145.1 KB · Views: 103
  • WCMM 2017 Jere welding a.jpg
    WCMM 2017 Jere welding a.jpg
    54.4 KB · Views: 105
  • WCMM 2017 Don pickup cab c.jpg
    WCMM 2017 Don pickup cab c.jpg
    125.5 KB · Views: 90
  • WCMM 2017 Don pickup cab b.jpg
    WCMM 2017 Don pickup cab b.jpg
    123.5 KB · Views: 89
  • WCMM 2017 Don pickup cab a.jpg
    WCMM 2017 Don pickup cab a.jpg
    137.6 KB · Views: 107
  • WCMM 2017 Ben Mechammer 2 b.jpg
    WCMM 2017 Ben Mechammer 2 b.jpg
    115.9 KB · Views: 115
Last edited:
To avoid these ads, REGISTER NOW!
OP
M

machine_punk

Well-known member
Joined
May 14, 2011
Messages
2,540
Location
Napa Valley, California
More pictures from the Wine Country Metal Meet:
 

Attachments

  • WCMM 2017 Shop a.jpg
    WCMM 2017 Shop a.jpg
    62.4 KB · Views: 103
  • WCMM 2017 Ron grill shell b.jpg
    WCMM 2017 Ron grill shell b.jpg
    114.9 KB · Views: 99
  • WCMM 2017 Ron grill shell a.jpg
    WCMM 2017 Ron grill shell a.jpg
    130.6 KB · Views: 99
  • WCMM 2017 Lunch Time.jpg
    WCMM 2017 Lunch Time.jpg
    129.8 KB · Views: 95
  • WCMM 2017 Lazze window frame b.jpg
    WCMM 2017 Lazze window frame b.jpg
    61.8 KB · Views: 105
  • WCMM 2017 Lazze window frame a.jpg
    WCMM 2017 Lazze window frame a.jpg
    107.6 KB · Views: 105
  • WCMM 2017 Kirksite Pullmax Dies a.jpg
    WCMM 2017 Kirksite Pullmax Dies a.jpg
    128.8 KB · Views: 107
OP
M

machine_punk

Well-known member
Joined
May 14, 2011
Messages
2,540
Location
Napa Valley, California
Maker Space - Welding Practice Cube

I've started a small group in my workshop. We meet every Thursday night, from about 6-9p. It is starting small, since there are only a couple of us right now. My plan is to make it into a mini, weekly, maker-space-type event. I'll share my knowledge, tools and The Aerodrome Studio. Folks can come and learn a skill they need to build their dream project. If enough people start showing up, we'll pull the cars out and take up all three bays of the garage.

The first guy came over to learn something about welding. He is already a super-talented graphic artist and musician. Now, he wants to learn how to weld, so he can make projects for around the house and yard.

I needed a small project to get him started. I wanted something which allowed new welders to put several skills to use, without overwhelming them. I bought some 16 gauge (0.0598" or 1.5mm) sheet steel and cut it up into 4" squares. The idea is to take six of these and weld a hollow cube out of them. This introduces the new welder to several skills: tacking, aligning parts, and corner welds.

For those who want to know the settings: Lincoln 210MP on 120 volts, 14.0v at 50 in/min, using Lincoln NR-211-MP Flux-Core 0.35" (0.9mm) with no shielding gas.

I think I'm going to go down to 18 gauge sheet steel (1.2mm). My shear is rated for 16 gauge but I'm not pleased with how much strain that seems to put on the machine. I routinely stock 18 gauge material and it will make this project a little less expensive. I also think I'm going to put a dimple in the middle of at least one side. This will allow folks to see that it is hollow and they can use it as a pencil holder on their desk or in the shop. It also allows them to see the reverse side of the welds.

After I built my own 16 gauge cube, I found a video of a VERY similar project on Jody's welding website, Welding Tips and Tricks. He also recommended this cube as a great project for beginners. #WeldingTipsandTricks

I'm hoping to get this group off the ground and start routinely hanging out with other makers. If you live in the San Francisco Bay Area (or are planning to come to Napa Valley on vacation), shoot me a PM and I'll give you the details.

Kev
 

Attachments

  • Welding Practice Cube 16g.jpg
    Welding Practice Cube 16g.jpg
    113.4 KB · Views: 98
Last edited:
OP
M

machine_punk

Well-known member
Joined
May 14, 2011
Messages
2,540
Location
Napa Valley, California
Punch

At the Wine Country Metal Meet, a guy offered me a Roper Whitney #17 punch for a very fair price. As soon as I saw it, I said, "Yes" to the deal.

I got it home and tried it out. The punch and die were clearly worn out. On a few practice punches, on 18 gauge (1.2mm) steel, the punch just tore the metal and couldn't even separate the material. It left a huge dimple of torn metal. Hmmm...let's see what a new punch and die set will cost.

A quick search online revealed that this punch is still manufactured and sold and the punches and dies are readily available. I use this punch for the inside corners of a notch. I punch a hole at the corner of the notch and cut up to the hole. This reduces the chance of stress risers and cracking at stress points. My 'go to' diameter for this is 1/4" (0.25" or 6mm). I quickly found the die I needed for right at $35 USD, plus shipping.

Overall, a great deal on an awesome punch that is likely to see a LOT of use in The Aerodrome Studio. Now, I just need to build a stand for this thing, to get it off the bench and out of the way, when I don't need it.

Kev
 

Attachments

  • WR 17 Punch.jpg
    WR 17 Punch.jpg
    108.3 KB · Views: 59

Stuart in MN

Well-known member
Joined
Sep 8, 2005
Messages
23,112
Location
Minneapolis
Re: Maker Space - Welding Practice Cube

I needed a small project to get him started. I wanted something which allowed new welders to put several skills to use, without overwhelming them. I bought some 16 gauge (0.0598" or 1.5mm) sheet steel and cut it up into 4" squares. The idea is to take six of these and weld a hollow cube out of them. This introduces the new welder to several skills: tacking, aligning parts, and corner welds.

Kev

When I took a night class in welding, we had a similar project. Immediately after finishing the cube we had to toss it in a bucket of water; if there were any voids in the welds it would **** in water and sink, if the welds were all good it would float. Mine floated. :)
 
OP
M

machine_punk

Well-known member
Joined
May 14, 2011
Messages
2,540
Location
Napa Valley, California
Good job on welding your cube!

I plan to use this one as essentially a paperweight and conversation piece, so I didn't throw it in the water (I didn't want it dripping all over the desk forever). I also left all the bb's, coloring from the heat-affected zone and other 'character' on the cube. I'll probably make another and make the welds thick enough that I can sand it down to a 'perfect cube,' with rounded edges and corners.

Kev
 
OP
M

machine_punk

Well-known member
Joined
May 14, 2011
Messages
2,540
Location
Napa Valley, California
Really Large Wing Nuts

What do you do, when you are a welder and you need really big wing nuts? You make them, of course!

5/8-11 hex nuts with 1" (25mm) sections of 3/8" (9.5mm) steel rod welded on. I usually make the mouse-ears style of 'wings' (two circles) and braze them on (actually, I usually need 'wing bolts,' instead of wing nuts). I wanted 'quick' tonight, though, so I just chopped up some stout rod for the 'wings.' I wanted more practice with flux core and arc welding, but if I had to do it again, I would braze them with the gas torch. Welding in a circle, on that small of a circle, is tough.

I made eight of them, even though I have 12 spaces on the grinder tree. I tend to use grinding discs with a threaded hub, if possible and those won't need a wing nut to hold them on. The wing nuts are only for retaining the spare discs which don't have a threaded hub.

Yep...I know those are not the prettiest welds. Welding on a round object is new to me and these were buggers to hold down, just because of their small size. I tried to just hold them with a (heavily) gloved hand, but quickly realized I needed a ground. I don't always thing of that--I've only been arc welding for a short time and I've never had to worry about a ground with gas torch welding. I ended up clamping them in the ground clamp, holding the ground clamp in my left hand, and using that to turn them around as I welded with the flux-core gun in my right hand. I'm still using a fixed-shade hood too, which adds to the challenge. I am, however, getting MUCH better with the head flick to make the hood go down.

I think I'm going to have to get a 5/8-11 tap too...there is some weld spatter in some of the threads.

Kev
 

Attachments

  • Wing Nuts.jpg
    Wing Nuts.jpg
    54 KB · Views: 100
Last edited:
OP
M

machine_punk

Well-known member
Joined
May 14, 2011
Messages
2,540
Location
Napa Valley, California
Aero Wine Rack

Just finished the Aero Wine Rack, which I built and donated for a local fundraiser. The hospital where I work has an annual fundraising event, called the Solano Food & Wine Jubilee, which benefits their Hospice and Bereavement programs. I promised a piece of metal art for the silent auction this year and here is the result. I designed and sketched this in November of 2013 and finally built the first one in May of 2017.

I stamp all of my "Aero" projects with basic information and a serial number. The inscription on this one is custom to the fundraising event.

The last picture below shows the raw materials for the project (3003 Aluminum sheet 0.065" (1.6mm) H14 and solid aluminum rivets.

Go to this site, to see the auction:
www.northbayc2c.org

Kev
 

Attachments

  • Aero Wine Rack Starting Materials.jpg
    Aero Wine Rack Starting Materials.jpg
    48.3 KB · Views: 81
  • Aero Wine Rack Inscription.jpg
    Aero Wine Rack Inscription.jpg
    40.6 KB · Views: 108
  • Aero Wine Rack Topb.jpg
    Aero Wine Rack Topb.jpg
    112.6 KB · Views: 93
  • Aero Wine Rack Front b.jpg
    Aero Wine Rack Front b.jpg
    100.6 KB · Views: 107
Last edited:
OP
M

machine_punk

Well-known member
Joined
May 14, 2011
Messages
2,540
Location
Napa Valley, California
I've started having folks over to my home workshop on Thursday nights. There are lotsa folks out there who want to make something, but don't have the workshop space, tools or skills needed. Folks come over with stuff they want to fix and we sort it out together. I've also been teaching welding to several folks. Here's one of the guys learning welding and working on a part of one of his trailers...
 

Attachments

  • MaKshop - Welding - Jun2017 - Scott.jpg
    MaKshop - Welding - Jun2017 - Scott.jpg
    113.6 KB · Views: 59
  • MaKshop Scott Wheel R.jpg
    MaKshop Scott Wheel R.jpg
    140 KB · Views: 62
Last edited:
OP
M

machine_punk

Well-known member
Joined
May 14, 2011
Messages
2,540
Location
Napa Valley, California
I'm TIRED of the welder tripping a circuit breaker. I have the Lincon 210MP, which can connect to 120 or 240 volts. I'm trying to start welding some thicker projects and it is time to upgrade electrical.

I've never done any real electrical before, other than replacing the occasional outlet or switch. I found a book on electrical and read through t key parts a couple of times.

I have a building permit, which is barely required for this project. I wanted to do it the 'right' way and have a second set of eyes, since this is my first major electrical project.

I'll end up with
- two 120-volt, 20-amp circuits for outlets and lighting
- one 120-volt, 20-amp circuit for a 15-amp air compressor (30 gallon, 2 HP)
- one 240-volt, 50-amp circuit for an upgraded air compressor (will be hard wired)
- one 240-volt 50-amp circuit for the welder (6-50R outlet)

Here are a couple of pics of the conduit on the walls. I'm using PVC. Yes, I know they still need conduit clamps.

Kev
 

Attachments

  • Aerodrome - Electrical Upgrade - Conduit 1R.jpg
    Aerodrome - Electrical Upgrade - Conduit 1R.jpg
    107.5 KB · Views: 75
  • Aerodrome - Electrical Upgrade - Conduit 2R.jpg
    Aerodrome - Electrical Upgrade - Conduit 2R.jpg
    106.3 KB · Views: 62
  • Aerodrome - Electrical Upgrade - Conduit 3R.jpg
    Aerodrome - Electrical Upgrade - Conduit 3R.jpg
    95.4 KB · Views: 60
Last edited:
OP
M

machine_punk

Well-known member
Joined
May 14, 2011
Messages
2,540
Location
Napa Valley, California
Here is the Hairpin-leg coffee table I am building...got REALLY tired of resetting the circuit breaker.
 

Attachments

  • Hairpin-Leg Coffee Table Base M_P R.jpg
    Hairpin-Leg Coffee Table Base M_P R.jpg
    130.1 KB · Views: 47

ScubaSteve

Well-known member
Joined
Dec 14, 2011
Messages
79
Location
New Bern, NC
Nice! Those extra outlets are going to be a huge upgrade. Once you've done these, you'll see that it's pretty simple...but always best to take precautions if you don't know what you're doing and expect to have insurance cover you in the event of a fire!
 
OP
M

machine_punk

Well-known member
Joined
May 14, 2011
Messages
2,540
Location
Napa Valley, California
August 5

Made some progress on the electrical upgrade out in the garage today. I have my first-ever building permit--not very exciting to most, but one of those bucket-list items for me.

All of the conduit on the walls is up. Now, I just need to run the conduit for more lighting and install conduit clamps--then I can notify the city to complete the rough-in electrical inspection.

This will give me a 240-volt outlet for a welder (REALLY tired of tripping breakers, when welding), another 240-volt circuit for an upgrade on the air compressor, and two, full 20-amp circuits for lights and tools.

#TheAerodromeStudio #MaKshop #Machine_Punk #WhatDoYouWantToMakeToday #WeldingIsCool

Kev
 
OP
M

machine_punk

Well-known member
Joined
May 14, 2011
Messages
2,540
Location
Napa Valley, California
August 7

Been posting on Facebook mostly...I'll copy-and-paste those over here, to the GJ thread...

Continuing with the electrical upgrade in the garage. Pulled wire through conduit for the first time. Of course I pulled the heavy wires for the welder first, not that I'll get to use it, until the project is done and the inspector gives his "OK."

I'm technically just one circuit breaker and 5 minutes away from being able to use full power on the welder. This is just the electrical rough-in, though. I still have a LOT of wire to pull, before I can even call the inspector for the first check.

I will likely be a couple of weeks before I'll have the system completely together.

I can, however, say that all the conduit is up, including for the outlets for ceiling lighting and a couple of switches and outlets by the garage door.

#TheAerodromeStudio #MaKshop #Machine_Punk #WhatDoYouWantToMakeToday

Kev
 

Attachments

  • Conduit for Switches and Outlets.jpg
    Conduit for Switches and Outlets.jpg
    69 KB · Views: 28
  • Ceiling Conduit.jpg
    Ceiling Conduit.jpg
    103.6 KB · Views: 19
  • First Wire Pull R.jpg
    First Wire Pull R.jpg
    64.6 KB · Views: 20
Last edited:
OP
M

machine_punk

Well-known member
Joined
May 14, 2011
Messages
2,540
Location
Napa Valley, California
August 10

For those of you who don't know, I've started a weekly group in my workshop. There are a lot of people out there who want to make something, but don't have the workshop, tools or skills needed. I let them come to my workshop once a week and teach them new skills and let them use the tools and shop.

I call this new venture MāKshop. The goal is to eventually turn it into a maker space, in a local warehouse. Right now, I am working on my teaching skills and figuring out what sort of skills and tools real people want to learn and use.

This electrical upgrade is going to help a lot with that. I started with a plan for two 120-volt circuits. I've found a new type of circuit breaker, which will allow me to increase that to FOUR 120-volt circuits, on top of the THREE 240-volt circuits (one disconnect for a future air compressor and two 6-50 outlets for welders, heaters, kilns, etc.)

WHEW...a friend came over for MāKshop tonight and helped me with pulling the rest of the wire through the conduit. It was so much easier with two people working on it together. I still have some work to do, before the electrical rough-in is done, but this was a HUGE step forward. I am tired and sore, but pleased with tonight's progress. THANKS for the help, friend!

#MāKshop #WhatDoYouWantToMāKToday #TheAerodromeStudio #Machine_Punk
 

Attachments

  • Logo - MaKshop Red & Black.jpg
    Logo - MaKshop Red & Black.jpg
    12.6 KB · Views: 9
OP
M

machine_punk

Well-known member
Joined
May 14, 2011
Messages
2,540
Location
Napa Valley, California
August 12

Enjoying the clear sky and palm trees in the back yard. This is one of the things I like most about Napa Valley...most days are 70 degrees and clear.

This is Brain, one of my guinea pigs, sharing the beautiful afternoon with me.

Kev
 

Attachments

  • Brain and Palm Trees.jpg
    Brain and Palm Trees.jpg
    73.8 KB · Views: 21
  • Palm Trees in Back Yard.jpg
    Palm Trees in Back Yard.jpg
    70.3 KB · Views: 15
Last edited:
OP
M

machine_punk

Well-known member
Joined
May 14, 2011
Messages
2,540
Location
Napa Valley, California
MaKshop - Rhino Jeep Ornament

A friend came over for MāKshop tonight. He wanted to MāK an ornament for his Jeep today. He's had this cast iron rhinoceros head for a couple of years and he found some square tubing the correct size for a receiver hitch. His Jeep has a receiver hitch on the front bumper and that is where he wanted it. We set the tubing up as a receiver hitch, drilled and tapped holes to bolt the rhino head on the bracket, then welded the rhino securely to the bracket. For a finish, we we primed it and painted it red.

He learned to weld a long time ago in school. He's had a couple of welding lessons at the MāKshop in the last month to freshen up his skills and this was his first "real" welding project, after a couple of weeks of practice. It was a fun project.
 

Attachments

  • Rhino in the Rough L.jpg
    Rhino in the Rough L.jpg
    47 KB · Views: 31
  • Red Rhino.jpg
    Red Rhino.jpg
    139.1 KB · Views: 32
  • Jeep Rhino.jpg
    Jeep Rhino.jpg
    111.8 KB · Views: 31
OP
M

machine_punk

Well-known member
Joined
May 14, 2011
Messages
2,540
Location
Napa Valley, California
August 20

Whew...Done with the electrical rough-in. Time to call the inspector for the first check. The hard part is done--The circuit breaker box and all the wiring is in place. After the inspection, I'll be able to install the receptacles and switches, have a final inspection, and really be done.

This has been a looong 3 weeks on this project, but I'm looking forward to being able to weld and use the air compressor, without tripping circuit breakers constantly. This will also give me the ability to have several people working at the same time, on my weekly MāKshops.

#MāKshop #TheAerodromeStudio #Machine_Punk
 

Attachments

  • Rough In L.jpg
    Rough In L.jpg
    54.1 KB · Views: 16
To avoid these ads, REGISTER NOW!
OP
M

machine_punk

Well-known member
Joined
May 14, 2011
Messages
2,540
Location
Napa Valley, California
DONE! No more wires hanging out, anywhere. Final outlets and cover plates installed. If all goes well, the inspector will come by tomorrow, for the final electrical inspection. Then, I can turn on the circuit breakers and use the new outlets.

I am particularly looking forward to having the 240-volt outlets for the welder. No more tripping the breaker constantly and I'll finally be able to use the full power of the welder.

I've colored the outlet covers to indicate which circuit they are on...so when several people are working at the same time, during a MāKshop, they won't trip a breaker.

Notice there are two different colors of outlets and switches for the shop lights. They are wired separately, so I can decide which lights come on with which switch...just by plugging them into the correct color of outlet for the grouping I want.

Also notice that all the outlets are at least 4 feet off the floor, so they will never be blocked by a piece of plywood stacked against the wall.

The box to the top, right, in the picture with the yellow outlet cover, is a 60-amp Air Conditioner Disconnect...for a future 5 HP air compressor.

(Editor's Note...I did, I did, I did pass final electrical inspection!)

Kev
 

Attachments

  • Yellow Circuit and Future Air Compressor Circuit r.jpg
    Yellow Circuit and Future Air Compressor Circuit r.jpg
    77 KB · Views: 50
  • Blue Circuit and Welder outlet r.jpg
    Blue Circuit and Welder outlet r.jpg
    99.2 KB · Views: 64
  • Two Switched Circuits for Shop Lights r.jpg
    Two Switched Circuits for Shop Lights r.jpg
    66.3 KB · Views: 55
OP
M

machine_punk

Well-known member
Joined
May 14, 2011
Messages
2,540
Location
Napa Valley, California
Had a surprise guest at MāKshop tonight. My twin brother, from the midwest, happened to be at his company's office in San Francisco this week and arranged for a surprise visit to the workshop tonight. I saw him walk past the open garage door and thought, "Which one of the neighbors is that?!?!" Then, I thought, "That looks a LOT like my brother..." and it WAS, it was my brother.

Another friend came over and we made some progress on the grill he is making out of barrels. There was welding, with the welder hooked up to the new electrical outlets.

My neighbor stopped by for a chat and to check out the electrical upgrade.

Mrs. Machine_Punk made fresh bread last night and we had that for sandwiches, before MāKshop started.

Great night in the MāKshop, but there is still plenty of room for a few folks to be working on projects at the same time. Is there something you want to MāK, but you don't have the skills, tools or workshop space to complete? Stop on by, if you are in the North Bay Area.

#MāKshop #WhatDoYouWantToMāKtoday #MāKerKevinWest
 

Attachments

  • Barrel Grill Start r.jpg
    Barrel Grill Start r.jpg
    67.5 KB · Views: 67
OP
M

machine_punk

Well-known member
Joined
May 14, 2011
Messages
2,540
Location
Napa Valley, California
What do you get, when you cross a metal barrel with a Santa Maria-style grill? I don't know, but we are going to find out soon.

One of the guys at MāKshop worked some more on his Santa Maria-style barrel grill and did a GREAT job of cutting and welding the spindle accurately tonight...his welding technique is getting better every night. Scott made excellent progress on his barrel grill at home this past week.

Below, you see the book we used to figure out how to make a coping pattern for the 55-gallon drum. There are also pictures of more-complex projects this book teaches you to create patterns for. Then you see the development of the full-size coping pattern, flowing off the kitchen table. I used a big roll of brown butcher paper for the pattern. Once we developed the pattern, we cut it out, wrapped it around the barrel and he used a grinder with a cutting disc to cope the barrel.

A new guy came over, who hasn't welded for a while, and he hasn't ever used a wire-feeding welder, like the flux-core welding we did tonight. He did really great for one night of practice on a new welding process.

Then, we went in the house and talked a little bit about some designs I have for some saw horses. Once we get a few people going in the shop, we'll need more bench space. Once we pull the cars out of the garage, I can use a few saw horses with plywood on them, to create some temporary work benches.

What do you want to MāK today?

I talked to another guy this week, who wants to come over and learn to weld, so he can build parts for his rock-crawler truck. He is planning to join us, to learn to weld and work on designs for parts for his truck.

#MāKshop #WhatDoYouWantToMāKtoday #MāKerKevinWest
 

Attachments

  • Barrell to be Coped.jpg
    Barrell to be Coped.jpg
    99 KB · Views: 39
  • Sheet-Metal Pattern Drafting.jpg
    Sheet-Metal Pattern Drafting.jpg
    69.2 KB · Views: 40
  • Basic Patterns.jpg
    Basic Patterns.jpg
    52.6 KB · Views: 36
  • Complex Patterns.jpg
    Complex Patterns.jpg
    64.4 KB · Views: 36
  • Pattern for Pipe Saddle - Pipes Same Size r.jpg
    Pattern for Pipe Saddle - Pipes Same Size r.jpg
    75.4 KB · Views: 37
  • Grinding Rooster Tail.jpg
    Grinding Rooster Tail.jpg
    73.5 KB · Views: 46
  • LARGE Coping Pattern.jpg
    LARGE Coping Pattern.jpg
    73.2 KB · Views: 42
Last edited:
OP
M

machine_punk

Well-known member
Joined
May 14, 2011
Messages
2,540
Location
Napa Valley, California
Barrel Grill

Here is the final coping of the barrel. It needs a little adjustment. The pattern was developed for the outside of the barrel, but he taped it in place over one of the ridges, which is a larger diameter. We always expected to need to do a little bit of fitting.

After seeing these two barrels together, he decided it didn't fit his original vision and he built a different base for it. It was a great experience, though, developing a coping pattern for such a large 'tube.'

The other picture is an adapter bracket I built, to attach a large punch to a pre-made base. The bases were being thrown out and I figured I could find something for which to to use them. I just welded together 4 pieces of angle iron, to get the dimensions and angles I needed. I also welded on four nuts, so you only need one wrench to remove the punch from the bracket.
 

Attachments

  • Barrel Grill Coping.jpg
    Barrel Grill Coping.jpg
    44 KB · Views: 54
  • Punch Adapter Plate.jpg
    Punch Adapter Plate.jpg
    137.4 KB · Views: 61
OP
M

machine_punk

Well-known member
Joined
May 14, 2011
Messages
2,540
Location
Napa Valley, California
Napa Fires

On Oct 10, the fires were raging in Napa Valley. We were fortunate, in that we were not affected by the fire. Many people lost their homes to the fires.

We did deal with a lot of smoke in the air for a couple of weeks.

Mrs. Machine_Punk and I did do some volunteer work with the Salvation
Army in Napa...sorting out donations for those affected.

Kev
 
OP
M

machine_punk

Well-known member
Joined
May 14, 2011
Messages
2,540
Location
Napa Valley, California
Nobody showed up for MāKshop last night. With Thanksgiving Day lurking quietly around the corner, I suspect everyone was busy. I know that was exactly what kept me busy in the MāKshop last night. We are hosting Thanksgiving for around 15 people and don't have a coffee table for the parlor yet.

As you remember, the hairpin-leg coffee table was the straw which broke the proverbial camel's back, electrically speaking. I was tired of trudging out to the corner of the house to reset the tripped circuit breaker for the shop, every few seconds, while trying to weld the legs onto the frame. I finally decided 'enough was enough' and spent a month upgrading the electrical supply in the garage.

This project came full circle last night. With more electricity in the workshop now than any three MāKers can shake a stick at, I was able to finish welding the coffee table. It was nice to set the welder for the actual thickness of the metal, instead of as-close-to-the-correct-setting-as-I-can-get-without-tripping-a-breaker. I also installed the table top.

I originally planned to use glass for the top. While Mrs. Machine_Punk and I were brainstorming about what to use as a temporary table top, she remembered a stack of laminate flooring we have left over from one of the rental houses. It has the look of salvaged wood and certainly meets the looks-cool-enough criteria. Now, the only question remaining was, "How do I attach it to the metal frame?"

The wheels were already spinning on ideas for attaching a wooden top, so I stopped by the hardware store to pick up what I planned to use. Fortunately, a much better plan hit me, between the time I picked up the hardware wanted to use and when I left the store. I returned the hardware to the shelf and picked up some metal strips. I ended up stitch-welding these in place, once I fit the flooring material into the frame. Have I ever told you that welding is amazing? My plan worked and the coffee table was complete.

While this was meant to be a temporary answer to the problem of needing a coffee table this week, it looks far more amazing than we expected. I think the wooden table top is here to stay. In fact, I may end up making a couple of side tables to match this coffee table.

What do you want to MāK today?

#MāKshop #WhatDoYouWantToMāKtoday #MāKerKevinWest #DesignDude
 

Attachments

  • Hairpin Leg Coffee Table 1.jpg
    Hairpin Leg Coffee Table 1.jpg
    96 KB · Views: 52
  • Hairpin Leg Coffee Table 2.jpg
    Hairpin Leg Coffee Table 2.jpg
    110.8 KB · Views: 36
  • Hairpin Leg Coffee Table 3.jpg
    Hairpin Leg Coffee Table 3.jpg
    69.6 KB · Views: 34
Last edited:
OP
M

machine_punk

Well-known member
Joined
May 14, 2011
Messages
2,540
Location
Napa Valley, California
Santa Cruz Metal Meet 2017 - Late October

I taught a couple of topics at this year's Santa Cruz Metal Meet. Of course, that means I didn't get any pictures of myself teaching. I did, however get pictures of other demonstrations.

Ron Covell showed some English Wheel techniques.

Gregg Montellier showed some restoration techniques he uses on 1930's cars, including some automotive sculpture he does.

Jere Kirkpatrick showed some beading machine techniques.

Bill Gruhlke taught pulse techniques with TIG welding.

I taught solid rivets and accurate hole layout on sheet metal.

One of the locals showed up with his electric bike.

On Saturday night, we went on a tour of Michael Leed's shop, where we had the opportunity to have our picture taken behind the wheel of "Blown Ranger..." his most-recent car build, using a 12-cylinder Ranger aircraft engine.

Kev
 

Attachments

  • Kevin Sitting in Blown Ranger.jpg
    Kevin Sitting in Blown Ranger.jpg
    120.9 KB · Views: 129
  • Electric Bike at Santa Cruz 2017.jpg
    Electric Bike at Santa Cruz 2017.jpg
    122.8 KB · Views: 112
  • Automotive Sculpture by Gregg Montellier.jpg
    Automotive Sculpture by Gregg Montellier.jpg
    143.8 KB · Views: 103
  • Bill Gruhlke Teaching at Santa Cruz 2017.jpg
    Bill Gruhlke Teaching at Santa Cruz 2017.jpg
    65.7 KB · Views: 94
  • Jere Kirkpatrick at Santa Cruz 2017.jpg
    Jere Kirkpatrick at Santa Cruz 2017.jpg
    144.1 KB · Views: 96
  • Gregg Montillier and Ron Covell at Santa Cruz 2017.jpg
    Gregg Montillier and Ron Covell at Santa Cruz 2017.jpg
    88.6 KB · Views: 97
  • Ron Covell Teaching at Santa Cruz 2017.jpg
    Ron Covell Teaching at Santa Cruz 2017.jpg
    91.4 KB · Views: 100
OP
M

machine_punk

Well-known member
Joined
May 14, 2011
Messages
2,540
Location
Napa Valley, California
Deep Thoughts on Sawhorses

With several folks working in the shop at a time, I need work benches. Since I only need these benches once a week, I wanted to make something which does not take up much room the rest of the time.

While I do want to eventually want to build a plywood torsion box as a portable work surface, that's not on my project list for the near future. I'm thinking more like sawhorses with a piece of 3/4" (19mm) plywood across it. I've been thinking a LOT about saw horses lately and have some different designs I want to try out. One of the design ideas I want to pursue is "how to make a sawhorse with the least amount of 2x4" (40x80mm) lumber."

For lighter use, it occurred to me that you don't need the classic 'A' frame design. You don't even really need 4 'feet.' In fact, a design with 3 'feet' would even be stable on uneven floors...not to mention using less lumber and stack well together when not needed. Hmmm...I think I have a plan for my 'minimalist' sawhorses. I spent some time in my 3D Design software (Alibre) and drew up a rendering of a minimalist, 3 footed saw horse.

I also have a bunch of fire sprinkler pipe I salvaged from a building site (yes, I asked permission to have it). I thought it would be neat to use some free material for another set of saw horses. I'm beginning to think about using tubing more in projects, so I thought this would be a good time to practice some coping for tubing (well, pipe, in this case). I hit the 3D design software again and drew up a rendering of saw horses using the sprinkler pipe, with an 'upside-down-T' shape. I also have some salvaged 14gauge (0.080" or 2mm) sheet, which would serve as a 'U' bracket to hold 2x6 (40x120mm) lumber.

Then I figured I'd like to build something a little more substantial than the minimalist design, but have 4 'feet,' to make it a little more stable. I still wanted them to stack together, but I didn't need anything that would hold a lot of weight. I actually built this set. It shocks and saddens me how long it takes to build something as simple as a saw horse. I think these took about 3 hours to build. I used the Kreg jig system to make pocket holes and I still have about half of the box of 2,000 Kreg screws I bought for the fence project a few years ago. Notice they stack well together (one leg of each sawhorse is offset inward, so the feet/horizontal legs get out of each other's way). These have been outside for a month-or-so, so they are are not shiny or pristine anymore.

That's it...probably more than you ever wanted to think about saw horses. I still have at least a couple more sets of them to build. Eventually, I'd like to build a couple of long, thin torsion boxes too.

Kev
 

Attachments

  • Saw Horses - Open Position a.jpg
    Saw Horses - Open Position a.jpg
    95.4 KB · Views: 33
  • Saw Horses - Stowed Position b.jpg
    Saw Horses - Stowed Position b.jpg
    107 KB · Views: 33
  • Saw Horses - Stowed Position a.jpg
    Saw Horses - Stowed Position a.jpg
    82.8 KB · Views: 37
  • Saw Horse Rendering - Sprinkler Pipe and Wood.jpg
    Saw Horse Rendering - Sprinkler Pipe and Wood.jpg
    37.8 KB · Views: 32
  • Saw Horse Rendering - 3 Leg.jpg
    Saw Horse Rendering - 3 Leg.jpg
    48.6 KB · Views: 32
OP
M

machine_punk

Well-known member
Joined
May 14, 2011
Messages
2,540
Location
Napa Valley, California
MIG Welding Gun Holder

One of the things I've been figuring out about arc welding is that you have a lot of Stuff (capital S) you need to keep handy. I actually have my MIG machine set up for flux core right now, so there is even more stuff I need to keep ready to use. You have the MIG gun itself, clamps, a wire brush and chipping hammer for slag, a pair of pliers for grabbing hot metal--the list goes on and on. One of the most frustrating things for me is setting the MIG gun down at the end of a weld, while you knock the slag off that weld and get the piece ready for the next weld. MIG guns are pretty well designed for actual welding, but fall short in the what-do-you-do-with-it-when-it-is-not-in-your-hand department.

If you set it flat on the welding table, it just slides off. If you hook it over the edge, it presses the trigger and starts feeding wire (best case) or flashing and blinding you (worst case). Draping it across the top of the welder is fine for long-term storage between welding sessions, but makes it hard to grab the gun quickly while working. Hooking it to the handle on the welder causes the same problems as hooking it on the table. I finally got tired of answering the age old question about where to set the MIG gun when it is temporarily not in use.

There are plenty of places selling cheap holders for TIG torches. That's great for when I am using TIG, but not so helpful with MIG. I've seen some folks weld attach a short piece of metal tubing to a magnet or the welding machine. That works OK with MIG, with a relatively short stick out, but Flux Core has quite a bit more stick out. I really like the hook on the MIG gun...I just needed something to hold the trigger away from any corners.

Here is what I came up with. It is all parts from the scrap bin. A small section of angle iron for the base. This is just attached to any handy surface with a locking clamp. I have a couple of tiny clamps which work well for this. The upright is a piece of (don't know the dimensions--and don't know the metric conversion for that) mild steel bar stock. The horizontal bar is a piece of round stock. I also created a 'button' for the end of the horizontal bar, from the same bar stock as the vertical piece. It would have been simplest to just flux core weld this together. If you know me, though, you know 'easiest' isn't always the way I do things.

I've really been liking the brazed look lately. Shiny steel with silicon bronze braze at the joints. I guess it's the same reason I like rivets...you actually see the joint and see how it was made. The visual contrast between the white steel and the bronze helps too. I tacked these together with flux core (the brazing should not get the temperature high enough to melt the tacks). I chamfered the edges to give the braze more area to stick and give me a place to hide the tack welds.

Most of my experience with brazing is with VERY small joints...think sheet metal at 90 degrees to another piece of sheet metal. This needed a lot more heat, so I used the Victor 100 gas torch with oxy-acetelene.

It does a great job of holding the MIG gun. As you can see, it is set up for flux core, with a rubber cover over the copper conductor, instead of the metal tube for directing MIG gas over the weld. These are readily available from the welding shop or online and screw on exactly the same as the MIG nozzle. They make the tip of the gun smaller, but keep you from grounding out the copper conductor on your project or welding table.

Kev
 

Attachments

  • MIG Gun Holder a.jpg
    MIG Gun Holder a.jpg
    122.2 KB · Views: 74
  • MIG Gun Holder b.jpg
    MIG Gun Holder b.jpg
    137.7 KB · Views: 70
OP
M

machine_punk

Well-known member
Joined
May 14, 2011
Messages
2,540
Location
Napa Valley, California
MIG Torch Holder, Part Deux

It occurred to me how much of a pain it was going to be to keep a clamp around, just for the MIG Torch Holder. Then, it occurred to me, "Machine_Punk, YOU are a metal fabricator and welder. Why don't you MAKE a clamp for that bracket?

I heated and bent a section of solid bar stock into a rough "U" shape. I made one leg of the "U" a little longer, so it would center under the bracket.
I drilled a hole on the longer side of the "U" shape, tacked a bolt in place over the hole, then welded it. I welded the "U" shape in place, on the MIG Torch Holder.

I ground most of the head off a 1.5" long, 1/4-20 bolt (approximately 40mm long, M6x1.2). I cut a short piece of solid rod and brazed it on the head of the bolt, to make it a thumbscrew.

Kev
 

Attachments

  • MIG Torch Holder Clamp b.jpg
    MIG Torch Holder Clamp b.jpg
    106.6 KB · Views: 55
  • MIG Torch Holder Clamp a.jpg
    MIG Torch Holder Clamp a.jpg
    128.3 KB · Views: 51
  • MIG Torch Holder b.jpg
    MIG Torch Holder b.jpg
    108 KB · Views: 58
  • MIG Torch Holder a.jpg
    MIG Torch Holder a.jpg
    119.9 KB · Views: 58

bullnerd

Well-known member
Joined
Sep 17, 2012
Messages
5,690
Location
Jersey
Merry Christmas and Happy new year to you too.

I have been thinking about this thread. I might have some questions for you soon.

Thinking about making an aviation style flag holder for my fathers air force flag. My mom bought a cheap china version just to get it in something, but my dad was proud of his short time in the AF and I want to make something nicer. I can make a nice wood one no problem, but really thinking of the Aviation style. I think I will start with a sketch.

Thanks for all you've posted BTW, great stuff.
 
OP
M

machine_punk

Well-known member
Joined
May 14, 2011
Messages
2,540
Location
Napa Valley, California
LED Lights

I just upgraded the lights in my garage from fluorescent to LED.

After the electrical upgrade, the two, 4-foot (125cm) fluorescent shop lights looked pitiful. I've also been using a clamp-on light, with a CFL, to cover the bench with the drill press on it. Now that I'm letting folks come over to use the shop weekly, I need to add more lights to where we park the cars, so we have plenty of light when we move the cars out to give people enough room. Since I have to get new lights anyway, I had to make some decisions about which way to go.

I could have just bought more 4-foot shop lights and installed them. I like the 5000K fluorescent bulbs. They put out a LOT of light. The thing is, LED has finally become a viable option and I think that's the way I want to go in the future. I started looking at LED shop light replacements.

I want to stick with the shop lights because this is not my final workshop. When I installed the new electrical circuits, I intentionally used outlets on the ceiling instead of permanent lighting fixtures, so I could use shop lights and take them with me when I move. Buying LED fixtures now will also help me determine if they are what I will eventually want in my final workshop.

I also set the ceiling outlet boxes up with two circuits each, with one dark-colored duplex outlet on one circuit and one light-colored duplex outlet on the other circuit. By the door which comes from the house, I have both a light- and dark-colored switch. This allows me to decide the pattern of lighting by how I plug in the lights. For now, I planning to set it up for "when I am working by myself" and "when we pull the cars out and need more room to work with others."

I figured out which LED light I wanted and ordered a 4-pack for about $140 USD. These things are TINY, compared to normal shop lights. They come with a steel cable to hang them from the ceiling, or you can simply screw the bottom bracket to the ceiling and clip the light in. I chose to clip them to the ceiling, so they wouldn't get in my way.

These new lights are AMAZING. Plenty of white light, with only 4 of them installed in the one garage bay. I wanted more light over my benches, so I put three on one side and only one on the other. I like the way I can attach these LED lights to the ceiling with just two toggle bolts. I plan to re-install the four fluorescent fixtures over where we park the cars. I'll try to come up with some simple bracket to attach them directly to the ceiling too.

Kev
 

Attachments

  • LED Lights OFF Dec2017.jpg
    LED Lights OFF Dec2017.jpg
    55.1 KB · Views: 53
  • LED Lights ON Dec2017.jpg
    LED Lights ON Dec2017.jpg
    55.2 KB · Views: 49
Last edited:
OP
M

machine_punk

Well-known member
Joined
May 14, 2011
Messages
2,540
Location
Napa Valley, California
Merry Christmas and Happy new year to you too.

I have been thinking about this thread. I might have some questions for you soon.

Thinking about making an aviation style flag holder for my fathers air force flag. My mom bought a cheap china version just to get it in something, but my dad was proud of his short time in the AF and I want to make something nicer. I can make a nice wood one no problem, but really thinking of the Aviation style. I think I will start with a sketch.

Thanks for all you've posted BTW, great stuff.

Thanks for the kind words. When people reply to this thread, it makes it easier to go through the effort to put together the pictures and story and post them.

A sketch is a great place to start. If you're not wanting to get the tools for solid rivets, I think it would look great with pop-rivets too.

Looking forward to seeing what you come up with.

Kev
 
OP
M

machine_punk

Well-known member
Joined
May 14, 2011
Messages
2,540
Location
Napa Valley, California
Minimalist Saw Horse

I'm sure you are tired of hearing about saw horses from me. Unfortunately, this is my thread and I'm not quite tired of thinking about them yet. I'm not sure what my fascination with them is...likely just a design objective...and 'design' is what I do. I enjoy working within a set of constraints and coming up with the most-elegant answer I can.

These minimalist saw horses are exactly that...just how little material can you use and still have a saw horse which works? I boiled it down to only needing three 'legs.' They will find their own stability, whether or not the floor is flat, unlike saw horses with four feet, which will rock like a hobby horse on uneven surfaces. Of course, this doesn't mean the top of the sawhorse will be level...just that it will be stable.

I also got it down to just three pieces of 8-foot, 2x4 lumber (40x90mm, 2500mm long) to make two saw horses. There is actually a fair piece of 2x4 lumber left over (the top piece, in the picture below, is the 'left-over' piece). It doesn't get much more minimalist than that.

I designed them to stack together. One of the legs are not quite 90-degrees, which prevents everything from lining up, but the pictures below give you the idea of how compactly they stack. I used the KREG system of pocket holes to make these as sturdy as possible. The pocket holes allow you to get away from screwing into end grain. In this case, they also keep metal hardware away from the top of the sawhorse and power tools. It also makes it super easy to replace the top piece, once it is cut up too much.

Would I put 4x4 lumber on these for sawing? Probably not, but that isn't what this set is for. This is perfect for setting up a saw station for your cross-cut saw or getting a project up to waist height to paint or stain it. In fact, I think this set of saw horses is going to hold my (yet unbuilt) mini-paint booth. I use a lot of spray cans for painting. Currently, I am using big sheets of cardboard as a temporary paint booth, but I want to make a framework to support furnace filters as a mini paint booth. Somewhere in the range of 3x3 feet (1x1m), for painting small projects.

There we have it...two sets of saw horses done. The minimalist saw horses were really an exercise in design for me, but they actually ended up being successful and I can see where I will use them in real life.

Kev
 

Attachments

  • Minimalist Saw Horse 2.jpg
    Minimalist Saw Horse 2.jpg
    101.3 KB · Views: 30
  • Minimalist Saw Horse 1.jpg
    Minimalist Saw Horse 1.jpg
    80.7 KB · Views: 33
  • KREG Drilling Station 2.jpg
    KREG Drilling Station 2.jpg
    142.1 KB · Views: 27
  • KREG Drilling Station 1.jpg
    KREG Drilling Station 1.jpg
    93.9 KB · Views: 30
  • Minimalist Saw Horse - 3 2x4's Cut Up.jpg
    Minimalist Saw Horse - 3 2x4's Cut Up.jpg
    84.1 KB · Views: 30
  • Minimalist Saw Horse 3.jpg
    Minimalist Saw Horse 3.jpg
    102.8 KB · Views: 36
Last edited:

sean Buick 76

Well-known member
Joined
May 7, 2013
Messages
3,221
Location
Edmonton Alberta
Amazing metalwork... I am not trying to be rude but is there a reason you prefer rivets over welding? It all looks super duper string, just time consuming.
 
OP
M

machine_punk

Well-known member
Joined
May 14, 2011
Messages
2,540
Location
Napa Valley, California
Thanks for stopping by and posting!

Yes, there is a reason. It is all 'the look of it.' It is rather time consuming, but in the end, I have something nobody else has and I really like the look of rivets.

I went to a 5-day class in England (ContourAutoCraft), to learn to do metal shaping and create body panels for cars. We were trained to TIG weld the pieces together, to make a larger, seamless piece. In the end, I thought it was a cool thing to know how to do, but I prefer seeing the joints and seeing the 'mechanical-ness' of things. So, it is really just a preference. When I look at pictures of things I like, I find a lot of things built with rivets...aeroplanes, industrial-style furniture and bridges. I like the look of it and there are not many others doing the same thing.

I also enjoy design. I like to figure out how to make something with rivets when others would make it by welding.

I like welding too. I recently got an electric welder (MIG, Stick, TIG), but I've been welding with gas torches for a while. There are times when welding makes sense and I just 'want to get it done.' The riveting is FOR the art of it. This isn't my day job...I don't have a time constraint on riveting. I suspect there are very few people who would be willing to pay me what my time is worth to build them something with rivets. I've had a few people ask for a commissioned piece, but back out when I tell them what it would cost. If you are in the business of metalworking for others, that usually means welding, because people simply won't pay you for the time it takes to do it with rivets. Fortunately, this is art for me and I don't have to make a living by riveting.

Both welding and riveting have a place in my shop. For that matter, as much as I prefer metalworking, I'm a fair woodworker too. I'm OK with leather. I'm also hoping to start working with carbon fiber.

One thing I hope to do soon is to build a series of the same object with different materials. Imagine a small tool box made of every imaginable material...steel, aluminum, fiberglass, leather, cloth, birch bark, etc. Then being able to look at each of those tool boxes which are the same size, but have different forms to comply with the requirements of the base material. That may sound impractical to most people, but it sounds like a lot of fun to me.

In the end, the actual designing phase is my favorite part. I enjoy fabrication well enough--and I definitely enjoy seeing a completed design. But, really, my favorite part of the whole thing is making a design as elegant as possible, within the constraints of the materials and processes I've chosen.

For example, look back a few posts at the MIG gun holder I made. That ended up being pretty much just brute force. It does the job and it will never break. I've thought of a much more elegant way to make it since then, using fewer materials and taking less time. I don't suspect I'll ever build it, though, since I've already got one and it works well enough.

If you like welding projects, keep checking back. My next project is a cart for my welders, which will be MOSTLY welded together. There will be some surprises, though, so keep checking back.

Kev
 
Last edited:
To avoid these ads, REGISTER NOW!
Top Bottom