To avoid these ads, REGISTER NOW!

The Average Man's Garage

Mr.ratchet

Active member
Joined
Jul 7, 2011
Messages
27
Location
Minnesota
Well I have lived in my house now for 4 years and before we moved in I told the wife the first project was the garage. Well I got the the electrical done the first winter and the walls mud, taped, and painted that spring. Early summer I got the floor epoxied and then moved my tools in from the in-laws in soon after. Then came the honey do list. You know oh I thought YOU were going to put the fireplace in soon and I really need the laundry organizer and you know we need an office so we can get the HOUSE organized. Well I finally said enough I can't live out of boxes any more. Besides she is side tracked with the new baby (5 months old on the 18th).

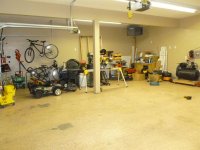
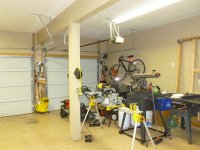
So here are a couple of pictures before I got started.
attachment.php

attachment.php

attachment.php

attachment.php


The picture below is the wall I am building cabinets for. I will have uppers and lowers. The lowers are going to "Float or cantilever out. I don't want them on the floor so it is easier to sweep and keep the rodents from nesting. I plan on 10-16 feet of cabinets.

attachment.php
 

Attachments

  • P1010794.JPG
    P1010794.JPG
    70.9 KB · Views: 1,753
  • P1010795.JPG
    P1010795.JPG
    58.9 KB · Views: 1,678
  • P1010796.JPG
    P1010796.JPG
    72.6 KB · Views: 1,658
  • P1010797.JPG
    P1010797.JPG
    59.6 KB · Views: 1,639
  • P1010798.JPG
    P1010798.JPG
    70.3 KB · Views: 1,650
Last edited:
To avoid these ads, REGISTER NOW!
OP
M

Mr.ratchet

Active member
Joined
Jul 7, 2011
Messages
27
Location
Minnesota
Re: The Average Mans Garage

I need one of you Pro Thread Posters to teach me how to insert the pictures into the tread so you guys don't have to click on the links or thumb nails to see them. I have new pictures but will wait until i figure out how to do that.
 

Jack Olsen

Super Moderator
Staff member
Joined
Mar 22, 2009
Messages
6,678
Location
Los Angeles
Re: The Average Mans Garage

Set up a free account at Imageshack.us and then copy the address for each image and paste the address into your post. Then type the 'code'
after that address.
 

Air_Cooled_Nut

Well-known member
Joined
Mar 28, 2007
Messages
492
Location
Portland, Oregon
Re: The Average Mans Garage

... Well I finally said enough I can't live out of boxes any more. Besides she is side tracked with the new baby (5 months old on the 18th)...
BTDT! Yeah, ya gotta put your foot down sometimes. Having a kid (or more) really cuts into your time so it's best to get your tasks done. Doing so will make your house work easier instead of wasting time rummaging through the boxes. Besides her 'honey do' list you'll have yours as well, except for yourself :eek7:

It would be no fun to prepare meals if every pot, pan, plate, cup, and utensil was stored in a box ;)
 
OP
M

Mr.ratchet

Active member
Joined
Jul 7, 2011
Messages
27
Location
Minnesota
Re: The Average Mans Garage

Well Jack Helped more than just me I am glad!! I will post my cabinet pic tonight yet. Thanks to Jack
 

Thruxton

Well-known member
Joined
Dec 30, 2010
Messages
767
Location
Virginia
Re: The Average Mans Garage

I need one of you Pro Thread Posters to teach me how to insert the pictures into the tread so you guys don't have to click on the links or thumb nails to see them. I have new pictures but will wait until i figure out how to do that.

Set up a free account at Imageshack.us and then copy the address for each image and paste the address into your post. Then type the 'code'
after that address.

It's even easier- Open GJ in a new tab and go to User CP>Networking>Pictures and Albums. Create an album, follow the prompts to upload pix to it. In the first GJ tab start a new thread, enter your text and wherever you want a fullsize pic from your album to appear, copy the BB code at the bottom of the pic in the Album (in the 2nd tab you opened) and past it into the text in the first GJ tab. Then preview to be sure you have what you want. Just be careful to copy and paste the BB code!

The reason why this is better is that it avoids a lot of the broken links caused (for a number of different reasons) by linking to an outside site.

Hope this helps!
 
OP
M

Mr.ratchet

Active member
Joined
Jul 7, 2011
Messages
27
Location
Minnesota
Re: The Average Mans Garage

My uppers I made out of predrilled laminated presboard from Menards. I assembled it using biscuit joinery and pocket holes. They are 40" tall and 30" wide.
View media item 13325View media item 13326View media item 13328View media item 13329
The bases are made out of 23/32(3/4) sandply from HD. The bottom of the carcass are dado 3/8" and the top and back blocking is made from 3/4 reg plywood and joined using pocket holes. The bases I am hoping are strong enough to be "floating" / cantilevered off the wall. I like the lines of base cabinets off the floor and I like the idea off being able to sweep and mop under them. Also less places for little critters to hide.
View media item 13330View media item 13332

The rail is made out 1x2 popular and the style is made out of 1x3 popular that I cut in 3 strips =3/4 thickness. I painted them in Latex enamel that matches my tool box. My doors will be made out of 1x2 popular. I don't know what color the doors should be (Same color of the faces, Gray, graphite, or metallic silver)? I am going to build the doors so they are inset in the cabinets. I like the flush look and the idea less edges for dust to gather on.
View media item 13327
Here are the Uppers and bases ready to be faced. As you can see I decided to add another back cross support. Each base has 2 top cross supports and 3 bottoms cross supports. I will use 3" screws to screw each support to 2 studs. So if I do my math right LOL that will be 6 3" screws holding each base to the wall.
View media item 13333
Here are the uppers faced and hanging.
View media item 13334
 
OP
M

Mr.ratchet

Active member
Joined
Jul 7, 2011
Messages
27
Location
Minnesota
Re: The Average Mans Garage

It's even easier- Open GJ in a new tab and go to User CP>Networking>Pictures and Albums. Create an album, follow the prompts to upload pix to it. In the first GJ tab start a new thread, enter your text and wherever you want a fullsize pic from your album to appear, copy the BB code at the bottom of the pic in the Album (in the 2nd tab you opened) and past it into the text in the first GJ tab. Then preview to be sure you have what you want. Just be careful to copy and paste the BB code!

The reason why this is better is that it avoids a lot of the broken links caused (for a number of different reasons) by linking to an outside site.

Hope this helps!

Thanks for your help Martin I am sure others will appreciate your tip.

I found this as I was adding pictures to my album and then looking at the pic I uploaded. I too opened another page so I could flip back and forth.
 

Gregory M

Well-known member
Joined
Nov 19, 2011
Messages
65
Location
shelley, idaho
Re: The Average Mans Garage

great looking garage. what kind of heater do you have mounted up in the corner? and have you had any problems with it. i also put some pictures on here today had no luck with image shack and half the pictures i up loaded from thia site failed.
the storage shelves are also looking great keep yp the good work, anf happy thanks giving.
 

Dan in Pasadena

Well-known member
Joined
Feb 18, 2009
Messages
13,109
Location
Pasadena, CA
Re: The Average Mans Garage

Very nice cabinet work so far.

I've gotta admit I kinda doubt the long term viability of particle board cabinets being unsupported down below AND being loaded/leaned on. If that becomes a problem I'll offer the following idea my brother in law used in his garage with those premade particle board cabinets:

The rears of the bottom cabinets sit on the curb the garage footing acts as. Under the front of the cabinets he used a galvanized flat pipe flange screwed to the underside of the cabinet bottom with a short pipe ****** and a cap used as legs. The threads on the ****** and cap can be screwed in or out to level the cabinets and have the advantage of not rusting if you hose or mop out under the cabinets periodically.
 
OP
M

Mr.ratchet

Active member
Joined
Jul 7, 2011
Messages
27
Location
Minnesota
Re: The Average Mans Garage

great looking garage. what kind of heater do you have mounted up in the corner? and have you had any problems with it. i also put some pictures on here today had no luck with image shack and half the pictures i up loaded from thia site failed.
the storage shelves are also looking great keep yp the good work, anf happy thanks giving.

Thank you, They heater is from Menards by Beacon Morris
http://menards.com/main/plumbing/he...irect-vent-garage-heater/p-1312847-c-8473.htm
I haven't had any problems with it and it heats my 30x26 garage to 50-60 degrees pretty fast.
 
OP
M

Mr.ratchet

Active member
Joined
Jul 7, 2011
Messages
27
Location
Minnesota
Re: The Average Mans Garage

Very nice cabinet work so far.

I've gotta admit I kinda doubt the long term viability of particle board cabinets being unsupported down below AND being loaded/leaned on. If that becomes a problem I'll offer the following idea my brother in law used in his garage with those premade particle board cabinets:

The rears of the bottom cabinets sit on the curb the garage footing acts as. Under the front of the cabinets he used a galvanized flat pipe flange screwed to the underside of the cabinet bottom with a short pipe ****** and a cap used as legs. The threads on the ****** and cap can be screwed in or out to level the cabinets and have the advantage of not rusting if you hose or mop out under the cabinets periodically.

The base cabinets are made from 23/32 sandply. It is like a baltic birch ply but holds paint better. The bottom of the cabinet is dado into each side by 3/8" the back bottom back brace is pocket holed into the bottom and sides. The middle back braces is pocket holed into each side. The top back brace is pocket holed into the top back brace and into each side. Each of these back braces will be anchored into the wall stud twice.

I have heard about using a pipe flange and ****** as legs and thought about that as a back up plan. I hadn't heard of the cap trick to help level though good idea. Thanks
 
OP
M

Mr.ratchet

Active member
Joined
Jul 7, 2011
Messages
27
Location
Minnesota
Re: The Average Mans Garage

Well I finally found time between the baby and the wife to post some more pictures of the construction of my cabinets. I would also like anyone's opinion on a color scheme. Right now I am I have painted the face of the cabinets Blue to match my Craftsman tool chest. I am thinking of doing a silver metallic paint on the bottom half of the wall topped with a white or light grey on the top half. I think I want to do a pin stripe detail in blue where the two colors meet. What do you guys think?


Here is the dado that attaches the bottom to the sides
View media item 13671

This shows the pockets holes attaching the bracing to the sides and top and bottom
View media item 13670

Picture of the top bracing
View media item 13672

After talking with a coworker of mine I decided to beef up the corners to take most of the weight and also help distribute it to other cabinets
View media item 13673
View media item 13674

Here are the bolts from the support bracket
View media item 13669

I also decided to add a ledger board that the cabinets sit on to take some weight. They are treated 2x4's attached to the poured concrete wall with 1/4" tapcons.
View media item 13668
View media item 13667

I have more pictures but I don't have time to post them tonight I will try to update them this weekend. I need to order my router bits for the rail and styles for the doors. I have also found a good price on butcher block top at sears and will order them next week. I will be ordering 2 8ft by 24inches by 1 1/2 inches thick. But I have to pay my credit card off this month before I make more charges. I have the dove tail jig on order so I can make more own drawers.
 
OP
M

Mr.ratchet

Active member
Joined
Jul 7, 2011
Messages
27
Location
Minnesota
Those are going to be nice cabinets! You're a little ahead of me, but I plan to be at this stage in January, so I'm watching with interest.

Thank you and I took a peek at your post and both of your garages are coming along nicely. I had started my 4 years ago (wiring,drywall,painting, and floor epoxy) Then I was side tracked by the honey do list. So you are moving along alot better than I have. I would like to keep going until it is done but I will have to see if the wife can handle me living in the garage for the next couple of months. I can already tell it is starting to bother her.
 
OP
M

Mr.ratchet

Active member
Joined
Jul 7, 2011
Messages
27
Location
Minnesota
It's Friday about to head home thought I would post more pictures of the base cabinets. I don't know how much time I will have out in the garage this weekend but I have been playing with insulating the doors or building an over head wood rack for this weekends project.


Here are the base cabinets before attaching them to the wall. I decided to leave a gap for my stool and I will be adding drawer cabinets to each end. I think I will add a drawr also to two of these base cabinets.

View media item 13666
View media item 13665
Here are the cabinets on the ledger board and attached to the wall.

View media item 13676
View media item 13675
Here are are the base cabinet with shelves and loaded with my tools

View media item 13677
View media item 13678

Can't wait to get my butcher block counter tops but that will be another couple of weeks.
 
To avoid these ads, REGISTER NOW!
OP
M

Mr.ratchet

Active member
Joined
Jul 7, 2011
Messages
27
Location
Minnesota
View media item 13678
Can't wait to get my butcher block counter tops but that will be another couple of weeks.

I forgot to tell you all that I did test the strength of these cabinets. Once they were loaded I jumped up on the end cabinet of the three and bounced on it and it didn't move or creak so I think they should hold there shape and not sag. I know butcher block is heavy but with all the cabinets sharing the weight I think i should be ok. I have thought about toe drilling 3" screws into every stud on the under side of the butcher block to help with the weight by transfering some to the wall.
 

mws444

Well-known member
Joined
Jan 2, 2011
Messages
245
Location
Texas
Great Job! I love the cabinets, I think they will hold up just fine.
I think you need to change your title, there is nothing average about the quality of the work you do. Or I guess on further thought, when it comes right down to it we are all just average guys. It is the family and a few good friends that sets us apart. Things money cant buy are the real sucess to be judged by. You seem well on your way to greatness.
 

rogsmart

Well-known member
Joined
Aug 22, 2009
Messages
240
Location
It's the part that's gonna fall in the ocean when
Those cabinets are turning out really well. A good call to leave a knee space where your stool will be.

Have you given any thought to putting in some lighting under the wall cabinets?
I always like to have light from several different directions when I'm working at
the bench in order to cut down on shadows.

Keep posting pics. This is a great build. Thanks for sharing it.
 

kippieland

Well-known member
Joined
Oct 22, 2011
Messages
1,123
Location
Western Washington
Great idea for the lower cabinets up off the floor. My stupid shop floor is so out of level and wavy I had a hell of a time. My have to take them down and try that. Great job by the way, especially with HD wood. Its so hard to find an pieces that aren't totally warped.
 

klhitman

Well-known member
Joined
Sep 17, 2010
Messages
1,016
Location
pewee valley
i like how you say the average man garage.

how many of us one here dont have a garage like that. i know there are some that dont have the room like that. LIKE ME!!!! and a few others.

not to start a bitching match

looks good i wish i had that kinda place to do stuff like that
 
Last edited:

ChristopherLutz

Well-known member
Joined
Jun 17, 2010
Messages
270
Location
Flower Mound, TX (DFW)
Very fine work - it looks fantastic and very solid.

I would; however, take Dan from Pasadena's idea and give it some consideration. I have used galvanized pipe flanges "extensively" - though not in this application....

I designed a room for my son based on a "shop" - I laminated a couple of 3/4 thick plywood sheets together and used pipe and flanges for the legs. It turned out ROCK solid and it's pretty low cost.

In your application - the legs in front (or even set back a bit) wouldn't hinder cleaning much and would provide support at the outer edge of the cabinets where you're likley to lean....install a vise?

They look damn solid - but, it's just cheap insurance.

On color - it's hard to see the blue, but it looks like you're picking up some blue from the color chips in the floor - that's a nice accent.
 
OP
M

Mr.ratchet

Active member
Joined
Jul 7, 2011
Messages
27
Location
Minnesota
Great Job! I love the cabinets, I think they will hold up just fine.
I think you need to change your title, there is nothing average about the quality of the work you do. Or I guess on further thought, when it comes right down to it we are all just average guys. It is the family and a few good friends that sets us apart. Things money cant buy are the real sucess to be judged by. You seem well on your way to greatness.


Well my "garage is totally average compared to your build. People really need to check out your thread.
 
OP
M

Mr.ratchet

Active member
Joined
Jul 7, 2011
Messages
27
Location
Minnesota
Those cabinets are turning out really well. A good call to leave a knee space where your stool will be.

Have you given any thought to putting in some lighting under the wall cabinets?
I always like to have light from several different directions when I'm working at
the bench in order to cut down on shadows.

Keep posting pics. This is a great build. Thanks for sharing it.

Yes I will be adding under cabinet lighting. I have it all wired to do so. On two walls. As of right now i plan on pucket lighting.
 

mws444

Well-known member
Joined
Jan 2, 2011
Messages
245
Location
Texas
Well my "garage is totally average compared to your build. People really need to check out your thread.

Quality is not average my friend! You should be proud.
Like I said before, all the "stuff" in the world mean nothing without those you love. I will agree I have been blessed financially, I have invested 35 years of my life to get to this point. However above all else it is my family which brings me the most pride and joy.
Just as there will always be many who have more "stuff" or money, there will always be those who have less. Just don't let them get you down, and always aspire to better yourself, not just financially.
 

Dan in Pasadena

Well-known member
Joined
Feb 18, 2009
Messages
13,109
Location
Pasadena, CA
Very fine work - it looks fantastic and very solid.

I would; however, take Dan from Pasadena's idea and give it some consideration. I have used galvanized pipe flanges "extensively" - though not in this application....They look damn solid - but, it's just cheap insurance....

After having seen HOW he constructed his cabinets I agree they look stout as hell. I guess it's my tendency to overthink things or to worry, but I'd probably STILL put the galv pipe legs on them, just kinda far back from the front edge so they would not be as visible.
 

Nighttrain

Well-known member
Joined
Aug 6, 2009
Messages
2,682
Location
Dripping Springs, Tx
Very nice, I hope to start my lower cabinets this week and will be a close build to yours. I have a Kreg jig and 12 sheets of cabinet grade plywood just waiting to be cut.
 
OP
M

Mr.ratchet

Active member
Joined
Jul 7, 2011
Messages
27
Location
Minnesota
Very nice, I hope to start my lower cabinets this week and will be a close build to yours. I have a Kreg jig and 12 sheets of cabinet grade plywood just waiting to be cut.

Thank you,

WOW 12 Sheets thats alot of Cabinets. I used 3 sheets for the lowers and one of those sheets was just for bracing.
 
OP
M

Mr.ratchet

Active member
Joined
Jul 7, 2011
Messages
27
Location
Minnesota
After having seen HOW he constructed his cabinets I agree they look stout as hell. I guess it's my tendency to overthink things or to worry, but I'd probably STILL put the galv pipe legs on them, just kinda far back from the front edge so they would not be as visible.

I really appreciate your sugestion and will use it if they start to lean/sag at all. I like the idea of the cap to make them adjustable. If I do end up needing legs I will paint the flanges, *******, and caps a chrome and put them out front.
 
OP
M

Mr.ratchet

Active member
Joined
Jul 7, 2011
Messages
27
Location
Minnesota
Sorry for the lag of updates just been busy with other projects around the house. I am finishing a room above the garage now. Need to finish that monther in-law apartment soon lol. I do have some picture updates I will try to get them up this weekend.
 
To avoid these ads, REGISTER NOW!
Top Bottom