To avoid these ads, REGISTER NOW!

Above 1200 Sq/FT The Barber Shop

Wokspaces above 1200 squarefeet.

manwithtools

ALLIANCE MEMBER
Joined
Aug 24, 2015
Messages
13,705
Location
Lebanon, TN
Well, since my last name is Barber, I thought that should be a good name for my new shop. I have been procrastinating the purchase because of costs for a few months, but about 7 weeks ago I pulled the trigger. Pretty clear costs are not falling soon. It's post type construction, 32' x 48' with 12' high walls. One half will have attic trusses for light storage, 1/4 will have scissor trusses for extra lift clearance and 1/4 will have standard trusses. Three 10' x 10' doors on the front walls and a 8' x 8' on the back wall.

Planning on a full bath (to be used like a pool house), shop sink and also a hook up for washer and dryer and a RV dump connection for RV visitors. Will be closed cell foamed and finished inside with liner metal. Planning on a mini-split for heating and cooling.

We would have liked to have a building that matched the house construction - brick and Hardiboard board and batten with asphalt shingles but the cost got to be astronomical. I did design it with large overhangs so it will look more like a garage and less like a pole barn. Color scheme will be off white walls and charcoal roof and trim, hopefully complimenting the house but not exactly matching.

Screenshot 2024-09-05 165323.jpg

Screenshot 2024-09-23 124326.jpg


So far the building pad is in, 9 tri-axle loads of really nice red clay, compacts very well and as long as it stays dry is very hard. We have had 9 weeks with no appreciable rain and now that the builder is about to start, rain is in the forecast. Working in this red clay when wet will not be fun (if even possible). Trusses are set to be delivered Wednesday. We are next on the list, possible start on Friday - weather dependent.

I'll be providing the pad, concrete (after building is erected), garage doors and insulation. I'll also be doing electrical, plumbing and interior finishing. Wish I had pulled the trigger sooner, I'll be working in some cooler temperatures that are coming up. I'll try to keep this thread updated as we progress.

Pad area picture, not much to see here, just stripped the top soil:

PXL_20241011_134723069.jpg

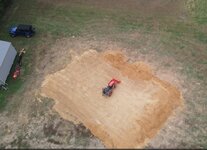
Pad after the 9 loads of clay. I'm not going to smooth the slopped edges yet as they will get torn up during construction. Will probably need more dirt to get a decent grade after building is complete. The pad tapers diagonally from font left to back right corner about 2' at the deepest point, 0' at the origin:

024-11-04 121404.jpg

I struggled to get the area flat with the tractor, so I called in a guy from up the street with a CTL to flatten it out and then I built out the tapered sides for now.

PXL_20241104_181744157 (1).jpg
 

Attachments

  • 024-11-04 121404.jpg
    024-11-04 121404.jpg
    155.8 KB · Views: 22
  • 2024-09-11 143913.jpg
    2024-09-11 143913.jpg
    67.9 KB · Views: 20
Last edited:
To avoid these ads, REGISTER NOW!

LXCam

ALLIANCE MEMBER
Joined
Apr 23, 2013
Messages
19,095
Location
AZ
Well its a good thing you waited for the rainy season to start MWT :D


Good luck my friend, this will be fun to watch. When do you have the framing scheduled to start?.
 

jessew

Well-known member
Joined
Jan 11, 2010
Messages
46
Location
Montana
That’s gonna look great! How big of a mini split do you think you’ll need? Or you gonna do one on each end
 
OP
M

manwithtools

ALLIANCE MEMBER
Joined
Aug 24, 2015
Messages
13,705
Location
Lebanon, TN
Now for some posts, these are three ply laminated posts. 3 - 2x6's glued together. The lengths are finger jointed together, the bottom 1/3 or so being treated and the top portion non treated. They are planed after lamination and are straight as an arrow. Much better than a treated 6 x 6 that will twist like a pretzel.PXL_20241108_180144538.jpg
 
Last edited:
OP
M

manwithtools

ALLIANCE MEMBER
Joined
Aug 24, 2015
Messages
13,705
Location
Lebanon, TN
Looking great, Dan!

I bet Joy's chili and cornbread were fantastic and appreciated!
They were, they cleaned out the Chili! The cornbread was perfect! They thanked us several times! We love to share food with folks, it just seems like the right thing to do. They are working hard and are far from home, no time to really enjoy lunch if they have to grab fast food. It's the simple things that bring joy to our lives :)
 
To avoid these ads, REGISTER NOW!
OP
M

manwithtools

ALLIANCE MEMBER
Joined
Aug 24, 2015
Messages
13,705
Location
Lebanon, TN
4 -1/2 days since holes went in the ground and the shell is almost done. Rain just started, I hope they can finish today. They have a 2-1/2 hour drive each way. It would be a shame to drive all that way to complete another hours worth of work.

Someone will be coming back as they still have to do gutters and down spouts.

PXL_20241113_193007707.jpg
 
Last edited:

545_days

Well-known member
Joined
Oct 30, 2016
Messages
580
Location
Texas
Looks great. When I first started reading this thread the photos reminded me of some other build and I thought "Oh I've read this old thread before." Then I saw the date it was posted and was happy. Another new build to follow!
 
OP
M

manwithtools

ALLIANCE MEMBER
Joined
Aug 24, 2015
Messages
13,705
Location
Lebanon, TN
Looks great. When I first started reading this thread the photos reminded me of some other build and I thought "Oh I've read this old thread before." Then I saw the date it was posted and was happy. Another new build to follow!
You know what? I just realized due to your comment how similar this looks to my old shop rebuild. I will sincerely state, this was not intentional. But none the less, here we are. It would appear there are some colors that just happen to work for me :)

OMG, the old shop from 2015, 30' x 40' : 20151105_063206.jpg
 
OP
M

manwithtools

ALLIANCE MEMBER
Joined
Aug 24, 2015
Messages
13,705
Location
Lebanon, TN
Quick update from today. Trenches dug for the DWV system, everything but the final tie in to the septic tank. That's look more complicated than I thought. I had much qualified help today, younger and stronger than me. I appreciated every minute of it. We also now have temporary lighting, very nice to have this time of year.

$8-12k quotes for drain plumbing are now looking more like $1800, even if I include the cost of beer and chili and cornbread. Crew was made up of my son, my son-in-law and two friends of my son we have known for 20 years (since they were 15), these boys all grew up together and what fine men they have become. Very proud of them! Hard workers and great dad's and husbands!

Really looking forward to good times in this shop, just like we had when they were teenagers in the last shop. Some very serious car guys here. They are ready to have a shop with lifts and all the amenity's they dream of, but can't currently afford. I feel privileged to be part of this journey.


5392284900688795961_n.jpg

1128061329182011693_n.jpg

8484270579938494061_n.jpg

2387116755301028921_n.jpg
 
OP
M

manwithtools

ALLIANCE MEMBER
Joined
Aug 24, 2015
Messages
13,705
Location
Lebanon, TN
Coming along nicely, Dan!
Trying to get the plumbing done this coming week, promises of concrete first week of December. I just can't go all day anymore. Back, hips and knees all start to complain after 6 hours or so of walking on uneven terrain and bending down into trenches. I'm in chair with ice on the back now. :cry:
 

bugnut

ALLIANCE MEMBER
Joined
Jul 14, 2012
Messages
3,860
Location
Central Ohio
Dan, the building is really looking good. I am a bit jealous of your friends and family plan working on the building. Mine are to far away or aged out so my only help is the checkbook.

And slow down it'll get done the body will thank you!
 
OP
M

manwithtools

ALLIANCE MEMBER
Joined
Aug 24, 2015
Messages
13,705
Location
Lebanon, TN
So it's been slow (no) going on the plumbing as it's been too damn cold and there is no rush as it's too cold to pour concrete too. We've got an early start to cold weather this year.

Today I put in a few hours getting the RV dump plumbing trench ready for pipe. We trenched all the trenches to approximately 2' depth, figuring it's easier to put a little dirt back in the trench for proper slope rather than hand dig deeper after the trencher was returned. Tricky part was setting slope over 48'. I had bought a couple of tools for this project and this trench was a perfect chance to use one of them. Milwaukee 3 Plane Laser. It has a mode where it won't self level, it just emits a laser at what ever position it's in. I was shooting for 1/4" per foot of slope so I screwed a piece of metal to the post and used it's magnetic mount to secure it to a central post and then adjusted it's position to that slope.

Here you can see the slope in the laser line along the West wall:
PXL_20241207_213113042.jpg

Here is the laser line relative to the purlin on the South wall:

PXL_20241207_213209207.jpg

Next is the laser line relative the purlin on the North wall, 48' away. 48' * 0.25" = 12"? :

PXL_20241207_213259594.jpg

Now it's simple matter of using the grade pole and the laser detector to check our progress along the trench. Took me about an hour and a half to properly slope the 48' by myself.

PXL_20241207_213139149.jpg

And yes I know the detector is not positioned properly in the picture. :)

Le Trench:

PXL_20241207_213648800.jpg

Hoping it might get warm enough near next Friday for concrete...
 
Last edited:

LXCam

ALLIANCE MEMBER
Joined
Apr 23, 2013
Messages
19,095
Location
AZ
Oh boy ain't that some fun in a 4" wide trench. But you're making some progress MWT, looking good bud.

When I redid the front yard drainage on our place in cali I had a 600ft run from my high point to the creek. I could only pull off 1/16" of fall per ft. Having two 6" lines I went with an 18" wide bucket and sanded the bottom so I could nail the slope. Another words, I feel your pain.
 
To avoid these ads, REGISTER NOW!
Top Bottom