To avoid these ads, REGISTER NOW!

Above 1200 Sq/FT The Blizzard Build 40x60

Wokspaces above 1200 squarefeet.
To avoid these ads, REGISTER NOW!
OP
T

TurnipTruck

Well-known member
Joined
Aug 28, 2005
Messages
1,579
Location
Southcentral Alaska
Since it is still winter up here, I am trying to finish some major projects inside.
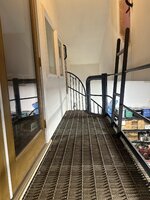
This week was handrails on the catwalk to the Lair and additional balusters on the spiral staircase.

I have finally sold/tossed/organized enough stuff to clear enough floor to assemble the rolling scaffold and simulate working safely from heights.


I used the hoist to lift the scaffold to put the wheels on:
40745AB9-BDB7-4711-AA6E-A93DA350D041.jpeg

An overall view of the finished catwalk:
7FF97525-224E-4C51-B488-AAA785138C07.jpeg

And some views at height:
74FB9435-9489-499B-87EA-587E4D621590.jpeg
17BBC867-6E0E-4671-956B-6BD23BAA055D.jpeg
17321FB5-209C-4BEA-8FF3-FC02C31012D0.jpeg
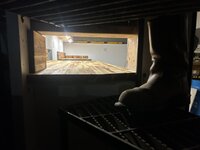
The 3 pink foam boards are interim attic access hatch plugs.
 
OP
T

TurnipTruck

Well-known member
Joined
Aug 28, 2005
Messages
1,579
Location
Southcentral Alaska
I have managed to squander another ”summer” that is ordinarily brief anyway, but this summer was shortened further by five months of above average rainfall.
And today was our first frost! In mid-September!!! The apples are still green!
4FB55F29-22F5-4489-9D52-E5C318DA4686.jpeg


My plan for this coming Winter is to not have to do any exploratory snow berm digging searching for project material. By having everything elevated out of the snow, I won’t have to dig for it. Well, it has always been my plan, but this year it is finally attainable.
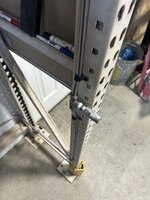
I brought a cantilever rack with me from the previous shop, and it has been stashed in the weeds for eight years. I have been wracking my remaining brain cells trying to figure out a hidden-yet-accessible spot to no avail, finally realizing that I could hide the racking behind the connex without going over the property line.

First, I needed a foundation. I got to hand dig a trench through the root layer, then filled it with riprap/ concrete chunks/ and the last of my driveway gravel, compacting by hand. Looks like all my railroad ties are used up, so I had to buy new pressure treated timber.
116452CB-B82F-415B-9666-0B5D0591A702.jpeg

Then fork over two of the 12’ uprights. The first was tied to the connex long enough to bring the second upright over then bolt them together. Safety third!
FB5FFAF2-CE59-4EA9-8EC0-E213C3B02DE6.jpeg,0DB3529D-3EB4-4BD4-B8B1-E57029D96027.jpeg,30386E77-A2E0-45A2-B950-C246A6800EDD.jpeg

Next will be a roof and some earthquake-resistant yet frost heave-compliant strut to the connex hard points. Then I get to root around in the woods in all my piles of steel and stack the good stuff and toss the rest.
 

Bruce 993 SEA

Well-known member
Joined
Oct 22, 2016
Messages
1,033
Location
La Conner, WA
Following with awe at what you have accomplished. Very inspirational!

You descriptions are fun to read and hope to see what project you come up with when you are done constructing.

Hope you have a bit of nice weather for fall.
 
OP
T

TurnipTruck

Well-known member
Joined
Aug 28, 2005
Messages
1,579
Location
Southcentral Alaska
Some minor updates:

I did get the 12’ cantilever rack loaded before Winter was suddenly thrust upon us, but no roof yet. I’d like to HAVE a roof, but don’t yet WANT to build one, especially given how precarious/poor access/tractor won’t reach/I’m getting old/I don’t bounce well/ it is.
7C8AD299-3141-433B-893B-42D416F2B118.jpeg
BUT; my only neighbor that direction has finally subdivided (after 40 years) and if I wanted to double my acreage and get yet more shoreline and an access road out the back and a couple flat acres on a platted cul de sac for a speculative house build, I could have even more places on which to stack treasures.
That fence on the right is off of my property, and is all that remains of a horse paddock last used in 1975. It’s a little overgrown now.


INSIDE: I have been asked by more than one of my friends over the years,”When are you going to quit building infrastructure and start building toys?” Valid question. All I have really done is maintenance and construction for pretty much the last decade. I don’t want this construction thread to devolve or derail (much) into a projects thread, but I will include brief blurbs.
5DB181A1-6961-422C-9318-78512F9675AD.jpeg
LEFT: The TurnipTruck has been pulled out of the lean-to so I can assess the damage I caused it by ignoring it since 2014. The .040-over 500 Cadillac may be ok, but I cleaned off the parking sprag in the turbo400 while winching in Park one day, and now have to chock the tires on hills. I have several 4L80e transmissions, and one even has a parking brake drum on the tail, which would be handy since I didn’t use e-brake calipers in the rear. I do have a tuned port Mercruiser 454 that would not require adaptation to the overdrive ******, or I could find a 6 liter LS to keep the weirdness down. Any of those choices should improve on the 8 mpg I got when I last drove it.

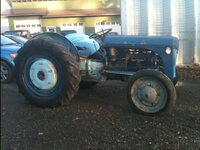
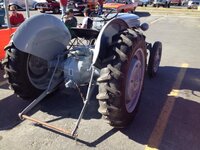
RIGHT: the Ford collector that I sold the 1941 9N tractor to brought it back to me for repairs, since he is not a mechanic. It looks like the only available point sets available anymore last just 50 hours before wearing down enough to not even open, so he hired me to put a Pertronix electronic ignition in that stupid front distributor.
 
OP
T

TurnipTruck

Well-known member
Joined
Aug 28, 2005
Messages
1,579
Location
Southcentral Alaska
Thanks, it’s a cool little tractor the size of a big fourwheeler with some amazing technology considering it’s 82 years old. I sold it because I didn’t feel I could properly store it, but it appears this self-professed “collector” left it in a ditch for the three winters since I last saw it.
I don’t have any restoration pics (8 phones ago!?) but these are what I do have:
A1CD5A55-2C45-4353-B2AE-B0FE81D1E1BA.jpeg2377B62B-33E2-4317-A796-F5AD72EC2015.jpegF62F269B-6206-48AA-85DE-09F229D54672.jpegC0B3F062-C998-4048-AAE2-4B6AA6279DD8.jpeg
Yes, I have taken it to several car shows!
 

DennisK59

Well-known member
Joined
May 21, 2021
Messages
205
Make sure to epoxy the pins in, also the rotor nead needs a tight fit too. Otherwise the keyed slot loosens the rotor and goes out of time. They will not sell you paris!
 
OP
T

TurnipTruck

Well-known member
Joined
Aug 28, 2005
Messages
1,579
Location
Southcentral Alaska
Yes, the flying magnet ring is kinda loose on the distributor shaft cam. Epoxy that?

The mechanical advance slots? Or the distributor drive key slot in the timing gear? Both look as new.
 

madison069

Well-known member
Joined
Nov 5, 2010
Messages
4,186
Location
Monroeville, PA
Nice Garage build! It's hard to work on projects and also work on the building at the same time. Seems time and money has to be directed at one project at a time or you won't be able to finish the project in a timely manner!
 
OP
T

TurnipTruck

Well-known member
Joined
Aug 28, 2005
Messages
1,579
Location
Southcentral Alaska
At my last shop, I had a pass-through in the wall near the air compressor so I could plop out a dedicated air fitting hose for airing tires and stuff outside without opening the 16’ overhead door. I would pull the hose back in after use, otherwise it would freeze and leak.
I am reluctant to add holes to this building (especially on that windward side), so I came up with this overhead reel convenient to the door but out of the way even in use.IMG_3980.jpeg


I started out by excavating some salvaged stainless tubing and fittings out of the snow, hanging overnight to thaw and drip dry, straightening the best lengths, and finally putting some bends back in. The Swagelok brand roller benders at work definitely spoiled me, but I’m not about to drop $1k on a set. Luckily I dug these superseded non-roller benders out of the Dumpster a couple decades ago cuz
WE DON’T THROW AWAY TOOLS.
IMG_3975.jpeg


I added a low point blowdown and a tap for a potential blasting cabinet while I was at it, since the tubes weren’t long enough without a splice or two.
IMG_3978.jpeg


The new puppy is wondering when I am going to update the To-Do list. Someday, pup. Get off the door!
IMG_3981.jpeg
 
Last edited:

jollygreengiant

Well-known member
Joined
Nov 10, 2013
Messages
2,362
Location
Ontario, Canada
I started out by excavating some salvaged stainless tubing and fittings out of the snow, hanging overnight to thaw and drip dry, straightening the best lengths, and finally putting some bends back in. The Swagelok brand roller benders at work definitely spoiled me, but I’m not about to drop $1k on a set. Luckily I dug these superseded non-roller benders out of the Dumpster a couple decades ago cuz
WE DON’T THROW AWAY TOOLS.

Throwing away perfectly good tools??!!

 
OP
T

TurnipTruck

Well-known member
Joined
Aug 28, 2005
Messages
1,579
Location
Southcentral Alaska
So you got that paperweight home. Any updates here? Did you splurge on some more acreage?
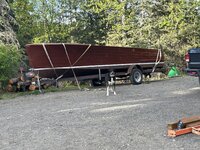
I guess I could do a semi-annual update.

The wife is totally on board with adding some buffer property, and I am beginning to agree with her.

The wooden purgatory is safely ensconced in the lean-to until the large bay is emptied of other almost-running projects. Additionally, I am pondering a temporary (or permanent) gantry lift point in the ceiling in tandem with a second lift point at the garage door header so I can safely twirl the hull. I should also hang some dust curtain rods before the hull clogs up acccess to the whole bay.
IMG_4498.jpeg


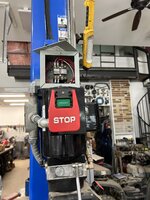
I also added a contactor to the two-post after the cheesy push button welded itself ON again while weighing the boat engine:
IMG_4570.jpegIMG_4475.jpeg

Then I was very graciously gifted a Powermatic 66 3-phase tablesaw with the Biesemeyer fence, so I’m rabbitholing the conversion to single phase and all the other hotrodding goodies I can throw at it. The saw is also finally (hallelujah!) inspiring the organization that the woodshop and dust collection system has been desperately craving.


Otherwise, all that Quality Shop Time has been squandered in the clearing for and amazingly slow erection of the wife’s second greenhouse;
IMG_4356.jpeg,IMG_4534.jpeg,IMG_4602.jpeg
probably not in time for this season at this rate.

How did I ever get anything done at home when work took up 12 hours of every day for the last 45 years?
Just the boat is pretty much going to be a full time job for the next two years.
Coordinating Mom’s doctors and lawyers for the last eleven months has been a full time job some weeks.
 
To avoid these ads, REGISTER NOW!
OP
T

TurnipTruck

Well-known member
Joined
Aug 28, 2005
Messages
1,579
Location
Southcentral Alaska
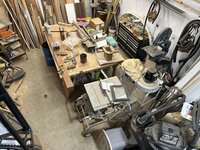
This corner of my shop has been a hassle and an embarrassment since the beginning.
I was far more anxious to resume playing with metal after six solid years of house remodel and shop construction than spend one more minute thinking about wood, so this corner became the dark place that wood-related stuff went to hide while the weld corner got all my time and attention.
Now that the ChrisCraft is inside and many thousands of dollars of imported mahogany, white oak, and sapele are in my near future, I probably should do something about all the cohabitation of tripping hazards with whirling blades of death.
IMG_4991.jpeg


First of all, I had to make some room:
IMG_4993.jpeg
IMG_5014.jpeg


That air piping is going to be in the way, let’s see what I hid in the wall.
IMG_5018.jpeg


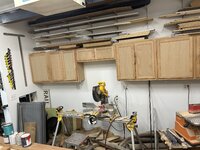
Hmmm. What can I do with a mostly unused stud bay so the chop saw doesn’t stick out so far?IMG_5020.jpeg


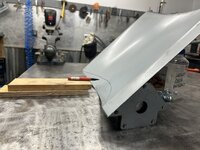
I found this perfect chunk of powder coated 14 gauge in the recently organized outside rack and bent a pair of flanges, rolled a curve over a chunk of wood, and temporarily bolted down a 30-year-old but completely unused #2 Beverly shear I found at a garage sale to cut to size.
IMG_5023.jpeg


A quick scribe at 45 and fit&tack…IMG_5024.jpegIMG_5025.jpeg


…and cut&thread a 3/4 pipe ****** to relocate the air chuck…
IMG_5027.jpeg


…we can reassemble the wall and test the saw swing.
IMG_5031.jpeg

I gained 2 inches without moving a stud, or buying a wall-hugging $aw!
 
Last edited:
OP
T

TurnipTruck

Well-known member
Joined
Aug 28, 2005
Messages
1,579
Location
Southcentral Alaska
After excavating a majority of the remaining **** out of the room.
IMG_5044.jpeg

I used a laser level to make a line around the room even with the bottom of the cupboards.
IMG_5046.jpeg

I then worked my way around the room hanging these auction-sourced WallControl steel pegboard panels.
IMG_5056.jpeg


I had to raise these orange Bora racks nearly to the ceiling to clear the WallControl panels. I also used up several shelf standard remnants on the back wall in case I need to hang something in the warm breeze from the heater duct in the left corner.
IMG_5064.jpeg

I have been tripping over these pegboard panels all summer; hanging them in the woodshop as a trial to see if I like them was as much a factor as getting them out from underfoot. I have one more nice panel to finish the right hand wall, but I won’t hang it until I figure out where a new door will end up.
 
Last edited:
OP
T

TurnipTruck

Well-known member
Joined
Aug 28, 2005
Messages
1,579
Location
Southcentral Alaska
I thought long and hard about making my own custom cabinet carcasses, but without a functioning woodshop it would have been an exercise in frustration at this stage.

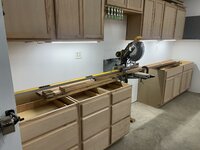
So a minor outlay of cash instead of a major outlay in time got us these Depot unfinished cabinets to match the uppers.IMG_5065.jpeg


Several days of mock-up to confirm heights.
IMG_5072.jpeg
IMG_5069.jpeg
IMG_5066.jpeg


I was constrained between the top of the saw recess and the left hand passthrough window sill and one of them had to change before I could settle on a final counter height, which then determined the floor cleat height. I then ended up belt sanding a sliver to as much as a half inch from each of the toe kicks of the cabinets to conform to the floor waviness.
IMG_5071.jpeg

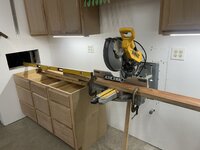
The passthrough sill was initially built to match the jobsite saw table height, but now I needed room for the counter thickness, too, so out came the sawsall and oscillating saw. I built the spiral stair with this passthrough in mind.
IMG_5073.jpeg


The six year plan is finally coming together!
IMG_5076.jpeg
 
Last edited:
OP
T

TurnipTruck

Well-known member
Joined
Aug 28, 2005
Messages
1,579
Location
Southcentral Alaska
I originally designed the bench with the potential to bury the dust collection piping under the counter behind the cabinets, but impatience and clog possibility talked me out of it.

So today I fine tuned the fits and screwed the second batch of cabinets together and down.
IMG_5077.jpeg

Straight enough.
IMG_5080.jpeg

With my final free hour this weekend, I fit and installed filler panels at each end.
IMG_5081.jpeg
(it will make more sense in a couple weeks)
 
OP
T

TurnipTruck

Well-known member
Joined
Aug 28, 2005
Messages
1,579
Location
Southcentral Alaska
So you got that paperweight home. Any updates here? Did you splurge on some more acreage?
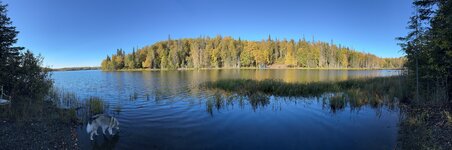
My 80yo out-of-state neighbor has just agreed to sell us half of the cove!
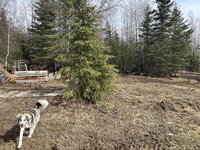
We will add the 800 feet of shoreline to the left of my little black dog.
I hope to add a gazebo surrounding a firepit where I am standing on the tip of this small peninsula, if the lake ever goes back down.
IMG_5135.jpeg
 
OP
T

TurnipTruck

Well-known member
Joined
Aug 28, 2005
Messages
1,579
Location
Southcentral Alaska
Happy New Year!
I am currently flat on my back in traction for stubbornly lifting these cabinets and countertops solo one too many times.

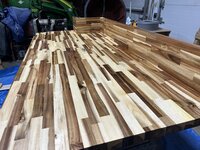
The whole reason I spaced the cabinets so far from the wall was the discovery of this pair of extra-deep 39”x72” acacia island tops. Here I’m fitting the remnants as backsplashes.
IMG_5109.jpeg

The wife suggested using up some teak oil on the tops.
IMG_5128.jpeg
IMG_5129.jpeg


Right-sized the passthrough.
IMG_5156.jpeg


Since I couldn’t find any tops longer than 6 foot, I consolidated the saw and sander (and their dust collection) together between the tops.
IMG_5165.jpeg

I fabbed up a steel leg to support the two different height tool shelves and was in the process of adding a lower split quad switched receptacle when my T10 vertebra said “alright, funny boy, it’s time to lay down for a week”.


EDIT: “…a month”.
 
Last edited:

jollygreengiant

Well-known member
Joined
Nov 10, 2013
Messages
2,362
Location
Ontario, Canada
Those countertops look beautiful!

Sorry to hear about your back though. If I've learned anything about watching my father and grandfather deal with back issues, it's actually to take it slow until things are better. I can't tell you how many times they tried to do something too early and ended up back on the couch for another week.
 
OP
T

TurnipTruck

Well-known member
Joined
Aug 28, 2005
Messages
1,579
Location
Southcentral Alaska
Did you know that you can slip on the ice and hit your skull hard enough to dislocate your jaw and not get a concussion?

Anyway, back to pulling wire for a hidden switched receptacle under the saw station.
IMG_5175.jpeg

Followed by a quick inspection by the code dog.
IMG_5176.jpeg

And a brief respite of clear coating the drawers and salvaging enough matching knobs and pulls.
IMG_5212.jpeg

Before I dared fit three walls of beadboard
IMG_5279.jpeg

Which then led to tying up the remainder of the entire shop with two coats of drying paint.
IMG_5281.jpeg

Now that the bead boards are glued up, I can finally begin testing dust collection piping routing.
IMG_5301.jpeg
 

Sumboodie

Well-known member
Joined
Mar 20, 2021
Messages
10,706
Location
AK
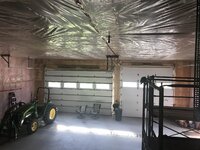
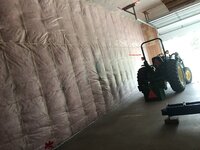
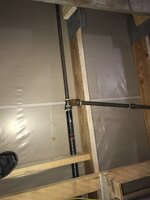
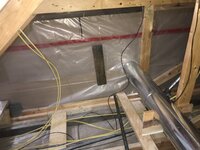
F90039D8-6F2B-46D8-AC92-261A922DFA94.jpegI had to special order a separated combustion air 80k Hot Dawg, primarily to control infiltration air, but flammable atmosphere is a minor consideration, too.C188133B-34EF-472B-971E-267AC70CAB93.jpegEighty bales gave us somewhere between R60 and R80.EA40A015-7120-4417-ACB8-8BADBEFFA8E1.jpegSome of the many things in this attic about to be covered with a couple feet of insulation: the insulated duct is a 6” fume fan exhaust; the black pipe is 1-1/4” gas line; the silver line is a 1” galvy air header; the uninsulated duct is for outside combustion air to the furnace; the flat 2x6 will be a buried walkway.
No vapor barrier?
 

Sumboodie

Well-known member
Joined
Mar 20, 2021
Messages
10,706
Location
AK
6465E800-B859-4B25-89E1-941D0ACE7B8C.jpegIn an effort to start getting all my **** off the floor and readily accessible, I took this stainless steel garage sale bench top and welded rear brackets and bolted-down front legs to it. A mis-matched pair of Home Depot Husky cabinets got their wheels and wood tops pulled off and placed on custom scribe fit steel brackets. Nothing is welded or bolted to the boxes. If I need to access the conduits or drain behind the left box, I just palletjack it up, pull out the brackets, and pull out at an angle.66060247-A064-40BD-986A-CFAD90B84578.jpegThe creepers fit underneath as if they were designed.
There is a central drain in the bench, but I doubt it will ever need a water spigot. I did plumb air back there with an auto blowdown, so regulated and unregulated air connects may appear, even if it’s only to fill the holes drilled in the top.
I have a pair of those as well. Got them just before Carona for about $300 each.
 

HogDude

Well-known member
Joined
Dec 25, 2020
Messages
229
Location
Nebraska
Did you know that you can slip on the ice and hit your skull hard enough to dislocate your jaw and not get a concussion?

Anyway, back to pulling wire for a hidden switched receptacle under the saw station.
IMG_5175.jpeg

Followed by a quick inspection by the code dog.
IMG_5176.jpeg

And a brief respite of clear coating the drawers and salvaging enough matching knobs and pulls.
IMG_5212.jpeg

Before I dared fit three walls of beadboard
IMG_5279.jpeg

Which then led to tying up the remainder of the entire shop with two coats of drying paint.
IMG_5281.jpeg

Now that the bead boards are glued up, I can finally begin testing dust collection piping routing.
IMG_5301.jpeg
...and you faced the cabinets too! Well done young man, well done!
 
OP
T

TurnipTruck

Well-known member
Joined
Aug 28, 2005
Messages
1,579
Location
Southcentral Alaska
One final mock-up with tools in place so I can measure for dust collector piping:
IMG_5300.jpeg

Glued in some cove base cuz it’s not going to get any easier after the tabletops are installed.
IMG_5308.jpeg
Fluffbutt approved the bracing and will chew on some of it later.


I wanted some sort of dust collection trough at the bottom of the saw indent, and my divine inspiration wasn’t musing until I stumbled across some 3” pipe and some foam tape and came up with this:
IMG_0994.jpeg


One last thing to install while I had easy access was this gifted lube reel that had been cleaned out and rehosed with 1/4” air line. Why not have a convenient hose reel just for low flow staplers? I had to dig pretty deep in the pipe leftovers bucket to find enough odd fittings to make it look like I know what I’m doing, then I red headed the reel to the floor. I even found a round chunk of brass to be an escutcheon!
IMG_5316.jpeg


One or two more experiments to go until the blower and cyclone get married and mounted.
 
To avoid these ads, REGISTER NOW!
Top Bottom