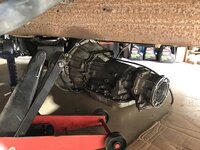
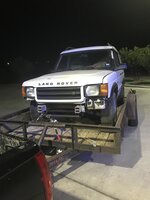
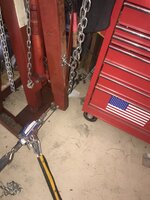
So the last piece I needed to finish before re-installing the self-rebuilt 4l60e in my 98 K1500 was to somehow un-stick the frozen front driveshaft. The rear yoke is supposed to be able to travel a few inches back and forth when the front axle moves up and down. This driveshaft may as well have just been made one length. The splines had completely frozen in the yoke. I am no doubt responsible for this since I have never greased it. But after taking it apart I would also blame the engineer who left a hole in the end of it for water to get it and be trapped since the hole is in the middle of the shaft diameter. Oh enough with assessing blame, either way it needs to be fixed.
Plan A - I got my heavy duty grease gun with some thick grease and attempted to force the yoke off by injecting as much grease in it as possible. In my head I was going to build up massive pressure and the yoke would slowly force its way off the splines. It totally felt like it was working because it became harder and harder to pump, and I did manage to displace some rust. But ultimately the pressure displaced just enough rust to create paths for the grease escape and the pressure dropped and the yoke didn't move.
Plan B - soak it in PB Blaster till it moves easily.
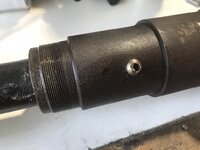
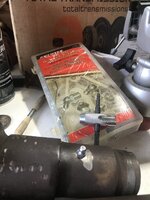
That stuff is amazing and i truly expected this to work, only issue is how to get it in there. the hole at the end only held a little and was not draining down, so my buddy helped me out by attempting to remove the zerk fitting. Since it didn't seem to have any shoulders to use a wrench he whipped out the vice grips and before you can say WTF? He had snapped to top off it.Well once I had removed the tiny spring from inside we did end up with a hole big enough for the hose on the PB can. I kept lubing it for about 3 weeks and gave it a few exploratory taps with a small persuader, but to no avail. It had not budged a millimeter.
Plan C - I have a hydraulic kit that has a hand pump and various attachments that can slowly move thing that i had previously considered immovable. I managed to unfold front of the frame of this very vehicle after I drove into the foundation of my house (long story not involving alcohol but equally as

embarrassing). I figure I can use a couple of metal plates in U shapes to go over the driveshaft one on the shaft and the other under the yoke and then us the hydraulics to push them apart and therefore push the yoke off the shaft. I hadn't quite figure out the whole plan of attack since I was coming up with is as I was checking my piles of tools in the shop. No luck. So I ran up to the house to check the garage. No luck there either. So I called my buddy who is currently tearing apart 3 trucks in the driveway. He told me to do what ultimately I will expose as Plan D which while being a better plan was also necessary since he admitted he had the hydraulics box at his house...
So On to Plan D - The U-joints are still good on this driveshaft but there is no denying they have a lot of mileage on them. You can tell this since they still have the plastic sprue hanging out of the holes from when they were manufactured for the original part. Over 200K probably should replace them. My buddy pointed out that the hole in the end of the yoke is in a type of cap that is press fit into the yoke. If I was able to remove it I could then use my press to remove the shaft the most mechanically correct way. So now I have a plan. Step one melt the plastic retaining ring that holds in the u-joint caps.
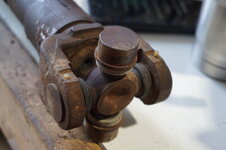
Then after a quick trip to Lowes for consumable refills of propane, mapp and oxy, little tanks. I used the mapp to heat the yokes just above the plastic melting point.
View media item 113206I would say using mapp is wiser since it doesn't allow any of the metal to get to a temperature that could distort it but in reality I used it because I haven't had much time with the oxy-acetylene setup and I didn't feel like burning down the shop today. I was very pleased with how the heating worked and moved immediately to the press to remove the U-joint while it was still hot.
Here is a blury image of pushing the first cap out

As you can see in this next image the plastic is still in the groove to retain the cap but enough was removed to let it press out.

I used a stack of bearing press adapters just smaller than the cap, I really only needed one. But if I stack them I don't have to pump the press so many times

The removed U-joint looks surprisingly good for over 200K miles.

Here is a quick shot of the yolk before I have removed the extra plastic remnants. The end cap is also in view with the "questionable" hole placement.

The third circle one the inside closest to the middle hole is the edge of the end cap. It is a bit like a freeze plug in the way that it is pressed in but not screwed or welded on. Come to think of it, it probably is a freeze plug since water could get behind it and would need a way to escape if the central hole got plugged.

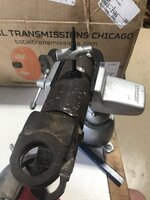
Plan D 1.0 removing the end cap. My buddy told me to find a hook small enough that I could use on the slide hammer to pull it off. So I don't have anything that small, so I screwed a decent sized desk screw through it and slammed it a few times with the slide hammer. Not luck and after having to move up a few larger screw sizes it gave up since it was starting to bow up in the middle.
Plan D 2.0 I tried inserting a masonry screw and levering it quickly with a claw hammer. That managed to break the threads off the screw.

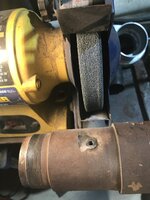
Plan D 3.0 I could use a Dremmel tool to cut across the cap in half. I was surprised at how well the disks did cutting, I was not surprised as one by one the shattered when the got too hot and ultimately didn't reach the other side and the cap didn't budge.

Plan D 3.1 Since I already had a nice slice all the way across if I could push one side down I might be able to use something to pry the high side off. Enter the Cold Chisel!
DOWN

AND OUT!

I was just admiring my handy work and thinking about how un-handy it will look when I try to put this thing back together. but I just checked the 'ol Interwebs and it turns out they sell them! It's called a slip yolk plug. No clue how to size it or order it since i have only found it for a spicer shaft so far. but at least there is hope. Who'da thunk it?

Immediately back to the press, this time with about 6 different press adapters to push.

after pumping it down a considerable amount I figured it must have broken loose and I would be able to pull the rest myself.. NOPE.

So after a trip back to the press and enough adapters to push another 4 inches. Success.
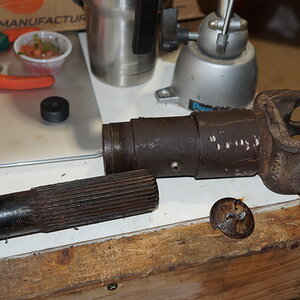
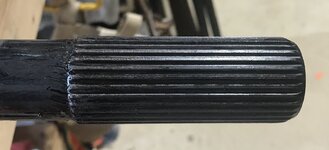
The yolk and drive shafts are now two different pieces of metal. I will be cleaning and possibly painting and then added a new U-joint and tapping for a new zerk fitting. But it is already late and the heat has taken it out of me. So that will wait for another day. But i will leave you all with a quick question if anyone knows.. How important is it that the black surface be intact on the splined end of the driveshaft? I noticed it looked like hair peeling back everywhere after putting it in the parts washer. I figured it was just black paint but my buddy says it is a special epoxy and once it is gone you should buy a new driveshaft! err... that sounds a bit off. If it really is necessary I don't see why a coating of black epoxy couldn't be done by someone with my limited skills. If anyone knows I will be doing some googling about it soon.