To avoid these ads, REGISTER NOW!

Between 705 & 1200 SQ/FT The Busted Stud and Rusty Nutz Garage

Workspaces between 705 and 1200 squarefeet.

BoxedWino

Active member
Joined
Nov 2, 2016
Messages
41
Location
Leon Springs, Texas
I have been lurking on the Garage Journal for a while now, apparently almost 5 years. I see the amazing work, creativity, time and effort put into work spaces and projects. I have seen some ongoing marvels that bring joy and camaraderie to fellow GJers and I have seen some tragic events that have brought others to an end. But they all have something in common. They all took the time to document the ride here in the forums. I have decided it is time for me to stop making excuses and just start posting. I will warn you now that if it is anything like most projects in my life it will be unfinished and sometimes ignored but hopefully I will also lavish it with the manic outpouring of effort that helps move other projects forward significantly and keeps them worth working on. Here Goes.

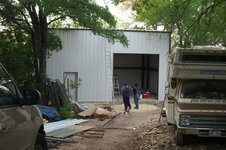
I live in my forever home just north of San Antonio, in a small area called Leon Springs. Back in the day (2006), I managed to have a 20X30X18 25X36X20 (updated to reflect reality) shop put up and since then I have collected and had donated multiple "treasures" that have accumulated in, around and in front of said shop. Since I don't have a neighbor next to me on one side and a couple of acres I seem to have let it get a little out of hand. With the help of a buddy who's wife told him to git rid of some vehicles, I have managed to create a large collection of "projects". Earlier this year my "buddy" with the extra vehicles ran power to the shop and for the first time I am able to run equipment from a wall plug. I still have extension cords running all over the place but at least they are plugged into the wall. Here is a quick glimpse of what the shop looks like as you approach. 38E77905-7CFE-4FF5-B3B2-482D92EF15B3_1_105_c.jpeg
I purposely stayed back to not put everyone off what would cold be considered to be a junk yard. There will be more embarrassing pictures to follow that will hopefully shame me into cleaning up more.

OK, well that has broken the seal, I will be posting my current project and progress soon. This one is different. I managed to promise myself not to start any more projects until I finish this one!
 
Last edited:
To avoid these ads, REGISTER NOW!

xtremek

Well-known member
Joined
Apr 13, 2012
Messages
11,603
Location
St. Johns, Mi
..........................OK, well that has broken the seal, I will be posting my current project and progress soon. This one is different. I managed to promise myself not to start any more projects until I finish this one!

Preach it on the last sentence sir. All you can do is what you can do. Make the effort, don't give up, and enjoy the ride. Count me in for the adventure.
 
OP
B

BoxedWino

Active member
Joined
Nov 2, 2016
Messages
41
Location
Leon Springs, Texas
Thanks for the welcome. This project is a little different than most. My DD is a 1998 K1500 given to me by my old college room mate as payment for driving his belongings to Idaho. I've had it for about 5 years and about 225K miles the transmission let loose on the way up my driveway. I really like that truck and I really don't like letting anyone else work on it. That being said, I am not a transmission mechanic, but I figured I could give it a try and if it doesn't work out, I can get one from the junkyard and move on. Turns out it's a good job I work from home.
 
OP
B

BoxedWino

Active member
Joined
Nov 2, 2016
Messages
41
Location
Leon Springs, Texas
After consulting with my buddy, he convinced me that a common issue on trucks like mine was the transfer case getting stuck between 2 and 4wd. In this state it would make a horrendous grinding / teeth skipping sound. I personally thought of it more as a metallic fan rubbing the shroud while having gravel thrown into it. Since neither of these sounds would come from any piece of properly working machinery I decided to give his hypothesis a test by removing the Tansfer Case Shift Encoder Motor.
1627658051220.png
It's a pretty simple task 3 bolts and an electrical connector, the truck is lifted and tall enough that even a fat guy like me can get under it without the need of any jacks. I did chock the wheels since Park seemed to be non-existent with the current state of the drivetrain. While this is the exact reason why I built a shop, the truck was parked in front of the house. So I decided to do the small task in situ. I feel comfortable mentioning this here since fellow GJrs don't judge the way others might. And to be fair, my driveway is a looping 1200 foot affair mostly hidden from the roadway and made from road base that is struggling to stay in place on the side of the limestone hill I live on. If you see me working on my truck you are probably delivering me parts from Amazon.

1627659421577.pngThe transfer case is guarded by an aluminum skid plate that immediately gave me problems since I had only brought sockets with me and these required a wrench on the back side to hold the nut. Typical. Back out from under the truck with half the lose gravel stuck in my back I got the required tools and a moving blanket to lay on. The skid plate came off without any issue, the bolts had been kept well greased by the transmission fluid that had been leaking out of the transfer case for a few years.

I removed the drain plug from the transfer case. To my surprise the fluid that came out was only slightly dark red and didn't seem to have any metallic tint of residue in it. After that I removed the motor and used a pair of channel locks to rotate the shaft fully the only way it would move. I got out from under it and started the truck and put it in gear. I was rewarded with the exact same horrible noise as before.

OK so hypothesis 1 disproven. While it doesn't prove that the New Process 243C is working fine.IMG_0502.jpeg It does prove that it is not the root if this issue. Not a total loss, I need to take the transfer case out to get to the transmission anyway. That job is something that would neither be comfortable nor wise to do on loose road base. So to the shop it must go!
 
Last edited:
OP
B

BoxedWino

Active member
Joined
Nov 2, 2016
Messages
41
Location
Leon Springs, Texas
I guess before you see the current state of the shop you should probably get the back story. I wrote some of this back in the day so there is some confusion in some of the tenses in the wording...

Having always wanted to have a place to work on projects, I finally built a shop. And much like many things in life, it didn’t turn out the way I planned. But we all must learn and adapt to new situations. I originally wanted to build a shop by hand, the way I had built the shed and deck at my previous house. After many months of being on the road for work and running the girls to their various sports activities, I realized that just because I am capable of building something doesn’t mean I am ever going to get the time to do it.

As one of the many adages that rule my life says:
“When you have the money you won’t have the time and when you have the time, you won’t have the money.”

So I ended up waiting longer and when I had plenty of money and no time at all, I ended up hiring a crew to do what I would have like to have the time to do myself. They broke ground on March 14, 2007 they removed the existing corner I had placed and set up string lines to align the concrete forms with.
image.jpeg These are the original footings that I had created, when I was planning on building it myself. As you can see it wasn't much and it sat unfinished for a couple of years.

In the background there are a couple sweet treasures, a 16HP Craftsman lawn tractor with a 3point connector on the back. The red Montgomery wards lawn tractor that just needs a few tweaks before it work perfectly again. The 70s Yamaha motorcycle that needs a few things to work again (probably an engine and chain and a couple of tires). The little storage shed was built by the previous owner and is full of interesting things. It has plywood sides and a metal roof. It has probably been there since he purchased the property in 1961.


PICT5236-scaled.jpgThese guys set up the string lines and threw as much of the dead cedar into the middle for me to burn in the burn barrel. It was very useful but only lasted till the end of the build.

image.jpeg

This is the front right side of the shop and you can see the back corner just in front of the opening in the trees in the back.


image.jpeg
Here are the first of the forms that were erected to hold back the concrete. The back of the foundation is going to be about 2-3 feet deep and the front will be about a foot. There is almost no part of this property that is flat, even the bottom of the hill has berms and gullies. On the good side anywhere you dig down you get to limestone almost immediately so it will be a solid foundation.

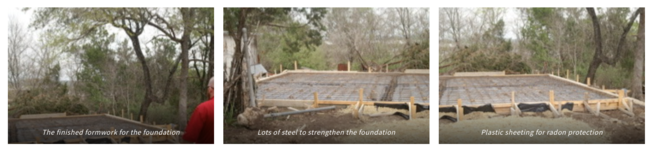
These guys move fast. It was only a couple of days and they already put in the forms, bagged the road base and created a large perimeter trench connected via two 12″ wide beams from left to right and front to back that intersect in the middle. The perimeter and beams have extra rebar in them to reinforce the foundation so any movement on this south Texas soil will not harm the concrete.

1627701620336.png

Here is a good look at the foundation ready for the pour. I did think about putting in water or power or sewer in the foundation but decided It was not something I needed in this building.image.jpeg
 

xtremek

Well-known member
Joined
Apr 13, 2012
Messages
11,603
Location
St. Johns, Mi
I have a super nice shop and bet you can't guess where I'm doing repairs today and tomorrow. That's right, in the driveway. At least the front half of the cars are on the driveway. So I completely understand your pain. Looks like you had decent contractors back then.
 
OP
B

BoxedWino

Active member
Joined
Nov 2, 2016
Messages
41
Location
Leon Springs, Texas
I have a super nice shop and bet you can't guess where I'm doing repairs today and tomorrow. That's right, in the driveway. At least the front half of the cars are on the driveway. So I completely understand your pain. Looks like you had decent contractors back then.
I'm glad I'm not alone in my misuse of spaces. I was please with these guys, one of my ex-student/employee's dad was running the crew. Pleasure to work with and a fun guy to drink a beer and listen to construction war stories with. He's retired now but I think he did a great job on the place.
 

captain14

Well-known member
Joined
Dec 19, 2012
Messages
7,063
Location
Near College Park Maryland 20740
I have a super nice shop and bet you can't guess where I'm doing repairs today and tomorrow. That's right, in the driveway. At least the front half of the cars are on the driveway. So I completely understand your pain. Looks like you had decent contractors back then.
There’s better daylight to see what your working on outside as long as it’s not raining or 1000* in direct sunlight.
 
OP
B

BoxedWino

Active member
Joined
Nov 2, 2016
Messages
41
Location
Leon Springs, Texas
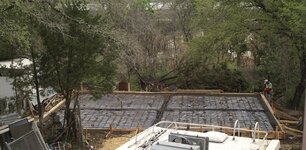
Here is a pretty good shot of the foundation just prior to pouring. You can see the channels for the beams and rim, the significant amount of bracing, the extensive use of rebar and the South Texas rebar mounts (Broken bricks) I can attest that some came from as far away as D'Hannis TX. FEDB8DB1-5107-42B8-A460-A4A9260590D4_1_105_c.jpeg
In the background those white things in the field are horse jumps and behind them a very tall and large roof over an arena. Since it was just the beginning of Spring, that view is as much as will ever be there. Any other time in the year the trees block it all out. You can just hear disembodied voices and horses hooves pounding in the sand. I've had worse neighbors (they probably haven't) ;-)

Gotta hand it to these guys, they are willing to go pretty much anywhere to get the job done.
Not sure I fancy driving backwards down a twisty rutted driveway downhill with overhanging trees. Of course had he hit anything I think the truck would take the least damage.

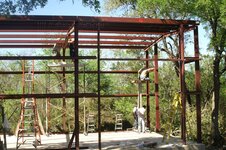
He managed to squeeze it between the junk and the old RV ready for the pour. I don't remember how many trucks were necessary but the got it done in a few hours. It cured for a few days and the iron started to move quickly. No heavy equipment involved. Mainly muscle scaffolding and a hand cranked lift for the tall beams. Other than the constant sound of conjunto music on the AM boom box, it was as quiet as construction workers can be.

1627765393453.png
1627765448673.png
1627765739734.png
1627765781468.png
Needless to say OSHA had a hard time finding the jobsite and the job got done quickly, No Florida steel toe flip flops on this job.
0ADE53A0-97F9-4588-BE29-ABE45FAEA012_1_105_c.jpeg
Insulation roofing and sheathing seemed to go faster than anything else. And while I was on the road for my job, the place was finished.
1627766182133.png
1627766193151.jpeg
The rollup door was put on that night and construction was officially finished. According to the pictures it started on March 14th finished on April 5th 2007. The weather played along and we had an awesome crew that did a great job. The only thing I would do different were I to do it again. I would had got an insulated rollup door and pulled power and water immediately to make it more useful. As it is, it has been amazing and the only issues have been my misuse of it so far. All things that can be fixed.
 
OP
B

BoxedWino

Active member
Joined
Nov 2, 2016
Messages
41
Location
Leon Springs, Texas
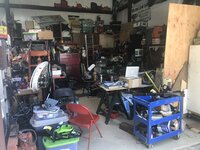
So let's just skip forwards in time till about say August of 2021. The amount of life events, unforeseen occurrences, hiccups, triumphs and tragedies that have occurred in the past 14 years is only eclipsed by the amount of "treasures" that have gravitated into and around the shop. While the word "Hoarder" has been thrown about by some with little understanding of the value of "things" I consider myself a connoisseur of previously unrecognized collectible items. My downfall in this collecting business is not a space issue as you can see I have the luxury of plenty of it. It turns out it is an organization issue. It reminds me somewhat of when I went bald around my 35th birthday. From the hair on my chin, chest, back and shoulders, it is apparent my hair has no supply problem, it is more of a distribution issue. Well before I get too far off track and start showing selfies, let me throw in a picture of the shop in it's current state of.... being.

75BF7894-D6F1-49A7-98AA-E8E6D7C23690_1_105_c.jpegEF796287-5250-478C-A9AC-B3964718D5E4_1_105_c.jpeg
These shots are from the left to right of the large door. It is crammed full of good stuff but most of it you can't get to to use.
On the left by the man door is a large table saw, a welding table, Old metal lathe, and drill press, they are all hard to get to but very useful when you do. On the right here is where I am supposed to be able to drive vehicles in to work on them.

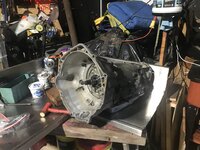
To be fair the makeshift tables on the right I put together to have an empty horizontal surface on which to rebuild the transmission and transfer case for my truck.
D23C5538-6EF3-48C4-A37E-FE9419D1D0EE_1_105_c.jpeg

I did get that finished and have since removed the tables to make room to pull the truck in to install them. Here is how it looks now...
7F52C1CA-2A5A-4C4C-88E3-DBE2753C1322_1_105_c.jpeg

The 4x8 plywood, I was keeping as part of my retirement fund, since I had purchased it for $25 6 months ago, and 2 weeks ago it was worth $115. But, sadly, lumber futures have dropped and sanity is on its way back to the building industry. So I am going to use it to make shelves in my garage to try my hand at this organization game in there too. The 4 oxygen tanks up front there are from my buddy :) He wants to use them as legs on an insanely large steel plate table on the shooting range at his ranch. He still has not come up with an acceptable, or at least safe solution for cutting them to size. For the time being i am going to get a few old cans and cover the top threads that he wants kept nice and chuck them out of the shop so I have a little more room to get around.

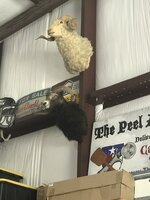
To gain a little more room at ground level and also use some of the decorating materials that I have laying around I put up probably the only RAM that will be in this shop.
A84DD2B1-65A9-4A45-B87A-586847A6C48E_1_105_c.jpeg

And finally to keep watch over my tool box, A South Texas White tail buck with a rack so narrow it would make Twiggy look buxom.
DD359997-349D-4859-8D53-FB93C2E6C3D7_1_105_c.jpeg
If I wasn't headed out to a graduation party for a good friends daughter I would be figuring out how to get the truck in now. I guess I will work that out tomorrow morning.
 
OP
B

BoxedWino

Active member
Joined
Nov 2, 2016
Messages
41
Location
Leon Springs, Texas
Matt Crawford refers to *stuff* piled outside the building as
"Yard inventory"
Nice term, the weird thing is I can still tell what each and every piece came off and how it came to be where it is. I can't necessarily tell you what its future use is but I just figure that inspiration just hasn't struck me yet.
Getting organized is the hard part. When you figure out how to do, let me know.
So far I am using pile management. I know what things are in the pile and the level within the pile that any specific thing is, based on how long ago I put that thing on the pile. So, if I just move the piles around to make space I should be able to still find stuff.
 

Jim_No_Garage

Well-known member
Joined
Jan 15, 2011
Messages
3,322
Location
Millington NJ
And finally to keep watch over my tool box, A South Texas White tail buck with a rack so narrow it would make Twiggy look buxom.
DD359997-349D-4859-8D53-FB93C2E6C3D7_1_105_c.jpeg
Nice reference to Twiggy . . . I wonder how many had to google the reference.
I admit to Googleing the Matt Crawford reference.

Nice place there . . . Keep the story coming . . .

Cheers

Jim
 
OP
B

BoxedWino

Active member
Joined
Nov 2, 2016
Messages
41
Location
Leon Springs, Texas
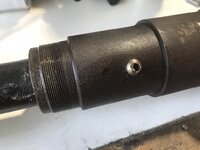
So the last piece I needed to finish before re-installing the self-rebuilt 4l60e in my 98 K1500 was to somehow un-stick the frozen front driveshaft. The rear yoke is supposed to be able to travel a few inches back and forth when the front axle moves up and down. This driveshaft may as well have just been made one length. The splines had completely frozen in the yoke. I am no doubt responsible for this since I have never greased it. But after taking it apart I would also blame the engineer who left a hole in the end of it for water to get it and be trapped since the hole is in the middle of the shaft diameter. Oh enough with assessing blame, either way it needs to be fixed.

Plan A - I got my heavy duty grease gun with some thick grease and attempted to force the yoke off by injecting as much grease in it as possible. In my head I was going to build up massive pressure and the yoke would slowly force its way off the splines. It totally felt like it was working because it became harder and harder to pump, and I did manage to displace some rust. But ultimately the pressure displaced just enough rust to create paths for the grease escape and the pressure dropped and the yoke didn't move.

Plan B - soak it in PB Blaster till it moves easily. FAABF33F-FDD7-48E3-946D-F391FF0DC7F1_1_105_c.jpegThat stuff is amazing and i truly expected this to work, only issue is how to get it in there. the hole at the end only held a little and was not draining down, so my buddy helped me out by attempting to remove the zerk fitting. Since it didn't seem to have any shoulders to use a wrench he whipped out the vice grips and before you can say WTF? He had snapped to top off it.Well once I had removed the tiny spring from inside we did end up with a hole big enough for the hose on the PB can. I kept lubing it for about 3 weeks and gave it a few exploratory taps with a small persuader, but to no avail. It had not budged a millimeter.
Plan C - I have a hydraulic kit that has a hand pump and various attachments that can slowly move thing that i had previously considered immovable. I managed to unfold front of the frame of this very vehicle after I drove into the foundation of my house (long story not involving alcohol but equally as 085C53C9-974B-4B2E-BB99-3BC5F1B847C0_1_105_c.jpegembarrassing). I figure I can use a couple of metal plates in U shapes to go over the driveshaft one on the shaft and the other under the yoke and then us the hydraulics to push them apart and therefore push the yoke off the shaft. I hadn't quite figure out the whole plan of attack since I was coming up with is as I was checking my piles of tools in the shop. No luck. So I ran up to the house to check the garage. No luck there either. So I called my buddy who is currently tearing apart 3 trucks in the driveway. He told me to do what ultimately I will expose as Plan D which while being a better plan was also necessary since he admitted he had the hydraulics box at his house...

So On to Plan D - The U-joints are still good on this driveshaft but there is no denying they have a lot of mileage on them. You can tell this since they still have the plastic sprue hanging out of the holes from when they were manufactured for the original part. Over 200K probably should replace them. My buddy pointed out that the hole in the end of the yoke is in a type of cap that is press fit into the yoke. If I was able to remove it I could then use my press to remove the shaft the most mechanically correct way. So now I have a plan. Step one melt the plastic retaining ring that holds in the u-joint caps. B513DE5A-763F-4AFF-8AAD-1927CF035C13_1_105_c.jpeg Then after a quick trip to Lowes for consumable refills of propane, mapp and oxy, little tanks. I used the mapp to heat the yokes just above the plastic melting point.
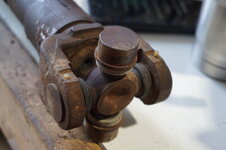
View media item 113206I would say using mapp is wiser since it doesn't allow any of the metal to get to a temperature that could distort it but in reality I used it because I haven't had much time with the oxy-acetylene setup and I didn't feel like burning down the shop today. I was very pleased with how the heating worked and moved immediately to the press to remove the U-joint while it was still hot.
Here is a blury image of pushing the first cap out

As you can see in this next image the plastic is still in the groove to retain the cap but enough was removed to let it press out.
I used a stack of bearing press adapters just smaller than the cap, I really only needed one. But if I stack them I don't have to pump the press so many times :) The removed U-joint looks surprisingly good for over 200K miles.

Here is a quick shot of the yolk before I have removed the extra plastic remnants. The end cap is also in view with the "questionable" hole placement.

The third circle one the inside closest to the middle hole is the edge of the end cap. It is a bit like a freeze plug in the way that it is pressed in but not screwed or welded on. Come to think of it, it probably is a freeze plug since water could get behind it and would need a way to escape if the central hole got plugged.

Plan D 1.0 removing the end cap. My buddy told me to find a hook small enough that I could use on the slide hammer to pull it off. So I don't have anything that small, so I screwed a decent sized desk screw through it and slammed it a few times with the slide hammer. Not luck and after having to move up a few larger screw sizes it gave up since it was starting to bow up in the middle.
Plan D 2.0 I tried inserting a masonry screw and levering it quickly with a claw hammer. That managed to break the threads off the screw.

Plan D 3.0 I could use a Dremmel tool to cut across the cap in half. I was surprised at how well the disks did cutting, I was not surprised as one by one the shattered when the got too hot and ultimately didn't reach the other side and the cap didn't budge.

Plan D 3.1 Since I already had a nice slice all the way across if I could push one side down I might be able to use something to pry the high side off. Enter the Cold Chisel!
DOWN

AND OUT!

I was just admiring my handy work and thinking about how un-handy it will look when I try to put this thing back together. but I just checked the 'ol Interwebs and it turns out they sell them! It's called a slip yolk plug. No clue how to size it or order it since i have only found it for a spicer shaft so far. but at least there is hope. Who'da thunk it?

Immediately back to the press, this time with about 6 different press adapters to push.

after pumping it down a considerable amount I figured it must have broken loose and I would be able to pull the rest myself.. NOPE.

So after a trip back to the press and enough adapters to push another 4 inches. Success.
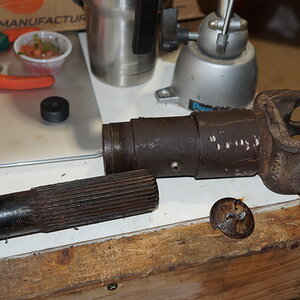
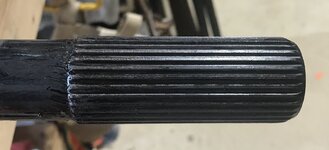
The yolk and drive shafts are now two different pieces of metal. I will be cleaning and possibly painting and then added a new U-joint and tapping for a new zerk fitting. But it is already late and the heat has taken it out of me. So that will wait for another day. But i will leave you all with a quick question if anyone knows.. How important is it that the black surface be intact on the splined end of the driveshaft? I noticed it looked like hair peeling back everywhere after putting it in the parts washer. I figured it was just black paint but my buddy says it is a special epoxy and once it is gone you should buy a new driveshaft! err... that sounds a bit off. If it really is necessary I don't see why a coating of black epoxy couldn't be done by someone with my limited skills. If anyone knows I will be doing some googling about it soon.
 

ZRX61

Well-known member
Joined
Aug 15, 2006
Messages
28,716
Location
Solar Blight Valley, SoCal
Nice reference to Twiggy . . . I wonder how many had to google the reference.
I admit to Googleing the Matt Crawford reference.

Nice place there . . . Keep the story coming . . .

Cheers

Jim
His latest book (Why We Drive) would resonate with everyone on this forum... well, except maybe those who move around in a device instead of actually drive a car :)
 
To avoid these ads, REGISTER NOW!
OP
B

BoxedWino

Active member
Joined
Nov 2, 2016
Messages
41
Location
Leon Springs, Texas
Nice reference to Twiggy . . . I wonder how many had to google the reference.
I admit to Googleing the Matt Crawford reference.

Nice place there . . . Keep the story coming . . .

Cheers

Jim
Thanks Jim, she was one of my mom's favorite models when we lived in England. Dad's was Raquel Welsh :cool:
His latest book (Why We Drive) would resonate with everyone on this forum... well, except maybe those who move around in a device instead of actually drive a car :)
Dr. Crawford has a somewhat mixed message, where he warns about the use of advanced technology that help people use things they previously would not have qualified to use. But at the same time he also uses said technology to deliver the message.

I admit I feel the same way sometimes especially when I see someone use something carelessly, that is exquisitely intricate, and that without the help of technology that they don't understand they would be hard pressed to use it. It seems that they should have no right to be using it since they don't understand how it works or give the level of respect that it deserves.

Unfortunately if this were the case I should not have been driving an automatic car until now. His book and his message did remind me a lot of a book I read years ago "Zen and the Art of Motorcycle Maintenance" Great book a but little disappointing if you are trying to figure out how to fix a motorcycle.
 

ZRX61

Well-known member
Joined
Aug 15, 2006
Messages
28,716
Location
Solar Blight Valley, SoCal
Dr. Crawford has a somewhat mixed message, where he warns about the use of advanced technology that help people use things they previously would not have qualified to use. But at the same time he also uses said technology to deliver the message.

I admit I feel the same way sometimes especially when I see someone use something carelessly, that is exquisitely intricate, and that without the help of technology that they don't understand they would be hard pressed to use it. It seems that they should have no right to be using it since they don't understand how it works or give the level of respect that it deserves.

Unfortunately if this were the case I should not have been driving an automatic car until now. His book and his message did remind me a lot of a book I read years ago "Zen and the Art of Motorcycle Maintenance" Great book a but little disappointing if you are trying to figure out how to fix a motorcycle.
I read his books, that's old technology, was nice to find the videos though.

I read Pirsig's book shortly after it was first published & enjoyed it (read it around '78). I read it again a couple of years back & thought it was a pile of pretentious ****, gave up before I finished it. Apparently I got a bit more cynical as I aged :)
 
OP
B

BoxedWino

Active member
Joined
Nov 2, 2016
Messages
41
Location
Leon Springs, Texas
Did you figure out the epoxy yet?

I did have a few useful hits on "The Googles". The defining one was this...

Anytime you have a patent involved someone is trying to make some money and it is therefore pretty serious business. From what I can tell the epoxy is really a nylon based material to help combat corrosion and to minimize friction force as the shaft slips in and out, and to cushion the splines as the gears are engaged and disengaged. All good things to have, not totally necessary, especially if you keep up maintenance and lube the joint. If I can find some spray on which won't break the bank I may give it a go, otherwise I will plan on regular maintenance and replace it if it starts to go.
 
Last edited:
OP
B

BoxedWino

Active member
Joined
Nov 2, 2016
Messages
41
Location
Leon Springs, Texas
Well that is a little embarrassing. I just had to update the thread to move it up in the size sub category. It's not that I built on, it was just that I was trying to figure out why my measurements were off compared to reality. I thought the shop was 20X30X18, but after trying to fit my truck in there to change the transmission I realized it can't be since my truck is 19'6" and would fit in with my toolbox and some cabinets in front of it. So I headed out and measured the outside with a tape. The actual measurements are 25'6"X30'6"X~20'. So I figure internally just remove the 6" and the shop is really 25X36 and damn tall.

So a quick word of warning for anyone thinking of building a shop. Think carefully of what you will be working on. When I built the shop I had a 7series BMW and an Expedition both pretty large but the shop was really for me to work on wood working and metal working projects and small English cars. At that point it was plenty big enough. I have always planned on building a second floor on one side of the building and I have made a few steps towards that as I have run out of space. The issue I have currently is that my truck is freaking huge compared to a little English sports car. I literally have to re-arrange the shop to be able to work on it if I want to be able to close the door. Another 5 or 6 feet would have been much better.

Well I can't complain I have seen too many others work with so much less. I just need to get out there and re-arrange so I can finish the truck and move on to a ton of other projects. Happy Monday Folks!
 
Last edited:
OP
B

BoxedWino

Active member
Joined
Nov 2, 2016
Messages
41
Location
Leon Springs, Texas
Got a little TX hill country two step going... Two steps Forward, and one step back.

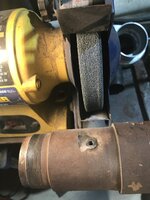
After some research into the strange coating peeling off the driveshaft splines. I have decided to clean them up and rely on the grease to keep them moving. I heated them up with the Mapp torch and brushed them with a steel brush going along the splines rather than across. The coating is pretty impressive, it didn't burn off but basically went back to a liquid state and stuck back to the splines in a thinner coat. Once it cooled off I checked it with the yolk and it slides nicely all the way from top to bottom. Success!
IMG_1011.jpeg

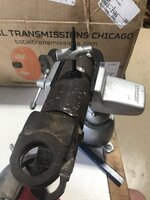
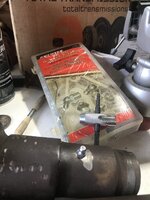
Having had the zerk fitting snap off while attempting to separate the yolk from the shaft, I decided to tackle that next. I ground down the existing one, drilled out the hole with a 7/32" and used the zero tool to tap out the hole. I'm pretty sure that the tool is made for cleaning threads rather than cutting new ones but with a some patience and the hands of an ogre I managed to get it done. After that it was a 3 hour battle to find the box of zerk fittings (ended up being in the tool box in the garage). It installed with the tool with no issues. Success #2!

IMG_1007.jpegIMG_1008.jpegIMG_1009.jpegIMG_1012.jpeg

Having melted out the plastic retainers and removed the u-joint in the yolk I went ahead and attempted to replace the u-joint. Sadly this is where things got a little out of hand. To get the u-joint in place it is necessary to take of the two opposing caps and maneuver the joint into the two openings from the inside and push in the caps from the outside. I was a little concerned that the pin bearings may not be lined up by the time the cap meets the joint, I was correct. I should have pushed the joint into the cap and done one side at a time, but I though it would be less damaging on the yolk to do both, that may be the case or I could be wrong about that. What ended up happening was that at least one bearing fell onto the wrong surface of the joint and ended up being snapped when I pushed the caps in. I could tell by how tight the fit was and how horrible it felt when I tried to rotate it. So 30 minutes later, I had removed and installed the two good caps in the yolk 3 times as practice for when the new u-joint shows up. Here is a quick note, either tape the two non-installing caps on or remove them while you install the others. I dropped both at least once and ended up picking up tiny bearings covered in dirt to put back in the caps. Like I said I am considering this practice. Failure!

IMG_1013.jpeg

In the meantime, I need to melt the retaining clips out of the other end of the driveshaft and replace the u-joints in it. After that I can tackle the rear driveshaft, those clips are at least the more conventional metal type. Things should be going faster but it is 91º F in the shop and this fat man needs to not overheat himself too much. I will head back out there after sundown and tinker a little more.
 
OP
B

BoxedWino

Active member
Joined
Nov 2, 2016
Messages
41
Location
Leon Springs, Texas
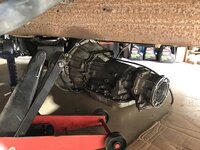
Today was the day. The day I would finally work on putting the transmission back in the truck. I have run out of excuses and other things to work on instead of doing it. The better half decided to work the weekend helping a neighbor take care of little ones. So I am running solo on a mission to right all the wrongs of making the decision to fix my own transmission. I did get some help from my Cabana tenant, he is awesome and managed to tow me into position and remove the strap so I could coast down the hill into the shop. I got mostly in and decided to leave the back tires out so I had more room to move about in front. 14532304-EE45-4652-8898-4CCF7CC68F05_1_105_c.jpeg64A98007-0688-4C13-A083-77F5AC82120E_1_105_c.jpeg
The first picture shows where the truck has been parked for the past 9 months. Under a cedar tree. Not like a nice Cedar tree that grow in other states, a horrible scrub, water stealing, allergy destroying Cedar. I ended up having to shop vac about 1 cubic foot of dead cedar droppings off the hood and windshield area.

Halloween seems to come earlier an earlier every year. It's not even September but it was definitely Halloween for me. Check out what I found under the hood of the truck...
View media item 113325The Shopvac worked very well, except for the fact that when I emptied it as far from the shop as possible, most of them were still alive and running around! Yuck.

Anyway, back to the problem at hand. How to get a transmission back in the truck.
6E5EC9F0-9633-4901-8B42-8E5373D9A332_1_105_c.jpeg

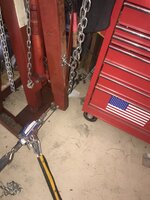
I could only lift it far enough to bell housing under with an issue, but there was no way I was going to get it up another 10" that would be required to get it under while on the jack with my buddies transmission adapter. So I had to come up with something, after checking with the experts (youtube search) I found something that was both brilliant and sketchy at the same time. Always interesting when working alone. The guy used ratchet straps wrapped around the frame rails to lift the transmission high enough to get the jack underneath. Since I had just solved my missing tow strap problem with a ratchet strap, I figured I had at least stress tested it.
8F3286B4-0146-4864-8D4F-920BD4830CD1_1_105_c.jpeg
Genius! I managed to get the jack underneath it and started getting it in place when I found out that the front to back adjuster was bent and frozen solid. There was no way I was going to be able to use it to get this transmission in place. GRRRR.
0C574C09-5C00-449E-894B-7592E8E0F4AE_1_105_c.jpeg

After another quick search on the web of wonder. I found out that Harbor freight has a "real" transmission jack. So after a quick trip I had it under the truck and used the same ratchet strap procedure to lift it off the old jack and on to the new one.
F002D0C2-A7F2-487F-9302-90F3DDC10664_1_105_c.jpeg
After working with the ratchet strap I decided to use it rather than the flimsy chain and hook that came with the jack.
Result, Transmission is lined up with the two pins and now has two bolts in it to keep it in place over night. SCORE!!!!
 
OP
B

BoxedWino

Active member
Joined
Nov 2, 2016
Messages
41
Location
Leon Springs, Texas
Since you're a pro now, when can I expect you to drop by and help throw the trans in my daughter's F-150?
As it stands now. I need to:
  • Install and torque the transmission bell housing to engine bolts and attach all the brackets.
  • Install the transfer case, mount and cross member.
  • Install the driveshafts after replacing the rest of the U-joints.
  • Install the starter and rewire it.
  • Flush the cooler and lines before hooking them back up.
  • Install the electronic shift switch and connect it to the harness after removing what is left of the original plug that is still factory glued to the harness.
  • Hook up the rest of the transmission and transfer case harness, and vent lines and fill tube.
  • Fill both transmission and transfer case with fluids.
  • Re-install the fuel lines that were attached to the bell housing bolts.

And lastly try not to cry like a baby if 10 months of work has been in vain due to missing some single item during the home rebuild of a highly complicated piece of equipment that was never meant to be serviced at home. And there we strike the chord that has been the real reason why I have been somewhat avoiding finishing this project. Putting off the inevitable judgement day.

After this I will continue with one of two lists.

If the truck is able to go into reverse and then when changed goes into drive and goes forward:
  1. Immediately claim Success!
  2. Stand with mouth open amazed that it actually works.
  3. Pretend that I knew it would work all along and only showed doubt for dramatic effect.
  4. Pinch myself to make sure it is not a dream in case I end up standing on a stage in my underwear while everyone points and laughs at my non working truck, like in all my other dreams.
  5. Park the truck in a place of prominence so everyone will know that I fixed an automatic transmission.
  6. Never drive it again in case it was a fluke that it works and might break at any second.

If on the other hand I finish it up and it won't even go into reverse or refuses to go into drive:
  • Sigh heavily.
  • Graciously admit defeat.
  • Look for the root cause of what is not working.
  • Scapegoat the weather, the work schedule, the lack of documentation available, football season for taking my mind off finishing strong.
  • Cry into the pile of empty barley pops.
  • Swear to never work on another transmission as long as I live.
  • Find a professional shop that can actually fix it.
  • Ask them to let me know where I screwed it up, (just in case I am stranded and have to fix it myself)

That is the list for my truck. I also have a few other projects that are promised (they tend to stack up after promising to not start anything else before finishing this one). With just promises to family members here is the list.

3A920D6F-5E8D-4E5F-97A3-E4F177A40EE0_1_105_c.jpeg
Better half's 2006 Hummer H3
  • replace leaking steering pump and hoses.
  • replace radiator, upper and lower hoses, thermostat, and radiator cap
  • replace valve cover gasket (a stupidly complicated job due to ***** design of air intake)
  • replace serpentine belt and tensioner
44D9D739-D6FF-4CBF-9F3B-78EEAF36C106_1_105_c.jpeg
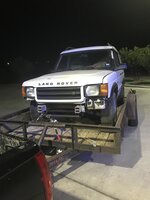
17's 2001 Land Rover Discovery Series 2
  1. Anti Lock brake mechanism re-install
  2. Head Gasket replacement
  3. 4 new tires
  4. Front bumper (find or fabricate)
  5. Interior fixes for broken or missing switches (not fixing the ash trays)
C3E73440-8FEA-4719-98C4-A046B830355E_1_105_c.jpeg
19's 1997 Ford Expedition Eddie Bauer Edition
  1. re-insall dash (buddy helped me remove 3 alarm systems from POs that were actually nothing to do with the electrical issues we had)
  2. create new mounts and secure double din stereo with wiring for rear camera and GPS.
  3. Install 10" Kicker Sub box and amp, secure with cable and camouflage with blanket.
  4. Blank out the passenger side keyhole (broken by car thief, enabled by Ford ***** design plastic handles)
  5. Install remote start alarm (too damn hot to get in vehicle during summer before AC has run for 5 minutes)
  6. re-cover seat bottom of drivers side. (Use leather thicker than the 1mm **** on the bolster that ALWAYS wears out)

Screen Shot 2021-08-22 at 12.35.47 PM.png
My 2004 Escalade ESV
  1. Pry the keys from 19's hands so she can drive her Expedition and give me back the ****-illac.
  2. Remove 2 years worth of petrified Whataburger fries from under the drivers seat.
  3. Replace the heavily leaking Front main oil seal
  4. Replace the Water Pump
  5. Replace the leaking Oil Pan Gasket
  6. Hunt down and Permanently fix the fly by wire fault between the pedal and throttle body. (problem is neither the pedal or the throttle body, both have been replaced)
BBA2D972-F672-4DB1-849A-774C1E156302_1_105_c.jpeg
Dad's 1996 Chevy Tahoe
  • Front sway bar bushings (so it doesn't sound like a pocket full of change when it hits a bump)
  • Brake job all the way round it is down to the metal on at least one corner
  • shock absorbers, the originals died around 200k miles it now has 250
  • LED headlights, the current lights are dimmer than the turn signals
  • sun visors, the current ones have been shredded by the sun
  • replace rearview mirror, the auto dark is half on and half off at all times.
  • Do something with the paint???
B5FF30F4-FBF3-4099-9984-72656A5DCE07_1_105_c.jpeg
Better Half's 1972 MGB
  • Install Master Cylinder
  • Install door trim attachments
  • tastefully replace the stereo with hidden sub, front 6" speparates and hook up Kenwood 6x9 in the back.
  • replace carpet with marine grade carpet around $200 not the $600 pre-made kits
  • Do something to the suspension so it can drive over something taller than the potholed roadbase in my driveway
  • Sell off one of the children to partially fund a new convertible canvas
  • Paint the hood with the same puke yellow it originally came in.
  • Only drive it on days when not having AC in South Texas is OK (both of them)
Screen Shot 2021-08-22 at 12.42.33 PM.png
My 1974 Jensen Healey
  • Remove and replace non working engine with working engine
  • Fix some other bits
  • Wash it
  • put it in a car show
456261E3-920A-48A5-AADE-0BE52D5A9364_1_105_c.jpeg
My 1974 Chevy Blazer
  • remove and fix turbo 350 transmission (possibly by a professional)
  • fix broken window in hardtop
  • create a hardtop removal mechanism which doesn't involve me damaging my back
  • abate some more rust on the body.
  • engine refresh, (it was running when i parked her 15 years ago)
  • Install a family cage
  • replace all seats with racing buckets that can withstand weather
  • fit with a massively over powered marine stereo with led lit speakers and sub and speakers hanging from roll cage
  • Paint it some garish color (Yamaha green)
  • Put lights all over it.
  • Drive it for a week to enjoy it one last time.
  • Sell it to some rich kid for a BUNDLE (retire to work on cars?)
300z.png
My 1984 300Z
  • Stop it from rusting in the Texas Sun
  • Replace everything rubber
  • Make it work again (It was driving when parked 10 years ago)
  • Drive it with the the windows down and T tops off to bring back the ignorance and innocence of the 80's (although from the outside I will just look like an old guy having a mid life crisis without a budget to fund it)
But once these lists are cleared, I'm up for a trip to help you out. I hope your daughter isn't in a hurry :)
So now that I have willfully spent half the day responding to your brief comment rather than working on the truck, I guess I better mosey on down to the shop and see what i can do.
 
OP
B

BoxedWino

Active member
Joined
Nov 2, 2016
Messages
41
Location
Leon Springs, Texas
With that list how many football seasons do you plan on missing?
Let Alone all the parts you have to remove and re-install after each project.
I can deal with missing pre-season, but I may need to work on some way to get the games on in the shop. I am sincerely working on removing non-necessary items from the shop so I can really use it.

Using a metal D ring bolted into the foundation, an engine lifting strap and a come along, I did actually manage to get the truck totally in the shop. But it was so tight it is impossible to work on it with the door closed so I just keep it like this over night then move it back and lift it to work on it.
IMG_1033.jpegIMG_1034.jpegIMG_1036.jpegIMG_1037.jpegIMG_1038.jpeg
So as soon as the trans project if finished I will start on the archeological dig to remove "old junk" from inside the shop.
 
To avoid these ads, REGISTER NOW!
Top Bottom