So I think I am running into the physical limitations of my Ender 3V2 - at the SMALL end of the spectrum.
One of my "hobbies" is collecting interesting pen's and mechanical pencils. I picked up a Esterbrook pen from the 50's that requires a "no longer available" refill. I found a guy online who is selling 3d printed "sabot adapters" to use a modern pen insert in this vintage pen. He has a deal with a 3d print on demand company where the "adapter" sells for $9.00 and shipping/handling is $9.99. That seemed a little steep for S&H so I went after it on my own.
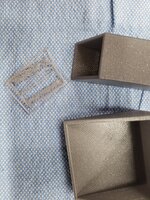
The good news is I have a non-functioning refill so I can get the critical measurements. I have been modeling the adapter in Fusion (I **** at Fusion BTW) and have been struggling with the print quality of my printer for this tiny object. This "collar" is 2.2mm tall, 5.4 mm from "tip to tip" with a 2.7 mm center bore. The trapezoidal "ears" ratchet inside the nose of the pen to extend/retract the insert - all in all it's a pretty cool mechanism.

You can see the "original" and the disaster of a printed copy below. I'm trying to get the "collar" details right and I will add the rest of the model if I can get the collar to print. I'm getting almost no definition on the angles of the "wings" - just a blob.

I might print them square and try filing to fit . . .
I'm slicing with Cura with the out of the box "Super Quality" profile - 0.12 mm layers . I've never done any prints needing this level of precision so I'm thinking I'm working outside of the capabilities of the printer.
Any input would be appreciated.
Additional information:
Printing in PLA
Factory 0.4 mm nozzle - which
@Bad Habit pointed out below could be a limiting factor
Cheers
Jim

.jpeg")
.jpeg")
")