I posted this in the Garage forum as well (KC Wrenching Society garage condo thread) but thought its appropriate to post here as well, so some of this is duplicated elsewhere.
First, this isn't necessarily the product I would have bought as its Chinese manufactured LED lighting, but my wife bought it as a birthday gift for me and I am appreciative that she made a thoughtful purchase AND I appreciate that she supports my "garage habit". Also, its certainly much better than what it was.
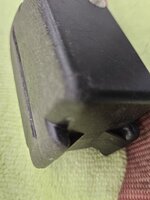
But... its Chinese and so you get to deal with the typical issues that comes with that. First, the mounting brackets that they sent were made out of a special kind of "tin foil" that doesn't hold for ****. Secondly, to mount them on overhead joists requires more effort that I want to put into it as drilling overhead through thick gauge metal isn't my idea of fun. Here's what came with the lights...
Its flimsy as hell and even worse, after I test fit the first one and then called it a night, I parked my Spyder under it and the next morning came back to find that it hadn't properly secured the light and the light fell and put a small dent in the fender of my car so now I get to make a visit to my PDR guy. $@&$#%%#! At least the light still works.
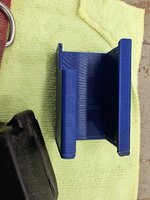
I already knew I wasn't happy with the brackets so I drew up a quick design and ran a prototype print that would better secure *and* center the lights on the joists. After I test fit the prototype, I made a few minor tweaks... here's a pic of the prototype and the final product side-by-side....
I built a collar on revised part just in case I needed to run a bolt through it for additional clamping strength, but I built some spring tension into (hard to see but it is there lol) and it seems like it has enough clamping strength and surface area contact on its own to hold with no worries.
Here's a picture of the clamp holding the light to the joist.
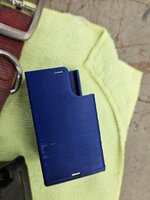
And just to satisfy the inner-nerd in me, I worked on the tolerances of the fitment to the luminaire itself and was pleased with how it came out on the first try. I might actually be getting to the point of being able to accurately measure things... finally. lol
So far, I only have two of the printed clamps pending the trial fit, I used mechanical beam clamps and ty-wraps to secure the rest of the lights for now but it is definitely much better lit than it used to be under the mezzanine. I *may* add one more row of lights at some point, and I will run EMT conduit and permanently wire the lighting before I call it good.


 The trick is to hold the cooling fins, even the sock gets pretty hot, ask me how I know .