To avoid these ads, REGISTER NOW!

The Everything 3D Printer Thread

protegeV

Well-known member
Joined
Apr 18, 2018
Messages
13,363
Location
DFW
Bought my son an ender 3 for Christmas. We've been making a lot of cool little trinkets, but where it really proved itself was the simplest thing we've made to date. A button for the e-brake on my car that broke off. The handle assembly is like $200, but $.05 worth of plastic saved the day :D
 

Attachments

  • 20200210_225003.jpg
    20200210_225003.jpg
    86.1 KB · Views: 190
To avoid these ads, REGISTER NOW!

youinreverse

Well-known member
Joined
Nov 9, 2015
Messages
128
Location
SLC
Just got an Ender 3 a few weeks ago and I’m loving it so far. I’ve upgraded it with an SKR mini board so now the motors are silent and I’ve also added yellow bed springs and a BLTouch.

This thing has been going non stop printing some socket storage solutions for me and they’re turning out great.

f0898242cc924b1a10b5f9ae4a6e0503.jpg


Sent from my iPhone using The Garage Journal mobile app
 

Attachments

  • f0898242cc924b1a10b5f9ae4a6e0503.jpg
    f0898242cc924b1a10b5f9ae4a6e0503.jpg
    249.7 KB · Views: 3

Keyblazer

Well-known member
Joined
Jul 30, 2009
Messages
1,471
Location
Irvine, CA
Very cool!

I need some of those!

Kinda new to this whole "Home 3D Printing" thing, so I have questions...

The Printer itself does not scare me... its the Design/Software side that does.
What is everyone using that is easy to learn/

I'm looking around and I like the look of the Artillery Sidewinder X1....
Anyone got one?
Opinions?
 
OP
B

BoilermakerFan

Well-known member
Joined
Apr 17, 2006
Messages
2,188
Location
Indianapolis, Indiana
The Sidewinder X1 seems well regarded by the more reputable reviews I've seen on the YT channels I subscribe to. The only thing I don't care for is the ribbon cable for the hot end/extruder. They include a spare and nobody seems to have had any issues with it, but I just don't care for it.

The Ender 3 family of printers is really hard to beat for the price points and the amount of aftermarket upgrade support for it.

My Prusa Mk2 --> Mk2.5S upgrade kit is scheduled to arrive tomorrow morning. I printed out 3 bearing holders for the Y axis today in prep for the new heatbed. After I install the new heatbed I can start printing the rest of the upgrade parts.

It will stay a MK2.5S for about a month or two... I can't order the rest of upgrade parts until early April.

And I'm kind of jonesing to build a Prusa Mini clone.
 

DuratecMan10

Well-known member
Joined
Feb 21, 2020
Messages
220
Location
Central Florida
Noob here. I'm thinking about having a big mouth air intake breather 3D printed for my car. I want an aftermarket one and Velossa Tech nor any other brands make one for my car (Mk2 Focus/Duratec 2.0.) do you think this can be done?


Sent from my iPhone using Tapatalk
 

bmxdad

Well-known member
Joined
Feb 18, 2014
Messages
2,539
Location
Puyallup, WA
Just got an Ender 3 a few weeks ago and I’m loving it so far. I’ve upgraded it with an SKR mini board so now the motors are silent and I’ve also added yellow bed springs and a BLTouch.

This thing has been going non stop printing some socket storage solutions for me and they’re turning out great.

f0898242cc924b1a10b5f9ae4a6e0503.jpg


Sent from my iPhone using The Garage Journal mobile app


Is that your design or something from Thingiverse? Link?
 

Attachments

  • f0898242cc924b1a10b5f9ae4a6e0503.jpg
    f0898242cc924b1a10b5f9ae4a6e0503.jpg
    237.4 KB · Views: 6

youinreverse

Well-known member
Joined
Nov 9, 2015
Messages
128
Location
SLC
Is that your design or something from Thingiverse? Link?
Here it is: https://www.thingiverse.com/thing:2875215

It's a really cool pattern. You open the file in OpenSCAD and edit the code with the length, diameter, and label of your sockets and it will scale it for you. Super easy!

These work well for me because my sockets are in a tool cart with shallow drawers and I don't have the height to stand them up. There wasn't really any good off the shelf solutions that worked without taking up a ton of space, so these are really nice. I used a silver sharpie to make the lettering stand out, but you could probably change filament during the last couple layers and make it even better.
 

slim01

Member
Joined
Feb 6, 2010
Messages
23
Found this recent video on the X1... I'd skip it and go with a Creslity3D printer.


Ive got 2 X1s, a version 3 and a version 4. While they do have a few issues such as the ribbon cables, there are certainly no more than any other brand.

Go on the Creality support pages on facebook and see what comes up. The CR10S Pro was going to be my first choice before doing any research but after a few weeks of watching the support pages of both brands it became obvious that the X1 was the better machine out of the box with the direct drive extruder.

With printers in this price bracket you're not going to get a faultless machine but 9 times out of 10 its the user not the machine that is the problem. As an example the extruder ribbon can burn out a couple terminals due to running a higher draw from high temp set points. I ran @ 270/280C for quite a while but I did eventually burn a ribbon out.

In hindsight I should have been running a lower temp (245/250C) and a slower print speed to compensate but I was pretty new to printers and hadnt used slicer programs before and at the time the only way I could get a nice first layer to stick was a high temp running PETG. With experience now, a 0.3 layer height, 25/30% speed and 220-240C (depending on the filament) will produce good results.

You will see a lot of questions on the Artillery pages but I do honestly believe that is mostly due to new inexperienced operators not knowing what they're doing and the experienced people very willing to help and offer advice so the new guys tend to ask more.
 
OP
B

BoilermakerFan

Well-known member
Joined
Apr 17, 2006
Messages
2,188
Location
Indianapolis, Indiana
Well, caution there too...

The Artillery support pages are heavily moderated, so they just delete negative posts or people who continually challenge the product.

No 3D printer is perfect. I've had issues with PETG first layer adhesion on my Genuine Prusa MK2 bed. That's why I'm upgrading it to a MK2.5S. The Prusa support forums tried to help me and I did finally get it working well enough to start printing my upgrade parts. And the new Mini is having teething issues, but Prusa will get the fixes pushed out to the owners.

That all said, I have a hard recommending a Prusa because of their cost. If it was a $550 printer, it would be easier to recommend, but at $750 for the kit, I think it's just too expensive for the build volume you get.

TEVO had issues out of the gate, but they have improved. Creality3D at least has a larger user base and a lot more support from the aftermarket community. But Artillery's use of the ribbon cable is a very poor application on the print head of 3D printer. That's poor design that will cause problems for you long term until you gut everything and rebuild it properly. In which case, your money could have been better spent on a printer that at least used more standard designs so they're more easily compatible with upgrading hardware.


And speaking of my MK2.5S upgrade, my box from the Czech Republic arrived yesterday:

20200305_165627.jpg


The upgrade kit, a smooth PEI spring steel sheet, and two spools of Prusa PETG.


Printed a few parts earlier:

20200306_102239.jpg


I forgot a few of the extruder upgrade parts have to be printed in black for the new filament sensor to work, so I need to reprint those with the black PETG included with the kit once I see which parts they are.


And now I'm 4 hours into the print of the new Rambo covers and cable strain relief:

20200306_153831.jpg
 

slim01

Member
Joined
Feb 6, 2010
Messages
23
The moderating is pretty good I thought, considering some of the muppets that post up Im surprised that some are left up as long as they are. Given that those pages are to assist I dont think its the problems that are being hidden, more the people and the attitudes.

Ive posted up several times myself requesting help and had no issues. Occasionally you'll get a know-it-all with a bit of an attitude but just like real life, these people are just part of life.

I think that people will always have preferences for their own reasons or bias's but that's not to say everyone is right either. I was ready to burn my 1st machine when I did the 20 pin extruder ribbon running PETG 2 287/270C.

I had no experience with 3D printers before and was a bit overwhelmed but managed to work thru it. I bought 2nd X1 which blew a power fuse mid way thru its 1st print but once fixed its been fine. I think understanding the slicing programs makes a bigger difference than which machine people use.

My prints are more practical than the baby Yoda & Groot stuff that seem to be the trend lately so mine arent as detailed. Im usually running 0.3 layer heights for my big stuff @ 240C and havent had a failed print for a while now. Occasionally on the longer and narrow prints Ive had slight adhesion issues but I dont use the glues or hairsprays. I'll just clean the bed the best I can, relevel and run the 1st layer a bit hotter with a slightly hotter bed. Im using Esun PLA+ a lot lately.
 

Attachments

  • 20200211_191047.jpg
    20200211_191047.jpg
    124.2 KB · Views: 71
  • 20200211_190736.jpg
    20200211_190736.jpg
    73 KB · Views: 78
  • 20200211_190332.jpg
    20200211_190332.jpg
    68.7 KB · Views: 69
  • 20200211_185818.jpg
    20200211_185818.jpg
    156.6 KB · Views: 74
  • 20200211_185700.jpg
    20200211_185700.jpg
    86.3 KB · Views: 70
  • 20200211_185608.jpg
    20200211_185608.jpg
    77 KB · Views: 70
  • 20200211_185557.jpg
    20200211_185557.jpg
    153.9 KB · Views: 82

slim01

Member
Joined
Feb 6, 2010
Messages
23
This is a Can Am dash face plate I made:
 

Attachments

  • 20200227_105007.jpg
    20200227_105007.jpg
    146.9 KB · Views: 86
  • 20200226_090233.jpg
    20200226_090233.jpg
    123 KB · Views: 82
  • 20200226_085931.jpg
    20200226_085931.jpg
    147.3 KB · Views: 79
  • 20200227_105437.jpg
    20200227_105437.jpg
    101.9 KB · Views: 85
  • 20200227_130246.jpg
    20200227_130246.jpg
    104.1 KB · Views: 95
  • 20200227_132144.jpg
    20200227_132144.jpg
    149.2 KB · Views: 117
  • 20200227_132243.jpg
    20200227_132243.jpg
    125.9 KB · Views: 118

bmxdad

Well-known member
Joined
Feb 18, 2014
Messages
2,539
Location
Puyallup, WA
... I think understanding the slicing programs makes a bigger difference than which machine people use ....


Spot on ... The more you understand the slicer the better your prints.

I use PrusaSlicer and love the ability to have multiple layer thickness's through out the print. Lets me have smother transitions on corners and stress points.

I have an older Mk2 MMU, but it has upgrade rails and bearings so prints pretty good.
 

bmxdad

Well-known member
Joined
Feb 18, 2014
Messages
2,539
Location
Puyallup, WA
Here it is: https://www.thingiverse.com/thing:2875215

It's a really cool pattern. You open the file in OpenSCAD and edit the code with the length, diameter, and label of your sockets and it will scale it for you. Super easy!

These work well for me because my sockets are in a tool cart with shallow drawers and I don't have the height to stand them up. There wasn't really any good off the shelf solutions that worked without taking up a ton of space, so these are really nice. I used a silver sharpie to make the lettering stand out, but you could probably change filament during the last couple layers and make it even better.

That's exactly what I was looking for, thank you ... Thingiverse needs a better indexing system. There is so much stuff that's just buried.
 

Heap64

Well-known member
Joined
Mar 17, 2006
Messages
135
Location
Illinois
The Sovol is a nice printer out of the box. I'm a nube and pretty happy so far.e444e641cd0247c71a4fda59e305339d.jpge76d840a74499fd27423faaf2d8007d4.jpg

Sent from my Pixel 3 XL using Tapatalk
 

Attachments

  • e444e641cd0247c71a4fda59e305339d.jpg
    e444e641cd0247c71a4fda59e305339d.jpg
    585.1 KB · Views: 7
  • e76d840a74499fd27423faaf2d8007d4.jpg
    e76d840a74499fd27423faaf2d8007d4.jpg
    587 KB · Views: 11

brawls43

Well-known member
Joined
Aug 29, 2012
Messages
133
Location
Minneapolis
Bought my Ender 3 back on Amazon Prime day, finally got it built up and running last weekend. Tried making the dog that comes free with it, but in my haste, I forgot to put glue stick on the mat, and it came detached near the end. So I stole a glue stick from my kids and built two imperial Mickey's. They needed supports, but still turned out pretty well without them. Now making a bunch of socket organizers for the tool box!
 

Attachments

  • IMG_20200315_083556.jpg
    IMG_20200315_083556.jpg
    149.6 KB · Views: 108
  • IMG_20200314_170458.jpg
    IMG_20200314_170458.jpg
    147.8 KB · Views: 101
  • IMG_20200314_105836.jpg
    IMG_20200314_105836.jpg
    134.3 KB · Views: 98
  • IMG_20200308_161551.jpg
    IMG_20200308_161551.jpg
    98.8 KB · Views: 106
  • IMG_20200307_122608.jpg
    IMG_20200307_122608.jpg
    90.4 KB · Views: 93
  • IMG_20200307_112254.jpg
    IMG_20200307_112254.jpg
    95.4 KB · Views: 90

WoodsTruck

Well-known member
Joined
Jan 12, 2013
Messages
1,019
I print with a "raft" with my Ender 5 and have never glued the printer bed. I did buy a glass bed to go on it but haven't pulled it out of the box yet.
 

vpd66

Well-known member
Joined
Mar 1, 2010
Messages
709
Location
Central Wisconsin
I have an Ender 3 with the same removable mat and never had a problem with PLA adhering to it. Sometimes on bigger surface area parts I have to remove the mat and flex it to get to part to release.
 

bmxdad

Well-known member
Joined
Feb 18, 2014
Messages
2,539
Location
Puyallup, WA
Has anyone tried to anneal PLA by boiling it? I have some hooks I made and was wondering if it would be worth the effort.
 
To avoid these ads, REGISTER NOW!
OP
B

BoilermakerFan

Well-known member
Joined
Apr 17, 2006
Messages
2,188
Location
Indianapolis, Indiana
Has anyone tried to anneal PLA by boiling it? I have some hooks I made and was wondering if it would be worth the effort.

From all that I have read, it does work for the most part, but the prints do not shrink evenly so you kind of have to print a part, anneal it, then measure the dimensional changes in all axis, calculate the percentages, reprint at that lose larger dimensions, anneal again, and dial it in that way to get a final part that is to the final dimensions you want.

I haven't bothered because if I need a really strong part I will print it in PETG or just plan to wrap the PLA part in cloth and epoxy it.

I've only broken one part in PLA that i didn't expect to break and that was early on with my printer. With 3 or 5 perimeters and 30%-40% 3D honeycomb infill, I haven't been able to pull apart or break anything I've printed.

My son did his science fair project on infill pattern strength last year. We only printed a test cube with one parameter skin and tested in fill patterns in the X, Y, and Z axis. Spoiler alert, rectilinear, grid, or cross hatch; however you want to say it, *****. Even in the strongest axis it was very weak. Gyroid, cubic, and 3D honeycomb are the strongest. Even just 15% infill in 3D Honeycomb would resist over 1,550 pounds of force on a 40mm cube.
 
OP
B

BoilermakerFan

Well-known member
Joined
Apr 17, 2006
Messages
2,188
Location
Indianapolis, Indiana
So it's been about a week and half since my last post...

I'll post a more detailed update in my Killing Time thread tomorrow.

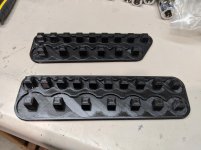
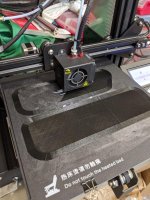
I wasn't happy with the look of the parts in the translucent green PET, so I reprinted them in the eSun purple PETG.

20200315_224331.jpg


20200315_224426.jpg


Much better. I also printed all of the extruder upgrade parts with the included Prusa black PET since I wasn't sure which parts were critical to the functionality of the IR filament sensor.


20200315_224347.jpg


Thursday I started tearing down my MK2 to upgrade it to the MK2.5S. I discovered that all of my linear bearings were bone dry. So I ended up tearing down all of the axis, pulling the bearings, cleaning them, and greasing them. I also cleaned and polished the linear rods.


20200315_224244.jpg


20200315_224222.jpg


That was more work than I had planned on, but I'm glad I spent the time to do it.


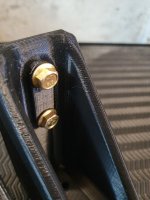
I ran into small issues along the way during the upgrade. The most annoying one was that the new MK52 heatbed required that my Y axis connector on the belt be rotated 180deg. instead of messing with that, I just pulled the whole bed carriage assembly and rails out, then rotated it 180 degrees. That way I didn't have to mess with my belt tension, which was perfect.

One unique one that I didn't discover until Thursday night was that my upgrade kit was missing the IR sensor PCB. I email Prusa right away that night since it was close to 6am Friday local Czech Republic time. They replied right away that a sensor board was being shipped to me and I had DHL tracking info by the time I woke up at 6:30am local Friday morning. They also told me how to disable the sensor in the new firmware once I had everything completed with the assembly, so I could start calibrating and printing this past weekend. I received my sensor this afternoon. I had already routed the wire and had everything in place for it, so it was super easy to install it.


Earlier I didn't think the genuine Prusa upgrade was worth it, but now that I have it all installed, I'm glad I bought the kit. I'm still planning to continue to upgrade the printer, but the money was well spent to get the new Bondtech extruder, new MK52 design 12V heatbed, and the removable steel spring build plates.


I have a lot of pictures of the process, but I'll spare you guys the pic puke unless you want to see more specific areas later...

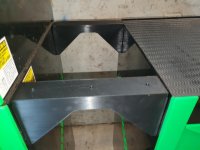
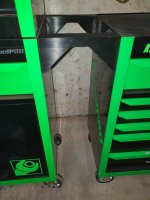
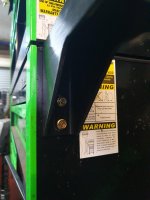
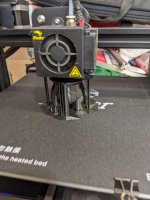
Here it as it sits right now. And one minor, easy thing I did which made a huge aesthetic upgrade was peel off the ugly, yellow warning label.


20200315_224047.jpg


20200314_130937.jpg


20200315_223924.jpg


20200315_223841.jpg


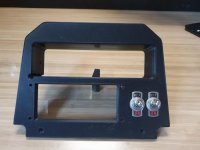
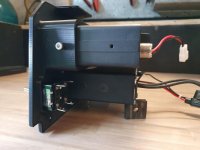
And my first print on the upgraded printer was a new purple case for the Raspberry Pi 3B for Octoprint. The RSP 3b came with the printer, but I never used it. Now i'm going to use it, so it needed a proper case.

20200315_223717.jpg


And installed I discovered that it mounts "upside down", so I spent some time on Thingiverse last night tracking down the STLs for my original black case and found them! Tomorrow or Wednesday I print a purple version of the original case.


20200315_211712.jpg


I also downloaded some other parts to add or upgrade the printer that I need to print. I have all the G-codes exported so I just need to fire it up tomorrow in the morning and get it going. After those parts are done, I will be going back and reprinting a lot of the stock black parts in the new purple. Mostly for looks, but I did discover that a lot of the parts on my printer are getting a little brittle or they just were not printed very well to begin with. Apparently this is not uncommon with the MK2 Prusa kits. They were so backlogged they didn't print for aesthetics, just functional parts. I will be reprinting for improved strength and improved aesthetic finish...


Because my printer sits on a cart in the basement under our bedroom, I'm not allowed to run the printer over night. I need to build an noise abatement enclosure to put around the printer on the cart so I can run it 24/7 if I need to. I'm going to use acoustic ceiling tiles for the inside since they abate noise, they are white & diffuse light, and most importantly; they are fire rated to prevent or slow the spread of a fire in a structure. I already have a smoke detector on our basement wall right above the printer, but having a fire rated material on the inside and within the "walls/top" of my enclosure framework is just an extra bonus. And I will be putting it on the top of my cart under the printer and a couple layers on the underside of the wood of the cart. Again, the main reason being noise abatement, but every little bit helps.


20200315_223458.jpg


The cart is perfect for the printer and my wife gave it to me when she decided she didn't want it in the kitchen anymore. I'm going to upgrade the casters to leveling casters and buy a roll of MLV to wrap around the base (going to use magnets to hold it on to the steel frame) to hide the spools and tools on the shelves, plus it will add weight to cart and help reduce vibrations. The MK2/MK2.5S will never be silent because of the drivers, but at least these mods to the cart and an enclosure for the top will help a lot.


I think the next phase of upgrades will be to source a green Bear Tall FULL upgrade frame and the taller Z axis motors with integrated screws.


Kleurrijke-Prusa-i3-MK2S-MK3-MK3S-Beer-kit-prusa-i3-mk2s-mk3-Aluminium-profiel-frame-kit.jpg_640x640q70.jpg_.webp


I waffled on going with purple or orange, or even just plain black, but the more I see the green frames "in the wild", the more I like the green.

I'm about to order a black Dragon hotend from BIQU. I'll probably order the SKR V1.4 Pro control board at the same time, but that upgrade will be done in another phase. Final phase will be converting to 24V PS and 10mm linear rods on the Y and Z axis with all new Misumi Linear rods and bearings.

Of course, all of these upgrade phases require the printing of new parts, so that's the main reason I'm doing them in phases. I want to sprinkle in fun prints or more useful prints in between the printer upgrade partss. Plus I want to make sure I get any issues or bugs resolved with each phase instead of possibly having everything change at once with major issues I can't track down a root cause for.


Oh, I'm also seriously considering an Anycubic Photon resin printer and their Wash & Cure station, but I'm just not sure I want to mess with the resins and disposal of the wash IPA contaminated with resin. The quality and speed of the high detail prints is pretty tough to ignore though.

Cheers - :thumbup:
 
OP
B

BoilermakerFan

Well-known member
Joined
Apr 17, 2006
Messages
2,188
Location
Indianapolis, Indiana
I don't have direct experience with the Bear Upgrade yet... But enough guys I respect have bought the kits and upgraded. You can find several stream builds on YT too.

I'm going to go with a clone kit because I want a green tall kit to bring the Z axis up to 320mm.

I printed more upgrades yesterday and installed them but I haven't uploaded the pics yet.
 

bmxdad

Well-known member
Joined
Feb 18, 2014
Messages
2,539
Location
Puyallup, WA
Latest print. Works pretty good to.
 

Attachments

  • sl2.jpg
    sl2.jpg
    64.9 KB · Views: 180
  • sl1.jpg
    sl1.jpg
    46.5 KB · Views: 184
  • sl.jpg
    sl.jpg
    56.2 KB · Views: 175

bmxdad

Well-known member
Joined
Feb 18, 2014
Messages
2,539
Location
Puyallup, WA
3 hour print. That's for my MP Shield 45. I also did one for a 40 Beretta double stack.
They seems to be holding up pretty well. It's what I was asking about for the Annealing. I was concerned about layer separation, but seems to be holding fine. ... so far, knock on wood.
 
OP
B

BoilermakerFan

Well-known member
Joined
Apr 17, 2006
Messages
2,188
Location
Indianapolis, Indiana
3 hour print. That's for my MP Shield 45. I also did one for a 40 Beretta double stack.
They seems to be holding up pretty well. It's what I was asking about for the Annealing. I was concerned about layer separation, but seems to be holding fine. ... so far, knock on wood.

Nice! If you do start to have layer separation just increase your nozzle temp 10degC or so...

And I broke my Prusa... :(

After I installed those upgrades the fan cover extended the side too far so the X axis wouldn't home. Threw the printer our of calibration and now it fails XYZ calibration every time on point 3 in the rear right corner diagonally opposite of home. I've tried every suggestion on the support forums and even flashed the firmware back to the original MK2.5 version.

I tore the printer apart, made sure everything was in spec and moving freely, readjusted the PINDA, changed the wire routing, anything I could think of I checked. I have a bad feeling I damaged the X axis driver or the motor. It was making a horrible racket and acted really weird until I messed with the wiring. It seems to be moving fine now except for the calibration failures.


So I think I'm about to order the BIGTREETECH BTT002 board and see if that resolves the issue. BTT002 control board


If not, then I will have to order a new X axis stepper motor. If I do that, then I'll just grab the entire stepper motor kit from Zaribo and an extra one for the MK2.5S...
 
OP
B

BoilermakerFan

Well-known member
Joined
Apr 17, 2006
Messages
2,188
Location
Indianapolis, Indiana
After trying more tips from the Prusa Support forum searches and knowledge base with zero success, I ordered the BIGTREETECH BTT002 control board tonight with the 4 TMC2209 drivers. I ordered 2 more loose TMC2209s as well so that I can move them over to a SKR V1.4 turbo board in the future if I want to. I also ordered one of the Biqu MK52 clone heatbeds in 24V. That's mostly for the future upgrade to 24V once i have the Bear Upgrade assembled with the SKR v1.4 board in the future.

I'll keep you guys posted on how it goes.
 

bdbecker

ALLIANCE MEMBER
Joined
Nov 18, 2015
Messages
5,542
Location
Iowa
Can anyone suggest a good, non-Amazon retailer for PETG filament? I'm working from home for the foreseeable future and figured it would be a good time to mess around with some prints since I can keep an eye on them. Amazon is showing delayed shipping (understandably) on non-essential items, all the way out to April 21st for filament.
 
OP
B

BoilermakerFan

Well-known member
Joined
Apr 17, 2006
Messages
2,188
Location
Indianapolis, Indiana
Oh, bdbecker, I discovered that Ratrig in the UK offers the Bear Upgrade with the printed parts in a ton of custom colors in PETG or PLA. With the strong dollar and weak pound, it's only a few bucks more and their charge for the parts is MUCH cheaper than anywhere else I've seen. For a custom color you have to buy the spool of filament but they send you the balance of the spool with the order.

I'm going to order the kit with custom printed parts this week. The kit is standard height in black, but I can get just the Bear Tall Z extensions separately from All3D later for $20 when I'm ready to order the Zaribo 320 stepper motors.
 

bdbecker

ALLIANCE MEMBER
Joined
Nov 18, 2015
Messages
5,542
Location
Iowa
Is it possible to School the rest of us on drawing up a project for input. Say a simple water tumbler for starters.

Have you tried looking for tutorials on YouTube? There is a lot of good content about how to use TinkerCAD or Fusion360 out there.
 

bdbecker

ALLIANCE MEMBER
Joined
Nov 18, 2015
Messages
5,542
Location
Iowa
Printed Solid, Matter Hackers... I can't remember if Proto-Pasta has PETG. Atomic Filament is another good one to order direct.

Thanks - I've bookmarked those sites for future reference. After posting this question, I saw that Walmart is still offering 2 day shipping so I took a chance on a spool from them, we'll see how that goes. I see that Atomic has a carbon fiber infused PETG... probably going to have to get a roll of that at some point.

Oh, bdbecker, I discovered that Ratrig in the UK offers the Bear Upgrade with the printed parts in a ton of custom colors in PETG or PLA...

I have an idea for a motorcycle part and wanted to use something a little more durable than PLA. From what I've read, PETG should run pretty well on my CR-10 S4.
 

bmxdad

Well-known member
Joined
Feb 18, 2014
Messages
2,539
Location
Puyallup, WA
Nice! If you do start to have layer separation just increase your nozzle temp 10degC or so...

And I broke my Prusa... :(

After I installed those upgrades the fan cover extended the side too far so the X axis wouldn't home. Threw the printer our of calibration and now it fails XYZ calibration every time on point 3 in the rear right corner diagonally opposite of home. I've tried every suggestion on the support forums and even flashed the firmware back to the original MK2.5 version.

I tore the printer apart, made sure everything was in spec and moving freely, readjusted the PINDA, changed the wire routing, anything I could think of I checked. I have a bad feeling I damaged the X axis driver or the motor. It was making a horrible racket and acted really weird until I messed with the wiring. It seems to be moving fine now except for the calibration failures.


So I think I'm about to order the BIGTREETECH BTT002 board and see if that resolves the issue. BTT002 control board


If not, then I will have to order a new X axis stepper motor. If I do that, then I'll just grab the entire stepper motor kit from Zaribo and an extra one for the MK2.5S...


Sounds like it's twisted. Looking down on plate, it would have rotated a degree or so, so that the plug that is sensed is to far off spec to be compensated. I did the same thing with a bed heater cover. Needed to loosen rails and realign it.
 

Heap64

Well-known member
Joined
Mar 17, 2006
Messages
135
Location
Illinois
There are so many Creality style printers out there... I'm curious, why did you choose the Sovol over an Ender 3 or a CR10?
I had heard good things about them, that they came with a few standard upgrades that saves a bit of money overall. I'm happy with it.

Sent from my Pixel 3 XL using Tapatalk
 

Retrosmith

Well-known member
Joined
Mar 31, 2011
Messages
139
Location
Texas
Can anyone suggest a good, non-Amazon retailer for PETG filament? I'm working from home for the foreseeable future and figured it would be a good time to mess around with some prints since I can keep an eye on them.

I use a fair bit of PETG. Push Plastic has decent filament at good prices if you by bulk (3kg, 10kg or 25 kg). https://www.pushplastic.com/collections/3-kg-bulk-reel Atomic's low gloss is very nice too but a little pricey.
 

Cruzan80

Well-known member
Joined
Jul 22, 2015
Messages
4,154
Location
Denver, CO
Hey Guys,

While I have been 3d printing for a while, and I have a Makerbot clone I use, I recently picked up a Prusa i3 clone for $45, since the frame was acrylic and the main part had broken. Trying to both figure out what all I have, who may have made it, and where I can talk to others who have gone about upgrading/modifying this. Best option right now I see is that someone did a CTC Prusa frame on Thingiverse, which I can print out and assemble. Supposedly everything is working fine. Figured at a minimum parts were worth $45, and if I can get a second printer working, great. Closest thing I have found is a Xi3 seems similar, but a couple of small differences. Would post pictures, but already tore the entire thing down for space.
 
To avoid these ads, REGISTER NOW!
Top Bottom