To avoid these ads, REGISTER NOW!

Above 1200 Sq/FT The Lone Beech Garage (60x46x16)

Wokspaces above 1200 squarefeet.

drivesitfar

Well-known member
Joined
Oct 23, 2013
Messages
36,079
Location
Pacific Northwest
Re: The Lone Beech Garage Build Thread (60x46)

SB: I think you'll enjoy Woody's thread and if you want to HIGH TECH your media room or home a few of the guys are picking Woody's brain and some good stuff on it lately that i don't have a clue about.

here's something interesting that might be something to look for in your truck's wobble. i had the same thing with our 2005 Honda CRV and here's what another member just PM'd me.

Originally Posted by drivesitfar View Post
SB: let us know if that might help with the wobbling cause my CRV used to wobble a bit and my mechanic changed out the front axles (twice) with after market ones cause Honda's were 3 times as much.
"do a search and see if your CRV has the same vibe problem as Accords caused bye OE pad and rotor combo."


I know your truck isn't a Honda product, but thought i'd mention that i had a similar issue and here's maybe another solution to fix yours.

I understand you not wanting to do rust prevention on your old truck, but maybe if you buy a new one some day the rust treatment might be something you'd like to attempt to keep the underside in great shape.

isn't it fun when the UPS or packages arrive?

good luck and I always enjoy your posts even if i don't have a clue what you are talking about.
 
To avoid these ads, REGISTER NOW!
OP
S

sbosecker

Well-known member
Joined
Sep 25, 2012
Messages
3,539
Location
Peachtree City, GA
Re: The Lone Beech Garage Build Thread (60x46)

...I know your truck isn't a Honda product, but thought i'd mention that i had a similar issue and here's maybe another solution to fix yours...


...isn't it fun when the UPS or packages arrive?

good luck and I always enjoy your posts even if i don't have a clue what you are talking about.

DrivesItFar,

Thanks for the ideas on the vibration!

It is great to get presents this far in front of Christmas!

As to your last line:

Thanks...
...I think. Ha!

Best regards,

Scott
 
Last edited:
OP
S

sbosecker

Well-known member
Joined
Sep 25, 2012
Messages
3,539
Location
Peachtree City, GA
Re: The Lone Beech Garage Build Thread (60x46)

Tuesday - December 5, 2017


20171205-01.jpg 20171205-02.jpg

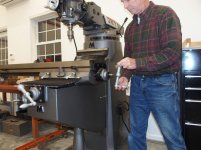
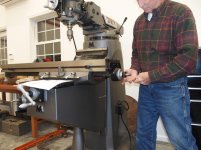
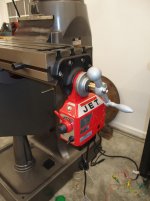
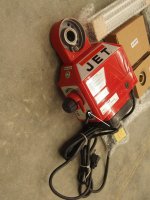
This evening I thought I'd attempt to install the X-Axis Powerfeed on the JET Mill. Looking through the - rather poor - installation instructions, there was a reference regarding where the limit stops for the powerfeed should be installed.

That's when I noticed that the existing travel stops on the Mill's table seemed to be located in odd places. The left side is about 8 inches from the end of the table and the right side is about 5 inches from the end of the table.

Obviously I'll need to put the Powerfeed's stops farther away from the ends of the table.


20171205-11.jpg

First step: Remove the right side's handle nut.


20171205-12.jpg

Now the handle comes off.


20171205-13.jpg

Remove the Dial Nut.


20171205-14.jpg

...then the dial itself. Inside the dial is a black threaded part that is separate from the dial but comes off with it.


20171205-15.jpg

At this point I found a few shims. I removed them.


Continued in next post...


Key Words: JET Milling Machine X-Axis Powerfeed Power Feed Installation
 
Last edited:
OP
S

sbosecker

Well-known member
Joined
Sep 25, 2012
Messages
3,539
Location
Peachtree City, GA
Re: The Lone Beech Garage Build Thread (60x46)

Continued...

20171205-21.jpg

I carefully removed a shaft key.


20171205-22.jpg

Everything is now out of the way so that the adapter can be removed.


20171205-23.jpg

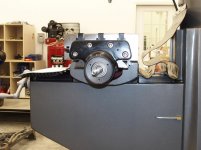
The four socket-head machine screws were removed. Note the white arrows pointing to a couple of locating pins.


20171205-24.jpg

Those pins really made removing the adapter a pain. I didn't see a good way to get any leverage from behind the adapter to help persuade it to come off. I got a puller (a long one) from my tool box. I was gentle in applying torque to the screw. The puller couldn't get a perfectly symmetric "grab" on the adapter.

The puller managed - with not much effort - to start to pull the adapter away from the table.


20171205-25.jpg

With a crack now available between the table and the adapter, I now used a couple of sharp chisels as levers to start moving the adapter slowly away from the table.


20171205-26.jpg

After a bit of work the adapter - and the bearing inside of it - were free from the table.


Continued in next post...
 
Last edited:
OP
S

sbosecker

Well-known member
Joined
Sep 25, 2012
Messages
3,539
Location
Peachtree City, GA
Re: The Lone Beech Garage Build Thread (60x46)

Continued...


20171205-31.jpg

Here's where the instructions got very fuzzy. They indicated I should place "the bushing" on the shaft. I looked in the parts bag and this rather heavy bushing seemed the most promising there...
...on the shaft; not so much.


20171205-32.jpg

I looked back in the parts bag. Great - two different bushings.

The larger one is the first one I tried.


20171205-33.jpg

The smaller of the two bushings was placed on the shaft. That looks better.


20171205-34.jpg

The Adapter Plate that came with the Powerfeed was bolted to the table.


20171205-35.jpg

The Powerfeed was attached to the Adapter Plate with two socket head screws. It should be noted that these were the first metric items that I had encountered. A 5mm Hex Wrench tightened them to the plate.


20171205-36.jpg

The Bevel Gear was now removed from its box. It had a protective black plastic cover over the gear (removed when I took the picture).

At this point one does a lot of placing-the-Bevel-Gear-on-the-shaft-and-taking-it-off as shims are placed on either side of the Bevel Gear. It took me several shim iterations to get the clearance right for the gears and the Dial.


20171205-37.jpg

The Bevel Gear on the shaft.


Continued in next post...
 
Last edited:
OP
S

sbosecker

Well-known member
Joined
Sep 25, 2012
Messages
3,539
Location
Peachtree City, GA
Re: The Lone Beech Garage Build Thread (60x46)

Continued...


20171205-41.jpg

Eventually the shimming seemed right and I tightened the Dial Nut onto the shaft.


20171205-42.jpg 20171205-43.jpg

The instructions called for the handle, a "washer" and the locking nut to be placed on the shaft. Again, the bag of parts had a couple of possibilities for the "washer". It didn't help that I assumed the order - handle, washer, nut - that had been listed in the instructions meant something.

I finally decided the "washer" the instructions referred to was a washer with a key passage on its inner diameter and that it needed to go on the shaft first. It's the silver rascal between the brass Bevel Gear and the Handle.


Although the instructions called for "packing" the Bevel Gear with an unspecified grease, I wanted to see if this thing worked. It should be noted that the gears were not "dry". There was some sort of lube from the factory already on them.

I plugged it in and turned the switch to "ON". A light came on and I selected the direction knob to the right.

It worked!

I now moved the speed knob a bit and the motion became more brisk. I selected the direction lever to neutral and then to the left. The Powerfeed obeyed the instructions and moved left.

I stopped the Powerfeed and selected right again ...and nothing happened.

I selected left and off she went. I selected right and nothing happened.

I hand cranked the table to the right and, again, tried both directions with the Powerfeed lever. It would only work to the left.
I reached down to the Limit Switch - still encased in a plastic bag at the end of its cable - and exercised the switch buttons.

No Joy: The Powerfeed would only operate to the left.

It was starting to get late at this point and I left the LBG as I had an early Doctors Appointment the next morning.


Scott
 
Last edited:

matt_i

Well-known member
Joined
Mar 14, 2008
Messages
10,758
Location
SE Michigan
Re: The Lone Beech Garage Build Thread (60x46)

Wow 3 powerfeeds! :cool: Impressive, its a shame they did not work out of the box.
Mounting those overtravel limits takes a bit of courage...typically have to drill and tap your precision acquisition with a cordless drill...!?!?!! I would add if you are considering a DRO (digital read out or direct read out) it might be worthwhile to acquire that system before permanently mounting the overtravel limits. The backside of the table can get quite "busy" with other mounting brackets for the scales and reader heads, typically also need to custom make a hard-stop to avoid crashing the scale into the column by mistake. In the end, the limit switches sometimes have to be compromised and instead of relying on the simple round posts for actuation with the switch in the dead center of the table travel, the switch body has to be mounted off-center and a set of unequal-length fingers like a weldment has to be devised. And there is also the issue of needing an actual hardstop to avoid crashing the DRO into the scale supports... This is a lot of gobbledyspeak without pics but it will make sense in time :)

I forget the greases you had on hand earlier, but I'd go with a #2 viscosity like the AW-2 replacement (was it XHP222?). The main rule of thumb I have always gone with is to sort carefully when using EP "extreme pressure" additives because those chemically dissolve or corrode bronze over a long period of time. However its highly appropriate for when there's steel on steel. I think in Mobil, the "Mobilux" family has the -EP additives.

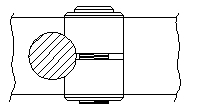
I had this other thought in relation to your lathe's tailstock. The part I think you are missing for the quill lock is a "cotter" as described by the author Guy Lautard. Basically a cylindrical clearance carved into a cylinder...e.g.

lautard5.jpg


One last thought. The dowel pins on the end-of-table bracket castings are just to hold the ends of the leadscrew in alignment with the centerline of the bronze nut hidden under the table. Ive always had success in tapping the casting evenly with a deadblow/soft mallet to release those dowels.

Great update! Its wonderful you already have a little stockpile of tooling from your other mill-drill :)
 
Last edited:
OP
S

sbosecker

Well-known member
Joined
Sep 25, 2012
Messages
3,539
Location
Peachtree City, GA
Re: The Lone Beech Garage Build Thread (60x46)

Wow 3 powerfeeds! :cool: Impressive, its a shame they did not work out of the box.

Mounting those overtravel limits takes a bit of courage...typically have to drill and tap your precision acquisition with a cordless drill...!?!?!! I would add if you are considering a DRO (digital read out or direct read out) it might be worthwhile to acquire that system before permanently mounting the overtravel limits. The backside of the table can get quite "busy" with other mounting brackets for the scales and reader heads, typically also need to custom make a hard-stop to avoid crashing the scale into the column by mistake. In the end, the limit switches sometimes have to be compromised and instead of relying on the simple round posts for actuation with the switch in the dead center of the table travel, the switch body has to be mounted off-center and a set of unequal-length fingers like a weldment has to be devised. And there is also the issue of needing an actual hardstop to avoid crashing the DRO into the scale supports... This is a lot of gobbledyspeak without pics but it will make sense in time :)

I forget the greases you had on hand earlier, but I'd go with a #2 viscosity like the AW-2 replacement (was it XHP222?). The main rule of thumb I have always gone with is to sort carefully when using EP "extreme pressure" additives because those chemically dissolve or corrode bronze over a long period of time. However its highly appropriate for when there's steel on steel. I think in Mobil, the "Mobilux" family has the -EP additives.

I had this other thought in relation to your lathe's tailstock. The part I think you are missing for the quill lock is a "cotter" as described by the author Guy Lautard. Basically a cylindrical clearance carved into a cylinder...e.g.

lautard5.jpg


One last thought. The dowel pins on the end-of-table bracket castings are just to hold the ends of the leadscrew in alignment with the centerline of the bronze nut hidden under the table. Ive always had success in tapping the casting evenly with a deadblow/soft mallet to release those dowels.

Great update! Its wonderful you already have a little stockpile of tooling from your other mill-drill :)


matt_i,

I just got back from Rome, Italy so if my post is a little "off" it may be jetlag.

Yeah...
I was trying to decide about the number of powerfeeds and then thought, "What the heck...", and pushed the 3 button.

Agree about the over-travel limits. Never having seen an installed powerfeed, I guess I was expecting something more 21st century than physical switches to limit the travel. How hard would it be to put an on-board processor that tracks gear/screw travel? Then you set a "zero" point and define two other values as "virtual" stops.

I'm an Aero-Astro Engineer by training - not a Mechanical Engineer - so I probably just wrote something incredibly stupid. Ha!

When I saw what was involved with Y & Z Axis Powerfeed Limits I started to twitch thinking about what was going to interfere with what if a DRO was installed. I think I'll check out the other two motors (they all appear to be identical), substitute a good one for the one-direction item currently mounted on the X-Axis, and then ponder the situation before mounting another motor.

I wonder if JET has one in stock somewhere with a DRO & 3 powerfeeds so I can see how they've handled the situation.

Grease: XHP222 was one of the greases I have procured.

Regarding the Tailstock Quill Lock... I am hopeful that I may have located a source for that item. However, your drawing looks pretty much as I have imagined it.

I tapped the end-of-table-bracket casting from above with a deadblow and it didn't twitch at all. The pins were not solid but were what I think are called "split roll pins". Maybe I don't know the secret hand shake necessary since, while it did come off, it didn't really come off willingly.

Thanks again for a thoughtful post.

Best regards,

Scott
 

Paul_VR6

Well-known member
Joined
Dec 27, 2012
Messages
301
Location
Oxford, Pa USA
Re: The Lone Beech Garage Build Thread (60x46)

Even a cnc that has software limits via encoder feedback will have limit switches (actual switch or proximity) for the "holy $4!t" limits. Even with the best stuff things can get lost and go "off the reservation" and the switches are cheap insurance.
 
OP
S

sbosecker

Well-known member
Joined
Sep 25, 2012
Messages
3,539
Location
Peachtree City, GA
Re: The Lone Beech Garage Build Thread (60x46)

Even a cnc that has software limits via encoder feedback will have limit switches (actual switch or proximity) for the "holy $4!t" limits. Even with the best stuff things can get lost and go "off the reservation" and the switches are cheap insurance.

Paul_VR6,

Yeah bleep happens sometimes. Ha!

Best regards,

Scott
 
OP
S

sbosecker

Well-known member
Joined
Sep 25, 2012
Messages
3,539
Location
Peachtree City, GA
Re: The Lone Beech Garage Build Thread (60x46)

Sunday - December 10, 2017


20171210-01.jpg

Here's a picture of one of the milling machine table bracket split roll pins that I was referring to in my reply to matt_i.


20171210-02.jpg 20171210-03.jpg

I started to swap the Y-Axis package Powerfeed for the faulty mounted X-Axis Powerfeed, then I noticed they weren't identical. White arrows point to the levers which are oriented differently on the X-Axis Powerfeed. The Y-Axis & Z-Axis Powerfeed motors have the same lever orientation but the faulty X-Axis's lever is different from the others. Looks like I'll have to see about a warranty replacement sooner rather than later.

While on the subject of these Powerfeeds...

Check out this video.

Note the Powerfeed when it comes completely out of the box at just before the 1 minute point. The housing is identical in shape to the JET device. During the unboxing I noted the packaging of this Align Powerfeed was identical to the JET packaging I had.

I'm pretty confident that the JET Powerfeed is made by the same folks that make the Align Powerfeed.


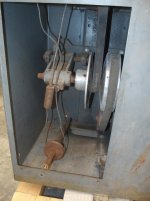
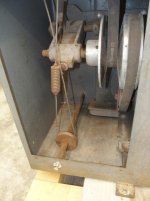
Since I couldn't do much with the JET Mill's Powerfeeds, I tried a little puzzle solving on the Rockwell Metal Lathe's Reeves Drive. When I got the machine the lower pulley and shaft were separate from the cabinet. I didn't know if there was anything else missing.


20171210-04.jpg 20171210-05.jpg 20171210-06.jpg

I grabbed a couple of 3/4-inch long 3/8"-16 bolts and washers and attempted to mount the lower pulley shaft onto the cabinet. Then I clamped the wire cable to the drive system via the clamping nut & washer. This all looked like what I had found online after searching for similar systems.


20171210-07.jpg

So I think I've got all the parts for the Reeves Drive. What I probably need to do now is to pull all of the shafts, etc. out of the cabinet. I need to get the rust off and add a little lubrication so this mechanism can function as it should.


Scott
 
Last edited:

shortykorte

Well-known member
Joined
Sep 1, 2014
Messages
8,039
Location
Tallahassee, Fl
Re: The Lone Beech Garage Build Thread (60x46)

So buy a new mill so you’ll have no problems. lol. At least you have the time to deal with the issues and the lathe to fiddle with while waiting on replacements.


Sent from my iPhone using Tapatalk
 
OP
S

sbosecker

Well-known member
Joined
Sep 25, 2012
Messages
3,539
Location
Peachtree City, GA
Re: The Lone Beech Garage Build Thread (60x46)

So buy a new mill so you’ll have no problems. lol. At least you have the time to deal with the issues and the lathe to fiddle with while waiting on replacements.

shortykorte,

Ha! Right!

At least I've got some support with the new JET Milling Machine vs. a used item. I called JET yesterday and a new X-Axis Powerfeed is on the way.

Best regards,

Scott
 
OP
S

sbosecker

Well-known member
Joined
Sep 25, 2012
Messages
3,539
Location
Peachtree City, GA
Re: The Lone Beech Garage Build Thread (60x46)

Monday - December 11, 2017


Decided to piddle with the Reeves Drive on the Rockwell 25-100 Metal Lathe today.


20171211-01.jpg 20171211-02.jpg

20171211-03.jpg 20171211-04.jpg

The two nuts holding the Motor Mount down were removed and then I blocked up the Motor Mount and removed the belt.

After I did this, to my complete surprise, I was able to pivot the Reeves Drive's linkage on the rusty shaft with ease. After exercising the linkage, I squirted some PB Blaster on the rusty shaft's sliding points just to continue the process of cleaning up the linkage a bit.


20171211-05.jpg

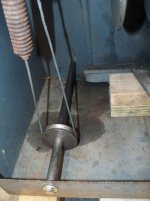
With the drive belt off the motor, I was able to easily move the Headstock's gears & selector mechanism. I checked them out more thoroughly than I had been able to in the past. Everything looked good.

With the drive belt off the motor and everything looking pretty good so far. I decided to move forward with turning this machine into a useful tool and purchase a TECO FM-201-OC Variable Frequency Drive (VFD) to power the 3-phase Rockwell 1-HP motor on the lathe.

I hope to received the VFD by early next week.

Scott
 
OP
S

sbosecker

Well-known member
Joined
Sep 25, 2012
Messages
3,539
Location
Peachtree City, GA
Re: The Lone Beech Garage Build Thread (60x46)

Tuesday - December 12, 2017

With a VFD (Variable Frequency Drive) ordered and on the way, I decided to start working on removing the motor in my lathe. When the VFD arrives I'll have the motor out where it can be bench tested.


20171212-01.jpg

The first order of business was to remove the switch that controls the motor. The switch is a Furnas FK102503.


20171212-02.jpg

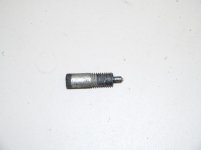
A screw on the top of the knob seemed to be the key to getting the knob out of the way so as to remove the switch mechanism. I totally removed this screw. It is more than just a set screw. It has a pin on the end of it that engages a hole in the Switch's shaft. I forgot to take a picture of this screw. I'll try to get one of it tomorrow.

Despite the total removal of the screw, I had a heck of time getting the knob off. I assumed this was due to the length of time the knob had been mounted on the shaft.


20171212-03.jpg 20171212-04.jpg 20171212-05.jpg

That may have been part of it but it also appears that "anything worth doing is worth over-doing" when it comes to mounting the knob on the shaft. I was unaware that there was a second set screw on the opposite side of the knob. An access hole allows a 1/8-inch Allen Wrench to access the set screw.


Continued in next post...


Key Words: Furnas FK102503 Drum Switch
 
Last edited:
OP
S

sbosecker

Well-known member
Joined
Sep 25, 2012
Messages
3,539
Location
Peachtree City, GA
Re: The Lone Beech Garage Build Thread (60x46)

Continued...


20171212-11.jpg

Now the Switch Mechanism could be removed from the cabinet.


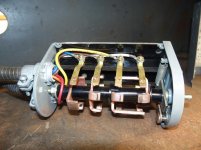
20171212-12.jpg 20171212-13.jpg 20171212-14.jpg

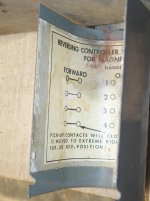
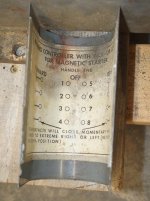
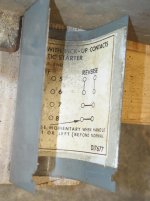
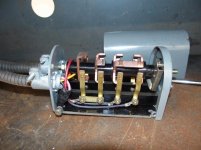
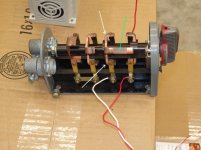
While I had the Switch Mechanism free from the cabinet, I opened it up to see how it was wired. When I did that I found some instructions glued to the switch housing.


20171212-15.jpg 20171212-16.jpg

These two pictures show the wiring on each side of the switch.


20171212-17.jpg

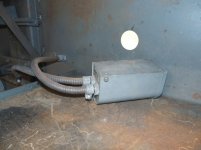
This what is inside an electrical box on the back of the Lathe's Cabinet. The 3-phase power lines entered this box and were connect to whatever the technical term is for this device.


Continued in next post...
 
Last edited:
OP
S

sbosecker

Well-known member
Joined
Sep 25, 2012
Messages
3,539
Location
Peachtree City, GA
Re: The Lone Beech Garage Build Thread (60x46)

Continued...

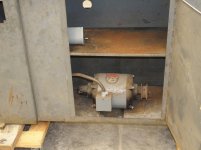
With the flexible conduit that fed the switch and motor now freed from the cabinet, I started removing the 4 nuts & bolts that mounted the motor to the cabinet.

What a PITA... the location of the motor is between the two hatches on the front of the cabinet. With the Reeves Drive on the left, a pretty long reach from the right and limited visibility... it was tedious work removing the fasteners.


20171212-21.jpg

Once I got the motor free, I was able to move it in front of the Cabinet's Door.


20171212-22.jpg

My first unobstructed view of the Data Plate on the Motor.


20171212-23.jpg

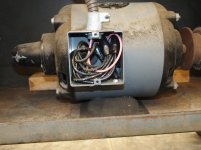
I removed the access plate from the motor's electrical box and was a bit startled by how crowded it was in there.


20171212-24.jpg 20171212-25.jpg

20171212-26.jpg 20171212-27.jpg

Comparing the numbered wires to the Motor's Data Plate, it appears my motor had been hooked up 220 volt, 3-phase power. This setup should make hooking up my VFD pretty straight forward.


Scott
 
Last edited:

AZpilot

Well-known member
Joined
Sep 29, 2012
Messages
413
Location
Mesa, AZ
Re: The Lone Beech Garage Build Thread (60x46)

One wire at a time. You have as many projects if not more than I do! Merry Christmas!
 
OP
S

sbosecker

Well-known member
Joined
Sep 25, 2012
Messages
3,539
Location
Peachtree City, GA
Re: The Lone Beech Garage Build Thread (60x46)

Wednesday - December 13, 2017


Today was mostly doing some cleanup on lathe components as well as a little maintenance on the JET Mill.


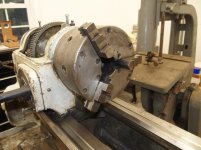
20171213-01.jpg

When the lathe's 3-Jaw chuck came out of the storage unit it was not pretty; lots of surface rust. I spent a bit of time with WD-40 & Scotchbrite pads to get the majority of the rust off. It probably would be good to tear it down and give its internals a bit of TLC.


20171213-02.jpg

The shaft and sheave inside the cabinet was another rusty item. It was removed and given the same treatment as the 3-Jaw.

The Reeves Drive's aluminum pulleys had some corrosion on the edges that I cleaned up with a Scotchbrite pad.


20171213-03.jpg 20171213-04.jpg 20171213-05.jpg

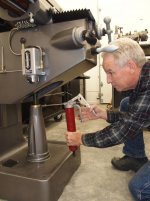
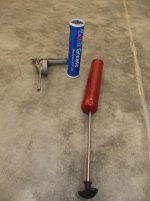
I loaded my two grease guns with the two different greases specified by the JET Mill's owner's manual. I will use the gun with the rigid tube for the knee's jackscrew and the flexible hose will be used for the gears in the head.

I'm used to greasing farm equipment and the technique I was taught was to keep pumping until the grease squirts out somewhere. I suspect that isn't necessarily the case for the JET Mill.

It did seem to work for the Knee Jackscrew but I put about 10 squeezes into the Head's gears and quit. Any thoughts on the amount of grease to squirt into the Head's gears?


20171213-06.jpg

Yesterday I mentioned the oddly elaborate set screw that was in the Lathe's Drum Switch Knob. I promised I'd get a picture of it today so here it is.


Scott
 
Last edited:
To avoid these ads, REGISTER NOW!

AZpilot

Well-known member
Joined
Sep 29, 2012
Messages
413
Location
Mesa, AZ
Re: The Lone Beech Garage Build Thread (60x46)

Is there a way to view the gears? I would think a coating on the gears would be enough. Without further guidance from the instructions.
 
OP
S

sbosecker

Well-known member
Joined
Sep 25, 2012
Messages
3,539
Location
Peachtree City, GA
Re: The Lone Beech Garage Build Thread (60x46)

Is there a way to view the gears? I would think a coating on the gears would be enough. Without further guidance from the instructions.

AZpilot

I agree... the manual just says to service it weekly when the backgears are being used.

If there's more specific information on the amount in the manual, so far I haven't seen it. I can always send an email to JET for some guidance.

Of course this thing is basically a Bridgeport clone... Bridgeports have been around for what; 70 years or so? With that much water under the bridge here must be some best practices floating around that an old head could share with me.


Best regards,

Scott
 
OP
S

sbosecker

Well-known member
Joined
Sep 25, 2012
Messages
3,539
Location
Peachtree City, GA
Re: The Lone Beech Garage Build Thread (60x46)

Thursday - December 14, 2017


My most recent eBay purchase arrived in today's mail.


20171214-01.jpg 20171214-02.jpg

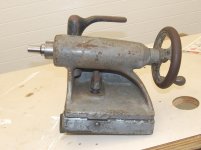
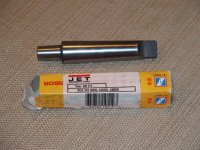
A #3 Morse Taper - #33 Jacobs Taper arbor. The Rockwell Metal Lathe's Tail Stock was reported to have a #3 Morse Taper. Looks like that's correct. The #33 Jacobs Taper is what the Drill Chuck uses that is currently on an R8 arbor on the JET Mill.


20171214-03.jpg 20171214-04.jpg

I decided to do a little rust removal on the metal lathe's Compound this evening. Specifically, the Compound's Handwheel.


20171214-05.jpg 20171214-06.jpg

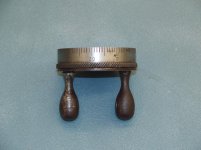
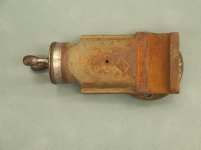
I didn't get as far along as I would have liked. The twin handles are hard to work around. They should be removable but I had no luck getting them off tonight. At least I can read the numbers on the dial now. Ha!

Plenty of rust to be knocked off this machine. I've asked for Scotchbrite pads for Christmas.


Scott
 

drivesitfar

Well-known member
Joined
Oct 23, 2013
Messages
36,079
Location
Pacific Northwest
Re: The Lone Beech Garage Build Thread (60x46)

SB: looks like you bought a NEW JET MILL that needed your expertise to work correctly. I know it's probably a pain to have to fix all the errors Jet made, but i bet you'll know more about your Mill than i would if i bought a working one. good luck

having that old lathe to work on and take up a lot of your spare time almost looks like fun as you are learning how it is put together. hopefully it will work great when you get finished and you won't find any parts missing that are UNOBTAINIUM ones.

if you might want to try electrolysis here's a thread that will show you how and i asked a ton of questions on it, but if you still have any or want to try and post up your results please do. here's the link to HOMEMADE ELECTROLYSIS

https://www.garagejournal.com/forum/showthread.php?t=237752&highlight=homemade+electrolysis

good luck with everything and i'm still watching, learning and thanking you for showing me (us) all the things you do. thanks for taking the time to document and take the pictures which are not easy to do when in the middle of a project.

cheers
 
OP
S

sbosecker

Well-known member
Joined
Sep 25, 2012
Messages
3,539
Location
Peachtree City, GA
Re: The Lone Beech Garage Build Thread (60x46)

SB: looks like you bought a NEW JET MILL that needed your expertise to work correctly. I know it's probably a pain to have to fix all the errors Jet made, but i bet you'll know more about your Mill than i would if i bought a working one. good luck

having that old lathe to work on and take up a lot of your spare time almost looks like fun as you are learning how it is put together. hopefully it will work great when you get finished and you won't find any parts missing that are UNOBTAINIUM ones.

if you might want to try electrolysis here's a thread that will show you how and i asked a ton of questions on it, but if you still have any or want to try and post up your results please do. here's the link to HOMEMADE ELECTROLYSIS

https://www.garagejournal.com/forum/showthread.php?t=237752&highlight=homemade+electrolysis

good luck with everything and i'm still watching, learning and thanking you for showing me (us) all the things you do. thanks for taking the time to document and take the pictures which are not easy to do when in the middle of a project.

cheers


DrivesItFar,

Well I knew the JET Mill would require learning things. I just thought I'd have it hooked up to electricity before that happened. Ha!

Things are coming along despite it being a busy time of the year. As far at the lathe goes, a few things are missing. So far they are small items that if I can't acquire (or make) I'm pretty sure a competent machinist could make them for me.

Thanks for the link to the electrolysis information. I have used that process on some old tractor parts. It is amazing what can be done with some electricity and some washing soda.

As to the pictures & documentation... one can have more than one goal:

1. I'm an old guy so I can forget stuff. I am grateful that in my senior years I am living in the age of the digital camera.

2. I certainly appreciate the folks that have documented various things and posted them on the internet. I hope that someday someone will see something I have documented and find the information useful.

Merry Christmas!

Scott
 
OP
S

sbosecker

Well-known member
Joined
Sep 25, 2012
Messages
3,539
Location
Peachtree City, GA
Re: The Lone Beech Garage Build Thread (60x46)

Friday - December 15, 2017

My son was available this morning so I had him help me move a few things in the LBG.


20171215-01.jpg

The reason for moving stuff was to get the Rockwell Metal Lathe moved to where I think it will be living at some point. I think this location will work. I hope to touch base with the electrician next week and, with the big machinery locations now known, he can start his work when he can fit me in.


20171215-02.jpg 20171215-03.jpg

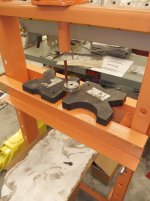
I checked with the Rockwell Lathe Yahoo Group and I was informed that the handles on the handwheels are indeed pressed on. With that information in hand, I went to the shop and set up the shop press. A properly sized punch coupled with a few strokes of the hydraulic jack and the handles dropped down into my "catcher".


20171215-04.jpg

...and this is after a considerable amount of effort yesterday. Ha!


20171215-05.jpg

I mounted each handle in the drill press's chuck and applied Scotchbrite as it spun around. They cleaned up pretty quickly.


20171215-06.jpg 20171215-07.jpg

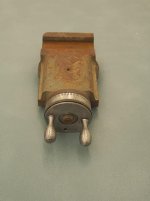
I used a Dead Blow Hammer to start the handles back into the handwheel. Then I used the shop press to set them all the way into the handwheel.


Continued in next post...

Keywords: Removing installing Handles from a Lathe Handwheel Hand Wheel
 
Last edited:
OP
S

sbosecker

Well-known member
Joined
Sep 25, 2012
Messages
3,539
Location
Peachtree City, GA
Re: The Lone Beech Garage Build Thread (60x46)

continued...


20171215-11.jpg

Well that looks better.
Of course I could take this a lot farther but the goal is just to clean things up a bit.


20171215-12.jpg

I installed the handle back onto the Compound just to make sure everything still worked properly.


20171215-13.jpg

I removed the handwheel and worked on cleaning the rust off the compound. Again, much more could be done but the compound is in a much better state that it was 24 hours ago.


Scott
 
Last edited:

250

Well-known member
Joined
Oct 16, 2014
Messages
537
Location
West of the Sierras
Re: The Lone Beech Garage Build Thread (60x46)

Things are looking pretty good. A personal practice of mine, generally not by choice, is to have a couple different projects going so there is always something to do. Looks like you're subscribing to that as well.

I've had some success with the e-tank, the only real down sides are some objects are hard to get wired up or just plain fit, and the time to cook. I can't remember if I've seen a blast cabinet in your shop or not. If not, might be something to look into. I've really enjoyed mine this last year and has saved hours and hours of cleaning.
 
OP
S

sbosecker

Well-known member
Joined
Sep 25, 2012
Messages
3,539
Location
Peachtree City, GA
Re: The Lone Beech Garage Build Thread (60x46)

Things are looking pretty good. A personal practice of mine, generally not by choice, is to have a couple different projects going so there is always something to do. Looks like you're subscribing to that as well.

I've had some success with the e-tank, the only real down sides are some objects are hard to get wired up or just plain fit, and the time to cook. I can't remember if I've seen a blast cabinet in your shop or not. If not, might be something to look into. I've really enjoyed mine this last year and has saved hours and hours of cleaning.

250,

Thanks - I'm having a pretty good time!

While I often have quite a few balls in the air, this particular moment seems worse than usual. I fault the completely random $200 Metal Lathe showing up on Craigslist a few days after the ordering of the JET Milling Machine.

Ha!

I have a blasting cabinet in the basement of my house. It was another Craigslist acquisition that has some issues. The lighting ***** and it leaks media. Also I would need to drag my portable air compressor down to the basement to use it.

The cabinet would need to be drug outside to use it and it's a bit brisk outside at the moment here in Georgia. Also I would have to break down the compound and/or whatever other item I needed to blast to keep the media out of the working parts. Certainly I may get to the point in the future that using the cabinet makes sense but, for now, I'm sticking with the Scotchbrite and WD-40.


Merry Christmas!

Scott
 
OP
S

sbosecker

Well-known member
Joined
Sep 25, 2012
Messages
3,539
Location
Peachtree City, GA
Re: The Lone Beech Garage Build Thread (60x46)

Saturday - December 16, 2017


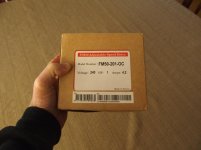
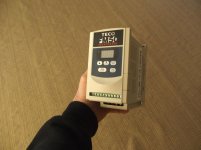
This morning I had an email notice that indicated my eBay purchased TECO FM50-201-OC Variable Frequency Drive would be delivered today.


20171216-01.jpg 20171216-02.jpg

Late afternoon another email arrived indicating the package had been delivered. I looked around outside on my porch and saw nothing so I went to the mailbox. It was in there; I was surprised how small it was.

Now came the real dilemma. Did I have enough time to hook this up - and get cleaned up - before the neighborhood Christmas Party started at 6:00?


20171216-03.jpg

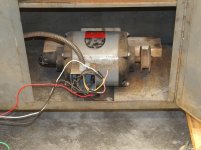
My Y-Chromosome kicked in with a "What could possibly go wrong?" attitude and I headed out to the LBG. The wires were hooked up to the motor.


20171216-04.jpg

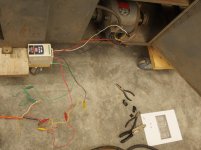
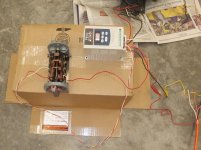
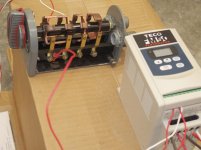
Then the wires were hooked up to the VFD and the temporary power supply. Would this thing really allow this 220 volt 3-phase motor to be run on single phase 220 volt power?


20171216-05.jpg

I plugged in the 220 volt plug. The VFD's display started blinking. She's alive!

I pushed the RUN button.

The VFD's default start is at 5 Hz so the motor was running at about 144 rpm or a bit over 8% of normal RPM. I ran it at that speed for 10 to 15 seconds then I brought the VFD to 30 Hz (half speed) which is depicted in the picture. A little bit of time at that speed and then I ran it up to 60 Hz which would be the normal 1725 rpm operating speed.

Pretty tickled that the motor seemed to be OK, I shut things down and ran back to the house to get ready for the Christmas Party.

I hope to try again tomorrow and this time I'm going to try to have the motor power the lathe.

Should be interesting.


Scott
 
Last edited:

drivesitfar

Well-known member
Joined
Oct 23, 2013
Messages
36,079
Location
Pacific Northwest
Re: The Lone Beech Garage Build Thread (60x46)

SB: congrats on the initial VFD success!!

have fun at your Christmas party and all this shop stuff will be there when you have time to return.

i love your attitude about taking pictures and documenting all the things you do cause i bet it helps a ton of us and might even help you looking back to find out what you did in the past on certain things.

cheers
 
OP
S

sbosecker

Well-known member
Joined
Sep 25, 2012
Messages
3,539
Location
Peachtree City, GA
Re: The Lone Beech Garage Build Thread (60x46)

SB: congrats on the initial VFD success!!

have fun at your Christmas party and all this shop stuff will be there when you have time to return.

i love your attitude about taking pictures and documenting all the things you do cause i bet it helps a ton of us and might even help you looking back to find out what you did in the past on certain things.

cheers


DrivesItFar,


The party was fun and the shop was still there when I came home. Ha!

Pictures... certainly the latter (a lot!). I certainly would also be pleased if the posted information is of use to others.

Best regards,

Scott
 
OP
S

sbosecker

Well-known member
Joined
Sep 25, 2012
Messages
3,539
Location
Peachtree City, GA
Re: The Lone Beech Garage Build Thread (60x46)

Sunday - December 17, 2017


Yesterday I had forgotten that I had planned to use this afternoon to do some plumbing maintenance in my house. That maintenance cut into my time working on the Metal Lathe's power setup today.

It was after supper before I got a chance to get out to the shop. This delay may have been fortuitous as it gave my subconscious some time to chew on the situation.

I had planned to put the lathe's motor on to its mount, hook up the belts and put the juice to it and see how many teeth I stripped off the gears in the headstock.

However I now realized that the location of the motor's electrical box made making wiring changes extremely difficult after the motor was on its mount in the cabinet. If possible it would be best to wire it, mount it and be done with it.

I went over to a local Home Depot just before they closed this evening to try to get Black, Red, Blue & Green 14 gauge solid THHM wire.

Well, 3 out of 4 isn't bad. Blue appears to be unobtainium at the big box stores in my neighborhood. I came home and found some blue wire on eBay for a reasonable price. I pushed the Buy It Now button. The bad news is I have to wait a few days for the blue wire to arrive.

Yes I know the lathe's motor doesn't know what color the wire is but I'd prefer to do this in accordance with I believe is convention for 3-phase wiring. That may help the next guy that gets this machine.

Still, there are things I can do to move the project forward and I went out to the LBG to do that.

Pretty much all of the existing wiring will be superfluous with the VFD running the show. Time to start removing stuff. I pulled all the power wires out of the motor's electrical box. All those wires led to the Drum Switch.


20171217-01.jpg 20171217-02.jpg 20171217-03.jpg

The Drum Switch's wiring was removed.


20171217-04.jpg 20171217-05.jpg 20171217-06.jpg

The wires leading to the Magnetic Switch were all pulled out of the cabinet and the Electrical Box that held the Magnetic Switch was removed. The black arrow shows the location where the conduit entered the Electrical Box.


20171217-07.jpg

I started to leave the shop for the night but then I remembered something. When I hooked up the VFD to the motor yesterday my recollection was that the motor had run counter-clockwise (looking at the pulley). When I thought about that I was pretty sure that when the motor was hooked up to the lathe's belts that the lathe would be running in reverse.
I decided to hook up the motor again to the VFD to see if I was remembering correctly. Sure enough, when I hooked up the VFD and pushed run, the motor ran counter-clockwise.

I unplugged my power from the wall socket, switched the black & red wires, and plugged the power back in. Now the motor ran clockwise.

That was it for tonight. I'm looking forward to getting the blue wire in the mail in a few days.


Scott
 
Last edited:
OP
S

sbosecker

Well-known member
Joined
Sep 25, 2012
Messages
3,539
Location
Peachtree City, GA
Re: The Lone Beech Garage Build Thread (60x46)

Tuesday - December 19, 2017


I had been wondering if I can use my existing Drum Switch to control the VFD's ON/OFF Forward/Reverse functions. I thought it would be nice if I could retain the "original" look of the lathe for these functions. The TECO TM50's manual certainly seemed to suggest that was possible. However, when I looked at the contacts on the Drum Switch it looked like I wouldn't be able to isolate the two functions since the drum switch made multiple contacts on each side of the switch in one of its three positions (Forward/Off/Reverse).


15-16.jpg


I thought maybe I could rotate the Drum Switch's last row of contacts 45 degrees and achieve my goal. I did a Google search "Drum Switch Modification" or something like that and I came across this schematic.

For some reason looking at this schematic allowed my brain to solve the problem while looking right at the switch caused me to not be able see the forest for the trees.

When I had the Drum Switch in my hand I was trying to see a way to hook my wires on opposite sides of the switch to accomplish my goals. The schematic allowed me to see I needed to hook one set of wires like that but the other pair should be hooked up on the same side of the switch.

That sure seemed like the solution.


20171219-01.jpg

I went out to the shop this evening with some bell wire left over from wiring up the LBG's Garage Door Controllers and hooked up the Drum Switch to the #3 (Forward), #4 (Reverse) & #5 (Common) terminals on the TECO FM50.


20171219-02.jpg 20171219-03.jpg

In these pictures the Drum Switch is in the "OFF" position with none of the contacts touching. If the Drum Switch is rotated counter-clockwise to the "FORWARD" position, the large copper contact (Green Arrow) touches the two contacts and completes the circuit between the VFD's #3 & #5 terminals. This tells the VFD to spin up the motor in the FORWARD direction.

If the Drum Switch is rotated clockwise, the white arrows point to the two large copper contacts that touch the common contact on this side of the switch and the contact wired to the VFD's #4 terminal on the opposite side. Completing that circuit tells the VFD to spin up the motor in the REVERSE direction.

So, after wiring up the VFD as described and pictured, I plugged in the power and flipped the Drum Switch's knob to FORWARD.

Nothing happened.

I pushed the RUN button on the VFD's keypad and the motor spun up in the forward direction. I rotated the Drum Switch back and forth which had absolutely no effect on the motor.

I shut down the power ...what did I do wrong? It took a couple of minutes before I remembered seeing a function in the FM50's manual that switched the motor controls from the VFD's keypad to external controls.

I flipped through the manual and... yes, here it is: F10.

F10=0 puts the Keypad in control of the motor.
F10=1 puts external controls in control of the motor.

I entered 1 into the F10 data and exited the data entry mode.

I turned the Drum Switch to FORWARD. The motor sprung to life!

I let it spin up to full speed clockwise and then returned the Drum Switch to the OFF position. The motor spun down to a stop.

Cool.

I turned the Drum Switch to REVERSE. The motor responded to the command by smartly spinning up in the counter-clockwise direction.

REALLY Cool!

I went back and forth a few times and then shut things down for the night.


Scott


Keywords: TECO FM50 VFD Wiring A Drum Switch Forward Reverse On Off How to wire a drum switch to a VFD
 
Last edited:

drivesitfar

Well-known member
Joined
Oct 23, 2013
Messages
36,079
Location
Pacific Northwest
Re: The Lone Beech Garage Build Thread (60x46)

SB: i'm kicking up your thread to maybe get a few more eyes on it since you are asking questions i don't have the answer to.

also i think you know already that there are a few Sparkies here on GJ and i've heard the electrical section is amazing if you might want to start a thread or read about your power issues over there.

good luck
 

250

Well-known member
Joined
Oct 16, 2014
Messages
537
Location
West of the Sierras
Re: The Lone Beech Garage Build Thread (60x46)

Nice choice on the FM-50. I've got a couple myself. And, as you've discovered, you can fire up an unknown motor/machine at a controlled rate and work your way up to full speed.

Merry Christmas to you as well.
 
OP
S

sbosecker

Well-known member
Joined
Sep 25, 2012
Messages
3,539
Location
Peachtree City, GA
Re: The Lone Beech Garage Build Thread (60x46)

SB: i'm kicking up your thread to maybe get a few more eyes on it since you are asking questions i don't have the answer to.

also i think you know already that there are a few Sparkies here on GJ and i've heard the electrical section is amazing if you might want to start a thread or read about your power issues over there.

good luck

DrivesItFar,

Thanks! I think I'm getting it sorted out.

Best regards,

Scott
 
OP
S

sbosecker

Well-known member
Joined
Sep 25, 2012
Messages
3,539
Location
Peachtree City, GA
Re: The Lone Beech Garage Build Thread (60x46)

Nice choice on the FM-50. I've got a couple myself. And, as you've discovered, you can fire up an unknown motor/machine at a controlled rate and work your way up to full speed.

Merry Christmas to you as well.


250,

The FM50 will really get tested when I get the motor hooked up to the lathe's power train. The wire I'm waiting for won't arrive until tomorrow at the earliest. Lot's of social events this weekend so it will be Monday afternoon at the earliest before I get a crack at running the lathe under power.

I'm looking forward to that!

Best regards,

Scott
 
OP
S

sbosecker

Well-known member
Joined
Sep 25, 2012
Messages
3,539
Location
Peachtree City, GA
Re: The Lone Beech Garage Build Thread (60x46)

Friday - December 22, 2017


Last night I had just a little free time to kill. I went out to the shop and looked around for some small project.


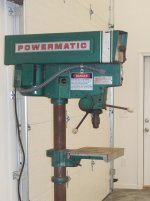
20171221-01.jpg 20171221-02.jpg

The Powermatic 1150 Variable Speed Drill Press that I had acquired over a year ago had been sitting patiently near my tractors waiting for some attention. Since I was considering having the Jacobs 633C Drill Chuck mounted on this drill press to also be used in the Rockwell Metal Lathe's Tailstock, I decided to see about cleaning the rust off the chuck.

I started the drill press and wrapped a length of ScotchBrite around the chuck.

What a transformation! In just a minute or so the rusty chuck was once again (somewhat) shiny.

I came into the house for the night and spent some time on the internet checking on how to remove this drill chuck from the drill press. That actually was more of a chore than I expected. Oh there were explanations but they seemed incomplete, vague or the author assumed knowledge that his reader didn't have. Part of the issue is the other drill presses (Delta) I had dealt with had a completely different system for removing a chuck from the spindle.


20171222-03.jpg 20171222-04.jpg

Today I returned to the Drill Press.

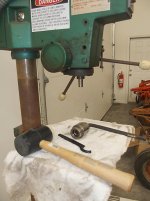
This Powermatic has a collar that one uses a tool - I used this spanner wrench - to rotate said collar down towards the top of the chuck. [The collar has a conventional right-hand thread.] While wrenching the collar down towards the chuck, I held the drive pulley to keep the spindle from spinning. Normally when the collar reaches the top of the chuck the pressure of the collar drives the chuck off the spindle's JT33 taper. This did not happen.

Not totally unexpected since I wouldn't be surprised if this chuck has EVER been removed from the drill press in its 40 or so year life.


20171222-05.jpg 20171222-06.jpg

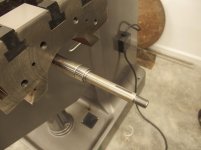
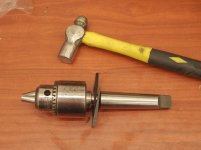
The solution to this unwillingness of the chuck to leave the taper is to chuck a large Allen wrench - mine was a 1/2-inch - and then whack it with a rubber mallet. A couple of whacks and the chuck was free.

However, I had assumed the collar was independent of the chuck. I thought it was just a device to drive off the chuck and, once free of the taper, the chuck would fall away.

Instead, the collar held onto the chuck and I continued to rotate the collar until the chuck and collar came off the spindle.


20171222-07.jpg

I looked into the collar and now I could see that it was being held onto the chuck by a snap ring (White Arrow).


Continued in next post...

Keywords: Removing a Jacobs 633C Chuck from a Powermatic 1150 Drill Press
 
Last edited:
OP
S

sbosecker

Well-known member
Joined
Sep 25, 2012
Messages
3,539
Location
Peachtree City, GA
Re: The Lone Beech Garage Build Thread (60x46)

Continued...


20171222-11.jpg

A little work with a snap wring pliers and the chuck was free from its collar.


20171222-12.jpg 20171222-13.jpg 20171222-14.jpg

I cleaned the chuck's internal taper with some acetone and a rag. I also cleaned the recently acquired JT33 to MT3 arbor's tapers. I slapped the various components together and exercised the assembly mounted in the Tailstock.


20171222-15.jpg 20171222-16.jpg

Satisfied that everything mated together as it should, I grabbed a set of #6 Jacobs Wedges and inserted them between the arbor and the chuck. A rap with the hammer and the chuck & arbor parted ways.

At this point I quit for the day.


Scott
 
Last edited:
To avoid these ads, REGISTER NOW!
Top Bottom