To avoid these ads, REGISTER NOW!

Above 1200 Sq/FT The Lone Beech Garage (60x46x16)

Wokspaces above 1200 squarefeet.
OP
S

sbosecker

Well-known member
Joined
Sep 25, 2012
Messages
3,539
Location
Peachtree City, GA
Continued..


20190411-11.jpg 20190411-12.jpg

20190411-13.jpg 20190411-14.jpg

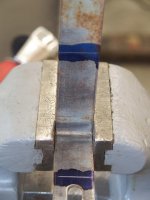
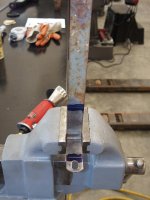
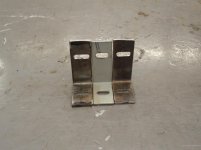
A little Steel Blue Dykem and the original bracket as a template to mark lengths that will be a bit too long. Then a cutoff wheel was used to trim the scrap piece to size. I considered using my horizontal band saw to cut the material but thought the cutoff wheel would be faster to set up.


20190411-15.jpg 20190411-16.jpg 20190411-17.jpg

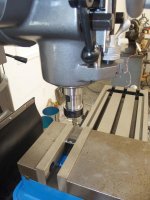
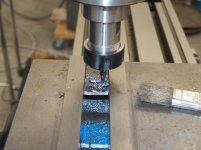
I moved over the JET Mill and installed a 1/4" end mill. Precision machining wasn't necessary to cut the necessary slots so I lined things up by eye and machined the slots. In the last picture of the above, the original is in the middle and is flanked on either side by my effort.


Continued in next post...
 
Last edited:
To avoid these ads, REGISTER NOW!
OP
S

sbosecker

Well-known member
Joined
Sep 25, 2012
Messages
3,539
Location
Peachtree City, GA
Continued...


20190411-21.jpg

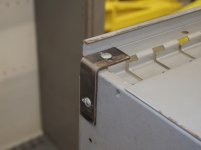
The fabricated brackets lined up with the Shelving Unit's holes and worked properly. I could do a little more cleanup and perhaps hit them with some paint but today's goal was to get the last two Shelving Units fixed so they could be moved to their new home.


20190411-22.jpg 20190411-23.jpg

A couple of my tractors had to come outside to get adequate access to the north wall of the Long Bay.


20190411-24.jpg

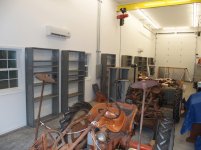
That's that: The Shelving Units are now all in place. A total of seven are spaced along the north wall.


20190411-25.jpg

Tools were put away, tractors returned to the Long Bay and... the Compact Bender gets an upgrade in living quarters. With plenty of shelf space now available, the Bender gets to leave the basement and live in the Lone Beech Garage. Ha!


Scott
 
Last edited:

250

Well-known member
Joined
Oct 16, 2014
Messages
537
Location
West of the Sierras
250,

Sorry I am slow in replying!

Glad to hear your son found the tractor video interesting. He may be amused to learn that that tractor is about 64 years old.

Best regards,

Scott

No problem. He loves tractors, and in fact we're going to an antique machinery show in a couple weeks.

The shelves are a nice add. They suite my desire to have symmetry and "matchiness" well.
 

matt_i

Well-known member
Joined
Mar 14, 2008
Messages
10,753
Location
SE Michigan
Hi Scott, great find on those metal shelves! I found a couple somewhat similar on CL a couple years back in Pontiac, MI, standard industrial green color. I bought two and left, but by the next weekend I called the guy up, he hadn't sold any more so I went back and bought the next 4 (!).

What I did with them so far was to build a custom base for each one (2 of the 6 have this "mod") which is a 3/4" ply deck and 3 pieces of 2x4 as "feet", torx drive screws. This allows me to slowly/carefully use a pallet jack to easily relocate the shelving unit (even fully loaded) around the shop space, whether that be for cleaning, accessing an outlet in the back, shop rearrangement, etc.

Your bender looks like a mini-Hossfeld. I have run the Diacro bender for a number of years, the side benefit of the Diacro is 95% of the tooling can be made on the lathe!
 

drivesitfar

Well-known member
Joined
Oct 23, 2013
Messages
36,075
Location
Pacific Northwest
SB: shelving looks good and I bet you've got the stuff to fill that up or you soon will.

I was thinking about you this week while watching the MASTERS. do you watch on TV? have you ever been invited to Augusta?

take care!!
 
OP
S

sbosecker

Well-known member
Joined
Sep 25, 2012
Messages
3,539
Location
Peachtree City, GA
No problem. He loves tractors, and in fact we're going to an antique machinery show in a couple weeks.

The shelves are a nice add. They suite my desire to have symmetry and "matchiness" well.


250,

Have a good time at the antique machinery show!

"matchiness" Ha - I agree! It was nice to get that many shelves and particularly nice that they all were of the same basic design.

Best regards,

Scott
 
OP
S

sbosecker

Well-known member
Joined
Sep 25, 2012
Messages
3,539
Location
Peachtree City, GA
Hi Scott, great find on those metal shelves! I found a couple somewhat similar on CL a couple years back in Pontiac, MI, standard industrial green color. I bought two and left, but by the next weekend I called the guy up, he hadn't sold any more so I went back and bought the next 4 (!).

What I did with them so far was to build a custom base for each one (2 of the 6 have this "mod") which is a 3/4" ply deck and 3 pieces of 2x4 as "feet", torx drive screws. This allows me to slowly/carefully use a pallet jack to easily relocate the shelving unit (even fully loaded) around the shop space, whether that be for cleaning, accessing an outlet in the back, shop rearrangement, etc.

Your bender looks like a mini-Hossfeld. I have run the Diacro bender for a number of years, the side benefit of the Diacro is 95% of the tooling can be made on the lathe!


matt_i,

I was trying to imagine my clumsy self attempting to "slowly/carefully" move my shelves around. While I am intrigued by the utility of such a setup, I'm pretty sure if I tried to mimic your approach it would end badly for me. Ha!

Still... do you have a picture of your mobile shelf setup that you would be willing to share?

Best regards,

Scott
 
OP
S

sbosecker

Well-known member
Joined
Sep 25, 2012
Messages
3,539
Location
Peachtree City, GA
SB: shelving looks good and I bet you've got the stuff to fill that up or you soon will.

I was thinking about you this week while watching the MASTERS. do you watch on TV? have you ever been invited to Augusta?

take care!!

DrivesItFar,

Thanks for the kind words regarding the shelfs! Yes, I think you are right, they will be full soon.

I have been to Augusta a few times but it was always a short layover with no time to sightsee.

I don't usually watch golf on TV but I wish I had watched the Masters this year! What a story!

Best regards,

Scott
 
OP
S

sbosecker

Well-known member
Joined
Sep 25, 2012
Messages
3,539
Location
Peachtree City, GA
You must teach me your ways of Craigslist Fu! I have little luck in my searches.

AZpilot,

Ha! The secret, grasshopper, is to spend WAY too much time looking at eBay & Craigslist.

If you're looking for tools and such, I think it helps to have an older demographic that worked in industry or as mechanics and are now downsizing. I could be wrong but your part of the country may have that demographic but they've already downsized and left the rust belt.

I did make another acquisition this past week...


20190415-01.jpg 20190415-02.jpg 20190415-03.jpg

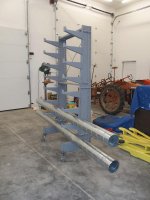
These racks had been for sale on Craigslist for several months. Nobody seemed interested in them [could have been the modification that added casters that put off potential buyers] and over time the price was eventually reduced to something I felt I could justify.

I'll probably be using them in my house's basement. I have a small pile of tubing and such that needs to be organized.


Best regards,

Scott
 
Last edited:
OP
S

sbosecker

Well-known member
Joined
Sep 25, 2012
Messages
3,539
Location
Peachtree City, GA
Saturday - April 20, 2019

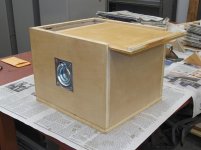
In a recent post I indicated I was trying to come up with a storage box for a set of gears. The gears were components of an accessory for my metal lathe that would allow the cutting of metric threads.

This past week I got quite a bit done on that box.


20190417-01.jpg

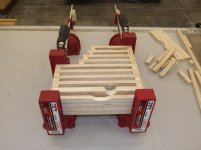
Constructing the "guts" of the box was a slow process as there were lots of small pieces to glue together. The only way I saw to do this somewhat accurately was to apply glue to a couple of pieces - wait about half an hour for the glue to set - and then apply glue to another couple of pieces.

Repeat.


20190419-02.jpg 20190419-03.jpg

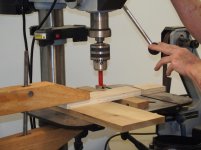
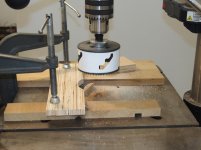
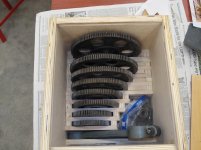
Most of the gears would fit into 1/2-inch slots but a couple of the gears needed additional clearance for their protruding hubs. Some work at the drill press took care of these issues.


20190419-04.jpg

Eventually the last components of the "guts" were glued together.


20190419-05.jpg 20190419-06.jpg

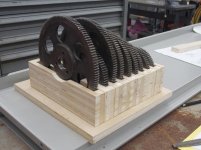
A test drive with the gears indicated there were a couple of slots that needed a little relief as that gear would stick a little in the slot. That could be addressed easily enough with a little sandpaper and/or a wood rasp. Overall the "guts" seemed to work.


20190419-07.jpg

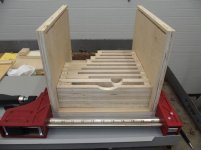
I calculated that the sides should be about 9-inches from the floor of the box. I cut the sides and fit them around the "guts".


Continued in next post...
 
Last edited:
OP
S

sbosecker

Well-known member
Joined
Sep 25, 2012
Messages
3,539
Location
Peachtree City, GA
Continued...


20190419-11.jpg

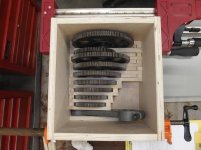
A picture from overhead the box with all the sides in place.

So far, so good.


20190419-12.jpg

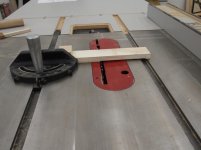
I sat up the table saw with a 1/4" dado blade stack and cut a dado completely across the back piece. The sides were a little more complex as I didn't want the cut to go complete across the side pieces. I wanted the dado to stop so there wouldn't be two visible holes on the back of the box.

Each side was a mirror image of the other so that complicated these cuts as there had to be a separate setup for each side. I used a piece of scrap clamped to the table saw's fence to act a stop. When the piece got to the stop, I shut the saw off and waited for the blade to stop spinning and then removed that piece.


20190419-13.jpg

When I dry fitted the sides of the box, the dados looked pretty good.


20190419-14.jpg

I cut a piece of 1/4-inch plywood to act as a lid and slide it into the dados. I knew the curve of the saw blade in the stopped cuts would interfere with the lid but I was hoping the it would be able to slide further than it did.

This was at about 11:00 pm last night so I quite for the night and resumed work this morning.


20190420-15.jpg

This morning I fitted my router with a 1/4-inch bit and set up a jig to clean up the end of the stopped cut. This was a bit tedious and - like the table saw setup - required separate jig placement for each side.


20190420-16.jpg

The router did the job nicely and the lid was able to slide all the way across the top of the box.


20190420-17.jpg

The last chore was to trim the lid and place a bit of plywood on the edge to match the rest of the box's sides.

Nothing has been glued yet. I need to clean up a couple of the tight slots in the "guts". Once that is accomplished I should be able to start the process of gluing the box's components together.

Some handles on the sides of the box would also be prudent. I'll have to think about the best way to accomplish that.


Scott
 
Last edited:

drivesitfar

Well-known member
Joined
Oct 23, 2013
Messages
36,075
Location
Pacific Northwest
SB: looks like you are adding nice stuff to your shop. also that piece you fabbed up with plywood for your lathe's gears is pretty nice.

if you have a chance to buy good lumber for a good price you can build some nice lumber or steel or storage for bigger stuff if you can't find the heavy duty steel ones at a good price for now you can just put up racks everywhere, but maybe someday you'll have the LONE BEECH full and you'll have to make changes.

I bet you could almost hear the Tiger roars from Augusta at your house cause it was fun to watch him win the MASTERS again.

HAPPY EASTER!!!!
 
OP
S

sbosecker

Well-known member
Joined
Sep 25, 2012
Messages
3,539
Location
Peachtree City, GA
SB: looks like you are adding nice stuff to your shop. also that piece you fabbed up with plywood for your lathe's gears is pretty nice.

if you have a chance to buy good lumber for a good price you can build some nice lumber or steel or storage for bigger stuff if you can't find the heavy duty steel ones at a good price for now you can just put up racks everywhere, but maybe someday you'll have the LONE BEECH full and you'll have to make changes.

I bet you could almost hear the Tiger roars from Augusta at your house cause it was fun to watch him win the MASTERS again.

HAPPY EASTER!!!!


DrivesItFar,

A belated Happy Easter to you!

"...you'll have the Lone Beech full..."

Just the mention of such a thing and my wife will start to develop a nervous tic. Ha!

I will say, when I sent pictures of the Pipe/Bar Racks to my dad he wondered in his response if the building was starting to get "saturated".

He thought that could be alleviated by using them in the basement.

We'll see ...for the moment they are in the LBG. The castors allow them to be rolled to wherever they need to be to be out of the way.


Best regards,

Scott
 
OP
S

sbosecker

Well-known member
Joined
Sep 25, 2012
Messages
3,539
Location
Peachtree City, GA
Saturday - May 4, 2019

About a week and a half ago my wife and I stopped by a lawyer's office to sign our updated wills. This was a long overdue item and I thought it would be good to see that project in our rear view mirror.

WRONG!

The lawyer gave us several sheets of paper describing how we needed to add legal language to our retirement funds, insurance & bank accounts to make our new wills work properly.

Two days after that my wife and I took a little trip to see old friends. We got back on Tuesday and, although I had made a dent in the lawyer's list of "stuff" before we left, there was still more to do.

Today we had rain in the afternoon forecast and I needed to knock out some mowing with my old tractor before that happened. I thought I could get it done in 30-45 minutes and then I could spend some long overdue quality time in the LBG.

I started the tractor and headed for the "wild" area on the southern part of my yard. I had used the tractor to clean up this section of the property a month or so ago and it needed to be visited again.

I had only made one or two mowing passes when the tractor's engine started surging. I managed to limp the tractor back to the LBG to investigate.

I added some fuel to the fuel tank and tried to start the tractor. I finally got it started but it would only keep running if I constantly applied the choke.

A fuel system problem no doubt …but the weather forecast indicates it is supposed to start raining in the next couple of hours.

I decided to constantly pull the choke rod, located in the rear fender behind me on my left, as I tried to finish the mowing job.
After a few minutes of this I decided this could be a new Yoga pose; I think "Choking Tractor Position" has a nice ring to it.


20190504-01.jpg 20190504-02.jpg

This worked long enough to get the mowing about 2/3 done. Then the tractor engine slowly petered out. Stopping about as far from the shop as possible and still be in my yard.


20190504-03.jpg 20190504-04.jpg

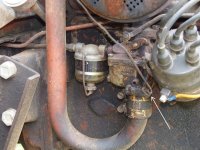
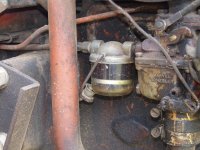
The Allis-Chalmers Model G tractor uses a Fuel Sediment Bowl upstream of the carburetor. This tractor was different from my others in that it had a filter of some sort in the Sediment Bowl. I can only assume that the original Sediment Bowl had gotten smashed at some point and this was a replacement. The arrow in the first picture points to the cable rod that operates the choke. In the second picture I have swung the Bowl Retainer out of the way so as to remove the Bowl.


20190504-05.jpg 20190504-06.jpg

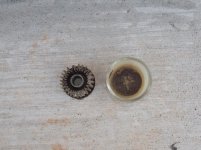
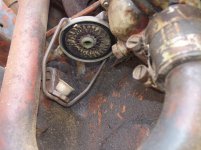
I removed the Bowl and (most of) the filter. Quite a bit of sediment in the Bowl - hard telling how long it had been since the Bowl had been cleaned. The filter was certainly fully depreciated - the top of the filter was still in the Fuel Bowl Assembly Housing. I got a pick and pulled out the top of the filter.


20190504-07.jpg

Since none of my other tractors have a filter in their Sediment Bowl, I cleaned this Sediment Bowl and installed it on the tractor without the filter.

I opened the fuel shutoff valve, climbed on the tractor and pulled the starter rod.

The tractor started right up and off I went.

Amazing how much better an engine performs if it is being provided with an adequate fuel flow.


Continued in next post...
 
Last edited:
OP
S

sbosecker

Well-known member
Joined
Sep 25, 2012
Messages
3,539
Location
Peachtree City, GA
Continued...


20190504-11.jpg

On my last pass mowing, it started to sprinkle. I got my tractors back into the LBG and the job was done - at least as much as the tractor could do. The couple of areas where there is grass/weeds sticking up are places where the belly mower can't mow without hitting a ridge or a mound of dirt.


20190504-12.jpg

The additional time I spent fussing with the disabled tractor cut into my shop time for the day.

I did manage to make another bracket for the recently added shelving - see top of this page. I was getting ready to attach my first shelving unit to the wall and discovered another missing bracket. The top of this shelf was "wedged" together so that it wasn't obvious initially that the bracket was missing.


Scott
 
Last edited:

1949 caddyman

Well-known member
Joined
Oct 5, 2010
Messages
1,778
Location
Arizona
I was at a car show in Tucson last weekend. They also had hit n miss engines & tractors. When I saw this I thought of your machines.
 

Attachments

  • DAB1C308-7D3A-41AA-A4CE-03E7E7595910.jpg
    DAB1C308-7D3A-41AA-A4CE-03E7E7595910.jpg
    148.9 KB · Views: 66
To avoid these ads, REGISTER NOW!
OP
S

sbosecker

Well-known member
Joined
Sep 25, 2012
Messages
3,539
Location
Peachtree City, GA
I was at a car show in Tucson last weekend. They also had hit n miss engines & tractors. When I saw this I thought of your machines.

1949 caddyman,

Thanks for sharing the picture of the Model G! Tucson seems like an odd place for a tractor like that but... it would be interesting to know the history of that machine.

I believe that one would have been built fairly early in the production run. The "grab handle" on the manual lift arm is definitely the earlier version of that part. I'd have to check my manuals for the date it was changed but I don't think they used that plain handle for too long.

Thanks again for stopping by!

Scott
 
OP
S

sbosecker

Well-known member
Joined
Sep 25, 2012
Messages
3,539
Location
Peachtree City, GA
Friday - May 10, 2019


Earlier this week I had a little time to work some more on the Metric Transposing Gear Box.


20190505-01.jpg

A couple of gears would bind a bit when placed in their slot. I took a pattern maker's rasp and some sandpaper and opened up the slots.


20190505-02.jpg 20190505-03.jpg 20190505-04.jpg

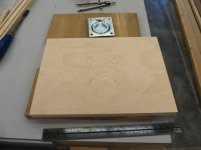
I also realized that I had forgotten to make a place for a metal placard in the box. I relieved a thin gap in one of the pieces of the box to accept the placard.


20190507-05.jpg 20190507-06.jpg

I got called out for a trip but I was able to glue the slots to the base of the box before I left.


Continued in next post...
 
OP
S

sbosecker

Well-known member
Joined
Sep 25, 2012
Messages
3,539
Location
Peachtree City, GA
Continued....

I got back from my trip yesterday and today I had a chance to continue working on the Gear Box.


20190509-11.jpg 20190509-12.jpg 20190509-13.jpg

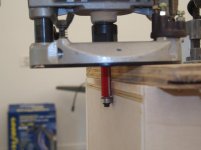
I purchased a couple of recessed handles for the side of the box. I drew a layout of the area I would need to rout out of the box sides, positioned some stops for the router and used the router to start the work.


20190509-14.jpg 20190509-15.jpg 20190509-16.jpg

After the basic outline of the handle had been routed out, I used the router freehand to complete the work. The handles fit nicely into the mortised areas. However the screws that came with the handles were one inch long and that wouldn't work with the plywood thickness of the box. I'll have to make a trip to the hardware store for some shorter screws.


Continued in next post...
 
Last edited:
OP
S

sbosecker

Well-known member
Joined
Sep 25, 2012
Messages
3,539
Location
Peachtree City, GA
Continued...

Before I could go to the Hardware Store, I got a phone call from a friend. He was wondering if he and a buddy of his could come over to the LBG and use either the 2-Post Lift or the "Tornado Shelter".

Of course I agreed.


20190509-21.jpg 20190509-22.jpg 20190509-23.jpg

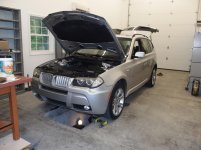
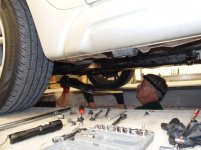
This owner of this 2006 BMW X3 needed to replace the Crankshaft Speed Sensor. I suggested using the "Tornado Shelter" instead of the 2-post lift and they went for it. I tend to favor the shelter over the 2-post lift if the job can be accomplished using either one.

Apparently the "official" approach to replacing the Crankshaft Speed Sensor is to come in from the top of the engine. This requires removing a manifold and is somewhat involved; the cost to have the shop do it was around $900. Apparently the Internet suggested that the task could be accomplished from underneath and that was the approach these guys decided to take.

The removal of a couple of shields under the BMW allowed access to the Crankshaft Speed Sensor. The problem with approaching this device from under the car was that it could be felt - but not really seen - by the person removing it.


20190509-24.jpg

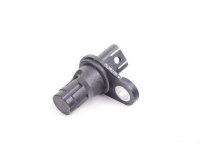
Note: This is a picture I stole from the Interweb. It looks similar to the sensor but I do not know if it is the exact part.

The owner of the car had the part out in pretty short order. Then the fun started: He could get the new part in place but he couldn't get the screw that secured the part to the engine to thread into position.

He worked and worked on this and it just wouldn't thread into the hole. Now it didn't help that all this work is being done by feel. After a very long time I loaned the owner a punch to try and precisely align the Crankshaft Speed Sensor's screw hole with the receiving hole.

The punch fit nicely into the hole and that's when we discovered what was causing the problem. The owner had been trying to insert the screw into the hole parallel to the floor. With the owners hands & arms out of the way we could see the punch pointing between 30 & 45 degrees above a horizontal position. With that information, the owner adjusted the orientation of the screw as he inserted it into the hole and now the screw threaded as it should.

The choice of using the "Tornado Shelter" vs. the 2-Post Lift became fortuitous during the screw alignment. With the hood up my friend, peering through the gaps in the manifold pipes, could see just enough of the owner's hands as he worked from below to guide him in orienting the angle of the screw. This assistance would not have been possible if we had used the lift.

With the new Crankshaft Speed Sensor installed, we used my Autel MD802 Scanner to clear the BMW's codes. The car was started and the owner indicated that it had started easier and was running better.

Everyone was pleased that the repair seemed to have worked. Especially after the lengthy time it had taken to install the new sensor. The owner literally had spent at least an hour and a half trying to get that screw to thread into place ...plus when he was trying to do that he looked like he was in an interrogation stress position.

At this point all that was left was to shut down the engine and reinstall the shields under the car. With that accomplished, the owner and my friend thanked me profusely for the use of my shop and left.

It was a great way to spend the day in the Lone Beech Garage!


Scott


KEYWORDS: BMW Crankshaft Speed Sensor Installation
 
Last edited:
OP
S

sbosecker

Well-known member
Joined
Sep 25, 2012
Messages
3,539
Location
Peachtree City, GA
Saturday - May 11, 2019


I ran over to a Hardware Store late this morning and picked up some #8-5/8" flat head wood screws to replace the 1" long items that came with the handle hardware.


20190511-01.jpg 20190511-02.jpg

I had bought these Craftsman Self-Centering Pilot Hole Drill Bits several years ago but had never used them. There are 3 of them: One for #6 screws, one for #8 screws & one for #10/#12 screws.


20190511-03.jpg

It seemed like a good idea to do a trial run of the #8 tool on a scrap piece of wood before using it on the gear box sides. The Self-Centering Pilot Hole tool worked pretty well.

The spring was weak so I had to pull the "self-centering" part of the tool out a fraction of an inch after each use but it did center the pilot holes nicely.


20190511-04.jpg 20190511-05.jpg

Reasonably confident the device would work properly, I used it on the sides of my Gear Box. I then applied glue and clamps to the box.


20190511-06.jpg

After the box's glue had dried, I performed the last gluing operation of the project by attaching a small strip of plywood to the lid.


20190511-07.jpg

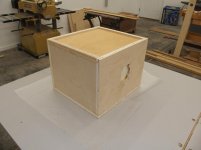
The Gear Box is pretty well complete. The lid needs a little trimming, a finish needs to be applied and I have to fasten the handles to the side.

...but we had reservations at a restaurant and it was time to enjoy a Mother's Day celebration with our children!

Tomorrow I hope to finish this project but we'll see what happens.


Scott
 
Last edited:

drivesitfar

Well-known member
Joined
Oct 23, 2013
Messages
36,075
Location
Pacific Northwest
SB: I'm still following along and enjoying all your pictures, posts and information.

congrats for helping a friend fix his BMW and for figuring out the issue to help him with that screw situation that must have been a nightmare for him.

of course even though your friends did most of the work it might have still been a good learning experience for you as well as helping them out.

hope you have a HAPPY MOTHER'S DAY!!!

cheers
 
OP
S

sbosecker

Well-known member
Joined
Sep 25, 2012
Messages
3,539
Location
Peachtree City, GA
SB: I'm still following along and enjoying all your pictures, posts and information.

congrats for helping a friend fix his BMW and for figuring out the issue to help him with that screw situation that must have been a nightmare for him.

of course even though your friends did most of the work it might have still been a good learning experience for you as well as helping them out.

hope you have a HAPPY MOTHER'S DAY!!!


DrivesItFar,

Thanks for stopping by! We had a very nice dinner with our children which made for a great Mother's Day.

I flew an airplane to Seattle last Wednesday. I had about 20 minutes to catch a "ride" back to Atlanta - and I made it. If I had missed that flight I would have spent the night in Seattle and I would have seen if we could have gotten together for a visit.

...but I made it on the Atlanta flight. Ha! I got back home at about midnight - a long day.

...as to the BMW. The owner was pretty stoic about the whole thing. My buddy & I felt pretty bad watching him struggle and offered to take a shot at it but the owner was resolute and kept at it.

The alignment issue was a lesson learned!

Best regards,

Scott
 
Last edited:
OP
S

sbosecker

Well-known member
Joined
Sep 25, 2012
Messages
3,539
Location
Peachtree City, GA
Sunday - May 13, 2019


Wrapped up the Lathe Gear Box project late today.


20190512-01.jpg 20190512-02.jpg 20190512-03.jpg

The lid of the Gear Box needed to be trimmed about 1/8 inch. I clamped the box to a Workmate and used a flush trim bit to clean up the lid. The black arrow points to the protruding plywood that needed to be removed. The piece of scrap plywood clamped to the top the box gave the router a platform to work on.


20190512-04.jpg

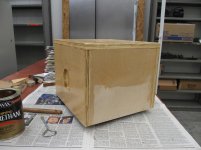
Then I put a couple of coats of polyurethane on the box.


20190512-05.jpg 20190512-06.jpg 20190512-07.jpg

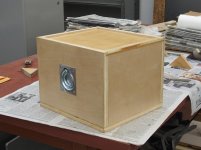
Installed the handles and I think we can stick a fork in it - the gear box project is done.


Scott
 
Last edited:

drivesitfar

Well-known member
Joined
Oct 23, 2013
Messages
36,075
Location
Pacific Northwest
SB: even if you just need a ride to your hotel please let me know when you are close cause i'm only about 8 minutes from that airport.

great to see you are getting that cool storage box finished.

keep up the great work!!
 
OP
S

sbosecker

Well-known member
Joined
Sep 25, 2012
Messages
3,539
Location
Peachtree City, GA
SB: even if you just need a ride to your hotel please let me know when you are close cause i'm only about 8 minutes from that airport.

great to see you are getting that cool storage box finished.

keep up the great work!!


DrivesItFar,

Thanks so much for the offer! I hope we can have a face-to-face some day.

Best regards,

Scott
 
OP
S

sbosecker

Well-known member
Joined
Sep 25, 2012
Messages
3,539
Location
Peachtree City, GA
Monday - May 13, 2019


I did some annual maintenance on my utility trailer today. This 20 minute job quickly turned into a couple of hours when my grease gun ran out of grease. I pulled the empty sleeve out of the grease gun and noted that it was Valvoline Durablend grease. My intention was to procure and install the same grease as I had been using.

This is when the skies started to darken...

I went into the house and got on the internet to see which of the local auto supply stores had the best price on this item.
AutoZone; Strike 1 - Advance; Strike 2; O'Reilly's; Strike 3.

Hmmm... Quicken (financial software) indicates that I bought the previous tube in 2015. Perhaps they don't make this stuff anymore.

I looked on the Valvoline website and didn't find what I was looking for. I filled out their Contact Us form requesting if Durablend Grease was still available and, if not, what was a compatible replacement.

I hit the Send button and there was a brief hesitation before the website indicated that there had been an error.

Nice.

I found an 800 number for Valvoline product support and endured the listing of half a dozen irrelevant options before hearing what appeared to be the correct choice.

A relatively short wait and Matt answered the phone. Matt confirmed that Durablend Grease wasn't being produced any longer and suggested a compatible replacement.

AutoZone is the closest auto parts store to me and I searched their website for "Valvoline Grease" at my local store. Up came a page of several types of Valvoline Oil but no grease.

I called the store and a fellow answered... I asked if they had Valvoline Grease in their store. Instead of walking 30 feet to check their stock he looked at his computer. "No", he answered, "we do not have Valvoline Grease."

I hung up and decided to check the AutoZone site to see what they had that might be a suitable replacement for my Valvoline Durablend. I entered "Grease" into the search function. After a short delay a page of various grease popped up. Included on the page were some Valvoline products labeled "Valvoline Lubricant/Grease". Apparently the computer didn't know that Lubricant/Grease was the same as Grease and eliminated it from my initial search.

Still, despite the time it had taken to resolve this, it appeared that my local AutoZone did have the grease that Valvoline Support had suggested as a replacement for the Durablend I had been using.

I hopped in the truck and drove down to the AutoZone. I walked to the back of the store where the grease was and found the suggested replacement item ...and then I noticed just above it - all by itself - was a single tube of Valvoline Durablend. The listed price was a third of the replacement item.

I grabbed it and headed for the check out. The person checking me out informed me the grease was on clearance and it would be $2 for the tube. I threw two bucks at her and left.

So at least after all the effort I got the item I had been looking for to begin with ...and it was on sale!

That's not the way these odysseys usually end. Ha!

After finishing greasing the trailer I had a few other chores to accomplish. At about 8:00 this evening I had a bit of time that could be spent in the shop. What would move the ball forward in the time I had available?


I decided to see if I could remove some paint from the 16" Walker-Turner Bandsaw I had obtained almost 2 years ago (see Post 1970).
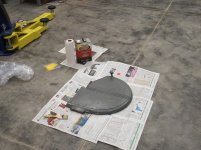


20190513-01.jpg

I grabbed the lower wheel cover and set up a place on the center bay floor to work. A drip pan and lots of newspapers were placed on the floor to contain the mess.


20190513-02.jpg 20190513-03.jpg 20190513-04.jpg

I put some Aircraft Stripper on the wheel cover and covered it with some plastic. I let it sit for about 15 minutes and then I used a plastic scraper to remove the paint.


20190513-05.jpg

Well at least some of it... there appears to be about half a dozen layers.


20190513-06.jpg

It took 3 applications of stripper to get to the metal. What a mess!


20190513-07.jpg

I wiped the cover down with some mineral spirits and called it a night. There's a LOT of paint on this bandsaw!

Scott
 
Last edited:
OP
S

sbosecker

Well-known member
Joined
Sep 25, 2012
Messages
3,539
Location
Peachtree City, GA
Tuesday - May 14, 2019

20190514-01.jpg 20190514-02.jpg

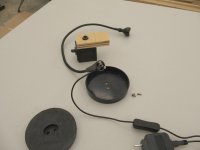
A few weeks ago I obtained a Jansjo LED work light from Ikea. I had seen a video on YouTube by ClickSpring where he built a shop work light using one a Jansjo light and a magnetic base.

Here's a LINK to that video.

I would like to make something like the machined adapter in the video as a beginning machinist project but I thought a wooden prototype would be good to make first.


20190514-03.jpg 20190514-04.jpg

I "measured" a Grizzly Magnetic Base and cut a piece of scrap plywood to size.


20190514-05.jpg 20190514-06.jpg

The Magnetic Base has a threaded hole in its top to allow mounting a vertical rod. Some investigation revealed that thread in that hole was 10mm-1.5. I purchased the shortest 10mm socket head machine screw I could find at the local hardware store (20mm). This was longer than I would prefer but it allowed me to start on the prototype.

I drilled a 10mm hole and then used a forstner bit to countersink the drilled hole a bit. The lamp uses a couple of 6mm studs and a couple of small screws to mount to a baseplate. I drilled 6mm holes in the plywood to secure the lamp to the adapter.


Continued in next post...
 
OP
S

sbosecker

Well-known member
Joined
Sep 25, 2012
Messages
3,539
Location
Peachtree City, GA
Continued...


20190514-11.jpg

The lamp mounted nicely to the prototype adapter.


20190514-12.jpg 20190514-13.jpg

20190514-14.jpg 20190514-15.jpg

I think this is going to work fine. I hope to machine an aluminum version soon. I'm going to have to find a much shorter 10mm machine screw for it to be "pretty".


Scott
 
Last edited:
OP
S

sbosecker

Well-known member
Joined
Sep 25, 2012
Messages
3,539
Location
Peachtree City, GA
After getting the grease, should have brought a lotto ticket. Lol.
Is the stripper caustic? You only used mineral spirits to clean metal afterwards?


shortykorte

Ha! Well I spent a lot of time to win that lottery!


Instructions from the side of the stripper can...

...Apply to one section at a time up to 9 square inches. Brush in one direction only. Allow the remover to work until the finish is blistered or softened completely, generally within 5-15 minutes. Remove paint with a flexible plastic scraper and then flush with solvent or water to remove any residue. Allow surface to dry before applying a new finish...


Best regards,

Scott
 
OP
S

sbosecker

Well-known member
Joined
Sep 25, 2012
Messages
3,539
Location
Peachtree City, GA
Wednesday - May 15, 2019


Yesterday I made a wooden prototype of an adapter to turn a LED desk lamp into a magnetic workshop task light. I thought I might like to attempt to make a metal version at some point.

This morning I looked online to see if I could find some 1"x2"x?" aluminum bar stock. As I was doing this I came across a website for Metal Supermarkets. This site showed several locations in the metro Atlanta area (I had probably seen this in the past) but this time the map showed an outlet on the south side of Atlanta in addition to the numerous north side locations. (The south side of metro Atlanta is generally not as commercially developed as the north side.)

This location was near the airport and would be about a half hour from me vs. the hour plus drive to a north side location. I decided to drive to this reasonably close vendor and see what they had to offer.

When I arrived I asked the folks behind the counter how long they had been open. They answer was less than 2 months.

The newness showed - I was the only one there and the staff seemed unseasoned. I was led to the back of their spaces where the various metal was stocked. A Stock Room Employee and I located a long length of 1"x2" 6061-T6 Aluminum Bar Stock. It was located adjacent to a similar length of 1"x1-1/2" Aluminum Bar Stock. The helper and I had measured both of them as we looked at the inventory.

I left the Stock Room and returned to the Counter. I arranged to purchase a 2 foot length of the 1"x2" Aluminum. The folks behind the counter called back to the Stock Room Employee that had been assisting me earlier and requested he cut a couple of feet from the 1"x2" aluminum bar stock.

I paid for my aluminum and then returned to the Stock Room just as the Stock Room Employee was finishing cutting my order. He handed the 2 foot section to me. As I accepted it from him I mentioned that it didn't look like 1"x2" material. He replied, "I just measured it", and then pulled out his tape rule. He laid the tape on the wider dimension and we both saw his freshly cut material was 1-1/2"wide not 2".

As I returned to the Counter, he went to the stock rack and found the correct item and took it to the band saw. At the counter I explained what happened and asked what the cost would be for the "mistake". They knocked about 40% off of what it would have been had I ordered it.


20190515-01.jpg

I bought that as well. I left with two 2-foot pieces of aluminum bar stock.

I don't know how much I'll use this place but it's nice to have it relatively nearby should I need something. Based on what I observed during today's visit, I probably should drop by periodically just to see how many other Stock Room Employee mistakes have wound up in the "Discounted Screw Ups Rack".


20190515-02.jpg 20190515-03.jpg

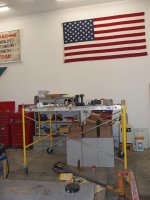
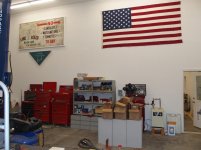
My son came over this evening for a visit. I asked if he had time to help me take down the scaffolding that's been living in the LBG since it was built. I had left it in place to work on the flag project and that had been finished quite a while ago. The two of us broke it down pretty quickly.

Good to have that out of the way.


Scott
 
Last edited:

shortykorte

Well-known member
Joined
Sep 1, 2014
Messages
8,039
Location
Tallahassee, Fl
Don’t you just love “Discounted Employee Screw up” deals especially since you had already been back there.
Definitely check back occasionally for drops. One place I’ve been too had bins for various types and sizes of small drops and oops pieces.
You might also see if there are any Alro suppliers in the area.


Sent from my iPhone using The Garage Journal mobile app
 
OP
S

sbosecker

Well-known member
Joined
Sep 25, 2012
Messages
3,539
Location
Peachtree City, GA
Don’t you just love “Discounted Employee Screw up” deals especially since you had already been back there.
Definitely check back occasionally for drops. One place I’ve been too had bins for various types and sizes of small drops and oops pieces.
You might also see if there are any Alro suppliers in the area.


shortykorte,

The employee in the stock room seemed like a nice guy but, in my opinion, he required constant, close, adult supervision. He couldn't seem to operate a tape measure properly and yet he was cutting metal with the mother of all bandsaws.

Almost certainly this will end badly.

I just looked at the Alro website and they do not appear to have any locations in Georgia. Closest one to me appears to be around Jacksonville, FL.

Best regards,

Scott
 
OP
S

sbosecker

Well-known member
Joined
Sep 25, 2012
Messages
3,539
Location
Peachtree City, GA
Thursday - May 16, 2019

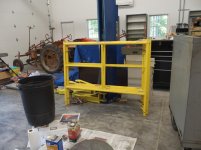
My son and I had broken down the scaffolding in the LBG last evening so today I moved from there to the house's basement.


20190516-01.jpg 20190516-02.jpg

20190516-03.jpg 20190516-04.jpg

So the scaffolding is no longer in the way in my shop spaces. That's a good thing.


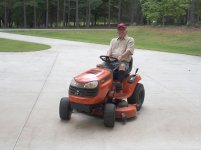
Recently I learned through the grapevine that one of my neighbors had a problem with his lawnmower. It was a little fuzzy what the actual problem was but it might involve welding. I called my neighbor and mentioned I'd be happy to have a look at his lawnmower and see if I could do anything to help with the issue. He brought his machine over and drove it into the middle bay.


20190516-05.jpg 20190516-06.jpg 20190516-07.jpg

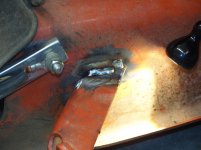
The issue was a structural failure of one of the Anti-Scalping Roller Brackets (Black Arrow). I told him I thought I might be able to weld that bracket back onto the mower deck. I asked him to give me a little time and I'd see what I could do.

I hit all the metal around the broken welds with a 60 grit roloc disc mounted in a pneumatic angle grinder.


Continued in next post...
 
Last edited:
OP
S

sbosecker

Well-known member
Joined
Sep 25, 2012
Messages
3,539
Location
Peachtree City, GA
Continued...

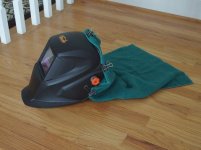
I had been practicing welding in anticipation of trying to help my neighbor. When I practiced I was having trouble seeing what I was trying to weld. I did some research on the internet looking for help with this.


20190516-11.jpg 20190516-12.jpg

One thing that was reported to help was additional light on the area being welded. The other was using something to block light from entering the inside of the welding helmet.

I used my recently crafted magnetic work light prototype to bring more light to the area being welded ...but what REALLY seemed to help me see things better was the towel I clamped to my welding helmet. This was a real game changer for me.


20190516-13.jpg

The location of the bracket made welding it a challenge for me but I think I was able to (crudely) repair my neighbor's mower.


20190516-14.jpg

I called him back to the LBG and he seemed pleased with the repair.

I hope my efforts hold up when he starts mowing his lawn.

Scott
 
Last edited:
To avoid these ads, REGISTER NOW!
Top Bottom