To avoid these ads, REGISTER NOW!

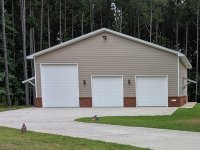
Above 1200 Sq/FT The Lone Beech Garage (60x46x16)

Wokspaces above 1200 squarefeet.
OP
S

sbosecker

Well-known member
Joined
Sep 25, 2012
Messages
3,539
Location
Peachtree City, GA
Monday - July 8, 2019

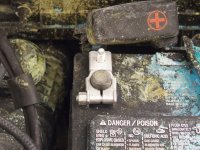
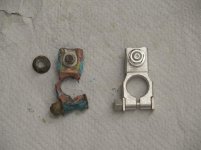
The Positive Battery Terminal (Part # 90982-05061) for my 2013 Toyota Highlander arrived in the mail today.


20190708-01.jpg

The old and the new side by side.


20190708-02.jpg 20190708-03.jpg 20190708-04.jpg

The installation was quick and painless. Which was good because I was in a "short-call" status with my employer and I just wanted to get the Highlander back into the game as quickly as possible.

Tomorrow I have more flexibility and hope to clean up the Highlander's Battery Compartment.

I had to chuckle a bit last evening when my wife meekly approached me while I was at the computer and informed me our dryer was acting up. The Timer Knob on the almost 20 year old machine was rotating - at the normal speed (slowly) - round and round without ever stopping. This kept the dryer "drying" all that time as well.

Another project! Part has been ordered and will be here on Wednesday.

Scott
 
To avoid these ads, REGISTER NOW!
OP
S

sbosecker

Well-known member
Joined
Sep 25, 2012
Messages
3,539
Location
Peachtree City, GA
Tuesday - July 16, 2019

In my last post just over a week ago, I was waiting for a part - obtained via eBay - to repair our Maytag Dryer.


20190709-01.jpg

I know, I know... we won't be in the Laundry Room for very long.

The part arrived and let's just say it didn't match the description: "New in sealed box". Worse, it didn't work.

So I was back to Square One on the dryer repair. I needed a new Timer for the Dryer. I Googled the part number and... Google indicated that Zoro.com had the appropriate part available at a reasonable price.

I buy stuff from Zoro with some regularity. It's especially nice to find an item competitively priced and then have a 25% coupon in hand.

So I checked the Garage Journal's Hot Deals forum and found a 25% "Flash Sale" posted. The trouble was the 25% deal had a purchase threshold and the Dryer part only got me about a third of the way to it.

There must be something else I could use from Zoro…

...and then I found it. I placed the order and the Dryer part will arrive on Thursday but the other item arrived yesterday.


20190715-02.jpg 20190715-03.jpg

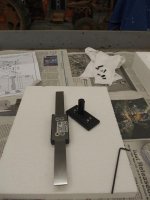
I want to add a DRO to my JET Mill but I haven't got around to that yet. matt_i had suggested that both a DRO on the knee and the quill would be useful. A Mitutoyo Quill Kit at 25% off seemed like just the ticket.


20190715-04.jpg

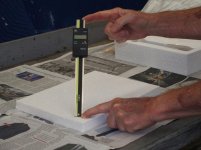
Today I intended to mount the Quill Kit. I went out to the LBG and set the Quill Kit on a table. I removed the Slider, Beam & Scale from the plastic wrap. The instructions read something like: "...remove the corrosion preventative oil from the scale using a soft rag soaked in cleaning oil..."

What the heck is "cleaning oil?"

I returned to the house and fired up the computer. Google wasn't really able to answer the "cleaning oil" mystery.

I went to the Mitutoyo web site and found a form on a Support Page. I asked the "What's cleaning oil?" question, entered my land line phone number & an email address and clicked send.

A couple of minutes later the phone rang. It was Eric from Mitutoyo. I read the passage from the instructions about the cleaning oil.

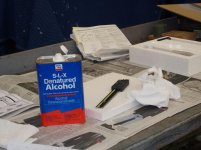
"Don't do that.", he said, "Just wipe it off with denatured alcohol."


20190715-05.jpg

I returned to the shop and removed the Beam from the Slider to clean it.

After the Beam had been wiped off something bad happened.


20190715-06.jpg

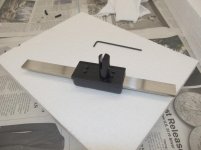
A part unexpectedly fell out of the inside of the Slider. A heart-felt machine-shop oath followed. "Where did that come from?", I thought as I peered into the inside of the Slider. It wasn't obvious & there was no reference to this item as I looked at the exploded diagram that came with the Quill Kit.


Back to the house and the Interweb.

I didn't have any luck initially but then I considered the concept that this item was really just a variant of a Mitutoyo Digital Caliper. I found an exploded diagram for that and saw a part that looked very similar to what had fallen out of my Slider.


20190715-07.jpg

It was a gib and if I aligned it as I have it in the picture above, it would slide into place and I could put the Beam back inside the Slider.


Continued in next post...
 
Last edited:
OP
S

sbosecker

Well-known member
Joined
Sep 25, 2012
Messages
3,539
Location
Peachtree City, GA
Continued...


20190715-11.jpg 20190715-12.jpg

The next step in the instructions was to add the battery. She lives!


20190715-13.jpg

Then I started to sort through the pieces to find the parts I needed for the next step. First off I've got too many Flat Head Screws, I should only have 2. Whatever.


20190715-14.jpg 20190715-15.jpg

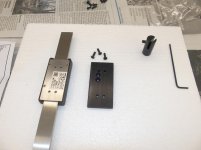
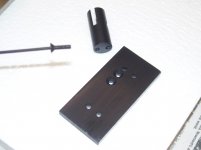
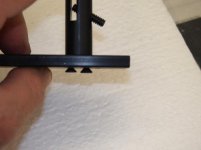
I attempted to fasten the round item to the plate using the two Flat Head Screws. Hmmm... I think I read about this in some of the reviews of this Quill Kit. The screws are too long.

EDIT: This isn't the issue I had seen in reviews. See next day's post.


20190715-16.jpg 20190715-17.jpg

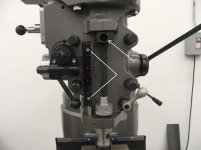
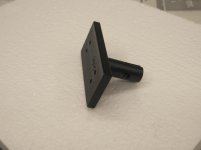
That post with the too long screws fits into a hole in the JET Mill (White Arrow). The plate on the back of the "post" mounts to the Slider. The Slide slides up and down the Beam and the other white pointers indicate where a bracket that supports the Beam is mounted. We'll get to all of that tomorrow.

The good news is that at this point my wife arrived and we went out to get some supper.

The bad news is that I can see more issues with the bracket hardware that is going to make this installation take quite a bit longer than it should.

Scott
 
Last edited:
OP
S

sbosecker

Well-known member
Joined
Sep 25, 2012
Messages
3,539
Location
Peachtree City, GA
Wednesday - July 17, 2019


Today a small package arrived in the mail...


20190717-01.jpg 20190717-02.jpg 20190717-03.jpg

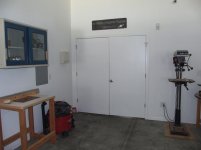
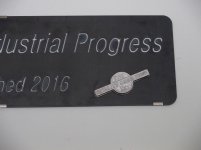
It was a 1/2 Cup Quality Shed Time aluminum casting. I decided the place for it was on the Palace of Industrial Progress steel sign that is over the double door that separates the Woodshop from the Auto/Metal Shop. It is so very nice to have this visible reminder of 1/2 Cup & Quality Shed Time.


20190717-04.jpg

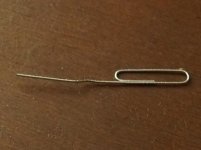
Yesterday I was having trouble getting the two Flat Head Screws to fully seat as I tried to fasten the Quill Stop Bar to the Rear Plate. I was meeting resistance with about 1/8 inch to go. Today I took the Special Tool pictured above and probed the 2 holes in the Quill Stop Bar. Sure enough, I dislodged some small metal chips. I blew out the holes with some compressed air and then threaded the Flat Hole Screws back into the holes.


20190717-05.jpg

There was some minor resistance at the same point as before but then the screws threaded all the way into the Quill Stop Bar. The screws were withdrawn and then I fastened the Quill Stop Bar to the Rear Plate.


20190717-06.jpg 20190717-07.jpg

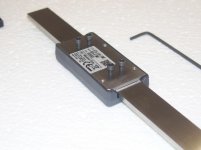
The next instruction was to attach the Rear Plate to the Slider using 4 small screws. The second picture shows the rear of the Slider - see the attached sticker? Believe it or not that sticker is thick enough to rock the Rear Plate and prevent all 4 screws from engaging. If enough force is applied and all screws engage the Rear Plate causes the Slider to bind.

This is another issue that has been mentioned in reviews. Most people remove the sticker. I'm going to see if I can find another solution as I'd prefer to have the sticker remain in place if possible.


Scott
 
Last edited:
OP
S

sbosecker

Well-known member
Joined
Sep 25, 2012
Messages
3,539
Location
Peachtree City, GA
Thursday - July 18, 2019


I've ordered some small screws from Albany County Fasteners that are a little longer than what was supplied with Mitutoyo Quill Kit to fasten the Rear Plate to the Slider. Also, remember that extra Flat Head Screw? That was a zero-sum game as they shorted me another screw that should have been in the bag of hardware. My order from Albany County should be here Saturday.


Today the part for the Dryer arrived so I got that fixed and I was helping my wife with some chores. Between all that stuff I did manage to finish up a project that had kinda been forgotten.


20190718-01.jpg 20190718-02.jpg

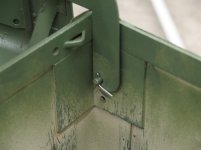
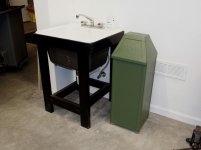
About a month ago I had refurbished the exterior of the Bennett Trash Can using a rattle-can of Olive paint. Yesterday, as I was working on the Quill Kit, I noticed the Bennett Trash Can's spring sitting on the worktable.

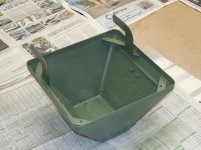
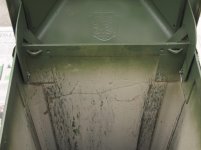
Today I took the lid of the trash can off gave the inside a hit with the rattle-can. I also painted the spring. Not trying to do anything more than keep the previously light-colored interior of the lid from jumping out at you when the door was pushed open.


20190718-03.jpg 20190718-04.jpg

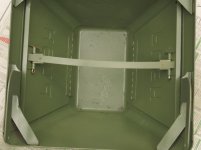
When the paint dried I used a couple of new cotter pins to attach the spring to the Push-Doors.


20190718-05.jpg 20190718-06.jpg

The lid of the Trash Can hinges on a couple of pins inside the carcass. A couple more new cotter pins and we're done.


20190718-07.jpg

I inserted the galvanized interior of the trash can into the carcass and placed a trash bag into the galvanized item. The lid was rotated back into position and the Bennett Trash Can is now useable.


Scott
 
Last edited:
OP
S

sbosecker

Well-known member
Joined
Sep 25, 2012
Messages
3,539
Location
Peachtree City, GA
Sunday - July 21, 2019


20190721-01.jpg

Yesterday a package of hardware arrived from Albany County Fasteners. Today I was able to return to the Mitutoyo Quill Kit.


20190721-02.jpg 20190721-03.jpg

I picked up where I left off on Wednesday. I tried using some longer cap screws with some washers to keep the Rear Plate from binding due to the manufacturer's sticker. This worked.


20190721-04.jpg

Another issue with the Quill Kit is the supplied 6-32 screws to mount an aluminum block to the JET Mill. While these screws will work with some Bridgeport-style machines, others (and mine) use 8-32 screws.


20190721-05.jpg 20190721-06.jpg 20190721-07.jpg

This means in addition to needing different screws than are supplied, one needs to widen the slot in the aluminum block to accept the larger screws. I removed about 6 thousands to each side of the slot. That did the trick.


Continued in next post...
 
OP
S

sbosecker

Well-known member
Joined
Sep 25, 2012
Messages
3,539
Location
Peachtree City, GA
Continued...


20190721-11.jpg

Now I ran into an issue that I hadn't seen reported before. This picture shows this bracket after I had fixed the problem. The black lines point to 4 M3 screws.


20190721-12.jpg

The holes for those screws had no threads. I got a 3mm tap out of the tool chest and tapped the holes to receive the screws.


20190721-13.jpg

Previously I had loosely mounted the aluminum block on the JET Mill. Now I positioned it correctly and tightened down the mounting screws.


20190721-14.jpg

The Slider Bracket is attached to the aluminum block and then some tweaking takes place to get the Quill Kit to slide properly. This did not take long. Once the positioning is finished all the mounting screws get torqued down and the set screw in the Quill Stop Bar is also tightened using an Allen Wrench.


20190721-15.jpg 20190721-16.jpg

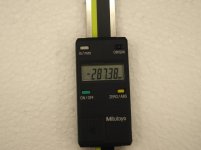
The device was turned on and zeroed out. Returned the quill feed wheel onto its hub and the Mitutoyo Quill Kit is installed.

Quite a few blips in the mounting hardware - I really expect a more refined product from Mitutoyo. Despite that I think this will be a fine addition to the JET Mill.


Scott
 
Last edited:

shortykorte

Well-known member
Joined
Sep 1, 2014
Messages
8,039
Location
Tallahassee, Fl
Kudos on getting kit installed. That is surprising what you had to do. Is kit for you mill or is a universal kit?


Shorty Korte
Always remember quality in QST

Sent from my iPhone using Garage Journal
 
OP
S

sbosecker

Well-known member
Joined
Sep 25, 2012
Messages
3,539
Location
Peachtree City, GA
Kudos on getting kit installed. That is surprising what you had to do. Is kit for you mill or is a universal kit?

shortykorte,

The kit is sold as a "Digimatic Quill Kit complete with brackets & scale for Bridgeport Type machines."

The issues I had:

1. Poor/Wrong Instructions.
2. Missing Hardware (gave me an extra screw of one item & shorted me a different screw)
3. Debris in threaded holes in Quill Stop Bar
4. Sticker on back of Slider causes binding issues.
5. Aluminum block requires modification to handle larger screws (#8-32 vs. #6-32)
6. Holes in Slider Bracket not tapped.


Most of these issues are, in my opinion, a result of poor management & oversight of the sourcing of the bracket hardware. There really isn't an excuse for 5 of the 6 listed issues.

I'll forgive them for Issue #5. Apparently there are Bridgeports & Bridgeport type Milling machines that use the #6-32 screws. While you can do what I did - mill out the slots to accommodate a larger screw; you can't go the other way - add material to the slots to accommodate a smaller screw.

It might be nice to have some information somewhere on the packaging informing the customer of that situation.

As I mentioned, most of the issues listed were noted in Amazon Reviews and other web site reviews. I don't recall seeing Items #3 & #6 mentioned anywhere.

Abom79 did an installation VIDEO on this same Quill Kit. I found that somewhat helpful.


Best regards,

Scott


KEYWORDS:
Mitutoyo 053906B Quill Kit Installation
 
Last edited:
OP
S

sbosecker

Well-known member
Joined
Sep 25, 2012
Messages
3,539
Location
Peachtree City, GA
Sunday - July 28, 2019

Due to work and other "stuff" I haven't been able to spend any quality time in the shop this past week. I'm also trying to prepare for my annual Recurrent Training Simulators.

Unlike Oscar Wilde who is reputed to have said, "The only way to get rid of a temptation is to yield to it...", I am trying to be a good boy and study vs. going out to the shop, "For just for a minute." HA!

However, one does have to eat and I was returning just now from the Grocery Store when I saw...


20190728-01.jpg 20190728-02.jpg 20190728-03.jpg

… a pair of Red-Tailed Hawks on the ground in front of the Lone Beech Garage. The one closest to the LBG has caught something and is "giving it the business". They were calling back and forth and stayed in position just long enough for me to get my smart phone out and take a few quick snaps.

Pretty cool.


Scott
 
OP
S

sbosecker

Well-known member
Joined
Sep 25, 2012
Messages
3,539
Location
Peachtree City, GA
Saturday - August 3, 2019

On Wednesday my employer called me and asked me to fly an airplane full of people to Lima Peru. I got back yesterday - late due to:
1. Inbound airplane was late to Lima
2. Had to return to the gate after pushback to deal with a disruptive passenger.

I got home and took a long nap followed by mowing my yard until I ran out of daylight.

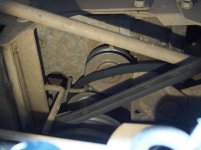
This morning I went out to finish mowing and then I would be able to return to my studies for next weekend's simulators. I started the mower and put it into gear... nothing happened. The drive belt had jumped off a pully.

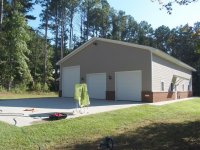
I pushed the mower across the back yard towards the Lone Beech Garage. My wife spotted me while I was doing this and came outside to help me push it up the half-circle ramp to the east Garage Door.


20190803-01.jpg 20190803-02.jpg

I sat up the grates over the Tornado Shelter so that I could place the mower in a position to work under it. I remembered the IKEA Jansjo LED Lamp I had modified in May to fit on a prototype adapter attached to a magnetic base (POST 2913 & POST 2914). I retrieved that lamp and positioned it so that it would provide light as I was working on the bottom of the mower.


20190803-03.jpg 20190803-04.jpg

Here was the most promising place to try to persuade the belt to return to a pulley. There is a rod sticking down vertically who's function is to keep the belt from coming off the pulley to begin with. I reasoned if I could force the belt between the "belt guard rod" and the pulley that I could fix this problem. My plan was for my wife to step on the mower's clutch which would give me the slack I needed to position the belt as in line with the pulley as best I could. Then I would have her slowly release the clutch pedal and hopefully the belt would be pulled past the "belt guard rod" and onto the pulley.


20190803-05.jpg

To my surprise this worked the first time we tried it. Even better, no fingers were harmed in the making of this picture. Ha!

Got the last of the yard mowed and returned to my studies.


Scott
 
Last edited:

1949 caddyman

Well-known member
Joined
Oct 5, 2010
Messages
1,778
Location
Arizona
Yesterday we got back from a 3 week trip to Europe. We had a non stop London to Phoenix. I slept on the plane for 5 or 6 hours in business class seating. Still feeling jet lag.

How does it affect you, do you get use to it?
 

shortykorte

Well-known member
Joined
Sep 1, 2014
Messages
8,039
Location
Tallahassee, Fl
Nice bird show.

The tornado shelter is coming in handy. On the simulator, what do you study?


Shorty Korte
Always remember quality in QST

Sent from my iPhone using Garage Journal
 
OP
S

sbosecker

Well-known member
Joined
Sep 25, 2012
Messages
3,539
Location
Peachtree City, GA
Yesterday we got back from a 3 week trip to Europe. We had a non stop London to Phoenix. I slept on the plane for 5 or 6 hours in business class seating. Still feeling jet lag.

How does it affect you, do you get use to it?


1949 caddyman,

First: Each human is different. Some people are "night people" some are "morning people" and I'm sure there other variants. Anyway, how you're built plays into the strategy each person uses.

Second: You were in Europe long enough to become adjusted to European time zones; generally pilots are not.

So kind of a different problem for us. We usually get a 24-hour layover and we're trying to get enough sleep after flying all night (usually) to be rested for the return to the USA .

Going to Europe: Usually most of us try to take a 2 or 3 hour nap after arrival. When the alarm goes off one is usually sleeping really, REALLY well and it's a fight to get up. It's probably early to mid afternoon (local time) at this point. Kill some time until supper; eat and then try to go to bed in order to get 8 hours of sleep before wakeup call happens. That could mean trying to go to sleep at about 4 or 5 pm body clock time it order to awaken at 2 am body clock time. This usually doesn't work as the tendency is to wake up after about 4 hours of sleep and flop around for an hour or more trying to go back to sleep.

The upside on the return to the USA (from Europe) is it's daylight. That's huge as your body is saying "I'm tired" but your brain is telling your body, "It's OK - it's daytime - be quiet you crybaby!"

So you're tired. Advancing age doesn't help. Turning that 3-day European trip into a 6-day (4 ocean crossings - not unusual) trip makes it even worse.

So, the condensed version, I don't think you get used to it. Each individual finds tactics to help mitigate the effects.


Scott
 
Last edited:
OP
S

sbosecker

Well-known member
Joined
Sep 25, 2012
Messages
3,539
Location
Peachtree City, GA
Nice bird show.

The tornado shelter is coming in handy. On the simulator, what do you study?

Shorty Korte
Always remember quality in QST

shortykorte,

The hawks were pretty cool. The Tornado Shelter does multi-task ...as was the plan. Ha!

What do I study... well, these days the changes are coming fast and furious. I attribute this to technology and the system trying to put 10 pounds in an aging, limited airspace 5 pound bag.

In the past decade the big boys have gone from using the amazingly comprehensive data recorded by the aircraft's flight data recorder only for accident investigation to using it for trend analysis. This required some negotiations between pilots, management & the Fed's to allow this data to be used primarily for "good" vs. "Big Brother" type oversight.

Prior to this recent change nobody really knew what was going on out there unless some metal was bent. Now this flight data, once analyzed, almost certainly showed there were things going on that no one had been aware of and caused new eyebrow height records to be set. When that sort of a revelation happens, the FAA & management demand that something must be done - NOW! Sometimes the "something" is a knee jerk that then gets modified again and again as time shows that the knee jerk may be inducing other issues.

New procedures are constantly being introduced to deal with congested airports and airspace to allow more airplanes to use strained assets.

So all of that, coupled with the 21st century ability to send out copious amounts of information digitally that is digested by the Electronic Flight Bag (EFB - an iPad with pilot software) without the pilot really knowing it is there, means that one needs to wade through the "stuff" and make sure one hasn't missed anything.

...only a year to go. Ha!

Best regards,

Scott
 
Last edited:

drivesitfar

Well-known member
Joined
Oct 23, 2013
Messages
36,077
Location
Pacific Northwest
SB: I hope you are ok cause I haven't seen you posting for a couple weeks. that said I know you are probably busy.

I also have a thread you should check out in vintage tools called metal cabinets if you haven't already seen it or posted on it before.

reason being one of the members just posted that he found some crash carts (drink carts) from somewhere and he said that there is a sale in Atlanta with some. here's the brief information and if you need more check out the thread and or PM Macgee.

For the GJ members in Atlanta, the Delta Museum have a surplus yard sale every month and sell aisle carts for $75 when they have them. Next one is Sept. 13th.

hope you have a great weekend
 
OP
S

sbosecker

Well-known member
Joined
Sep 25, 2012
Messages
3,539
Location
Peachtree City, GA
SB: I hope you are ok cause I haven't seen you posting for a couple weeks. that said I know you are probably busy.

I also have a thread you should check out in vintage tools called metal cabinets if you haven't already seen it or posted on it before.

reason being one of the members just posted that he found some crash carts (drink carts) from somewhere and he said that there is a sale in Atlanta with some. here's the brief information and if you need more check out the thread and or PM Macgee.

For the GJ members in Atlanta, the Delta Museum have a surplus yard sale every month and sell aisle carts for $75 when they have them. Next one is Sept. 13th.

hope you have a great weekend


DrivesItFar,

Thanks so much for checking on me and for the information about the Airline Meal/Beverage Carts.

All is well here... I finished what may well be my last set of Recurrent Training Simulators at Delta and then started preparing for my annual backpacking expedition with an old college buddy.


P8200119-edited.jpg

Here we are on Day 3 of 5 at about 7000 feet approaching Boulder Pass in Glacier National Park, Montana. I'm the runt on the right.

Here's a LINK to the route we traveled.

The above is from a SPOT GPS tracking device that can also call for the Calvary should that be necessary.

I finished the backpack and then went to Indiana to visit my dad and attend a family reunion. I got back to Georgia earlier this week and have been catching up on "stuff" that happened in my absence.

Looking forward to some Quality Shed Time in the near future!

Best regards,

Scott
 

AZpilot

Well-known member
Joined
Sep 29, 2012
Messages
413
Location
Mesa, AZ
Yeah, You did not fill out the drivesitfar check in/out sheet and we all got notified. Bad Scott, squirt bottle, squirt bottle.
 
OP
S

sbosecker

Well-known member
Joined
Sep 25, 2012
Messages
3,539
Location
Peachtree City, GA
Tuesday - September 3, 2019


With 2 major social events over the 3-day weekend out of the way, it was way past time to return to the LBG.


20190903-01.jpg

...but not so fast. I still needed to finish cleaning up my backpacking gear before putting it up for the year.


20190903-02.jpg

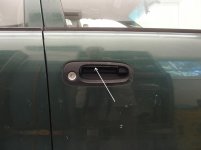
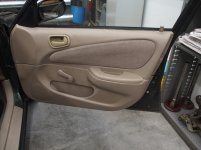
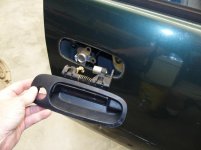
OK... now it's a bit of a silly project but I decided to do it anyway. The 2002 Toyota Corolla that will - eventually - be the subject of a major engine repair attempt has two broken exterior door handles. The passenger side broke quite a while ago and the driver's side broke a bit over a week ago. I do actually still drive this car around a bit so the driver's side door handle being kaput was a pain. Today I decided to replace the two broken exterior door handles - starting with the passenger side. The white arrow points to the place the broken part used to be.


20190903-03.jpg 20190903-04.jpg 20190903-05.jpg

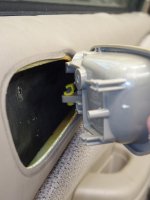
The first task is to remove the interior door handle.


20190903-06.jpg

With that out of the way, it's on to the next task.


20190903-07.jpg

A trim removal tool is inserted under the arm rest pad.


Continued in next post...

KEY WORDS: 2002 Corolla Exterior Door Handle Replacement
 
Last edited:
To avoid these ads, REGISTER NOW!
OP
S

sbosecker

Well-known member
Joined
Sep 25, 2012
Messages
3,539
Location
Peachtree City, GA
Continued...


20190903-11.jpg

Four clips hold the arm rest pad in place and the pad "hides" a couple of screws that need to be removed in order to get the door trim off the door.


20190903-12.jpg

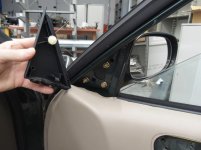
It isn't necessarily a requirement to remove this trim from behind the mirror but it appeared that not doing so would make removing the door trim harder. It was also extremely easy to remove this item so...


20190903-13.jpg

Removing the Window Handle is just a matter of pulling out the clip that holds the handle on the shaft. The Handle can then be pulled off.


20190903-14.jpg

Removing the two screw and using the trim removal tool around the lower parameter of the door trim allows the door trim to be lifted up and off.


20190903-15.jpg 20190903-16.jpg

The arrows point to the numerous "trim clip points" that fasten the door trim to the door. Some trim clips stayed with the door trim and most stayed with the door. After some thought, I realized the clips needed to be installed in the door trim when the door trim panel was reinstalled. I removed the clips in the door and installed them in the door trim.


20190903-17.jpg

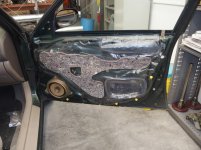
I pulled away the moisture barrier to gain access to the interior of the door.


Continued in next post...
 
Last edited:
OP
S

sbosecker

Well-known member
Joined
Sep 25, 2012
Messages
3,539
Location
Peachtree City, GA
Continued...


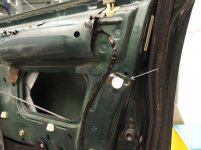
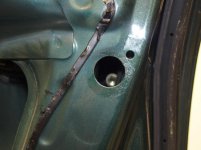
20190903-21.jpg 20190903-22.jpg

This little "sticky cover" needs to be removed to use an access hole.


20190903-23.jpg

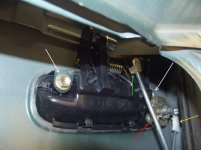
Here's what were dealing with...

Two white arrows point to the bolts (10mm wrench) that hold the handle to the door frame.
The red arrow points to a bolt (identical to the above) that fastens the lock to the door handle.
The green arrow points to a clip that secures the "door opening rod".
The yellow arrow points to a clip that secures the "door lock rod"


20190903-24.jpg

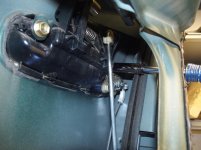
Using the "access hole" I removed the first bolt (white arrow) and then I unfastened the "green arrow clip". I used a 10mm combination wrench to unfasten the lock bolt. Last, I used the 10mm socket to unfasten the other "white arrow bolt".

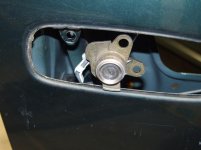
I had watched a YouTube video where a mechanic had unclipped the "yellow arrow" clip that secures the "lock rod" to the lock. I had attempted to release that clip as the fellow in the video did but I couldn't get it to release. I decided that maybe I'd have more luck approaching it from the outside... or at least I'd be able to see it better from the outside and figure out where I needed to apply force to release it.


20190903-25.jpg 20190903-26.jpg

However the lock cylinder was easily pushed out of the handle and it appeared that it was possible to reinsert the lock cylinder into the new handle without releasing the clip.


20190903-27.jpg

This is what I did and, after a brief struggle to get all the bolt holes to line up, I was able to reinstall the 3 bolts and fasten the new handle to the door frame.

As they say... installation was the reverse of the disassembly. The driver's side went quite a bit faster.

It was good to be in the shop again... even if it was a silly project.


Scott
 
Last edited:

drivesitfar

Well-known member
Joined
Oct 23, 2013
Messages
36,077
Location
Pacific Northwest
SB: that little Corolla is sure getting your attention and it seems to be a great car to learn on. I also bet your son loves that you are able to fix it for him or did he finally give you that car?

10 years ago I had a week long class in Missoula and my bride came with me to hang out cause there was plenty of time to do tourist type stuff and we drove up to Glacier park and while we kept hearing that the glacier was disappearing we weren't allowed to drive up one of the park's roads cause there was too much snow.

I bet it was fun in the summer? I love the people of Montana too and if it wasn't so far from the ocean I know my bride would agree, but she loves the ocean being close by.

all this simulater stuff seems like you are a new pilot and i'm guessing you are very close to MANDATORY RETIREMENT or do they do that anymore at 60 or 62?

take care and always fun checking in on you!!
 
OP
S

sbosecker

Well-known member
Joined
Sep 25, 2012
Messages
3,539
Location
Peachtree City, GA
SB: that little Corolla is sure getting your attention and it seems to be a great car to learn on. I also bet your son loves that you are able to fix it for him or did he finally give you that car?

10 years ago I had a week long class in Missoula and my bride came with me to hang out cause there was plenty of time to do tourist type stuff and we drove up to Glacier park and while we kept hearing that the glacier was disappearing we weren't allowed to drive up one of the park's roads cause there was too much snow.

I bet it was fun in the summer? I love the people of Montana too and if it wasn't so far from the ocean I know my bride would agree, but she loves the ocean being close by.

all this simulater stuff seems like you are a new pilot and i'm guessing you are very close to MANDATORY RETIREMENT or do they do that anymore at 60 or 62?

take care and always fun checking in on you!!


DrivesItFar,

Thanks for stopping by!

Yes, the Corolla is a great "teaching aid" as it has practically no economic value. Several years ago I purchased it for a pretty reasonable price as a vehicle that my son could use to get back and forth from Georgia Tech; so it belongs to me. I think I have mentioned previously that, for my purposes, it will be/is the equivalent of a Medical School Student's cadaver. Perhaps I should refer to it as the "Cadaver Corolla". Ha!

The backpack in Glacier worked out nicely. The weather cooperated (it didn't rain on us while hiking) although it was raining the day we arrived and it started raining again as we were driving to the hotel at the end of the adventure.

I did have one first: We nearly ran out of camp stove fuel. We must have purchased a can that had leaked or something as we always have fuel leftover on these events. Two days into the backpack I'm noticing the fuel canister seems to be behaving oddly and it seems light. I actually slept with a liter bottle of water in my sleeping bag on the 3rd night so the stove wouldn't have to burn as long to boil the water the next morning. On the morning we were hiking out (5th day) we had decided to just eat a couple of Clif Bars for breakfast and have a cup of coffee. The stove ran out of gas about 30 seconds after we started to boil our coffee water. So coffee had to wait until we got to the Polebridge Mercantile - located just outside the extreme northwest corner of Glacier National Park - a few hours later.

In the USA the mandatory retirement age for scheduled airline pilots changed from 60 to 65 in December 2007.

It was really great to get out into the shop again. Looking forward to more of the same in the coming months!

Best regards,

Scott
 

drivesitfar

Well-known member
Joined
Oct 23, 2013
Messages
36,077
Location
Pacific Northwest
SB: it's good to know you CAN be a pilot if you choose to after you turn 60 cause that just feels like it's too young and most of the 60 year olds need to be around to help the young guys now that are weather is getting so crazy.

I won't ask you if you've flown thru a hurricane or typhoon cause don't want to bring up those memories, but I bet you've saved more than one plane from disaster when something weird or an emergency popped up.

so if you didn't have propane would hot coffee be the only loss or would you miss a few meals too?

sounds like a fun trip.

is it hard to be so far from your dad's farm or does he have other relatives close that can check in on him?

we're thinking of moving out of the city, but with both our parents being alive and in their mid 80's it can be any day where they might need something and they are still living in their homes and very happy there.

cheers
 
OP
S

sbosecker

Well-known member
Joined
Sep 25, 2012
Messages
3,539
Location
Peachtree City, GA
SB: it's good to know you CAN be a pilot if you choose to after you turn 60 cause that just feels like it's too young and most of the 60 year olds need to be around to help the young guys now that are weather is getting so crazy.

I won't ask you if you've flown thru a hurricane or typhoon cause don't want to bring up those memories, but I bet you've saved more than one plane from disaster when something weird or an emergency popped up.

so if you didn't have propane would hot coffee be the only loss or would you miss a few meals too?

sounds like a fun trip.

is it hard to be so far from your dad's farm or does he have other relatives close that can check in on him?

we're thinking of moving out of the city, but with both our parents being alive and in their mid 80's it can be any day where they might need something and they are still living in their homes and very happy there.

cheers

DrivesItFar,

Sorry I'm slow getting a reply to your post...

We use freeze dried food for our morning & evening meals and Peanut Butter and Tortillas for lunches. Clif Bars for trail snacks rounded out the chow. The lack of the camping stove fuel would have meant using a campfire (where allowed) to heat up our freeze dried food and using up spare Clif Bars where that wasn't an option. If things were really bad we'd have to make a decision on whether or not to make a unauthorized fire to cook our chow.

Yeah... I wish I was closer to dad. Fortunately my 2 brothers live very close and visit him almost daily. That's huge. It is good that you're close to your parents.

Best regards,

Scott
 
OP
S

sbosecker

Well-known member
Joined
Sep 25, 2012
Messages
3,539
Location
Peachtree City, GA
Thursday - September 19, 2019

For the past few days I've been putting together a little project that will help in keeping my hardware collection organized. I keep the hardware larger than 1/4" in an Equipto Cabinet. All the smaller stuff is kept in 5x5-drawer plastic organizers that I've acquired at various Estate Sales over time.

All the organizers were scattered in the house's basement and needed to be organized better.

Yes, I needed to organize the organizers. Ha!


20190914-01.jpg

I had some scraps in my lumber pile that would work to make some shelves.


20190915-02.jpg

I spent a little time at the drafting table putting together a plan for the materials. Some folks can walk into the shop and just "make" stuff. It works better for me if I put it down on paper first.


20190915-03.jpg

Based on my drawing, I cut the scrap into useable sizes and cleaned them up with my ancient Craftsman belt sander.


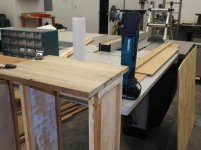
20190915-04.jpg

I cut some dados for the shelves and fit it together. I had let the sides of the shelves run "wild" and would trim them later. I placed one of the plastic organizers inside the shelving to insure I hadn't blundered when drawing the plan.


20190916-05.jpg 20190917-06.jpg 20190917-07.jpg

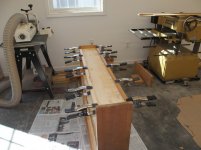
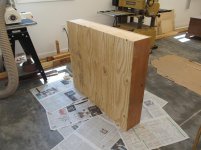
The shelves were glued and clamped then strips were added under the shelves to make them stiffer.


Continued in next post...
 
Last edited:
OP
S

sbosecker

Well-known member
Joined
Sep 25, 2012
Messages
3,539
Location
Peachtree City, GA
Continued...


20190917-11.jpg

I trimmed the sides of the shelving with my multitool.


20190917-12.jpg

A piece of scrap plywood was attached to the back of the shelves.


20190917-13.jpg

The shelves were primed and painted.

All of this was done at a leisurely pace over the past few days.


20190917-14.jpg

The shelves were mounted in the Lone Beech Garage this evening and the plastic organizers brought out from the basement. I have a few extra that are temporarily sitting on top the shelves. At some point in the future I'll probably make another set of shelves and locate it in a similar position under another window on the north wall of the shop.


Scott
 
Last edited:
OP
S

sbosecker

Well-known member
Joined
Sep 25, 2012
Messages
3,539
Location
Peachtree City, GA
Friday - September 20, 2019


A week ago I attended an Estate Sale. This particular Estate Sale seemed to have potential because:

1. It had an outbuilding with "stuff" piled up inside.

2. 3 (incomplete) Autogyros were a part of the sale.

Not that I wanted an Autogyro, incomplete or no, but their presence seemed to support the idea that this would be a sale that would have "stuff" I'd be interested in.

Although I did find a couple of items of interest, for the most part there wasn't that much that appealed to me.


20190920-01.jpg

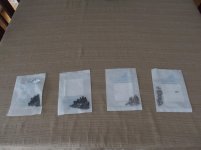
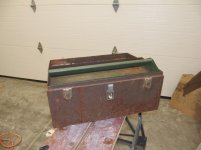
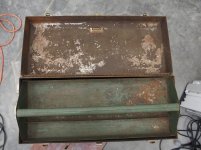
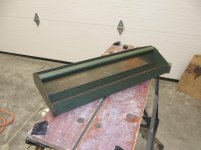
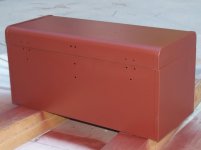
One thing I left with was this Kennedy K-20 Toolbox. It was FILLED with plastic sacks of aviation & mil-spec nuts and bolts. That was what I was interested in and the toolbox was a part of that lot.

I didn't need a toolbox and I was thinking I would probably put it on Craigslist for free or something like that.

A few days ago my son mentioned that he could use a toolbox and I showed him this one. He seemed to think it would work for him so now I'm going to try and clean it up.


20190920-02.jpg 20190920-03.jpg 20190920-04.jpg

20190920-05.jpg 20190920-06.jpg 20190920-07.jpg

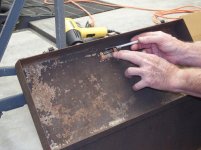
So there's going to be a lot of paint/rust removal and then a coat of paint. To facilitate the cleanup, I intend to remove the handle and latch hardware.

Here's where I'll be trying to learn something new. I'm going to attempt to reinstall this toolbox's hardware with Semi Tubular Rivets - just as they were when it was manufactured.

That should be an adventure in learning. Ha!


Continued in next post...
 
Last edited:
OP
S

sbosecker

Well-known member
Joined
Sep 25, 2012
Messages
3,539
Location
Peachtree City, GA
Continued...


This evening I was just trying to get it prepped a little and I hope to start the actual cleanup tomorrow.

One thing I thought I'd try to accomplish tonight was the removal of the "Kennedy Kits" label on the inside of the toolbox lid.


20190920-11.jpg

I reasoned that a little heat and an X-Acto Knife might allow me to save the label. I judiciously played the heat gun's output on the lid behind the label.


20190920-12.jpg 20190920-13.jpg 20190920-14.jpg

This actually worked much better than I thought it would. I didn't use a lot of heat so maybe the adhesive would have peeled off without any thermal work.


20190920-15.jpg

Either way, the label was saved.


Scott
 
Last edited:
OP
S

sbosecker

Well-known member
Joined
Sep 25, 2012
Messages
3,539
Location
Peachtree City, GA
Saturday - September 21, 2019


Today consisted of an afternoon of Quality Shed Time!


20190921-01.jpg 20190921-02.jpg

I started trying to figure out the best way to remove the hardware from the Kennedy K-20 Toolbox. I tried drilling out the rivets by stepping up in drill sizes but I was concerned that I would drill the hole too large at some point. I eventually went with a 90-degree die grinder with a 60 grit roloc disc and ground the rivet down to the metal.


20190921-03.jpg 20190921-04.jpg

That worked pretty well and I continued using that method.


20190921-05.jpg 20190921-06.jpg 20190921-07.jpg

I did have to use a grinding stone in my drill to get a couple of rivets out that couldn't be reached with the roloc disc but, in a reasonable amount of time, I had all the hardware off the toolbox.


Continued in next post...
 
Last edited:
OP
S

sbosecker

Well-known member
Joined
Sep 25, 2012
Messages
3,539
Location
Peachtree City, GA
Continued...


20190921-11.jpg 20190921-12.jpg

Moved the project outside to keep the paint dust & rust away from the shop's interior. It was a beautiful late summer day... temperatures in the low 80's and bone dry. We haven't had any significant rain for about 3 weeks.

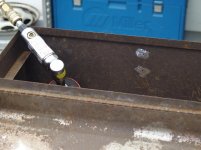
I used an Angle Grinder and a DA Sander to do most of the heavy lifting. Inside the box some small Harbor Freight wire wheels in my drill did some useful work. I followed that with a wire brush and some sandpaper for cleaning up the corners.


20190921-13.jpg 20190921-14.jpg

About 2 hours of time went into cleaning up the toolbox.


20190921-15.jpg 20190921-16.jpg

I hit the exterior with some primer and went to supper. A couple of hours later I sprayed the interior and the bottom of the toolbox.

At the moment the toolbox is still sitting outside the LBG. In about a half hour I'll bring it inside for the night.

Plenty of work yet to be done but I was happy with what I got accomplished today.


Scott
 
Last edited:

shortykorte

Well-known member
Joined
Sep 1, 2014
Messages
8,039
Location
Tallahassee, Fl
Nice save on the decal. Are you going try to go back with the brown crinkled paint? Look forward to seeing the finished box.


Shorty Korte
Always remember quality in QST

Sent from my iPhone using Garage Journal
 

drivesitfar

Well-known member
Joined
Oct 23, 2013
Messages
36,077
Location
Pacific Northwest
SB: it looks like you've got more small screws, nuts and bolts than most hardware stores and also organized so maybe you can find them when you need them.

in case you do want to do the Wrinkle paint texture that most Kennedy boxes have a few members put that finish on their vises so there is a bit of information about it on the vise repair 101 thread in vintage tools and here's some pics that i've saved to give you some help.

good luck and nice save!!
 

Attachments

  • IMG_20161122_163931.jpg
    IMG_20161122_163931.jpg
    86.2 KB · Views: 52
  • IMG_20150823_153448.jpg
    IMG_20150823_153448.jpg
    75.7 KB · Views: 52
  • IMG_20150804_085036.jpg
    IMG_20150804_085036.jpg
    79.6 KB · Views: 50
  • DSC00614.jpg
    DSC00614.jpg
    93.4 KB · Views: 54
  • DSC00612.jpg
    DSC00612.jpg
    88.5 KB · Views: 49
OP
S

sbosecker

Well-known member
Joined
Sep 25, 2012
Messages
3,539
Location
Peachtree City, GA
Nice save on the decal. Are you going try to go back with the brown crinkled paint? Look forward to seeing the finished box.

Shorty Korte
Always remember quality in QST

Shorty Korte,

I think I'm just going to paint it a satin brown vs. the crinkled brown. I haven't decided on a dark vs. a lighter brown. I might have gone with a different color but the handle is a dark brown and most other colors didn't seem like they would work as well. (Maybe an olive drab would have worked but I think I'll do the interior tray in that color.)

Probably the "teaching moment" of this project will be me attempting to rivet the hardware back onto the toolbox.

With the hardware off I used drill bits to measure the holes in the toolbox.

The larger holes would accept a Number 20 drill bit and the smaller holes would accept a Number 30 drill bit. I believe a Number 20 is .161" and a Number 30 is .1285". I think that indicates that I need 1/8" & 5/16" rivets for this project.

Installing them should be interesting. Ha!

Best regards,

Scott
 
Last edited:
OP
S

sbosecker

Well-known member
Joined
Sep 25, 2012
Messages
3,539
Location
Peachtree City, GA
SB: it looks like you've got more small screws, nuts and bolts than most hardware stores and also organized so maybe you can find them when you need them.

in case you do want to do the Wrinkle paint texture that most Kennedy boxes have a few members put that finish on their vises so there is a bit of information about it on the vise repair 101 thread in vintage tools and here's some pics that i've saved to give you some help.

good luck and nice save!!

DrivesItFar,

Ha! The number of the plastic organizers isn't representative of the hardware I have. As I mentioned, I've picked them up for small money at some estate sales and they were sitting on top of a table in my basement. I needed to get them organized before I could use them effectively for current & future hardware organization. I think I probably have 5 of the organizers actually being used to hold sorted hardware.

I'm sure some folks are shaking their heads at this and I get it. There are many different personalities out there and "collecting & organizing" is one of my quirks.

For a complete list of personality quirks you may contact my wife. If you do this set aside some time. Ha!

Thanks for the wrinkled paint information. I was aware that Kennedy had "touch up" paint (for considerable Denaro) but I didn't know about this product. Regardless, I'm going to go with a "normal" brown paint of some sort.

If I can get the toolbox refurbished I'm pleased that my son will be able to use it.

Best regards,

Scott
 

Bob Heine

ALLIANCE MEMBER
Joined
Oct 24, 2009
Messages
10,709
Location
Boca Raton, Florida
Scott, are you planning to use stainless rivets? If so, they require quite a bit more force than the aluminum rivets. It's a great opportunity to add a pneumatic rivet gun to your arsenal if you don't already have one. Otherwise, a large rivet setting tool like an Astro 1426 would make the job less painful.
 
OP
S

sbosecker

Well-known member
Joined
Sep 25, 2012
Messages
3,539
Location
Peachtree City, GA
Scott, are you planning to use stainless rivets? If so, they require quite a bit more force than the aluminum rivets. It's a great opportunity to add a pneumatic rivet gun to your arsenal if you don't already have one. Otherwise, a large rivet setting tool like an Astro 1426 would make the job less painful.


Bob,

I'm thinking of using Semi-Tubular Rivets to fasten the hardware to the box. I think that can be done by hand with the right tools. We shall see.

My fall back position will be to use something like you suggested.

Best regards,

Scott
 

drivesitfar

Well-known member
Joined
Oct 23, 2013
Messages
36,077
Location
Pacific Northwest
SB: let's have an agreement. I won't call your wife to ask her about you and you don't call mine to ask her about me.

speaking of my STUFF she's been calling my backyard JUMANJI cause since she gave it to me in exchange for giving her my old shed area it's really a jungle down there since I moved out of my old shop.

best of luck with the paint and i'm sure whatever you decide it will be great. that Wrinkle (or crinkle or Krinkle) is sort of a primer i think that you shoot on the color you like over it, but i'm not 100% positive cause it's been a while since i was in that conversation on how that member put it on his vises.

did you even have a second to check out that auction lead i sent you on the airplane service carts? with your skills at taking apart and fixing things i bet a few of those in the LONE BEECH GARAGE would come in handy.

have a great day!!
 
OP
S

sbosecker

Well-known member
Joined
Sep 25, 2012
Messages
3,539
Location
Peachtree City, GA
SB: let's have an agreement. I won't call your wife to ask her about you and you don't call mine to ask her about me.

speaking of my STUFF she's been calling my backyard JUMANJI cause since she gave it to me in exchange for giving her my old shed area it's really a jungle down there since I moved out of my old shop.

best of luck with the paint and i'm sure whatever you decide it will be great. that Wrinkle (or crinkle or Krinkle) is sort of a primer i think that you shoot on the color you like over it, but i'm not 100% positive cause it's been a while since i was in that conversation on how that member put it on his vises.

did you even have a second to check out that auction lead i sent you on the airplane service carts? with your skills at taking apart and fixing things i bet a few of those in the LONE BEECH GARAGE would come in handy.

have a great day!!

DrivesItFar,

The toolbox painting began today. I used Rustoleum Dark Brown.

Think UPS Truck. Ha!

I haven't checked on the airline service carts. I think I live in a target-rich environment for that sort of thing so I should be OK if I wait a bit.

I see them at some of the Estate Sales I frequent... as well as some other useful items. I'll have to take some pictures of the Airline Aluminum "trays" I've picked up over the past couple of years.

Best regards,

Scott
 
Last edited:
To avoid these ads, REGISTER NOW!
Top Bottom