To avoid these ads, REGISTER NOW!

Above 1200 Sq/FT The Lone Beech Garage (60x46x16)

Wokspaces above 1200 squarefeet.
OP
S

sbosecker

Well-known member
Joined
Sep 25, 2012
Messages
3,539
Location
Peachtree City, GA
Tuesday - March 31, 2020


20200331-01.jpg

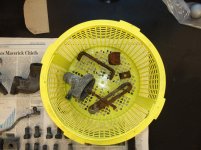
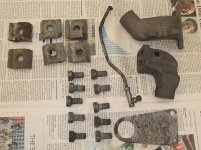
I pulled the rusty tractor items (see yesterday's post) out of the EvaporRust today. I rinsed them off with water and then hit them with a heat gun to dry them quickly.

A couple of the crustier items may need another dipping. These may have been sitting on one of the other items and that area may not have gotten properly exposed to the EvapoRust.


Scott
 
To avoid these ads, REGISTER NOW!
OP
S

sbosecker

Well-known member
Joined
Sep 25, 2012
Messages
3,539
Location
Peachtree City, GA
Wednesday - April 1, 2020


20200401-01.jpg 20200401-02.jpg

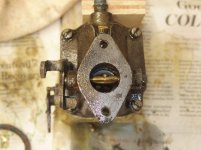
The Throttle Valve in the Marvel Schebler TSV-13 Carburetor freed up today.


20200401-03.jpg

Another batch of rusty Allis-Chalmers parts were readied for an overnight EvapoRust bath.


20200401-04.jpg 20200401-05.jpg

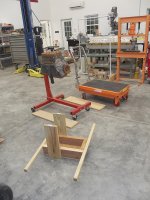
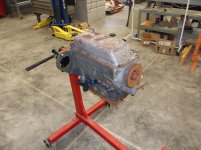
I want to get the Allis-Chalmers Model G engine on the engine stand so I can rotate it upside down and take the Oil Pan off. The outside of this Continental N62 engine has some rust on it from its time of neglect. I think it best to see what's going on inside as soon as possible. The Engine Stand was brought to the LBG from the house basement. I fashioned some handles on the box the engine is sitting on to facilitate carrying it out of the basement. Hopefully my son will have a free half-hour in the next couple of days and he'll help me move it.


20200401-06.jpg 20200401-07.jpg

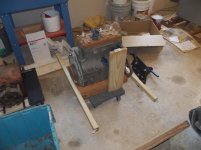
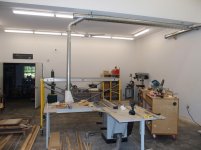
I got an email yesterday that my ductwork order had shipped. It is scheduled to arrive tomorrow around noon. In anticipation of that, I moved the Miter Saw Station out of the way and set up a section of scaffolding to assist in installing the ductwork.

Should be an interesting day tomorrow.


Scott
 
OP
S

sbosecker

Well-known member
Joined
Sep 25, 2012
Messages
3,539
Location
Peachtree City, GA
Thursday - April 2, 2020


20200402-01.jpg 20200402-02.jpg

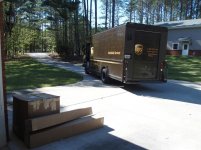
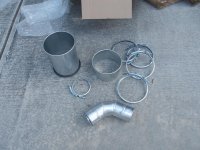
The ductwork delivery arrived late afternoon. I pulled everything out of the big cubic box - looks like I got shorted one 5-inch clamp. That's OK 'cause I now realize what I had forgotten to order... I didn't order any 8-inch clamps so I'll see about getting that and a couple of other items when I call about the missing 5-inch clamp.


20200402-03.jpg 20200402-04.jpg

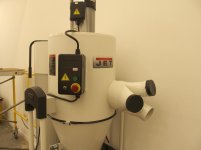
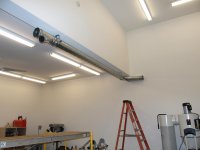
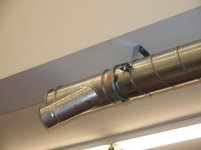
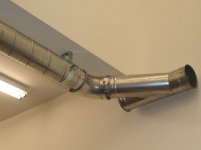
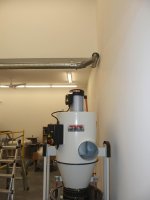
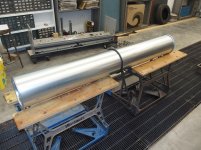
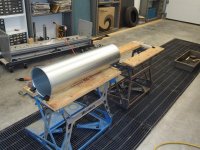
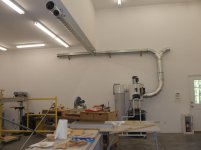
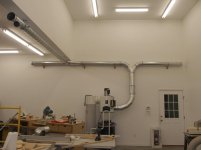
I unwrapped everything and laid a few items out on the floor to get the feeling of how it was going to work. This is the 8-inch duct that will feed directly into the JET Dust Collector. A Long Sweep 90 Degree Elbow will attach to the Dust Collector and attach to a length of 8-inch pipe. That pipe will attach to an 8-inch to double 6-inch wye. That will attach to 6-inch ducting that will run horizontally around the walls of the Woodshop.


20200402-05.jpg 20200402-06.jpg

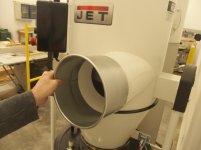
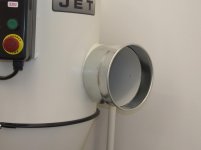
I tried to slide the Clamp Together Adapter onto the Dust Collector but it wouldn't go on. I will be asking a few questions about this adapter tomorrow. I made an assumption when I ordered it that might have been a mistake (inside diameter vs. outside diameter specifications)


20200402-07.jpg

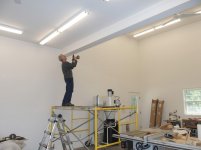
I moved the scaffolding around 90 degrees to assist in the first order of business which is mounting some hangers to the bottom of the I-Beam. The location of the length of ducting that hangs below the I-Beam will define the height of the rest of the horizontal runs. I need to pick up a few 3/8-inch Lag Screws tomorrow before the Governor shuts down the state for a week to help slow down The Virus. It sounds like the rest of the state will be asked to do what my wife and I have been doing for the past 3 weeks.


Scott
 
OP
S

sbosecker

Well-known member
Joined
Sep 25, 2012
Messages
3,539
Location
Peachtree City, GA
Friday - April 3, 2020

First order of business today was to try to order a few items from Blastgateco.com that I missed, they missed or an error of some sort needed to be fixed.

I needed some 8-inch clamps for the 8-inch duct. I had somehow forgotten that in the first order. I needed a 5-inch clamp that they shorted me. I needed a 60 degree 4-inch elbow and an 8-inch adjustment tube (error & another oversight on my part).

Before I called in the order, I needed to see if I had order an incorrect 8-inch Machine Adapter for the inlet to the JET Dust Collector. I showed a picture of that item next to the Dust Collector yesterday.

I went out to the Woodshop and measured and fussed with trying to either get the adapter on the dust collector or determine if I needed an 8-inch Outside Diameter flare vs. the 8-inch Inside Diameter flare on the one I had purchased. Measuring seemed to indicated that I'd never get an 8-inch Outside Diameter on the dust collector so I kept trying to persuade the adapter to go onto the dust collector... I was so close but it wouldn't go on.

Then I noticed something...


20200403-01.jpg 20200403-02.jpg

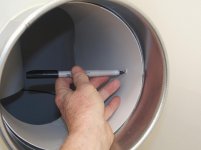
The adapter seems to have been manufactured incorrectly. The “flare” that was formed in the adapter is incomplete. There is a pretty good step on one side of the welded seam but it fades away after about a quarter of the way around the diameter and is nonexistent by about half way around.

I sent the pictures to Blastgateco.com and they are sending me a new adapter to go along with the rest of the stuff I ordered. Sadly he said it wouldn't go out till Monday so it will be the middle of the week or later before I get this stuff.


After I placed my order with Blastgateco.com I ran up to a local Hardware Store to get come 2-inch long 3/8" Lag Bolts.


20200403-03.jpg 20200403-04.jpg 20200403-05.jpg

When I returned home I drilled a couple of holes to receive the Lag Bolts and mount 2 hangers below the I-Beam that spans the ceiling of the Woodshop.


20200403-06.jpg 20200403-07.jpg

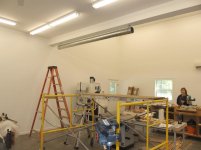
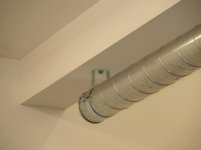
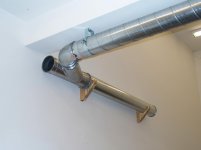
My wife assisted me with hanging a 10-foot section of 6-inch Spiral Duct from the hangers. I have a couple of 6-inch Nordfab Machine Adapters inserted in the end of the Spiral Duct. I had gotten the Spiral Duct via a Craigslist Ad before I became aware of the Clamp Together style of ducting. I have two 10-foot sections of the Spiral Duct and I think I can use it under the I-Beam. I'll be using Nordfab style clamp together duct everywhere else.

Continued in next post...
 
Last edited:
OP
S

sbosecker

Well-known member
Joined
Sep 25, 2012
Messages
3,539
Location
Peachtree City, GA
Continued...


20200403-11.jpg 20200403-12.jpg

20200403-13.jpg 20200403-14.jpg

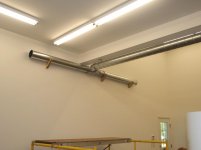
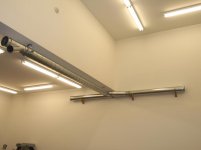
I now attached a couple of branches to the ductwork that was hanging from the I-Beam. The branch that parallels the East Wall will allow me to determine where to place my shopmade duct supports.


20200403-15.jpg

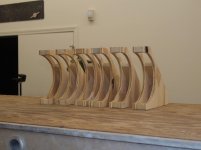
I had made a prototype some time ago. This seems like a viable approach so it was time to make some more.


20200403-16.jpg 20200403-17.jpg

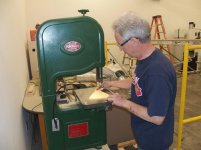
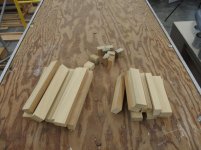
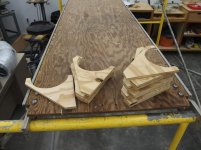
I cut a bunch of plywood to size on the Table Saw & Miter Saw, then I moved to the Band Saw to cut the half-circles that will support the duct. I have enough parts to make 6 hangers. I started gluing them up tonight. It will take a while to get all 6 made.

Scott
 
Last edited:
OP
S

sbosecker

Well-known member
Joined
Sep 25, 2012
Messages
3,539
Location
Peachtree City, GA
Saturday - April 4, 2020


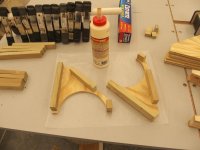
Last night I would trot out to the LBG, apply glue on one half of a couple of brackets, come back to the house and do "stuff" while the glue set. 45 minutes later I would return to the Woodshop and glue a couple of sides to the previous work - when that glue set up I'd have a completed bracket.

Repeat until around 11:00 pm.


20200404-01.jpg

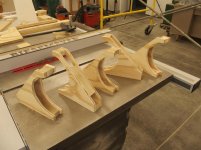
This morning I continued that drill until I had 6 new brackets made.


20200404-02.jpg 20200404-03.jpg

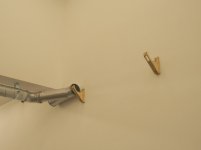
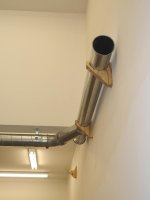
Establishing the correct position for the first bracket was critical. All the others would be fastened to the wall in a position established by a level line off the first bracket. My wife helped support the first 5-foot tube as I ensured it was level. With the tube level, a bracket was positioned and held in place as a line on the wall noted the bottom of the bracket. This procedure was repeated to check the accuracy of the pencil mark.

The tube was lowered to the floor and a couple of brackets were installed.


20200404-04.jpg

Using the previously established level line, I installed another bracket on the wall to allow the ducting to travel towards the north wall.


20200404-05.jpg 20200404-06.jpg 20200404-07.jpg

That's as far north as I'm going to go for the time being. I'll cap off that end of the duct's run. At this time the primary goal of this project is to get the Dust Collector hooked up to the ductwork and to get duct to the Table Saw, Planer & Drum Sander.

I think I will need to get another delivery from Blastgateco.com (expected the middle of next week) before I can move forward with the rest of the project.

Scott
 
Last edited:

1949 caddyman

Well-known member
Joined
Oct 5, 2010
Messages
1,778
Location
Arizona
That’s going to be a nice dust system. Mine is 2” ABS with a shop vac. For the size of my system it works very good.
 

Jayman17

Well-known member
Joined
Feb 6, 2017
Messages
3,820
Location
Seattle, Wa
Scott, looks like your DC ducting is going up nicely. I like those shop made hangers. I realize there are many different ways to achieve things while woodworking, did you consider using your first piece of plywood as a template?
You could then cut your other pieces to just outside the template line, screw/double back tape them together and finish on the router table with a pattern cutting bit. Every piece exactly the same. Not a criticism, just throwing out another method for consideration. :thumbup:
Stay safe

Jay
 
OP
S

sbosecker

Well-known member
Joined
Sep 25, 2012
Messages
3,539
Location
Peachtree City, GA
Scott, looks like your DC ducting is going up nicely. I like those shop made hangers. I realize there are many different ways to achieve things while woodworking, did you consider using your first piece of plywood as a template?
You could then cut your other pieces to just outside the template line, screw/double back tape them together and finish on the router table with a pattern cutting bit. Every piece exactly the same. Not a criticism, just throwing out another method for consideration. :thumbup:
Stay safe

Jay


Jay,

Thanks for the kind words and I appreciate the idea!

I hadn't thought of that approach and I think it has merit. I know I'll need a few more brackets before this is all over with so I'll chew on that.

I may stick with how I'm doing it now just because I've got "muscle memory" at this point and the brackets seem to work at these tolerances.

I certainly will use this idea for a future project!

Best regards,

Scott
 
OP
S

sbosecker

Well-known member
Joined
Sep 25, 2012
Messages
3,539
Location
Peachtree City, GA
Sunday - April 5, 2020


This morning I realized I could add three more parts to one end of my ductwork.


20200405-01.jpg

The 6-inch Elbows clamped to the 8-inch Wye helps me visualize what's going to be required next week when the rest of my components arrive.


20200405-02.jpg

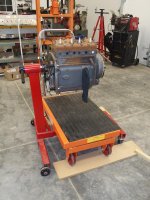
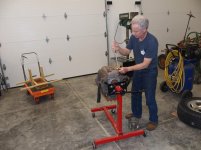
My son and I brought the Continental N62 Engine from the basement to the LBG today. I had the Hydraulic Scissor Cart straddling the Engine Stand so it was just a matter of sitting the engine's "Sedan Chair" on the Cart.


20200405-03.jpg 20200405-04.jpg

Lifted the Engine and mated it to the Engine Stand.


20200405-05.jpg 20200405-06.jpg

Lowered the Scissor Cart's table...


20200405-07.jpg

...then got the Scissor Cart away from the Engine Stand.

Now, when I get time, I will be able to evaluate the condition of this engine more easily.


Scott
 
OP
S

sbosecker

Well-known member
Joined
Sep 25, 2012
Messages
3,539
Location
Peachtree City, GA
Tuesday - April 7, 2020

I got back out to the Woodshop today and was going to start making some more Duct Brackets. Then I realized I probably should clean out sawdust from my ShopFox dust collector and the little Home Depot Rigid Shop Vac that serves the Miter Saw Station.


20200407-01.jpg 20200407-02.jpg

Goodness... Apparently I have neglected to do this for a while.


20200407-04.jpg 20200407-03.jpg

Ripped some plywood in to blanks and then used the Miter Saw to get them to the proper size and form. I made enough for 11 brackets.

From the Miter Saw Station I moved to the Band Saw and cut out the half-circle parts of the brackets.

I started gluing up the first set of brackets and then I quit for the evening.


Scott
 
Last edited:
OP
S

sbosecker

Well-known member
Joined
Sep 25, 2012
Messages
3,539
Location
Peachtree City, GA
Wednesday - April 8, 2020


20200408-01.jpg 20200408-02.jpg

Some of the Bracket components that I made last night.


20200408-03.jpg

The way I'm doing this - and it's not a time efficient process - is to glue one side of a bracket together; leave the woodshop while the glues sets; and then come back and glue the remaining side on the bracket.

I do this two sets of brackets at a time.

Repeat.


20200408-04.jpg

At the end of today I had finished 6 Brackets and had 2 more being glued up. I use the magnetic bases I have as weights to hold the pieces together as the glue dries.

Eight Brackets done today; I made enough components for eleven total. I should finish that up tomorrow.

I'm a little disappointed that Blastgateco.com hasn't charged my credit card yet. I hope this is just The Virus slowing things down a bit and my order hasn't been forgotten.

I may give them a call tomorrow.


20200408-05.jpg

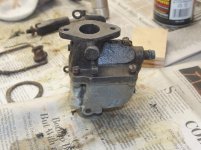
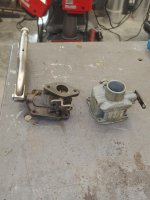
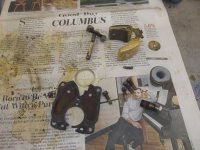
I tried again tonight to separate the TSV-13 Carburetor's Throttle Body & Float Body apart but the 4 screws refused to budge despite days of soaking in PB Blaster.


20200408-06.jpg

…so I cheated a bit. I fired up a propane torch and carefully applied just a bit of heat to the Throttle Body near each screw. That did the trick and I was able to break the carburetor apart.

Still a few items to break loose but at least a little progress was made.


Scott
 
OP
S

sbosecker

Well-known member
Joined
Sep 25, 2012
Messages
3,539
Location
Peachtree City, GA
Thursday - April 9, 2020

Today I had time to open up the Allis-Chalmers Model G Tractor Engine (Continental N62) that I had acquired about a month ago. I thought it prudent, based upon the perceived history of the engine, that I should look at the engine's mechanicals prior to doing anything else with the engine.


20200409-01.jpg 20200409-02.jpg

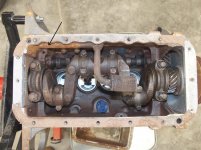
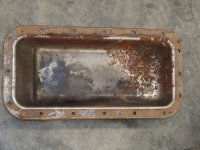
I rotated the engine so that it was upside down and the oil pan was easily accessible. I removed the oil pan bolts and took the oil pan off...


20200409-03.jpg

...and found a rather impressive mouse nest. Not good.


20200409-04.jpg

In an attempt to minimize "stuff" from falling into the cylinders, I rotated the engine back upright and then started pulling the nest out of the engine. In among the nest I found one rather dried out mouse.


20200409-05.jpg 20200409-06.jpg

I used a shop vacuum from underneath and then rotated the engine upside down again. Based on the rust patterns, it looks like the mouse nest was occupied with the engine pretty much in an upright position probably leaning a bit to one side. As a result it looks like any pest-induced damage is pretty limited. The camshaft next to where the nest was seems to have gotten the worst of any of the moving parts and, to me, it doesn't look too bad.

I'm going to reach out to my engine gurus and see what they think. My plan at the moment is to try to stabilize the situation (oil mist or ?) until the virus issue passes and I can get someone knowledgeable to examine the engine.

I think I probably should take the engine's Head off as well. I removed the spark plugs and I'm pretty sure I saw the head end of a Mud Dauber through one of the spark plug holes.

Sigh.


20200409-07.jpg

Meanwhile I finished the brackets for my Dust Collector Ductwork. I had 3 left over from the initial batch and I made 11 more.

I got an email today that the remaining ducting components were shipped. I'm guessing that shipment will arrive on Monday.


Scott
 
Last edited:

LutzTD

Well-known member
Joined
Dec 31, 2011
Messages
3,673
Location
Lutz, Florida
bummer, yeah SOP for me on old engines is if the carb is open, pull the manifold and if questionable the heads, if the breathers are open, pull the covers and pan. critters are very opportunistic, and a mouse only needs a dime size hole.....
 
OP
S

sbosecker

Well-known member
Joined
Sep 25, 2012
Messages
3,539
Location
Peachtree City, GA
bummer, yeah SOP for me on old engines is if the carb is open, pull the manifold and if questionable the heads, if the breathers are open, pull the covers and pan. critters are very opportunistic, and a mouse only needs a dime size hole.....


LutzTD,

Well if a dime-size hole is all that is needed, the rodents in this engine could have entered two by two. HA!

I took the Valve Cover off today and I'll probably take the Head off tomorrow. I would have done the Head today but I had to mow my grass which is a 3 hour job.

Best regards,

Scott
 
OP
S

sbosecker

Well-known member
Joined
Sep 25, 2012
Messages
3,539
Location
Peachtree City, GA
Friday - April 10, 2020


I had a small breakthrough with the Marvel Schebler TSV-13 Carburetor today.


20200410-01.jpg 20200410-02.jpg

I got the ****** out of the Carburetor Inlet. I put a 1/4-inch bolt in the ****** to allow the Vise-Grip to get a good bite on the ******. The PB-Blaster has been working on this area for a while but it still took a little heat from the propane torch to allow the Vise-Grip to start moving the ******.


20200410-03.jpg

I decided I should take the valve cover off the Continental N62 Engine to see if there were any surprises in among the valve springs.


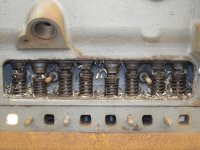
20200410-04.jpg 20200410-05.jpg

Looks like this was a snack bar waste basket for the rodents. I used the shop vac to clean out the debris.


20200410-06.jpg 20200410-07.jpg

I'm definitely going to take the Head off the engine tomorrow. I didn't have time to do that today but I did pull the spark plugs and vacuum each one of those as well as a coolant port.


Scott
 

shortykorte

Well-known member
Joined
Sep 1, 2014
Messages
8,039
Location
Tallahassee, Fl
With all that wood cutting for the brackets, you need a good dust collection system. Lol.
The mouse hotel looked like quite the place.


Shorty Korte
Always remember quality in QST

Sent from my iPhone using Garage Journal
 

matt_i

Well-known member
Joined
Mar 14, 2008
Messages
10,758
Location
SE Michigan
Hi Scott, just checking into the thread. Dust collection looks excellent and I like your hangers. Even if time consuming they look great and I think its worthwhile.

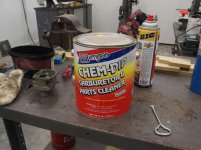
I have a couple (4 is a couple right? lol) of red tractors of various flavors, I have used Berryman's Chem Dip with good success on carbs. Essentially its a 1 gallon paint can which is filled around 2/3 full with a wire basket. One puts the carb into it overnight to soak. I can't tell you what exotic blend of solvents is in there but it works wonders on fuel gum. I have bought this at CarQuest and I think Napa once in the past. I usually follow the dip with a wire stolen from a paper wire-tag. Poke thru all of the holes, usually only two circuits, idle and main, then the air blast to finish.

That engine looks impressively clean like it was never run, or was cleaned up to be a "good spare" and then shelved. One thing rodents don't like is solvents....so that tells me there was not a lot of gasoline in that motor. In any case a flathead engine is a little torquey monster in good tune! Have 2 of them, a C60 in Farmall Cub and a Y112 in Clark Forklift.

I thought you might use the electric chain hoist to get the engine mated to the stand, but those hydraulic carts are very handy. The two of those devices combined would be very effective tools if you ever have to split a tractor...do your models require a split or does the G have a frame structure independent of the engine & trans?

I'm also in admiration of your super clean drafting table. I have a Mayline version with a parallel rule (cable aligned thingy) and due to me it became a desk to collect junk and sits in storage due to its rather large size.....Someday :)

I'm finding the Virus Shutdown to be somewhat therapeutic. I'm advancing a lot of projects in my shop! I can't imagine being cooped up in a house or apartment without some outlet......
 
Last edited:
OP
S

sbosecker

Well-known member
Joined
Sep 25, 2012
Messages
3,539
Location
Peachtree City, GA
Hi Scott, just checking into the thread. Dust collection looks excellent and I like your hangers. Even if time consuming they look great and I think its worthwhile.

I have a couple (4 is a couple right? lol) of red tractors of various flavors, I have used Berryman's Chem Dip with good success on carbs. Essentially its a 1 gallon paint can which is filled around 2/3 full with a wire basket. One puts the carb into it overnight to soak. I can't tell you what exotic blend of solvents is in there but it works wonders on fuel gum. I have bought this at CarQuest and I think Napa once in the past. I usually follow the dip with a wire stolen from a paper wire-tag. Poke thru all of the holes, usually only two circuits, idle and main, then the air blast to finish.

That engine looks impressively clean like it was never run, or was cleaned up to be a "good spare" and then shelved. One thing rodents don't like is solvents....so that tells me there was not a lot of gasoline in that motor. In any case a flathead engine is a little torquey monster in good tune! Have 2 of them, a C60 in Farmall Cub and a Y112 in Clark Forklift.

I thought you might use the electric chain hoist to get the engine mated to the stand, but those hydraulic carts are very handy. The two of those devices combined would be very effective tools if you ever have to split a tractor...do your models require a split or does the G have a frame structure independent of the engine & trans?

I'm also in admiration of your super clean drafting table. I have a Mayline version with a parallel rule (cable aligned thingy) and due to me it became a desk to collect junk and sits in storage due to its rather large size.....Someday :)

I'm finding the Virus Shutdown to be somewhat therapeutic. I'm advancing a lot of projects in my shop! I can't imagine being cooped up in a house or apartment without some outlet......

matt_i,

Thanks for stopping by and for all the kind words!

Making the components for the Duct Hangers really went pretty quick. It was the glue up that took a while ...but I wasn't looking for any methods to speed up the process so there's probably way more time efficient ways to accomplish that.

I have some cans of Berryman's Chem Dip. Maybe a couple of years ago I learned that Ollie's Outlet had the gallon cans for less than $10 so I got a couple of them. I've been trying to get the TSV-13 Carburetor completely apart before I dipped it. Maybe I should let it soak in the Berryman's a bit and see if that helps. I used the Berryman's on my back-up electricity Generator's carburetor a year or two ago.

The Continental N62 engine supposedly - and I believe it is true - was rebuilt a few years ago by/for the previous owner. I'm pretty sure he was an old hot-rodder so I don't know if he had the block's cylinders bored out for oversize pistons and he took it from there or if the work was done totally by somebody else. I would think the former rather than the latter. Anyway, yes it is/was in pristine condition and then he started suffering from dementia and the tractor project - and others - went sideways.

I just came in from the LBG after taking the head off the engine. I will be posting information on that later and I hope knowledgeable engine folks will offer their thoughts on what the next move should be.

I considered using the chain hoist but I had the engine in its Sedan Chair and just sitting that on the Hydraulic Scissor Cart was the path of least resistance. The only trick was getting just a little more clearance under the Cart to get the Engine Stand in place.

At the moment the only tractors I have are the Allis-Chalmers Model G. Due to its rear engine design, the engine can be removed without splitting the tractor. At some point I do hope to acquire the Ford 801 Powermaster my dad bought new in the early 60's. So there's a tractor that would have to be split to remove the engine.

Super-clean drafting table... HA! It helps that it isn't horizontal and that it's upstairs where I'd have to drag things to sit on it.

Like you, I pity the folks that don't have some home-based outlet to help them through their virus-induced incarceration. In addition to my piddling in the LBG, I seem to have plenty of other things to keep my mind busy.

Example: I've got about 4 months to figure out how Medicare works. That's not nearly as interesting as tinkering with stuff but I'd better get cracking on figuring it out.

Best regards,

Scott
 
Last edited:
To avoid these ads, REGISTER NOW!
OP
S

sbosecker

Well-known member
Joined
Sep 25, 2012
Messages
3,539
Location
Peachtree City, GA
With all that wood cutting for the brackets, you need a good dust collection system. Lol.
The mouse hotel looked like quite the place.

Shorty Korte
Always remember quality in QST

Shorty Korte,

HA! Fortunately I still have the Shop Fox Dust Collector that I've been using forever. That helps to keep the wood dust & chips from getting more than knee deep.

The industry of those little rodents is impressive. I didn't examine it closely but the nest seemed like it was made from something like chewed up cotton. Somebody's laundry might be missing!

...or perhaps the mouse was providing a valuable service by cleaning out someone's dryer vent.

Best regards,

Scott
 
OP
S

sbosecker

Well-known member
Joined
Sep 25, 2012
Messages
3,539
Location
Peachtree City, GA
Saturday - April 11, 2020


This afternoon I started on the task of removing the Head from the Continental N62 Engine.


20200411-01.jpg 20200411-02.jpg

Although it probably didn't make any difference, I decided to remove the Head Bolts in the opposite order that they should have been installed.


20200411-03.jpg 20200411-04.jpg

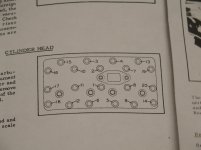
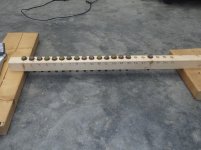
Again, it probably makes no difference but I put the Head Bolts into a rack that matched them with their position in the Head.


20200411-05.jpg

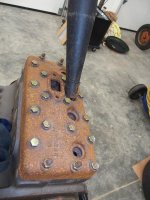
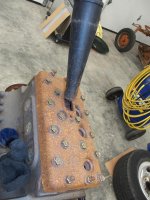
I used a small dead-blow mallet to loosen the Head from the Block.


20200411-07.jpg 20200411-06.jpg

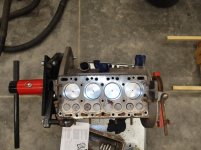
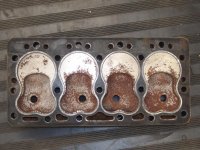
With the Head off the Block, I found a few mud daubers in one of the cylinders. I vacuumed the insects and quite a bit of rust flakes from inside the Head.


Continued in next post...
 
OP
S

sbosecker

Well-known member
Joined
Sep 25, 2012
Messages
3,539
Location
Peachtree City, GA
Continued...


20200411-11.jpg

While the Head does have quite a bit of rust on it, it looks worse in the picture than in reality.


20200411-12.jpg 20200411-13.jpg

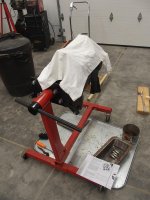
I've cleaned out the inside of the Engine to the best of my ability. I'm wondering what I should do to "stabilize" the situation until this Virus situation passes and I can get some advise on how to proceed with this engine.

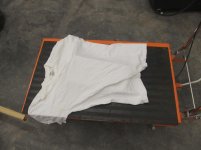
I got a couple of old T-Shirts from the Rag Bag and covered the Engine Block and the Head to keep them as clean as possible.


Scott
 
Last edited:
OP
S

sbosecker

Well-known member
Joined
Sep 25, 2012
Messages
3,539
Location
Peachtree City, GA
It looks like the pistons are .020 oversized & have never ran.

1949 caddyman,

I agree with the "never ran" part and I can see why you say ".020" oversized because I thought exactly the same thing when I first looked at the picture.

Yet I distinctly remembered seeing ".030" on some of the pistons so, immediately after looking at that picture, I went back out to the shop and looked at the pistons again.

They are all .030" oversize. The lighting, shadows & the way the "3" is struck causes that particular piston to look like it says ".020" but it is like all the others (.030")

I've never rebuilt an engine and I'm surprised by how "dry" everything seems to be. Shouldn't there be some sort of assembly lube in the cylinders and, if so, shouldn't its presence be pretty obvious?

Thanks for stopping by!

Best regards,

Scott
 

drivesitfar

Well-known member
Joined
Oct 23, 2013
Messages
36,079
Location
Pacific Northwest
SD: I haven’t had much to add lately while you seem to be working harder than you might when you’re working but I still wanted to let you know I’m still here.

HAPPY EASTER
 

matt_i

Well-known member
Joined
Mar 14, 2008
Messages
10,758
Location
SE Michigan
Hi Scott, my suggestion would just be to use engine oil.

My experience in working in a high volume engine-assembly department (automotive) is that everything got a drop of oil as it was assembled. Eventually the oil pan was filled and the engines cold-tested, which involved motoring the flexplate/flywheel.

Now when you do that with open cavities, it should be bagged.

Another good alternative is dessicant packs, also placed inside the micro-climate of the larger bag. Amazon has many flavors of dessicant. I think Summit Racing/Jegs have specialized bags that cover the engine on the stand when "life takes over".

In any case, excellent to have a fresh spare! My experience is that gasoline engines put a lot of crud into the oil side of the engine, so as long as its not hard abrasive particles and the introduced-crud is managed with frequent filter changes, you'll be very good. Not sure if there is a procedure to pre-lube the engine by turning the geared pump separately, or if you can remove a plug from a main oil gallery and use an oil-filled grease pump to hit the mains and rod bearings.
 
OP
S

sbosecker

Well-known member
Joined
Sep 25, 2012
Messages
3,539
Location
Peachtree City, GA
SD: I haven’t had much to add lately while you seem to be working harder than you might when you’re working but I still wanted to let you know I’m still here.

HAPPY EASTER

DrivesItFar,

...and a very happy Easter to you and yours!

Thanks for stopping by! I hope all is well in the Emerald City.

Best regards,

Scott
 
OP
S

sbosecker

Well-known member
Joined
Sep 25, 2012
Messages
3,539
Location
Peachtree City, GA
Hi Scott, my suggestion would just be to use engine oil.

My experience in working in a high volume engine-assembly department (automotive) is that everything got a drop of oil as it was assembled. Eventually the oil pan was filled and the engines cold-tested, which involved motoring the flexplate/flywheel.

Now when you do that with open cavities, it should be bagged.

Another good alternative is dessicant packs, also placed inside the micro-climate of the larger bag. Amazon has many flavors of dessicant. I think Summit Racing/Jegs have specialized bags that cover the engine on the stand when "life takes over".

In any case, excellent to have a fresh spare! My experience is that gasoline engines put a lot of crud into the oil side of the engine, so as long as its not hard abrasive particles and the introduced-crud is managed with frequent filter changes, you'll be very good. Not sure if there is a procedure to pre-lube the engine by turning the geared pump separately, or if you can remove a plug from a main oil gallery and use an oil-filled grease pump to hit the mains and rod bearings.

matt_i,

Thank you very much for all of that!

I looked at the Summit Racing website and, sure enough, they have engine bags. I'd never heard of such a thing.

Yes this engine was one of the prime motivators for purchasing the "tractor-in-pieces" at the start of March. If I can get it in good order, I may replace the engine in the tractor my grandfather bought in 1955 with this one.

Thanks again!

Best regards,

Scott
 
Last edited:
OP
S

sbosecker

Well-known member
Joined
Sep 25, 2012
Messages
3,539
Location
Peachtree City, GA
Sunday - April 12, 2020


Worked a bit more on the Marvel Schebler TSV-13 today.


20200412-01.jpg

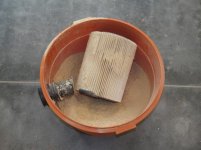
Pulled out a pail of Berryman Chem-Dip. I rotated parts in & out of the dip basket with each part getting a 30 minute soak and then a water rinse.


20200412-02.jpg

This was the Choke Valve after its first bath. The valve was not completely clean but it was much improved.


20200412-03.jpg

I got the Throttle Valve out of the Carburetor Body and added it to the other parts that had been removed. The Venturi had been removed a day or two ago.


20200412-04.jpg 20200412-05.jpg

I applied heat & some PB-Blaster to this plug. It finally yielded to the effort.


Scott
 
OP
S

sbosecker

Well-known member
Joined
Sep 25, 2012
Messages
3,539
Location
Peachtree City, GA
Monday - April 13, 2020

My delivery of the remaining Woodshop ductwork from Blastgate was scheduled for this afternoon.


20200413-01.jpg

Around 4 pm a UPS truck dropped off my delivery. Some 8-inch Clamps, a 5-inch Clamp that was left out of the last order, a 60 degree 4-inch Elbow, an 8-inch Adjustable Sleeve & another 8-inch Machine Adapter to replace the one that was not manufactured correctly. (See Post 3444).


20200413-02.jpg

The new Machine Adapter slid right onto the JET Dust Collector. This was a welcome change from the fight I had 10 days ago when I tried to install an Adapter that wasn't formed correctly.


20200413-03.jpg

There is a small screw that will secure the Machine Adapter to the Dust Collector. I positioned the Machine Adapter and marked the location of the screw hole.


20200413-04.jpg 20200413-05.jpg 20200413-06.jpg

I used a punch, applied to the inside of the Adapter, to make a visible "reverse dimple" on the outside of the Adapter. I used my Yost 33C Vise to hold a piece of steel round stock (my anvil) and some scrap wood to support the far end of the Adapter. Then I struck a dimple on the outside of the Adapter.


Continued in next post...
 
Last edited:
OP
S

sbosecker

Well-known member
Joined
Sep 25, 2012
Messages
3,539
Location
Peachtree City, GA
Continued...


20200413-11.jpg

I drilled an appropriately sized hole and removed the burr from the inside of the Adapter with a file.


20200413-12.jpg

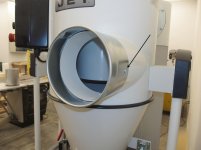
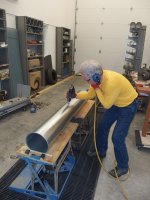
My measuring was apparently accurate enough to allow the screw holes to line up. The retaining screw (black arrow) was used to fasten the Adapter to the Dust Collector.


20200413-13.jpg

I attached the 8-inch 90 degree long sweep Elbow to the Dust Collector. The distance from the Elbow to the Wye is just a bit over 31 inches. I'll need to cut my 5-foot section of 8-inch ducting to size and use the 8-inch Adjustable Sleeve to mate all these components together.

Cutting the ducting to size is something I need to review tonight to make sure I don't goof up the cut tomorrow.


Scott
 
Last edited:
OP
S

sbosecker

Well-known member
Joined
Sep 25, 2012
Messages
3,539
Location
Peachtree City, GA
Tuesday - April 14, 2020

I watched some YouTube videos last evening on cutting a Nordfab-style piece of Ducting and using a Sleeve Adapter to get it to the desired length.


20200414-01.jpg 20200414-02.jpg

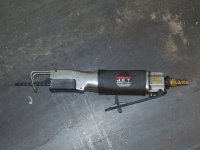
This morning I sat the 5-foot length of 8-inch Duct on the operating table and selected my "scalpel" - a JET reciprocating air saw.


20200414-03.jpg 20200414-04.jpg

I used the seal from the Sleeve Adapter to act as a guide as I marked a line 28 inches from the end.


20200414-05.jpg 20200414-06.jpg

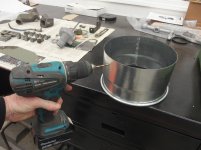
I drilled an access hole and then used the air saw to cut around the duct.


20200414-07.jpg

The cut went well and this was the leftover piece...


Continued in next post...
 
Last edited:
OP
S

sbosecker

Well-known member
Joined
Sep 25, 2012
Messages
3,539
Location
Peachtree City, GA
Continued...


20200414-11.jpg

...and this was the part, with the help of the Sleeve Adapter, that was going to be attached to the Dust Collector.


20200414-12.jpg

This is the assembled section.


20200414-13.jpg 20200414-14.jpg

I was by myself so it was a bit of a fight but I managed to get the Dust Collector hooked up to the ductwork.


20200414-15.jpg

This evening I mounted a bracket on the wall and attached a length of 6-inch duct to confirm I had everything lined up. Some of what's in place now will be removed and reconfigured.

The Dust Collector needs to go to the right as much as 2 feet. That means adding a short piece to the left of the Wye. The piece to the right of the Wye will also be trimmed to a much shorter piece. There will be a Long Sweep Elbow in the corner to make the duct turn towards the Drum Sander and the Planer. Between the Elbow and the Dust Collector move, there won't be a very big piece to be installed above the door.

Lots of cutting and fitting to be done tomorrow.


Scott
 
Last edited:
OP
S

sbosecker

Well-known member
Joined
Sep 25, 2012
Messages
3,539
Location
Peachtree City, GA
Wednesday - April 15, 2020

Made a little more progress on the Woodshop duct installation today.


20200415-01.jpg

I added a portion of the 4-inch drop to the Table Saw. This allowed me to measure the amount of extra duct I need to add under the I-Beam to put the drop at the end of the table extension. Looks like about 2 feet but I need to think about how I'm going to secure the 4-inch vertical section to the table extension. Also, I need a couple more Machine Adapters to continue the remaining 10 foot section of Spiral Duct towards the west wall. I need to order these items and I'd like to think through what else I need to spread the shipping cost over a larger order of materials.


20200415-02.jpg

In order to compare the drawings I made on the drafting table with reality, I assembled the start of the south wall's components on the floor. I've still got the drawing I made taped to the Drafting Table in the Upper Room so I made a few back and forth trips up & down the stairs.

It was oddly satisfying to find that my drawing and the real world matched pretty nicely.


20200415-03.jpg 20200415-04.jpg

Confident that my drawings were a good guide, I mounted a couple of brackets on the south wall and started assembling the ductwork. The 90 degree long sweep Elbow on the left won't face down like that when I'm finished but, by doing that, I establish a location that should be identical to when the Elbow is connected to the ductwork on the east wall.


20200415-05.jpg 20200415-06.jpg

There will be another 5-foot section of 5-inch tube clamped to the end of the pipe under the Mini-Split Head. I tried adding that piece to this assembly but, with that impressive moment arm, the additional pipe caused the whole assembly to teeter-totter towards the floor.


20200415-07.jpg

In preparation for the adjustments to the ductwork above the Dust Collector, I used some tape on the floor to located the Dust Collector's present position. I intend to remove the upper horizontal duct clamped to the Dust Collector's vertical duct and, with a helper or two, move the Dust Collector with the vertical duct still attached. When I get it as far to the south as access to the Alarm Keypad & Electrical Switches will allow, I will note the new position and measure the distance moved from the earlier tape locations. That should match the length of duct I need to add to the horizontal duct located 10 feet above the Dust Collector.


Scott
 
Last edited:

shortykorte

Well-known member
Joined
Sep 1, 2014
Messages
8,039
Location
Tallahassee, Fl
I assume if you went with under floor ducts, equipment pretty much has to stay where it was designed?


Shorty Korte
Always remember quality in QST

Sent from my iPhone using Garage Journal
 
OP
S

sbosecker

Well-known member
Joined
Sep 25, 2012
Messages
3,539
Location
Peachtree City, GA
I assume if you went with under floor ducts, equipment pretty much has to stay where it was designed?

Shorty Korte
Always remember quality in QST

Shorty Korte,

Yes, I would think so. Although my stationary woodworking tools are pretty much where I planned them to be, I wasn't thinking about dust control when I planned the LBG.

I had enough trouble with the Contractor & Subs getting their arms around a single pipe from the "Tornado Shelter" to the north wall of the building.

I didn't do the research but I think embedding multiple branches of ductwork in concrete would be "challenging".

HA!

Best regards,

Scott
 
OP
S

sbosecker

Well-known member
Joined
Sep 25, 2012
Messages
3,539
Location
Peachtree City, GA
Thursday - April 16, 2020


I spent most of my day "head scratching" as I considered the next steps in the Woodshop's Duct installation.

The first order of business was to place an order for additional ducting components from Blastgate. I hope to have those items delivered by midweek next week at the latest.

I looked over the vertical drop to the Table Saw and I think I have a plan to use a bracket to secure the vertical tube to the Saw's side table. I may work on that tomorrow.

As mentioned in yesterday's post, I need to have some help to work on the Horizontal Ducting above the Dust Collector. I'm coordinating with my son to see when he might be available to assist with that. Between him and my wife, I think we'd have enough horsepower to get the job done without damaging something. I'm hoping that can be done over the weekend at the latest.


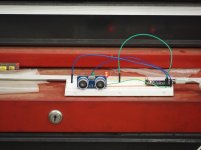
Moving from the ductwork to a different project. I've been trying to program my Arduino Nano to use a HC-SR04 Ultrasonic Sensor to turn a couple of LED's on & off at particular distances. I had accomplished this for ranges inside of a foot but tonight I tried it on a range of 10 feet.

I programed the Arduino Nano to turn a green LED on at 10 feet then off at 9 feet. A Red LED was to come on at 9 feet and off at 8 feet.

I was pretty sure this would work in a "laboratory" type situation; say a flat wall in 15 foot x 15 foot empty room.

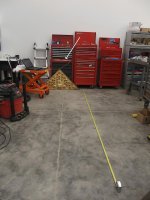
...but what about the LBG's middle bay where I hope to make this thing do useful work. There's the 2-Post Lift Columns... would they cause the sensor to be confused by causing spurious echoes?


20200416-01.jpg

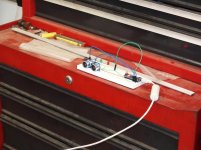
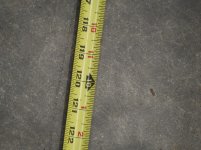
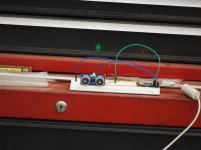
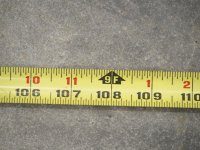
I sat the Arduino Nano (white arrow) on a rolling cabinet and my laptop on the Scissor Cart. The Laptop's only function is to allow me to tweak the Nano's "sketch" if needed and to power the Nano via the USB cable. I put a tape rule on the floor to compare my position with when the LEDs illuminated.


20200416-02.jpg 20200416-03.jpg 20200416-04.jpg

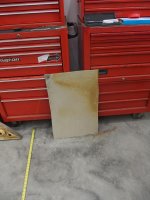
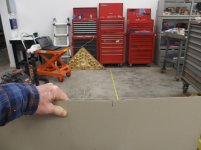
From left to right: The laptop, the Nano's breadboard & the "Target". The target was a piece of scrap sheet metal that I hoped would sort of represent the front of a vehicle approaching the Ultrasonic Sensor.


20200416-05.jpg

I would hold the target in front of me at the height of the HC-SR04 and walk towards it and see if my gadget worked.

Continued in next post...
 
Last edited:
OP
S

sbosecker

Well-known member
Joined
Sep 25, 2012
Messages
3,539
Location
Peachtree City, GA
Continued...


I started walking towards the sensor.


20200416-11.jpg 20200416-12.jpg

At right about 10 feet the Green LED came on.


20200416-13.jpg 20200416-14.jpg

I continued and at right about 9 feet the Green LED went out and the Red LED came on. At about 8 feet the Red LED went out.

Cool.

Still, the real test will be with my 2000 Ford F150 to see how that works. I was holding a flat piece of sheet metal perpendicular to the HC-SR04 sensor's ultrasonic output. That was probably an optimum situation.

We'll see how it does with the pickup's grill and radiator. I won't be too surprised if it has trouble with that.

Still, if it does work, the same LED's I'm turning on and off (and several more) could be individually lighting up the "Pins" on the Fort Sackville Bowling Alley Sign.


Scott
 
Last edited:

LutzTD

Well-known member
Joined
Dec 31, 2011
Messages
3,673
Location
Lutz, Florida
Continued...


I started walking towards the sensor.


20200416-11.jpg 20200416-12.jpg

At right about 10 feet the Green LED came on.


20200416-13.jpg 20200416-14.jpg

I continued and at right about 9 feet the Green LED went out and the Red LED came on. At about 8 feet the Green LED went out.

Cool.

Still, the real test will be with my 2000 Ford F150 to see how that works. I was holding a flat piece of sheet metal perpendicular to the HC-SR04 sensor's ultrasonic output. That was probably an optimum situation.

We'll see how it does with the pickup's grill and radiator. I won't be too surprised if it has trouble with that.

Still, if it does work, the same LED's I'm turning on and off (and several more) could be individually lighting up the "Pins" on the Fort Sackville Bowling Alley Sign.


Scott

sounds like the hard part is done, excellent
 
To avoid these ads, REGISTER NOW!
Top Bottom