To avoid these ads, REGISTER NOW!

Above 1200 Sq/FT The Lone Beech Garage (60x46x16)

Wokspaces above 1200 squarefeet.

shortykorte

Well-known member
Joined
Sep 1, 2014
Messages
8,039
Location
Tallahassee, Fl
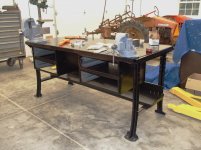
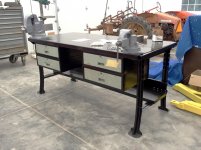
Bench is coming along really well. The laundry rack does have many uses. To assist with the drawers and many other things, have you considered one of those roll around lift tables. A great addition to a shop when extra hands aren’t available.


Sent from my iPhone using Tapatalk
 
To avoid these ads, REGISTER NOW!

Bob Heine

ALLIANCE MEMBER
Joined
Oct 24, 2009
Messages
10,709
Location
Boca Raton, Florida
Thanks guys!

"long suffering bride"... I am pleased to report that my spouse's health is excellent.

I thought almost all wives, by generally being married to men, were by definition "long suffering". Ha!

When I asked my wife to come out and help me I had not yet realized the extent that gravity was not going to be my friend while positioning the drawer under the table and trying to line up the fasteners. As a result there was a bit of spousal standing around while I tried to find a cardboard box tall enough to hold the drawer in place.

I guess I was feeling guilty about some of her time being wasted when I wrote that line.

Best regards,

Scott
Scott, my wife often volunteers to help but it always involves super helpful suggestions. Starting with "why don't you turn the table upside down and install the drawers?" Explaining how the weight of the table legs, shelf, top and cross bars will make that difficult results in a lengthy discussion of the lighter weight tables available at the thrift store. As day turns into night and dawn approaches, I forget why I asked her for help.
 
OP
S

sbosecker

Well-known member
Joined
Sep 25, 2012
Messages
3,539
Location
Peachtree City, GA
Bench is coming along really well. The laundry rack does have many uses. To assist with the drawers and many other things, have you considered one of those roll around lift tables. A great addition to a shop when extra hands aren’t available.


shortykorte,

I do have one of those... a Harbor Freight model acquired several years ago.

You are correct; they are VERY handy and that would have been the item to use for this task.

However, it's still in my house's basement and I underestimated the amount of hands it was going to take for this project by not having it on hand. My wife would have had to mill about smartly even longer if I had returned to the basement and schlepped it - it does have considerable mass - across the back yard to the LBG.

I plan to have it in place for the next go-around with those drawers.

Best regards,

Scott
 
OP
S

sbosecker

Well-known member
Joined
Sep 25, 2012
Messages
3,539
Location
Peachtree City, GA
Scott, my wife often volunteers to help but it always involves super helpful suggestions. Starting with "why don't you turn the table upside down and install the drawers?" Explaining how the weight of the table legs, shelf, top and cross bars will make that difficult results in a lengthy discussion of the lighter weight tables available at the thrift store. As day turns into night and dawn approaches, I forget why I asked her for help.

Bob,

Thanks for stopping by!

Diplomacy is important when you REALLY need another set of hands!

...and I have to admit. Despite the mission creep that usually results from spousal queries - every once and while their suggestions have merit!


Best regards,

Scott
 
OP
S

sbosecker

Well-known member
Joined
Sep 25, 2012
Messages
3,539
Location
Peachtree City, GA
Thursday - November 8, 2018


Another trip to Peru and then "the usual suspects" when I returned has kept me from getting shop time the past few days.

I was wanting to continue the refurbishment of the LYON table today but first I needed to return to the JET Milling Machine.


20181108-01.jpg

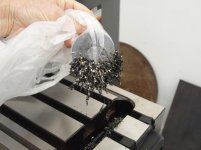
The work I had done milling slots in the tubing for the LYON table had left a lot of swarf that needed to be dealt with.


20181108-02.jpg

A magnet inside of a plastic bag was a pretty useful tool to get most of the metal chips cleaned up.


20181108-03.jpg 20181108-04.jpg

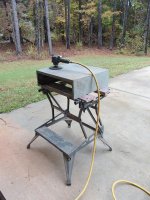
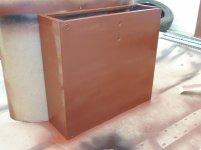
The weather was starting to deteriorate but I managed to get one of the LYON Table's drawer housing's prepped for painting before it started sprinkling.

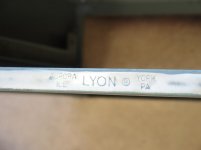
I was surprised to find the LYON logo on the drawer housing. It had been invisible due to the many layers of paint.


20181108-05.jpg 20181108-06.jpg 20181108-07.jpg

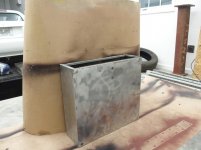
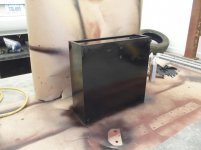
I brought the drawer housing inside the LBG and hit it with primer and paint.


I hope to work on another drawer housing tomorrow.


Scott
 

drivesitfar

Well-known member
Joined
Oct 23, 2013
Messages
36,079
Location
Pacific Northwest
SB: speaking of enlisting help from our wives that is a tricky deal that is for certain. I tend to try to think that over several times before asking now especially if it's moving something that I know she'd like me to sell or donate.

nice work on the LYON and keep up the great work.

just curious why the plastic bag on the magnet? is that so you don't have to scrap off the magnet and does the plastic bag with the shavings come off easily that i'm guessing you take off the bag over a garbage can?

when you fly to PERU do you get to spend a day in the sun by the pool since it's probably nice weather there now or are you back on another flight back home the next day?
 
OP
S

sbosecker

Well-known member
Joined
Sep 25, 2012
Messages
3,539
Location
Peachtree City, GA
Friday - November 9, 2018

Really crappy weather again today - drizzle/rain and breezy - kept me from any more LYON Table surface prep.

...and we had house guests.


20181109-01.jpg

I did drive by our local Kmart and noticed the "Store Closing" signs. I didn't think there would be anything of interest there but decided to stop in and look around.

To my surprise I found this Rubbermaid Step Stool. I've been looking for something to allow me to access the JET Milling Machine's drawbar (located on top of the machine's head) more easily. This step stool, while not perfect for the task, was at an attractive price point and it would do.


20181109-02.jpg 20181109-03.jpg 20181109-04.jpg

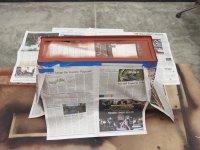
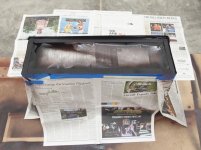
I did manage to get a little progress made on the LYON Table's Drawer Support. The paint had dried enough that I felt comfortable in sitting a painted side on the floor so that I could paint the remaining unpainted side.

I masked off the painted sides and got the rear of the Drawer Support coated. Some touchup remains but, for the most part, this item is done.


Weather is supposed to be clear and cold tomorrow. I'm hoping to get another Drawer Support prepped & painted.


Scott
 
Last edited:
OP
S

sbosecker

Well-known member
Joined
Sep 25, 2012
Messages
3,539
Location
Peachtree City, GA
SB: speaking of enlisting help from our wives that is a tricky deal that is for certain. I tend to try to think that over several times before asking now especially if it's moving something that I know she'd like me to sell or donate.

nice work on the LYON and keep up the great work.

just curious why the plastic bag on the magnet? is that so you don't have to scrap off the magnet and does the plastic bag with the shavings come off easily that i'm guessing you take off the bag over a garbage can?

when you fly to PERU do you get to spend a day in the sun by the pool since it's probably nice weather there now or are you back on another flight back home the next day?


DrivesItFar,

Since my wife pretty much wants me to sell or donate all my toys, I don't concern myself with that issue. Ha!

Thanks for the encouragement on the LYON table refurbishment! It's getting there.

The plastic bag makes it easy to separate the swarf from the magnet. If I choose to, I can simply invert the plastic bag; the swarf is then inside the bag and can be tossed into a trash can.

The trips to Lima, Peru leave Atlanta at about 6:00 pm and arrive at about 12:30 am Lima time. (At this particular time of the year, Atlanta & Lima are on the same time - Peru doesn't do Daylight Saving Time.)

By the time we get to the hotel and get checked in it is getting close to 1:30 am. Typically debrief the crew in the hotel bar while sipping an a adult beverage. A short amount of sleep followed by breakfast. The goal (for me) is to be a little sleep deprived so I can take a good nap early evening to get ready for the 2:00 am pushback to return to Atlanta. Transportation from the hotel to the airport takes place at midnight with a wakeup call scheduled for 11:00 pm.

Temperatures in Lima tend to be moderated by the nearby Pacific Ocean. It's not usually too cold or too hot (Average high temperature in their summer is about 80 - Average low temperature in their winter is in the high 50's). It is often overcast. Not exactly good pool weather.

On this past trip I took a 13-mile walk (round trip) to Lima's main plaza. When I got back from that I had an early supper and was really ready to go to sleep at about 6:00 pm.

That's when I found the note under my hotel room door that the hotel - as well as the rest of the country - would be participating in a "National Earthquake Drill" at 8:00 pm that night.

Perfect.

It's a glamorous life!

Best regards,

Scott
 
Last edited:
OP
S

sbosecker

Well-known member
Joined
Sep 25, 2012
Messages
3,539
Location
Peachtree City, GA
Saturday - November 10, 2018

After several rainy, dreary days, this morning dawned clear ...but chilly. Still, I looks like I can get some work done on the LYON Table's Drawer Supports.


20181110-01.jpg

First thing I have to do is separate the 3 individual units from the 3-Drawer stack.


20181110-02.jpg 20181110-03.jpg

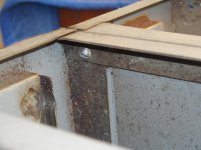
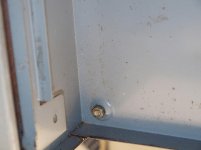
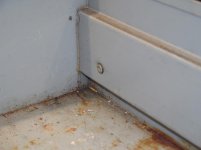
In my opinion a slotted truss head 1/4-inch machine screw is an odd choice for a fastener in this difficult location.


20181110-04.jpg

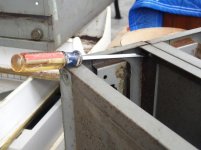
It can be accessed with a screwdriver but it doesn't have a secure anchor in the screw's head.


20181110-05.jpg

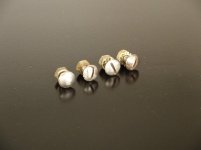
Then there's the issue of the oddball, machine screw with no slot - what's up with that!


20181110-06.jpg

The Drawer Supports are now separated and are ready for some abrasives.


Continued in next post...
 
OP
S

sbosecker

Well-known member
Joined
Sep 25, 2012
Messages
3,539
Location
Peachtree City, GA
Continued...

20181110-11.jpg 20181110-12.jpg 20181110-13.jpg

Got the Drawer Supports outside and after a bit of work they were ready for painting.


20181110-14.jpg 20181110-15.jpg 20181110-16.jpg

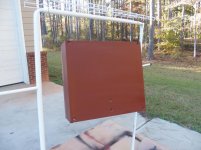
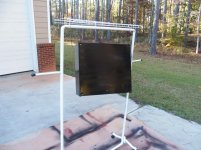
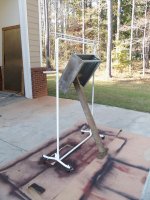
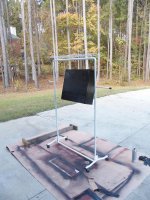
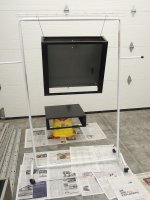
I decided to only paint one of the Drawer Supports today as I was starting to run out of daylight. I also thought I'd try using the clothes hanging rack so I could paint all the sides in one session.


20181110-17.jpg

Once the Drawer Support was painted, I brought it inside to dry.

Maybe I can get the other two painted tomorrow.

I have two more Drawer Supports - in addition to the four I've cleaned up - and one Drawer. The two Drawer Supports that I have l left untouched both have some internal roller issues. I didn't want to spend time cleaning them up if I can't fix the problems they have.


Scott
 
Last edited:
OP
S

sbosecker

Well-known member
Joined
Sep 25, 2012
Messages
3,539
Location
Peachtree City, GA
Sunday - November 11, 2018


We've not just been watching paint dry the past few days!


20181111-01.jpg 20181111-02.jpg

A previous owner had decided they needed dividers inside a couple of the LYON table drawers. They had accomplished this by trimming a piece of thin plywood to fit the width of drawer and caulking on each of the plywood's ends. I don't know what this caulk was but it had remarkable adhesion despite the glossy paint walls of the drawer. I used some 3M Caulk Remover to deal with this problem. It takes a little while for it to do its work and it may take more than one application but it did soften the caulk's grip on the drawer. Eventually I was able to remove the caulk with a putty knife.


20181111-03.jpg

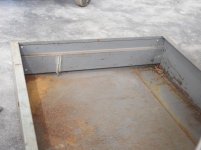
I mentioned in a previous post that a couple of Drawer Housings had issues and I had not prepped them to be painted. In one Drawer Housing both the roller's axles were almost pulled free from the rail.

In this Drawer Housing one of the rollers was not rotating. I worked on this one with a Vise Grip Plyers and some PB Blaster. After a bit of agitation, the roller started rolling again. Eventually I will clean up this Drawer Housing to be used with my second LYON Table.


20181111-04.jpg 20181111-05.jpg 20181111-06.jpg

I still had two cleaned up Drawer Housings from yesterday that still needed to be painted. I knocked that chore out this afternoon. I used a 2x4 to tilt the Drawer Housings a bit. This allowed easier access to all sides of the Drawer Housing when painting.


20181111-07.jpg

We had our first hard freeze last night and it is still too chilly to leave these freshly painted items outside. They were brought inside the LBG to dry.

Now four Drawer Housings have been painted. Tomorrow the paint on the first two should be cured and I hope to mount them to the LYON Table.


Scott
 

drivesitfar

Well-known member
Joined
Oct 23, 2013
Messages
36,079
Location
Pacific Northwest
SB: one tip I picked up here on GJ years ago was to use a big appliance cardboard box to spray paint in especially if it's windy. another reason is you don't have to prep the floor or driveway. another option is a huge wood crate you can usually pick one up free from some company that does trade shows. third option is to put plastic around a 2x2 wood frame to sort of make walls to protect from wind and overspraying things you don't want painted.

you seem to be doing great on your own and didn't know if you maybe wanted a couple more options.

keep up the great work repairing and spiffing up that old Lyon.

cheers
 
OP
S

sbosecker

Well-known member
Joined
Sep 25, 2012
Messages
3,539
Location
Peachtree City, GA
SB: one tip I picked up here on GJ years ago was to use a big appliance cardboard box to spray paint in especially if it's windy. another reason is you don't have to prep the floor or driveway. another option is a huge wood crate you can usually pick one up free from some company that does trade shows. third option is to put plastic around a 2x2 wood frame to sort of make walls to protect from wind and overspraying things you don't want painted.

you seem to be doing great on your own and didn't know if you maybe wanted a couple more options.

keep up the great work repairing and spiffing up that old Lyon.


DrivesItFar,

Those are great ideas! I'll keep them in mind when I start my next painting project.

The weather here today reminded me of Seattle in the winter... about 40 degrees and raining. Fortunately I could get some work done inside.

Best regards,

Scott
 
OP
S

sbosecker

Well-known member
Joined
Sep 25, 2012
Messages
3,539
Location
Peachtree City, GA
Monday - November 12, 2018

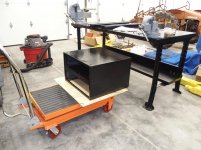
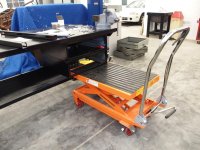
The weather was unpleasant this morning - 38 degrees and 3 tenths of an inch of rain already in the rain gauge - and I needed to get the Harbor Freight Hydraulic Table Cart from the house basement to the Lone Beech Garage.

After a cup of coffee, the rain seemed to have paused. I drug the Hydraulic Table Cart across the back yard and into the LBG - that was an invigorating way to start the day. As I returned to the house the rain started again - hard! My timing was good for a change.

I spent the rest of the morning doing a few chores. After lunch I was able to get back to the shop.


20181112-01.jpg

First order of business was to fasten the two Drawer Housings together. The sharper readers of this post have probably already noticed that I have the top Drawer Housing rotated 180 degrees compared to the bottom one.

I didn't notice this until I had fastened the two Housings together ...another product that wasn't Scott-Proof. The only harm done was a bit of time wasted undoing my mistake.


20181112-02.jpg

The Hydraulic Table Cart needed a bit of plywood for the Drawer Housing Stack to sit on. The Cart was just the tool I needed if I was to have any hope of mounting the Stack by myself.


20181112-03.jpg 20181112-04.jpg

Even with the Cart, fastening the Stack to the table solo was a tedious job. However, after quite a bit of fussing with lining up holes and inserting fasteners, I was able to mount the Stack to the table. I was pleased with the outcome but...

I had chosen to mount the Stack as close to the LYON table's leg as I could. When I had done a simplified test install of a Drawer Housing about a week ago, I had tried to verify that I would be able to access all the fasteners needed to put the LYON table completely back together.


20181112-05.jpg

The real trick was going to be getting this end cap fastened down from the inside despite the close proximity of the Stack. During the test install I thought my small hands would be able to fit between the Stack and the table leg and I'd be able to fasten the table's End Cap.

Today, with the Stack in place, I found that the clearance was not adequate to fasten the table's End Cap.


20181112-06.jpg 20181112-07.jpg

Sadly, this discovery - although not a total surprise - required moving the mounted Stack two inches towards the center of the table. Again not a disaster but it did take a bit of time to unfasten the Stack and remount it.


Continued in next post...
 
Last edited:
OP
S

sbosecker

Well-known member
Joined
Sep 25, 2012
Messages
3,539
Location
Peachtree City, GA
Continued...

20181112-11.jpg

So here's the day's work. The Stack doesn't look that much different than it did in its first position.

I hope to get the second Stack installed tomorrow.


Scott
 
Last edited:

Bob Heine

ALLIANCE MEMBER
Joined
Oct 24, 2009
Messages
10,709
Location
Boca Raton, Florida
First order of business was to fasten the two Drawer Housings together. The sharper readers of this post have probably already noticed that I have the top Drawer Housing rotated 180 degrees compared to the bottom one.

I didn't notice this until I had fastened the two Housings together ...another product that wasn't Scott-Proof. The only harm done was a bit of time wasted undoing my mistake.

Today, with the Stack in place, I found that the clearance was not adequate to fasten the table's End Cap.

Sadly, this discovery - although not a total surprise - required moving the mounted Stack two inches towards the center of the table. Again not a disaster but it did take a bit of time to unfasten the Stack and remount it.
Scott, I am certain I wouldn't have noticed the 180 until the very end, after everything was "done." That's when my Lyon table would have the unique and rare feature of a secret drawer, easily accessed while lying on my back on the floor.
 

drivesitfar

Well-known member
Joined
Oct 23, 2013
Messages
36,079
Location
Pacific Northwest
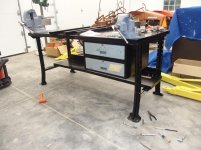
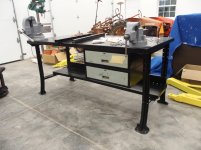
SB: If you have a minute can you give us a few more details on your hydraulic cart (weight limit, brand,...) and those two big old vises that look like a Yost and Morgan?

the hydraulic cart purchase has been on my radar for a while now, but I need more level space to use one here or at my storage unit. i had this old Jet lift that had this customized sale I just sold, but I really should have kept the nice table steel piece cause it might come in handy if I ever move and get a fork lift.

looks like you are making great progress. for some of us that don't have a nice lift would you maybe have been able to install the drawers with the table upside down?

keep up the great work and it does sound like you are getting our weather cause it was about 60 yesterday afternoon and sunny, but it's dipping to freezing at night now.

cheers
 

Attachments

  • put back together and sitting at it's new home.jpg
    put back together and sitting at it's new home.jpg
    149.5 KB · Views: 49
To avoid these ads, REGISTER NOW!
OP
S

sbosecker

Well-known member
Joined
Sep 25, 2012
Messages
3,539
Location
Peachtree City, GA
Scott, I am certain I wouldn't have noticed the 180 until the very end, after everything was "done." That's when my Lyon table would have the unique and rare feature of a secret drawer, easily accessed while lying on my back on the floor.

Bob,

I'm surprised I noticed it as early in the game as I did. Like you wrote, I normally would not have noticed it until it was installed.

I do suspect I would have done one better than you and had the secret drawer feature on the top rather than the bottom. Ha!

Stand by for more weirdness discovered in today's adventures.

Best regards,

Scott
 
OP
S

sbosecker

Well-known member
Joined
Sep 25, 2012
Messages
3,539
Location
Peachtree City, GA
SB: If you have a minute can you give us a few more details on your hydraulic cart (weight limit, brand,...) and those two big old vises that look like a Yost and Morgan?

the hydraulic cart purchase has been on my radar for a while now, but I need more level space to use one here or at my storage unit. i had this old Jet lift that had this customized sale I just sold, but I really should have kept the nice table steel piece cause it might come in handy if I ever move and get a fork lift.

looks like you are making great progress. for some of us that don't have a nice lift would you maybe have been able to install the drawers with the table upside down?

keep up the great work and it does sound like you are getting our weather cause it was about 60 yesterday afternoon and sunny, but it's dipping to freezing at night now.

cheers


DrivesItFar,

Yes I've been thinking "Seattle Weather" the past few days. We did get more measurable precip than the usual drizzle associated with the Pacific Northwest... just under 3-inches in the past 48 hours.

I got the Hydraulic Scissor Cart from Harbor Freight some time ago. It has a 1000 lb. pound capacity. Not something I use all the time but I have found it to be VERY useful on occasion.

It would be similar to THIS.

The Vises have been previously documented on the Garage Journal - see links. One is a Yost 33C and the other a 4" Standard Vise. We had a discussion in the Vintage Tools - Vise Repair 101 thread about 4 years ago regarding the Standard Vise and I believe we had compelling evidence that he Morgan Vise company had contributed DNA to the Standard Vise.

Installing the drawers with the table upside down probably solves some problems but introduces others. The biggest problem would be getting that son-of-a-gun back on its feet. If you had a couple of brutes for neighbors and could lure them to the shop with a "free beer" offer, the upside down table approach might have merit.

Thanks for stopping by!

Best regards,

Scott
 
Last edited:
OP
S

sbosecker

Well-known member
Joined
Sep 25, 2012
Messages
3,539
Location
Peachtree City, GA
Tuesday - November 13, 2018


This morning I returned to the LYON table project.


20181113-01.jpg

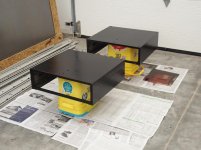
The remaining 2 Drawer Housings had dried long enough to assemble them into a stack and then mount onto the table.


20181113-02.jpg 20181113-03.jpg

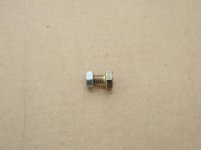
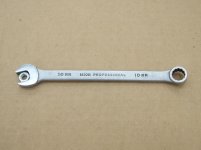
I hadn't gotten far when I ran into a problem. The first 1/4"-20 nut I had grabbed to fasten the Housings together wasn't cooperating. My 7/16" wrench was too big and the 3/8" wrench was too small.

Scratching my head, I reached into my toolbox and pulled out a 10mm wrench: It fit.

What the...?!?

Then I remembered having issues with the last fastener in yesterday's work...

Like most of the Drawer Stack work, I had threaded the nut on "by feel" - tightened it by hand - and then probed around with the 7/16" wrench to do the final torqueing. On this last operation I could not seem to get the wrench to get a purchase on the nut. I would say I tried for 5 to 10 minutes and then finally decided that hand tight was good enough and left the shop for the day.


20181113-05.jpg

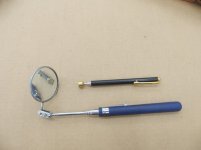
These two invaluable tools had been used extensively the past couple of days and now I reached for the Mirror-On-A-Stick again.

I couldn't remember which of the two front nuts have given me trouble so I got a 7/16 wrench and the mirror and moved to the front of the mounted drawer stack. The top drawer was removed and I tried fitting the wench onto the nut on the left - it seemed secure and the mirror confirmed the wrench fit the nut. The same procedure was performed on the right nut and, when I looked at the reflection in the mirror I could see the wrench was too large for the nut.


20181113-04.jpg

I positioned the Cart and, as it supported the Stack, I used a 10mm wrench to remove the nut.


When I started the task of mounting these Drawer Housings I had grabbed most of the hardware from the Equipto Cabinet where most of my nuts & bolts live. Most of these fasteners come from Estate Sale hardware purchases of boxes and jars for small money. I bring them home, sort them and squirrel them away in the Equipto Cabinet. Obviously I had gotten something odd and added it to my collection of 1/4-20 nuts.

I put the two "odd" nuts on the bench with the other nuts I had there and, when one looked closely, these two nuts were smaller.

I used a normal 1/4-20 nut to replace the one I had just removed. Now I could start on the remaining Drawer Housing Stack.


20181113-06.jpg

I positioned the supporting tubing and inserted the bolts and washers into the slots. As during yesterday's work, the Magnet-On-A-Stick was used more than once during this operation.


20181113-07.jpg

The Hydraulic Scissor Cart was used to position the second Stack.


Continued in next post...
 
Last edited:
OP
S

sbosecker

Well-known member
Joined
Sep 25, 2012
Messages
3,539
Location
Peachtree City, GA
Continued...


20181113-11.jpg 20181113-12.jpg

Apparently I'm getting towards the top of the learning curve because this Stack installation went much quicker than yesterdays.

I'm looking forward to getting the drawers cleaned up but that will have to wait until after the weekend. I've got a couple of Recurrent Training simulators this weekend and I need to do some reviewing of my manuals.


20181113-13.jpg

I did go down to the basement and the Equipto Cabinet and rooted around in the 1/4-20 nut compartment. That size is one of my bigger accumulations and I found a total of 12 (there may be more) of the odd 10mm sized items...

Has anyone ever heard of a 1/4-20 thread nut that needed a 10mm wrench to tighten it?

...or for that matter, any imperial thread that used a metric wrench to tighten it?

Scott
 
Last edited:
OP
S

sbosecker

Well-known member
Joined
Sep 25, 2012
Messages
3,539
Location
Peachtree City, GA
Sunday - November 18, 2018


After a couple of days of simulator training - including (last night) the hardest scenario I have had in over 35 years as a pilot - I look forward to getting back into the shop a bit this week before the holiday gluttony arrives.

I did take a short break from my personal studies in between the two simulator periods on Friday & Saturday and visited a very close Estate Sale. You know an Estate Sale has potential when one of the items in the collection is an unused, completely intact, lavatory for a Pan Am A-300!


20181116-01.jpg 20181117-02.jpg

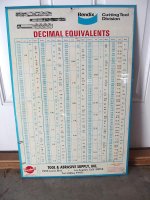
I got a couple of signs for the Lone Beech Garage. The "Decimal Equivalents" Sign is interesting as the telephone number listed at the bottom center of the sign is LUdlow 9-9171. I am old enough to remember when local telephone exchanges used two letters for the start of the phone number. In this case LU from the LUdlow. When I was a very young lad, our telephone number was TUxedo 2-5401 or TU2-5401.

It should be noted that our phone then was also on a "Party Line". For you kids, that means 1 or 2 other phones in other houses would ring when someone called you.

That would seem to date this sign to the 60's at the latest. I would have thought it was newer than that looking at it.


20181117-03.jpg 20181117-04.jpg

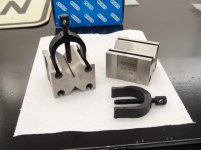
There were quite a few machinist items (reamers & such) but I didn't have enough time to evaluate the used stuff. However, this unused set of Fowler V-Blocks caught my eye and I grabbed them as well as the signs and returned home to my studies.


Scott
 
Last edited:

drivesitfar

Well-known member
Joined
Oct 23, 2013
Messages
36,079
Location
Pacific Northwest
SB: it seems like i've had metric nuts and bolts on old USA stuff and standard bolts on stuff made abroad or in Canada. as you say some don't even seem to be either a standard or metric so maybe some guy at the factory put his own version on the assembly line?

great work on the bench/desk and yep you are getting better with practice.

going back down memory lane do you recall when ZIP CODES were 2 digits?

i recall party lines in some areas having up to 17 families on one line and with a could chatty teenage girls in the mix that probably was our version of FACEBOOK.

hope you are enjoying your weekend!!
 
OP
S

sbosecker

Well-known member
Joined
Sep 25, 2012
Messages
3,539
Location
Peachtree City, GA
SB: it seems like i've had metric nuts and bolts on old USA stuff and standard bolts on stuff made abroad or in Canada. as you say some don't even seem to be either a standard or metric so maybe some guy at the factory put his own version on the assembly line?

great work on the bench/desk and yep you are getting better with practice.

going back down memory lane do you recall when ZIP CODES were 2 digits?

i recall party lines in some areas having up to 17 families on one line and with a could chatty teenage girls in the mix that probably was our version of FACEBOOK.

hope you are enjoying your weekend!!


DrivesItFar,

Regarding the odd 10mm-between-the-flats nut (1/4-20 thread)…

I've posted this oddity in the "The Tools-Fabrication & Techniques" and some responses suggested that this item might be a M6-1.25 thread. M6-1.0 is the standard and will thread onto the nut for about 2 revolutions and then stops.

I have seen some M6-1.25 "stuff" on the Interweb. I found a couple of M6-1.25 Machine Screws for a Bicycle component on eBay at small enough money that I pulled the trigger in an effort to prove/disprove this theory. I hope to have these in hand after Thanksgiving.

I was unaware of the 2-digit Zip Code and looked on Wikipedia for more information. Apparently the 2-digit Zip Code was for larger cities and broke up said metropolitan area into numerical subunits that allowed the mail to be sorted quicker once it got to the city. It should be no surprise that my rural upbringing did not expose me to this citified Zip Code. Ha!

I shall be seeking Party Line stories from my father at Thanksgiving in a couple of days.

Best regards,

Scott
 
OP
S

sbosecker

Well-known member
Joined
Sep 25, 2012
Messages
3,539
Location
Peachtree City, GA
Tuesday - November 20, 2018


I'm milling around smartly today waiting for a repairman to show up to replace the Pressure Bladder Tank that serves our water well pump. So what to do while I'm waiting?

I broke out the shop vac and cleaned up the woodshop.


20181120-01.jpg

I had purchased some V-Blocks at an Estate Sale a few days ago. They appeared to have never been out of their box so I changed that situation. They were in plastic bags and had a bit of "cosmoline" like substance on them. I cleaned that stuff off with some acetone.

You can never have too much "set-up" stuff!

I then turned my attention to the LYON Table's Drawers.


20181120-02.jpg 20181120-03.jpg

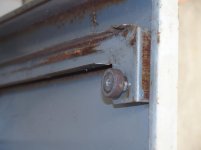
Some of the Drawer Rollers in the LYON Drawer Stacks are in poor condition. These are riveted into place and the rivets are failing on a couple of rollers and some of the other rollers have bearings that have been fully depreciated. I thought I'd take some measurements and see if I could find some suitable replacements.


20181120-04.jpg 20181120-05.jpg

I measured the following dimensions:

Outside diameter of the Roller - .936"
Width of the Roller - .3" (measured with a machinist's ruler)
The diameter of the Roller's inner standoff - .503"
Distance from the "wall" to the outside of the Roller - .575"

The only dimension I could take without interference was the Roller's large diameter.

I've spent the rest of the afternoon looking online for a replacement for these Rollers but haven't had any luck so far.


Scott
 

Bob Heine

ALLIANCE MEMBER
Joined
Oct 24, 2009
Messages
10,709
Location
Boca Raton, Florida
It should be no surprise that my rural upbringing did not expose me to this citified Zip Code. Ha!

I shall be seeking Party Line stories from my father at Thanksgiving in a couple of days.

Best regards,

Scott
Scott, your rural address was probably your name in the first line and RFD Town and State in the second line. My grandparents lived on a dirt road 4 miles from town and the mail always got to them, even when it was sent from another country:
attachment.php


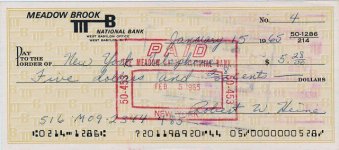
When we moved into our own place (in-law's rental) in 1963 the telephone was on a 4-party line. Over the next two years three of the parties got private lines. We were the last customers on the line so every month New York Telephone called us to tell us we needed to get a private line. We refused and that meant we had pretty small phone bills even though we had to pay NYT to rent the black rotary dial telephone. It was nice to have this kind of a payment:
attachment.php
 

Attachments

  • Postcard vBack.jpg
    Postcard vBack.jpg
    60.2 KB · Views: 510
  • Telephone Bill Payment.jpg
    Telephone Bill Payment.jpg
    75.3 KB · Views: 513
OP
S

sbosecker

Well-known member
Joined
Sep 25, 2012
Messages
3,539
Location
Peachtree City, GA
Scott, your rural address was probably your name in the first line and RFD Town and State in the second line. My grandparents lived on a dirt road 4 miles from town and the mail always got to them, even when it was sent from another country...


Bob,

Slightly different than RFD but pretty close.


2018 11 20 - Post Card.jpg

The R.R. #4 stood for "Rural Route #4". The gravel roads that constituted most of the rural county roads didn't have names. The Postman - and yes it was a man back then - knew everyone on his route and hand sorted the mail before departing the Post Office in the morning.

Best regards,

Scott
 
Last edited:

wasfast

Well-known member
Joined
Apr 10, 2014
Messages
874
Location
San Diego CA
We had a party line on the farm I grew up on in the very early 60's. I tell younger folks about that and the cost for long distance and they just can't understand that in the era of cell phones. I'm getting old I guess:)
 

Bob Heine

ALLIANCE MEMBER
Joined
Oct 24, 2009
Messages
10,709
Location
Boca Raton, Florida
Scott, RFD stood for Rural Free Delivery and I think they only had one route in Fairhaven. Had dad waited until we crossed the US border to mail that postcard it would have only been two cents. Grandma bemoaned the demise of the "Penny Postcard" in 1952 so I suspect she's spinning in her grave now that a postcard is $0.35.
 

drivesitfar

Well-known member
Joined
Oct 23, 2013
Messages
36,079
Location
Pacific Northwest
SB: I wonder if you will have to make some new rollers on your lathe? I haven't found a source for them either other than finding a really beat up donor drawer or cabinet.

hope you and yours have a HAPPY THANKSGIVING!!
 
OP
S

sbosecker

Well-known member
Joined
Sep 25, 2012
Messages
3,539
Location
Peachtree City, GA
SB: I wonder if you will have to make some new rollers on your lathe? I haven't found a source for them either other than finding a really beat up donor drawer or cabinet.

hope you and yours have a HAPPY THANKSGIVING!!

DrivesItFar,

I hope you had a great Thanksgiving as well! Ours was hectic but it is our big family gathering of the year so it's great to see everyone.

Rollers...

I think the lathe may come into play if I remove & replace a few of these puppies. I'm thinking an appropriate bearing mounted on a turned part could do the trick.

That's a ways away though.

Best regards,

Scott
 
OP
S

sbosecker

Well-known member
Joined
Sep 25, 2012
Messages
3,539
Location
Peachtree City, GA
Wednesday - November 28, 2018


As we all know, sometimes life throws you a curve ball that keeps you out of the shop. That happened to me over the weekend. I'm happy to say this wasn't some tragic curve ball... it was an eBay curve ball.

Just before traveling to the Lone Beech Melon Farm in southern Indiana for Thanksgiving, I won an eBay auction via a best offer bid. The auction was for a set of Metric Transposing Gears for my 11-Inch Rockwell Metal Lathe.

These are unobtanium so I was happy to have won the auction. On Saturday they were delivered by the Post Office in a flat rate box.
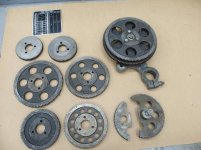
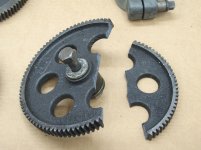
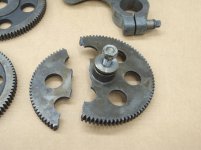

20181124-01.jpg 20181124-02.jpg 20181124-03.jpg

Bummer!

The seller had placed padding around the inside of the box but nothing protected the individual gears from each other.

I contacted the seller with pictures of the broken gear. He responded immediately with a return-for-refund message.

I asked if I could take some time to investigate the possibility of repairing or replacing the gear. Like I mentioned - this setup is pretty much unobtanium. The seller agreed to stand by.

I posted a query in the Garage Journal's Fabrication & Techniques section as well as in the Rockwell Lathe Yahoo Group. I got many helpful responses and most of these seemed to indicate that a repair was possible. The Yahoo group had some additional thoughts on taking a stock gear and modifying it.

On Monday I contacted a friend of mine. A retired Delta mechanic, I had met him because he had an Allis-Chalmers Model G like I have. Mostly we had laughed & scratched at an annual local Farm Heritage Days event so I knew of his welding skills mostly by reputation. I had used him one time to do some aluminum welding on my trailer and I was impressed by his work on that project.

On the phone I told him I had a broken gear that I believed was cast iron. I asked if would look at it and give me his opinion on if it was a repairable situation. He said to bring it to his shop and he would look at it.

I drove about half an hour to his place and he examined the gear. He stated he thought it was repairable. I asked him if he knew someone that could to the repair. He replied, "Yes".

I asked, "Is he close?" He smiled a big smile and said, "Yes".

He gave me a quote on the repair and I left with the gear. I still needed to negotiate with the eBay seller on a reduction in the price to offset the cost of the repair and other incidentals.

By Tuesday morning the seller and I had come to an agreement that allowed me to keep the gear set with some compensation for the damage during shipping. I called my friend and asked when I could drop the gear off for repair.

He told me to bring it right over and - because he was busy with other projects, to leave it in a designated location. I did this at about 11:00 am yesterday. I had already told him there was no hurry in getting this gear back to me.

This morning I got up and, as I was drinking my coffee, I was thinking about calling him to see if he had found the gear. As I was considering when would be an appropriate time to do that, my phone rang. It was my friend: "Your gear's ready." he said.

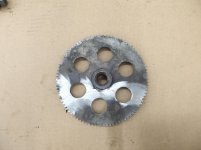
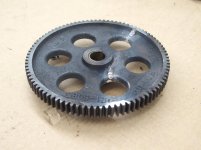

20181128-04.jpg 20181128-05.jpg

20181128-06.jpg 20181128-07.jpg

I drove over to his place. He was away from his shop and had left the gear where I could find it. I left the agreed to amount in an envelope under a brick and departed with my prize.

I am very pleased on how the repair turned out. My friend indicated he had welded it with silicon bronze. It has been pointed out to me by others that this repair was probably actually brazed not welded.

I am aware of the difference between brazing & welding but that's about it. I'm pretty sure my friend said he "welded" it. He was probably talking to me like one would talk to a slow child - trying to use words he thought I would understand.


Continued in next post...
 
Last edited:
OP
S

sbosecker

Well-known member
Joined
Sep 25, 2012
Messages
3,539
Location
Peachtree City, GA
Continued...
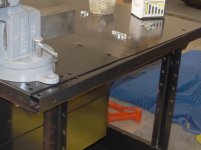
Today the first wave of Cyber Monday purchases arrived.


20181128-11.jpg 20181128-12.jpg

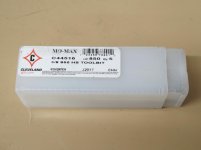
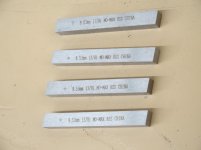
Some 3/8" Lathe Tool Blanks arrived.


20181128-13.jpg

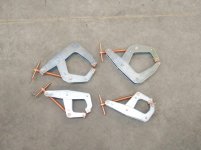
As well as some Kant-Twist clamps.


A couple of weeks ago I was mounting Drawer Stacks on the LYON Table. I encountered some weird 1/4-20 nuts that used a 10mm wrench to tighten them. The information on this situation is HERE & HERE.

In the second post I indicated that I had ordered a couple of M6-1.25 machine screws to test the "It's A Metric Nut Theory".


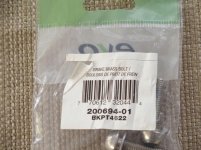
20181128-14.jpg 20181128-15.jpg

They finally arrived today. It is worth pointing out that these screws - or the updated part number CCBB-2PB - are advertised as having M6-1.25 threads in multiple locations on the internet.


I opened the package and tried threading one of the mystery nuts onto one of these machine screws. I really thought it was going to work but the nut threaded onto the screw and then stopped...
...right at the same position it had stopped threading onto the M6-1.0 screw.
At first I was thinking, "Well, that's that I guess. It's a 1/4-20 thread and not metric." Then I realized how weird it was that it stopped threading onto the screws at the same place as the M6-1.0 screw.


20181128-16.jpg 20181128-17.jpg

I got my metric thread gage out and...

...for Pete's sake. These screws aren't a 1.25 pitch; they're a 1.0 pitch. No wonder they stopped threading at the same place as the M6-1.0 screws I had already tested the nut with.


Back to looking for another M6-1.25 screw to test the "It's A Metric Nut" theory.


Scott
 
Last edited:

drivesitfar

Well-known member
Joined
Oct 23, 2013
Messages
36,079
Location
Pacific Northwest
SB: I always say if you can't be as handy as you need to be it's sure nice to have a few handy friends. nice work fixing that broken gear.

keep trying to solve the mystery of the screw and I bet you'll figure something out or just drill and retap might be the best solution if that is an option.

cheers
 
OP
S

sbosecker

Well-known member
Joined
Sep 25, 2012
Messages
3,539
Location
Peachtree City, GA
SB: I always say if you can't be as handy as you need to be it's sure nice to have a few handy friends. nice work fixing that broken gear.

keep trying to solve the mystery of the screw and I bet you'll figure something out or just drill and retap might be the best solution if that is an option.


DrivesItFar,

It is indeed good to know "people".

I don't really need those nuts to do anything... I'm just trying to make sense of it. I suspect they have a M6-1.25 thread but I want to prove that actually is the case.

No real good reason to piddle with it other than that's the way I'm built.

I just want to know. Ha!

If you want a complete list of my quirks... set aside an hour and contact my spouse.

Best regards,

Scott
 
Last edited:
To avoid these ads, REGISTER NOW!
Top Bottom