To avoid these ads, REGISTER NOW!

The roughest Craftsman 150 drill press?

To avoid these ads, REGISTER NOW!

DDOPWD23

Well-known member
Joined
Jul 8, 2024
Messages
149
Location
Glen Rock, NJ
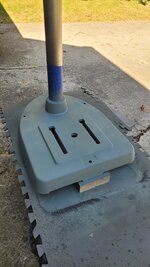
Well, it's coming along nicely. I sprayed primer on the first couple of pieces today. There's still lots to do, but I'm making progress. I wasn't able to get the column out of the base and gave up after trying off and on for several days, but was able to soak the base in citric acid. I'll have to spend some quality time on the base with a wire wheel, and will have to work on the column standing up, but I'm good with that and I have faith it'll come out well in the end.
Keep up the great work! You’ll be happy in the end. I too am in the same boat as you with restoring a few drill presses. One is a gift, two are for me and one is to give to a friend if he wants it and one is for me to restore and sell. IMG_8961.jpegThis one I am waiting for the head casting and motor, it is my grandfathers. uuid=1773FBEE-F192-4827-BD2E-1FC4BD490340&library=1&type=1&mode=1&loc=true&cap=true.jpegAs you can see the head casting is mounted to the table and column of the die saw. IMG_8114.jpegThis one I will restore and sell. IMG_9117.jpegThis one is a gift and I had a very hard time dismantling this one. Frank Lee helped me out and I too gave up getting the column out of the base. IMG_9555.jpegI just acquired this one that was going to be thrown out. I don’t know anything about it since it was delivered to my house while I am away. I will clean it up and give to my friend. IMG_7836.jpegThis one I am keeping I will just have to restore.
 
OP
M

MikeyMakey

Active member
Joined
Sep 12, 2024
Messages
27
Location
Muncie, IN
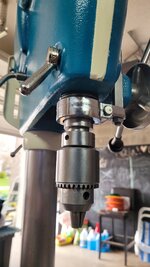
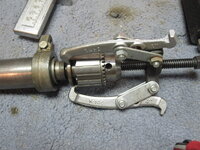
I haven't updated in awhile. I didn't do much over the winter (unheated garage) but have gotten pretty close to finished with the drill press itself. I'm still touching up the paint a bit, and I haven't touched the motor yet. I rebuilt and cleaned the chuck today, which was the most difficult part of the project so far. It was very difficult to press the outer sleeve off and back on with my vice, even after cleaning and lubing it. Felt like a victory when I accomplished it! Anyway, this is not an "I'm done" post -- just checking back in after getting moving on it again after a break. 😀

20250413_153916.jpg
20250413_164957.jpg
 
Last edited:

BSWS

Well-known member
Joined
Jun 2, 2019
Messages
361
Location
Tucson AZ
It's looking good. I'm still hoping to find the right thing for pressing the sleeve on and off. Did you come up with a good idea? I realize a spare chuck sleeve could work but I don't have one yet.
 
OP
M

MikeyMakey

Active member
Joined
Sep 12, 2024
Messages
27
Location
Muncie, IN
It's looking good. I'm still hoping to find the right thing for pressing the sleeve on and off. Did you come up with a good idea? I realize a spare chuck sleeve could work but I don't have one yet.
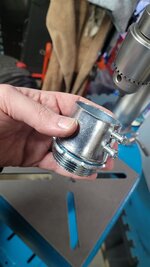
I scouted around Menards one day in the conduit and plumbing areas with the chuck in hand, hunting for a little section of pipe that was the right diameter. This was the best I found. It's a 1.5" conduit coupler, IIRC. It wasn't ideal because my vice would not open quite far enough to accommodate it and the chuck, but I managed to make it work.
 

Attachments

  • 20250413_201501.jpg
    20250413_201501.jpg
    526.6 KB · Views: 13
  • 20250413_201509.jpg
    20250413_201509.jpg
    548.4 KB · Views: 23

BSWS

Well-known member
Joined
Jun 2, 2019
Messages
361
Location
Tucson AZ
I scouted around Menards one day in the conduit and plumbing areas with the chuck in hand, hunting for a little section of pipe that was the right diameter. This was the best I found. It's a 1.5" conduit coupler, IIRC. It wasn't ideal because my vice would not open quite far enough to accommodate it and the chuck, but I managed to make it work.
That's pretty amazing. That's exactly what I used too. I did a very thorough search of one of the biggest Ace Hardwares in the country and that's the best I came up with. It worked but it's a little brittle so I did some damage to it. I'm keeping my eyes opened for a really cheap chuck that I can strip out for it's shell.
 
To avoid these ads, REGISTER NOW!
OP
M

MikeyMakey

Active member
Joined
Sep 12, 2024
Messages
27
Location
Muncie, IN
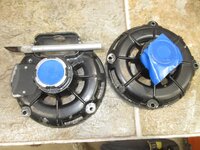
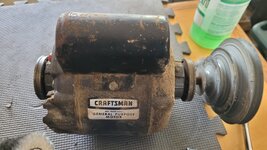
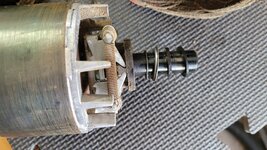
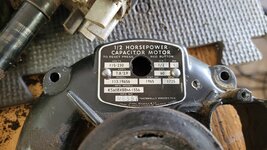
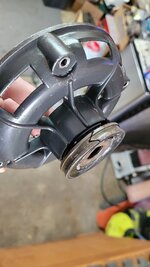
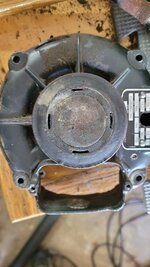
Hello folks! I'm working on the motor. Could someone tell me how these end assemblies come apart? My assumption is that I need a special tool to unscrew the cap piece - one that fits into the grooves. I'm leary of damaging the rubber seal on top, so wanted to ask the pros before I get too carried away. The motor is a 113.19656.
 

Attachments

  • 20250427_163755.jpg
    20250427_163755.jpg
    545 KB · Views: 15
  • 20250427_163744.jpg
    20250427_163744.jpg
    522.1 KB · Views: 14
  • 20250427_163749.jpg
    20250427_163749.jpg
    494.1 KB · Views: 12
  • 20250427_163813.jpg
    20250427_163813.jpg
    572.8 KB · Views: 16

FrankLee

Well-known member
Joined
Sep 13, 2010
Messages
3,618
Location
seMI, 48317
Hello folks! I'm working on the motor. Could someone tell me how these end assemblies come apart? My assumption is that I need a special tool to unscrew the cap piece - one that fits into the grooves. I'm leary of damaging the rubber seal on top, so wanted to ask the pros before I get too carried away. The motor is a 113.19656.
Your reason for removing them?

My suggestion is to leave them on and mask to clean or paint. I don't believe there are any serviceable parts inside.

Those resilient mounting rings may or may not come off.
 
OP
M

MikeyMakey

Active member
Joined
Sep 12, 2024
Messages
27
Location
Muncie, IN
Your reason for removing them?

My suggestion is to leave them on and mask to clean or paint. I don't believe there are any serviceable parts inside.

Those resilient mounting rings may or may not come off.
That's really what I needed to hear. My only goal is to thoroughly clean and paint it, but I'll just mask it instead. Thank you for the quick response!!
 

FrankLee

Well-known member
Joined
Sep 13, 2010
Messages
3,618
Location
seMI, 48317
More tips on how I refurb those Emerson motors...

1745792119711.jpeg 1745791400719.jpeg

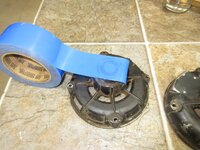
I clean the inside and outside of the motor rings in the end caps with acetone and mask with Dr Shrink tape. (Awesome tape... very sticky and kinda thick.) Don't forget to clean and mask the oil plug holes.
1745791477710.jpeg 1745791255633.jpeg

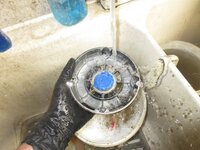
I use Grez-Off with a brush.
1745791571102.jpeg

Rinse with water, but don't submerge.
1745791624573.jpeg 1745793731444.jpeg

Remask the outside for painting.
1745791693744.jpeg

Pull the cap wire into the stator band if applicable.
Use whipped topping containers to "mask" the stator. Quick, easy and they fit perfectly.
1745791848036.jpeg


1745792062465.jpeg
 
Last edited:

y'sguy

Well-known member
Joined
May 1, 2010
Messages
1,345
Location
Tulsa, Oklahoma
Another method of removing the post or, for that matter, unseizing stubborn items, is to use dry ice in a bag on the column (lying on its side). It will drop to below-zero temperatures soon. Then use a heat gun or a torch to heat the cast iron base. Use a wooden mallet to rap on the base a few times, and it will come off. CAUTION, Be especially careful of the use of dry ice and read up on its usage.
 
OP
M

MikeyMakey

Active member
Joined
Sep 12, 2024
Messages
27
Location
Muncie, IN
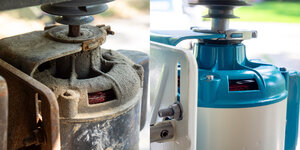
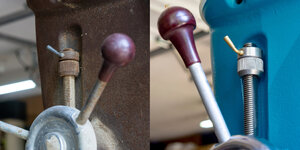
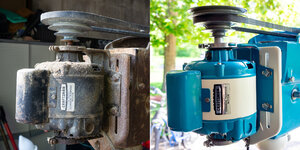
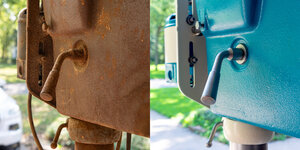
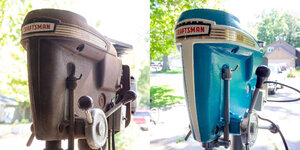
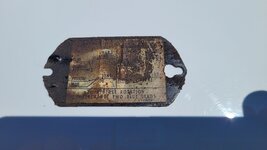
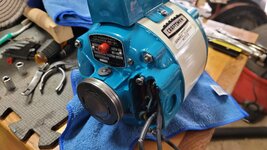
Well, folks, I can finally say I'm done. Well, ok, 99% done. I still need to recreate the badge, which was too far gone. I'll get around to that eventually. But the rest is finished. I am very happy with it!
 

Attachments

  • Craftsman 150 Before and After 13.jpg
    Craftsman 150 Before and After 13.jpg
    1.4 MB · Views: 12
  • Craftsman 150 Before and After 10.jpg
    Craftsman 150 Before and After 10.jpg
    585.6 KB · Views: 13
  • Craftsman 150 Before and After 8.jpg
    Craftsman 150 Before and After 8.jpg
    505.6 KB · Views: 12
  • Craftsman 150 Before and After 7.jpg
    Craftsman 150 Before and After 7.jpg
    582.7 KB · Views: 12
  • Craftsman 150 Before and After 6.jpg
    Craftsman 150 Before and After 6.jpg
    706.8 KB · Views: 12
  • Craftsman 150 Before and After 5.jpg
    Craftsman 150 Before and After 5.jpg
    543 KB · Views: 12
  • Craftsman 150 Before and After 4.jpg
    Craftsman 150 Before and After 4.jpg
    982.7 KB · Views: 13
  • Craftsman 150 Before and After 3.jpg
    Craftsman 150 Before and After 3.jpg
    686.8 KB · Views: 15
  • Craftsman 150 Before and After 2.jpg
    Craftsman 150 Before and After 2.jpg
    616.7 KB · Views: 14
  • Craftsman 150 Before and After 1.jpg
    Craftsman 150 Before and After 1.jpg
    504.1 KB · Views: 16
OP
M

MikeyMakey

Active member
Joined
Sep 12, 2024
Messages
27
Location
Muncie, IN
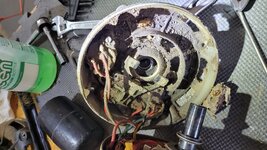
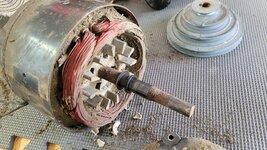
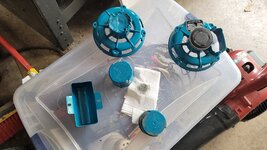
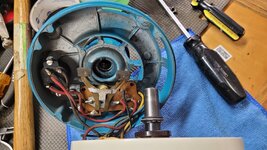
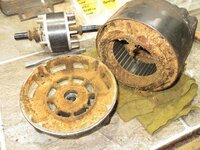
Here are some shots of the motor progress. I wanted to try to preserve the label inside the cover, but unfortunately as I tried to clean it off, the print came right with it. If anyone has a good photo of the wiring diagram of that label, I could recreate it (I'm a graphic designer).
 

Attachments

  • 20250427_160704.jpg
    20250427_160704.jpg
    794.2 KB · Views: 14
  • 20250427_151803.jpg
    20250427_151803.jpg
    871.7 KB · Views: 13
  • 20250427_150010.jpg
    20250427_150010.jpg
    423.5 KB · Views: 11
  • 20250427_145620.jpg
    20250427_145620.jpg
    606.3 KB · Views: 9
  • 20250427_145557.jpg
    20250427_145557.jpg
    594.9 KB · Views: 9
  • 20250427_145511.jpg
    20250427_145511.jpg
    625 KB · Views: 8
  • 20250427_145441.jpg
    20250427_145441.jpg
    535 KB · Views: 7
  • 20250427_145128.jpg
    20250427_145128.jpg
    595.5 KB · Views: 9
  • 20250427_140903.jpg
    20250427_140903.jpg
    307.6 KB · Views: 9
  • 20250427_140400.jpg
    20250427_140400.jpg
    376.1 KB · Views: 9
OP
M

MikeyMakey

Active member
Joined
Sep 12, 2024
Messages
27
Location
Muncie, IN
Last batch of the motor shots.
 

Attachments

  • 20250427_162712.jpg
    20250427_162712.jpg
    689.1 KB · Views: 8
  • 20250427_163700.jpg
    20250427_163700.jpg
    667.4 KB · Views: 8
  • 20250503_132617.jpg
    20250503_132617.jpg
    580.6 KB · Views: 8
  • 20250503_132638.jpg
    20250503_132638.jpg
    589.9 KB · Views: 7
  • 20250503_152725.jpg
    20250503_152725.jpg
    553.2 KB · Views: 7
  • 20250503_152742.jpg
    20250503_152742.jpg
    446.7 KB · Views: 7
  • 20250504_112735.jpg
    20250504_112735.jpg
    544.1 KB · Views: 7
  • 20250504_112809.jpg
    20250504_112809.jpg
    727.6 KB · Views: 7
  • 20250504_125322.jpg
    20250504_125322.jpg
    512 KB · Views: 9
  • 20250504_125309.jpg
    20250504_125309.jpg
    713.1 KB · Views: 8
To avoid these ads, REGISTER NOW!
Top Bottom