To avoid these ads, REGISTER NOW!

Between 265 & 485 SQ/FT The Scooter Workshop

Workspaces sized between 265 and 485 squarefeet.
OP
M

Modern Jess

Well-known member
Joined
Jan 2, 2011
Messages
1,362
Location
Bay Area, California
50cc is a class of its own where I live(Holland, EU). We can drive them without a ''real'' drivers license so a lot of people have them. It ranges from vespa's to scooters, and 2 strokes(new and old, even liquid cooled two strokes).

Yep. Lots of places in the US (though not California) allow people to ride 50cc scooters without a license or insurance, which is why they call them "liquorcycles" -- they're what people ride when they lose their drivers license because of a DUI. :sad:

Do I spot 2 cam shafts for that single cylinder by the way?

It's got two rocker arms, but only one camshaft. There are four valves, and each rocker operates two valves apiece.
 
To avoid these ads, REGISTER NOW!

Dillithium

Well-known member
Joined
Dec 14, 2011
Messages
151
It's got two rocker arms, but only one camshaft. There are four valves, and each rocker operates two valves apiece.

Ah, I see it now. I mistook the rocker arms for camshafts..but that wouldn't make any sense. Thanks for explaining.
 

Stuart in MN

Well-known member
Joined
Sep 8, 2005
Messages
22,976
Location
Minneapolis
Sheathing is a relatively new thing...my uncle is a stucco contractor and as a kid I worked for him. Paper and wire was the only thing on the outside of many old houses (under the stucco). And that's all we put up before we started with a scratch coat. But that was like 15-20 years ago so...

I think there are regional differences in construction - there are tons of stucco houses in Minneapolis that were built 100 years ago, and they're all sheathed underneath.
 

fergus

Well-known member
Joined
Oct 4, 2009
Messages
1,620
Location
Yolo County CA
You're probably right Stuart. Forgot to mention that was in Southern California. Mostly tract houses that were slapped together in the mid to late '40s and '50s. Now everything is sheathed here.
 
OP
M

Modern Jess

Well-known member
Joined
Jan 2, 2011
Messages
1,362
Location
Bay Area, California
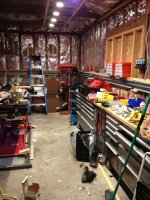
Managed to get a solid day of work on the shop today. I'm attempting to deal with the fiberglass bats that are falling out from between the rafters, their weight having been resting on stapled kraft paper edges for years and years. I'm not entirely sure 
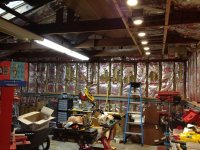
what I'm going to finish the upper ceiling with (though I've got some fairly novel ideas) but the first order of business was definitely to put some furring strips on the underside of the rafters, as the surface was extremely uneven. Whatever I end up putting up, this will help.

I'm working alone, so getting the furring strips in place is a little bit of a challenge, especially at the peak where the ceiling is maybe 14 feet off the ground. I made this wacky deadman lift to hold up the furring strips and index them against the end of the existing rafters. It's designed to wedge into the space under the ridge board, where the rafters come together. I made it from a painter's sanding pad and a lightbulb-changing pole, and it allowed me to do this job by myself pretty easily. Just slot the end of each furring strip above the sheetmetal tongue, and then nail a few brads into the board lower down (where I can actually reach). Then I went back and screwed the furring strips into the rafters with self-drilling screws.

workshop-h-1.jpg


workshop-h-2.jpg


workshop-h-3.jpg


workshop-h-4.jpg


(On a side note, I imagine there's got to be a thread somewhere here on GJ for weird home-made tools, right? If anyone knows what it's called, I'd appreciate the pointer).

In other news, I've been kind of casually hunting around for a drill press. I've seen a few interesting ones go by on Craigslist, but nothing that I felt compelled to jump on. Then, out of the blue, one of my friends calls me and tells me he doesn't have room for his drill press in his shop anymore, that it's sitting outside in his yard, and that it's going to start raining next week.

So I now have a perfectly serviceable drill press in my workshop. It might not be the be-all end-all drill press, but it was free. And it was delivered.


workshop-i-1.jpg


workshop-i-2.jpg
 

Huxley

Well-known member
Joined
Mar 4, 2008
Messages
210
Location
Colorado
Free tools that just show up? Sign me up!

Nice work. Have any shots of the furring strips installed? I am currently brainstorming some insulation ideas.
 
OP
M

Modern Jess

Well-known member
Joined
Jan 2, 2011
Messages
1,362
Location
Bay Area, California
I had a rare obligation-free weekend, and put it to good use on the ceiling of my shop. I've been agonizing over exactly how to finish the upper-part of the ceiling, and it's been slowing me down. I really, really dislike lifting giant sheets of drywall (yeah, I know -- rent a lift!) and the only thing I hate more than lifting sheets of drywall is taping and mudding and painting them. On the ceiling.

So I went out of my way to make things simultaneously easier and harder on myself. What you see in the photos below is actually bamboo flooring, nailed and glued to furring strips on the upper ceiling of my shop.

Wait! Before you tell me I'm doing it wrong, consider this: bamboo flooring is pre-finished on both sides, comes in tongue-and-groove format on all four edges, is very dimensionally stable, and at 5/8" thick can easily span 24"-OC rafters without sagging. It's also solid bamboo (well, a laminate of bamboo on bamboo on bamboo -- no MDF) and very much a renewable resource. What's not to like?

Well, the cost, mostly. At $2.50 a square foot, it's a bit more expensive than drywall. On the up side, once it's up, you're done -- no more finishing, sanding, or painting. While it is somewhat time-intensive to put up, I really don't mind the monotony of nailing each plank up with my brad nailer. It's kind of... therapeutic.

Anything to get out of drywall. ;)

workshop-j-1.jpg


workshop-j-2.jpg


workshop-j-3.jpg


workshop-j-4.jpg


workshop-j-5.jpg


workshop-j-6.jpg


workshop-j-7.jpg
 

Omphaloskeptic

Well-known member
Joined
Oct 11, 2008
Messages
2,346
Location
Ultima Ratio, Wa.
Dang, What a great idea! That price PSF seems steep at first, but if you had someone come in and do the whole job in sheet rock, I'd just bet the cost would come close to what you paid for materials. And besides, you got the added benefit of 'therapeutic' nailing. lol
 
OP
M

Modern Jess

Well-known member
Joined
Jan 2, 2011
Messages
1,362
Location
Bay Area, California
Dang, What a great idea! That price PSF seems steep at first, but if you had someone come in and do the whole job in sheet rock, I'd just bet the cost would come close to what you paid for materials.

This is one of those times that I'm grateful for the relatively small square footage of my workshop. If this were one of the ginormous buildings regularly featured on GJ, the cost would have been prohibitive.
 

Shoottx

Well-known member
Joined
Jan 30, 2011
Messages
314
Location
Plano Tx
Gotta say, that is one of the coolest ceilings on the whole site, if not in the whole world. :bowdown::bowdown::bowdown::bowdown:
 
OP
M

Modern Jess

Well-known member
Joined
Jan 2, 2011
Messages
1,362
Location
Bay Area, California
Gotta say, that is one of the coolest ceilings on the whole site, if not in the whole world.

Errr... thanks! I don't know about the whole world, but it is looking pretty cool so far. I'm kind of surprised, actually. I thought it would be a lot harder, but it really wasn't too difficult to put up -- just a bit time consuming.

Considering that the insulation was literally falling down on my head just a bit over a week ago, it's a big improvement.
 
Last edited:

Thedoc14

Well-known member
Joined
Mar 4, 2012
Messages
259
Location
Melb, Australia
Just to be clear, this cylinder head definitely will not fit older two-stroke Vespas. There are quite a few top end kits for those, though -- mostly from Malossi, Polini, and a few others. I'm not an expert in those kits, though. What kind of Vespa do you have? What era?

Hi I am not sure how old it is but I would say before 1980, I am not able to check it as it is in Australia. But now i know you know I will definately be back with some more questions.

Keep up the great work, the roof looks great.
 
OP
M

Modern Jess

Well-known member
Joined
Jan 2, 2011
Messages
1,362
Location
Bay Area, California
Recipe for Panic

1) Take a perfectly good roof
2) Cut a hole in that roof
3) Stand back and survey the carnage
4) Mutter to yourself "What have I done"
5) Remember that daylight savings time ended today, and it will be dark at 4:30.

skylight_hole.jpg
 
OP
M

Modern Jess

Well-known member
Joined
Jan 2, 2011
Messages
1,362
Location
Bay Area, California
If I'm not mistaken, the last Cannonball run was won on a vintage Lambretta.

That's not quite true. In 2010, the "Manual 200" class was won by Starr on her Lambretta, though she was competing in a class of exactly one. There was also an Automatic 190 class and an Automatic 250 class, with separate winners for each of those. The Auto 250 class had the most participants, and also the fastest overall times.

Attempts to compare points between classes aren't meaningful. Someone riding in a class of one will, by definition, take all the points for each day they finish. There's little point in trying to compare that to the other classes. Officially, there was no overall winner in 2010.

In 2012 (which has already happened) there were no classes, just handicaps. The "official" winner won on a 1946 Salsbury with a Ninja 250 motor stuffed into it. There was a deliberate loophole in the rules, and the guy who built that bike took it to the logical conclusion, got a huge handicap, and thus ended up with more points than anyone else. Oddly enough, though, the fastest rider (raw time) was on a Vespa GTS 250, who managed to outpace even the ginormous 400 and 500cc bikes by a pretty healthy margin.

Hell, I outpaced all the big bikes on my 259cc bike, which was blowing hot coolant in my face for the last day and a half of the event due to a blown head gasket. The big bikes didn't make such a great showing this year.
 
Last edited:
OP
M

Modern Jess

Well-known member
Joined
Jan 2, 2011
Messages
1,362
Location
Bay Area, California
Well, that skylight turned into a bit of a fiasco. The bottom layer of shingles were in pretty bad shape, and I couldn't really properly flash the skylight in to the existing shingles. Which layer would I even integrate it with?

I ended up ripping about half the shingles off that side of the roof down to bare wood and starting over, integrating the line of new shingles at a point below the skylight.

Of course, the new shingles were sized differently than the old ones, so getting the spacing right was also tricky.

This project was completely and utterly Not Worth It. If I had a time machine, I would go back in time and punch my previous self in the nose for being so daft. Realistically, it was a whole lot of work for what really amounts to not very much natural light in the workshop. The one silver lining is that I spent the extra money to get an openable skylight, so at least I'll have some ventilation.

roof-done-1.jpg


roof-done-2.jpg


roof-done-3.jpg


roof-done-4.jpg


roof-done-5.jpg


roof-done-6.jpg
 
To avoid these ads, REGISTER NOW!
OP
M

Modern Jess

Well-known member
Joined
Jan 2, 2011
Messages
1,362
Location
Bay Area, California
After the skylight debacle, I was eager to get back to work on the interior of the shop. Over the last couple of days, I've been roughing in some recessed cans with the intention of filling them with Cree CR4 LED lights.

Got them all wired up today, screwed in all the Cree fixtures and... well, it's pretty bright, but it's a bit shy of what I was hoping for. Kind of hard to tell from the photos (what with auto exposure and white balance) but they're not really quite workshop worthy, I think.

The color temperature on these is 2700k, which is well into the incandescent / yellow end of the spectrum. That's fine, the eye has auto white balance just like cameras do, and whatever the brightest thing in your field of view will become white after only a few minutes. But if I use this in conjunction with (say) some fluorescent tubes in the center (see the last photo, where I have some old T12s left by the previous owner) then the new lights are definitely going to look different at best and yellow at worst, depending on relative brightness.

So I would say that, so far, this is a bit of a failure. Or at least, not as spectacular as I had hoped.


attachment.php


attachment.php


attachment.php
 

Attachments

  • recessed_lights-1.jpg
    recessed_lights-1.jpg
    91.7 KB · Views: 5,112
  • recessed_lights-2.jpg
    recessed_lights-2.jpg
    111.4 KB · Views: 5,116
  • recessed_lights-3.jpg
    recessed_lights-3.jpg
    107.6 KB · Views: 5,121
OP
M

Modern Jess

Well-known member
Joined
Jan 2, 2011
Messages
1,362
Location
Bay Area, California
Are you going to sheet rock the walls? Maybe some white paint on there may help reflect some light around??

Yep. It will definitely improve with drywall (painted white, natch) on the walls and around the soffit.

I think I'll be able to live with it. Just not ready to recommend it at this point. LED technology is improving rapidly, though, so it might be as little as a year before something much better comes along.
 
OP
M

Modern Jess

Well-known member
Joined
Jan 2, 2011
Messages
1,362
Location
Bay Area, California
Man, this is the world's slowest build. Visible progress seems nonexistent, even though I'm out there working on it every weekend.

Having more or less made peace with the LED lights (they're actually fairly good, just not spectacular) I'm returning my attention to the walls, thickening them up and getting ready for additional insulation. On the way to that task, though, I got sidetracked again, as I needed to think ahead to the suspended shelf that will eventually run along the entire length of the shop.

My ceiling height is only going to be 8'1" or so. This makes it fairly important to conserve as much headroom / wall height as possible. While building a suspended shelf out of 2x material seems to be a a time-honored tradition around GJ, I really can't spare the vertical height. I think I can save a few vertical inches by building the shelf out of strut channel instead, with the outer edge suspended from the rafter ties with threaded rod.

To that end, I started putting up the wall-side strut channel, lag bolting at each stud with 4" Spax lag bolts. I decided I would mount this directly to wood, and drywall around it.

This will eventually give me 22 linear feet of shelf space for storage bins, without losing any floor space.

In other news, that old insulation is looking pretty tatty. :headscrat

attachment.php
 

Attachments

  • shelf_channel.jpg
    shelf_channel.jpg
    112.5 KB · Views: 4,919
OP
M

Modern Jess

Well-known member
Joined
Jan 2, 2011
Messages
1,362
Location
Bay Area, California
Finally, some progress!

I've mentioned before that I'm running Wiremold 4000 raceway around the shop, which is my way of coping with an inability to commit to a specific location for any specific piece of machinery. In keeping with that philosophy, I'm doing the same thing with my air lines.

Today, I managed to lay my hands on some Superstrut in aluminum. I got about 20 feet mounted on the wall I'm currently working on such that it lines up perfectly with the Wiremold raceway. This means the strut channel will be embedded in the wall, just like the raceway, flush with the drywall. There's a thin strip of foam weatherstripping stuck to the top edge of the strut channel to seal any air (or noise) that would get between the raceway and the strut channel. I'll probably caulk that gap as well, later on down the road.

I also mocked up an outlet to get a sense for how it looks and feels. The example below is a bit insubstantial, but I've got an idea for a more interesting milled block that I can fasten into the channel instead.

The idea here is that I can pop off the cover of the strut channel whenever I want in order to add a new drop, or delete a drop, or fix a leak, or whatever needs to be done. And the air lines will still be embedded in the wall, just not behind drywall.

Just so long as I don't have to commit to placement of machinery. :)

airline-1.jpg


airline-2.jpg


airline-5.jpg


airline-3.jpg


airline-4.jpg
 
Last edited:
OP
M

Modern Jess

Well-known member
Joined
Jan 2, 2011
Messages
1,362
Location
Bay Area, California
In other news, I've been building out the walls in order to get more insulation, more noise reduction, and (as a bonus) to make the raceway and strut channel flush, embedded in the wall. Will probably start adding rigid foam insulation to the gaps tomorrow.

furring-1.jpg
 
OP
M

Modern Jess

Well-known member
Joined
Jan 2, 2011
Messages
1,362
Location
Bay Area, California
Continuing on the air line topic: just got a package delivered today with some very nice brass / nickel push-to-connect tees. I had a handful of the glass-filled nylon variety, and they're perfectly fine, but the dimensions are a bit tight when I cram them into the strut channel. They fit, but you have to push them. Also, the nut for the NPT swivel is way too big, which means the nut can't fit between the tabs of the stainless cover.

These new solid metal ones are smaller in every dimension (the dimensions that matter, anyway) and should make fabricating the drops quite a bit easier.

w00t!

airtees-1.jpg


airtees-2.jpg


airtees-3.jpg
 
OP
M

Modern Jess

Well-known member
Joined
Jan 2, 2011
Messages
1,362
Location
Bay Area, California
Got some insulation up. This is the second layer, wedged in between the 1.5" furring strips that are mounted on the inside of the existing studs. I left the original layer of fiberglass insulation in place (plus stuffed a bit more here and there where there were gaps). That makes the total wall width 5".

Up at the top, you can see that I've run the bare minimum of furring strips in order to improve the overall R value of the wall. This will be the back of an enclosed shelf, so no real need to be able to hit a stud or anything. The height is only about 16", so it's basically the same as a vertical bay, turned on its side.

Took me a few tries before I got the hang of cutting the insulation to perfectly wedge between the furring strips, so there are some gaps in the foreground. I'll fill those with some expanding foam or something.

insulation-1.jpg
 
OP
M

Modern Jess

Well-known member
Joined
Jan 2, 2011
Messages
1,362
Location
Bay Area, California
More fiddly work today fitting insulation. Had to do some additional blocking as well, to leave me something to screw the drywall to when I get that far.

The corners are especially fiddly:

insulation2-1.jpg


Managed to make some more visible progress, though, so feeling pretty good about that.

insulation2-2.jpg


insulation2-3.jpg
 

Air_Cooled_Nut

Well-known member
Joined
Mar 28, 2007
Messages
492
Location
Portland, Oregon
What is the thickness of the insulation board or what is the R-value? I'm guessing that thickness equates to a certain R-value... Not a bad idea, IMO, to add additional insulation.

Good thread, I like the ideas. Thanks for keeping it updated.
 
OP
M

Modern Jess

Well-known member
Joined
Jan 2, 2011
Messages
1,362
Location
Bay Area, California
What is the thickness of the insulation board or what is the R-value? I'm guessing that thickness equates to a certain R-value... Not a bad idea, IMO, to add additional insulation.

The specs I've seen say that EPS foam is around R4 (or R3.9, depending on who you ask) per inch. So that makes these 1.5" panels around R6. Theoretically, that's on top of the R11 fiberglass insulation underneath. So total of maybe R17, give or take.

If it was only for insulation value, I probably wouldn't bother. But insulation + noise reduction + flush raceway in the wall, and it adds up to motivation. It's kind of laborious, though.

One up side: with the raceway and the super strut on the wall, I have a fairly clear (and straight) line in the sand, since neither of those really wants to flex very much. This is giving me a very clear picture of where the wall is straight and where it isn't. I've spent literally hours shimming the furring strips to give the perfect amount of reveal against the raceway (once the drywall goes up) and so I think that the walls are going to be very straight as a result. We'll see.

Good thread, I like the ideas. Thanks for keeping it updated.

Thanks! Will do. I was starting to wonder if anyone was still reading. :)
 

Rockcam

Well-known member
Joined
Jan 16, 2010
Messages
256
Location
Grand Rapids
Jess:

Looks great.

Thanks for the detail in your posts - it helps us understand what's happening, and your thinking behind it.

The superstrut-as-enclosure is super clean. Great idea. Where did you source the pex fittings?

Keep up the great work.
 
OP
M

Modern Jess

Well-known member
Joined
Jan 2, 2011
Messages
1,362
Location
Bay Area, California
The superstrut-as-enclosure is super clean. Great idea.

Thanks. The original idea was to run the air lines inside the Wiremold raceway, with the top and bottom halves divided as they would be for electrical and communications. I didn't feel like I had enough capacity for all the wiring just in the top half of the raceway, though. My next thought was to run another course of Wiremold below the first, but that seemed excessive. Doing some research on some other parts of the workshop project, I stumbled on the fact that you could use strut channel as wiring conduit (with various fittings to accommodate that) and it occurred to me that I could run air lines in it as well.

Where did you source the pex fittings?

I end up buying most things either from McMaster or Amazon, since both make it almost too easy to buy stuff once you've got an account set up with them. The brass / nickel fittings (that actually fit nicely inside the strut channel) I got from Amazon, though they're currently out of stock.

http://www.amazon.com/gp/product/B004E1107I/?tag=atomicindus08-20
 

rudyp

New member
Joined
Aug 3, 2012
Messages
2
Dude, stop playing with your hammer and start wrenching.

When it's cold in my garage, I put on my coveralls, when it's hot, I put on my short coveralls.

Besides, it's a TnG, lots of effort for an occasional oil change.

Seriously though, good work
 

ConCretin

Well-known member
Joined
Jan 20, 2011
Messages
3,378
Location
Central Maine
I love all the 'outside the box' thinking going on here. All of a sudden I need wiremold for my outlets and air lines run in aluminum channel. It might not be the most cost effective way to wire and pipe a shop but it definitely gets points for coolness and flexibility. I can't wait to see what you come up with next. Great job!

Oh yea, I can also relate to your skylight fiasco - I get myself in those situations all the time. Excellent result though.
 
To avoid these ads, REGISTER NOW!
Top Bottom