To avoid these ads, REGISTER NOW!

The Vintage Craftsman GP Motor Thread

FrankLee

Well-known member
Joined
Sep 13, 2010
Messages
3,617
Location
seMI, 48317
I added a second link in my post above that was not in your quote.

Who that’s a great write up and the cutaways are amazing to see what it all looks like for someone who has not tackled one of these.

I do still have the originals. I can clean them, I just didn’t want to deal with the open end in the long run. They should be fine with my use though. They have been operating just fine since 1948, not cared for by previous owners.
After cleaning, you do need to assess whether the original bearings are worn. There should be zero axial or radial play between the inner and outer races.

From the factory there was one shim on the switch side. Should I leave that there and not shim the other side? I figure the spring washer will take up the slack on the other side. I do have other spring washers to double up. I’ve seen them doubled up in some applications.
I've seen plenty of double spring washers too. Reinstall all original parts in the same position as they were removed. Do not add any additional spring washers.

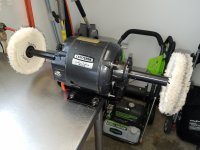
I guess that’s why that motor was flipped when I got it off a parts drill press. Someone must have flipped it for a reason and changed the rotation. I attached a picture of how it was before I did the restoration.

I do appreciate the link to that post you made. Really great stuff. Looks like you were a teacher in another life.
 
To avoid these ads, REGISTER NOW!

DDOPWD23

Well-known member
Joined
Jul 8, 2024
Messages
149
Location
Glen Rock, NJ
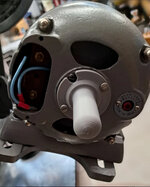
Has anyone 3D printed a shaft cover? I found a file online but I have no means of printing it. This is an example of the 3D file.
 

Attachments

  • IMG_8841.jpeg
    IMG_8841.jpeg
    1 MB · Views: 16

fordoz

Active member
Joined
Apr 21, 2024
Messages
41
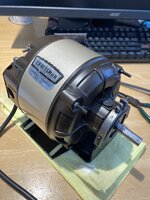
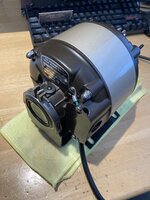
Found this thread on the CM motors and thought I would post some completed pic's of my 113,19351...
The motor insides were caked with sawdust and the switch contacts needed cleaning bad...
I used Krylon Matte Coffee Bean on the end bells and Rust-Oleum Champagne Mist on the Stator cover...
I disassembled and cleaned it with CRC Lectra-Motive and used Protexall Super Slick Stuff on the centrifugal switch mechanism...
I re-oiled the felt wicks with 20W ND oil... Replaced the electrical cord with a grounded plug...
Put it back together and it sounds so nice now... It was satisfying restoring this CM motor...
I'll need to contact Matt Blast to see if he can provide me with a new Craftsman sticker...

And thanks to you Jeff, it was very helpful watching your Youtube videos, before I took this motor to task...

IMG_2460.JPG

IMG_2457.JPG
The color and paint job is stellar!!
 
To avoid these ads, REGISTER NOW!

TinkerSwim

New member
Joined
Jan 26, 2026
Messages
1
Guy I got it from said it was from a table saw, but no idea what model. The only other one of these I've seen in the wild was under a late 40s Craftsman builder's saw.
I’m reconditioning a table saw just now with a 702.199. Date code is CJ. The saw is a 113.22411. I’m uncertain if it’s the original motor but from what little I’ve discerned from vintagemachinery.org that particular table saw was made between 1940-50.
 
To avoid these ads, REGISTER NOW!
Top Bottom