To avoid these ads, REGISTER NOW!

Above 1200 Sq/FT The Warthog Hidey Hole

Wokspaces above 1200 squarefeet.
OP
J

jbmatth

Well-known member
Joined
Jun 3, 2013
Messages
5,681
Location
Northern Ok.
The 8.8" might be able to, but it needs some work, leaking/cracked weld where the tube enter the center section, you'd also have to weld on spring perches, have a drive shaft made, possible other brake line and parking brake changes, and I'm sure the bolt pattern is different. I think you'd be money and time ahead if you just got to cleaning on the axle I pulled out of your hearse, right after you find that battery. :)
JB
 
To avoid these ads, REGISTER NOW!

FlyOverStateFarmboy

Well-known member
Joined
Jul 25, 2013
Messages
125
Location
Flyover State of Kansas
I wanted to show y'all the sickle mower I talked to Flyoverstatefarmboy, here it is in all of its glory:
attachment.php


It may take a little work before it is ready to use and will be tough to get out of the tree that has grown all around it. It is in the back portion of our place and will stay there indefinitely as far as I'm concerned.

Holy ****! I thought you said there was a mower in there...I see a few sickle guards, but where's the rest of the cutting bar? lol It looks like you've definitely got your work cut out for you.
 
OP
J

jbmatth

Well-known member
Joined
Jun 3, 2013
Messages
5,681
Location
Northern Ok.
The rest of the cutting guards, and bar are on the other side of the tree, you can barely see them through the middle of the mess. I have a feeling it'll stay right where it is to eventually return back to the earth.

In other news I have the tubular upper and lower control arms, I'm waiting on some mounting tubes to weld into the cross member. I've installed the master cylinder and have it all plumbed together. I placed an order for new QA1 coilovers as the ones I was going to buy wouldn't fit without more cutting and welding. I also have all the other parts on order as far as I know to get it back up and running. Pictures when it starts going back together, I'm just waiting on the brown truck for now.
JB
 

Bib Overalls

Well-known member
Joined
Dec 4, 2006
Messages
3,318
Location
Jonesboro, Arkansas
The 8.8" might be able to, but it needs some work, leaking/cracked weld where the tube enter the center section, you'd also have to weld on spring perches,

Ford 8.8 axle tubes are thinner than those used on the older 8" and 9" axles.

Be careful when you weld on those spring mounts.
 
OP
J

jbmatth

Well-known member
Joined
Jun 3, 2013
Messages
5,681
Location
Northern Ok.
Bib,
I must have been too vague in my previous comments. The 8.8" axle has been removed from the car and replaced with a new 9" housing. The welding will be on the front cross member. I'll post pictures that will hopefully make everything clear.

Saying that I didn't know that about the thickness of the axle tubes, thanks for the info.
JB
 
OP
J

jbmatth

Well-known member
Joined
Jun 3, 2013
Messages
5,681
Location
Northern Ok.
I have been a little quiet lately but have been busy, I now have just about everything I need to finish phase 1 (phase 2 if you count the electrical and interior a few years ago) of my cobra rebuild. The last piece that was holding me up were some spacers/pins/tubes that I have to weld in to the cross member. The tubes are 5/8" (15.875 mm) ID, 1" (25.4 mm) OD, and about 6" (15.25 mm) long. In order to fit them I had to drill out the existing 1/2" (12.7 mm) holes in the cross member. The good news was I had a 1" drill bit I also had a 5/8", but nothing between the two other than hole saws that wouldn't work in this application. Here are the bits with a penny (yeah that's right I'm a high roller!):
View media item 59785
Drilling through two layers of metal is a great way to catch a bit and rip the drill out of your hand or break a wrist. Luckily I didn't break anything but it sure did hurt for a bit. After the wholes were drilled I inserted the spacers, the holes were 1.001" and the tube has an OD of 1.003", that .002" makes for a really good press fit that required a bit of hammer work to make it fit. Here is the test fit ready to weld:
View media item 59786
Good news was it welded pretty good all in all, it was tough to reach some of the areas but it did work, and better news is these are probably my best welds which is great because these are critical for the front suspension:
View media item 59788Other good news is the picture didn't turn out so you can't really see how "good" they are. I'll keep an eye on them and call in reinforcements if this does ever start to crack.

I cleaned it all up and painted a portion of the front cross member and other spots that need a bit of touch up. I also got my QA1 coil overs for the front:
View media item 59787
The problem with them is the bottom part doesn't fit my LCA's so I'm having to modify the spacer a bit to shorten it up. Not a big deal and I have it all done and ready to install the next time I get a few minutes to install it.

In other news when I am waiting on parts or am stuck for a bit I've been working on Herb's (Bugthug's) Hearse. I have all of one side of the front suspension blasted, primed, and painted waiting on the paint to cure before I re-install it all. Herb if you are listening/reading I will need some brake lines and fittings before I can put it all back together. I can bend and flare the line when you can get me those parts.

Also in other news I sold the little red car I picked up from my brother, bad news I didn't sell it for what I would have liked, but can't complain because I made a 125% profit. :) Depending on how you want to do the math either that paid for the front coil-overs or it means I got the green Saturn for $17. :bounce:

Keep moving forward,
JB
 

BUGTHUG

Well-known member
Joined
Nov 12, 2010
Messages
2,960
Location
Kansas
I need to yak at ya! we'll get some parts ordered and get er done on that poor car. You send video in to Garage squad? I know you get more done before breakfast than I do all day.
 

NedNorton

Well-known member
Joined
Jul 14, 2012
Messages
608
Location
Colorado, USA
JB,
Just seeing what is going on. The welds look great, my friend. Are you Tig or Mig welding those? Just curious. In any event, can't wait to see the pictures of the Cobra out and about in the sunshine.

Cheers,
Chris
 

Bob Heine

ALLIANCE MEMBER
Joined
Oct 24, 2009
Messages
10,703
Location
Boca Raton, Florida
In order to fit them I had to drill out the existing 1/2" (12.7 mm) holes in the cross member. The good news was I had a 1" drill bit I also had a 5/8", but nothing between the two other than hole saws that wouldn't work in this application. Here are the bits with a penny (yeah that's right I'm a high roller!):
View media item 59785
Drilling through two layers of metal is a great way to catch a bit and rip the drill out of your hand or break a wrist. Luckily I didn't break anything but it sure did hurt for a bit.

Keep moving forward,
JB
JB, I bought a set of large bits from Harbor Freight and they worked just fine but their step drills work even better for that situation. You can get the hole enlarged to the size you want or at least much closer to the bit you want to use. The flats on these bits make them less susceptible to slipping. The step bits go on sale quite often and with a 20% off coupon it's a good deal.
HF%20Step%20Drill%20Bits_zpsyn0lncxb.jpg

http://www.harborfreight.com/2-piece-titanium-nitride-coated-high-speed-steel-step-drills-96275.html
 
OP
J

jbmatth

Well-known member
Joined
Jun 3, 2013
Messages
5,681
Location
Northern Ok.
I need to yak at ya! we'll get some parts ordered and get er done on that poor car. You send video in to Garage squad? I know you get more done before breakfast than I do all day.

Herb,
I'm excited about your car, the suspension parts are turning out great, and I really like that paint you picked out for them. It is going slow but I'm back on it now between working on my car and waiting on parts. I had the submission all ready other than the video but didn't remember to take the video until just recently. Sadly when I went to finish the submission my internet closed down and I lost all of the wording. :shocking: I'll get it all typed up again in the next couple days. You work late into the night and I just start too early. I have an eye infection again and couldn't sleep so I rolled out of bed at about 2:30 am this morning and got a few things knocked out before getting ready for work.

JB,
Just seeing what is going on. The welds look great, my friend. Are you Tig or Mig welding those? Just curious. In any event, can't wait to see the pictures of the Cobra out and about in the sunshine.

Cheers,
Chris

Chris,
I'm using a Millermatic 211 mig welder my wife bought for me for Christmas a few years back. I haven't ever gotten a gas bottle for it so I've been using flux core wire. Not the best way to go about things but I don't do a lot of welding typically. With as much moneys as I've spent on the suspension recently I'm ready to get it on the road again as well. I just hope it is at least as good or better than before. :3gears:


JB, I bought a set of large bits from Harbor Freight and they worked just fine but their step drills work even better for that situation. You can get the hole enlarged to the size you want or at least much closer to the bit you want to use. The flats on these bits make them less susceptible to slipping. The step bits go on sale quite often and with a 20% off coupon it's a good deal.
HF%20Step%20Drill%20Bits_zpsyn0lncxb.jpg

http://www.harborfreight.com/2-piece-titanium-nitride-coated-high-speed-steel-step-drills-96275.html

Bob,
I've been meaning to buy a set of step bits but haven't thought about it when I visit the H.F. store. The closest one is almost an hour from home sadly. Maybe a good trip to make this weekend now that I don't need them. They would have worked great for the first hole but I didn't have access to the engine side hole because the engine was in the way, this forced me to drill through the first then pass the bit through that hole to drill the second hole. The 1" bit I have was just barely long enough and only went through the second hole by about 1/8" (3.175 mm).


All,
As mentioned above I had a few good hours of work this morning. I set out to install the upper and lower control arms. I made a few steps backwards though. The guy I bought them from had them powder coated red, I was going to use them as they were but just couldn't do it. I tore them apart, prepped them and they are getting painted black. I'll have a few days of waiting for the paint to dry before I install them.

On another note, or as 1/2 Cup would say "Note to file" when installing coilovers with aluminum threads and aluminum locking nuts you have to use anti-seize. The only place I saw this was on a little yellow sticker on the packaging on the last shock. I'm glad I did or these could have been trashed if I ever tried to move them around. They are coated now and all should be good to go.

Thanks all for tagging along,
JB
 
OP
J

jbmatth

Well-known member
Joined
Jun 3, 2013
Messages
5,681
Location
Northern Ok.
First of all I am waiting on one final bolt and I'll be putting the rest of the suspension on the cobra, then bleed the brakes, give it a once over, get and alignment, and I'll be ready to cruise.

Next I have moved the blast cabinet to its resting place:
View media item 59891
It was tough to move as it weighs a ton (metric **** ton) especially with 100 pounds (45.37 kg) of media. The back casters only go front to back and the fronts are locking swivel casters. If I didn't have the hearse in the way I could have rounded the corner and put it in place. Oh well I used a dolly and floor jack to move it around and it worked great with little effort.

Here are a couple of photos of the hearse, sorry for all of the dust but that is life in the country:
View media item 59892
View media item 59893
Some of the gunk I'm dealing with while trying to clean the parts in prep for paint:
View media item 59894
The shock:
View media item 59895
The LCA mount:
View media item 59896
Cleaned up and painted:
View media item 59897
View media item 59898
Onto the blast cabnet:
I wasn't having any issues with moisture until recently, and wow has it gotten bad. I'm getting a ton of water in the gun causing issues and putting water on the parts I'm cleaning that in turn causes the part to rust in short order. I've done a few things to help mitigate this issue, but it ins't perfect, I get 10-20 minutes from when I start until the water is uncontrollable. I think I'm going to have to take some of ya'lls advice, I'll let you know what I come up with. I'll go back and hold my head in shame for not listening during the build. :(

JB
 

BUGTHUG

Well-known member
Joined
Nov 12, 2010
Messages
2,960
Location
Kansas
OH MY:shocking: what a pleasant surprise. That will help me to get motor-vated.
That is a big blasting box (3B).:) It does put the heavy use cycle on the air compressor. Glad to see its working out pretty well!
Need to finish up on the parts I have, and place an order for the ones I don't have. If you get a chance you might check out my brake master and I think it has a assist slave down on the frame under the driver seat. Might as well make sure the brakes are good to stop.:)
 
OP
J

jbmatth

Well-known member
Joined
Jun 3, 2013
Messages
5,681
Location
Northern Ok.
The Harbor Freight Drier aint half bad. what about a drop line just before entering the box?

Polexican,
I'll have to try to get a drier installed at each point of use, thanks for the positive referral on that part. I also have some other stuff up my sleeve I was hoping I wouldn't have to do, but you know what they say about desperate times. This post has some information on how I taped into the air header:
http://www.garagejournal.com/forum/showpost.php?p=5511148&postcount=539

OH MY:shocking: what a pleasant surprise. That will help me to get motor-vated.
That is a big blasting box (3B).:) It does put the heavy use cycle on the air compressor. Glad to see its working out pretty well!
Need to finish up on the parts I have, and place an order for the ones I don't have. If you get a chance you might check out my brake master and I think it has a assist slave down on the frame under the driver seat. Might as well make sure the brakes are good to stop.:)

Thanks for the comments on the blasting box, I've not even come close to putting anything in there that would warrant something that big, but it is always better to have it and not need it than it is to need it and not have it. I don't know a way to test the master cylinder/slave unless I have everything hooked up and bled and push the pedal. Just don't drive it the first time you test them out. :)
JB
 

BUGTHUG

Well-known member
Joined
Nov 12, 2010
Messages
2,960
Location
Kansas
I guess a visual to make sure its not dripping fluid might help.
Gotta get ready for the storm:shocking:
 
OP
J

jbmatth

Well-known member
Joined
Jun 3, 2013
Messages
5,681
Location
Northern Ok.
Will do on the visual. I'd rather be here than in St. Louis right now, wow it looks like they are getting hammered!
JB
 
OP
J

jbmatth

Well-known member
Joined
Jun 3, 2013
Messages
5,681
Location
Northern Ok.
A little update on some of the happenings with my cobra and around the shop. First of all as I've mentioned many times The Warthog Hidey Hole leaks a lot when it rains. Enough were sometimes I get standing water over a good portion of the floor. Well little by little over the past few weeks I've been working on that. I started by hammering in all of the nail, about 3,000 nails on the west roof alone, then I have been installing screws at each seam. For some reason the seams are facing the south, our predominant wind direction. Well here is a shot of what it looks like after the last round of storms:
attachment.php

Aww much better, and the good news is that was even in the area where I hadn't gotten to with the screws just yet.

On the cobra front I'm still waiting on the LCA bolt but it is in and I will pick it up today, I have some temp bolts in place just to hold it up for now:
View media item 59970
Here is a picture of the rear axle at ride height:
View media item 59971
Now I need some opinions, the rear axle is narrowed 1.5" (3.8 cm) on each side, should I add 1.2" (1.25 cm) wheel spacers, this is what it looks like right now:
View media item 59972
View media item 59973
View media item 59974
Let me know what you think. And yes it is a disaster in there along with the car being VERY dirty. I'm not worried about ever cleaning the underside because of that whole gravel road thing it wouldn't do any good. I'm getting really excited about getting this thing back on the road in the next few days.
JB
 

Attachments

  • IMG_3566.JPG
    IMG_3566.JPG
    123.4 KB · Views: 972

BUGTHUG

Well-known member
Joined
Nov 12, 2010
Messages
2,960
Location
Kansas
I would sit the car down on its own weight and see how much space is between the top of the tire and the rear wheel well. I'm sure you don't want it real low because of the gravel roads you travel. But it might be able to go down to maybe an inch above the top of the tire. As far as the back spacing, usually you want the whole space filled out to where the tire has enough room to put your fingers between the tire and the wheel arch of the rear fender. The best looking way is to of course change wheels to get the fullest look, or sometimes you can get a wider but a shorter squaty low profile tire. But if you already have money in your rims, and don't want to change, then you can figure out the back spacing to the axle hub to the wheel hub and see how much spacer you want. This is sometimes a hassel because then you need longer lug bolts or lug studs.:dunno:
 
OP
J

jbmatth

Well-known member
Joined
Jun 3, 2013
Messages
5,681
Location
Northern Ok.
I think it will need to be lowered a little but will have to wait and see once I drive it down the road a little. As far as getting new wheels and tires, not this year, the wheels I want would have to be custom made because of the size I need, as well as nice grippy rubber is expensive! Before this axle the tires would rub on the fender wells, I moved them in 1.5" knowing that it would probably be too much. I guess I just need to get it down on the tires and have a look from afar to really make a determination.
JB
 
To avoid these ads, REGISTER NOW!

OutlawDrifter

Well-known member
Joined
Jan 20, 2015
Messages
3,871
Location
KS
i would definitely get it down to ride height and see what kind of space you have, quality 1" spacers are pretty easy to come by.

i like what you've done with the space, and that blast cabinet gives me some great ideas!
 
OP
J

jbmatth

Well-known member
Joined
Jun 3, 2013
Messages
5,681
Location
Northern Ok.
Outlaw, thanks for the kind comments, and advice. I've used the blast cabinet quite a bit and it is nice to have. I ordered some .5" spacers that should be in soon and I'll let you know how it goes/looks. I'll wait to have the alignment done until those come in but everything else is finished and it is ready for the road, I can call this one done for now. Woo hoo!

On another topic I was stir crazy so I decided to take this vise:dd5c0cbc8da031fc68349d645eff93b1.jpg
0c34e7e47143f54ddae4963e7966c588.jpg
And clean it up, after blasting, priming, painting, and a little polish this is what I've come up with:
dfb5838acb7d6a15b2440e20b7206848.jpg
52ae7dae0138dfc2ce15bd4803b22d92.jpg
46258f67b21d85e086ebe13e9208180f.jpg

Not too bad, the only thing I would change would be the jaws. I couldn't get them off and it just wasn't worth the effort for something I will sell for about what I paid for it before doing all of this work. Oh well it was a fun time killer anyway. Have a great day,
JB


Sent from my bag phone.
 
OP
J

jbmatth

Well-known member
Joined
Jun 3, 2013
Messages
5,681
Location
Northern Ok.
Something else I've been working on was the area to the left of the main door, it had gotten to the point where stuff was piled everywhere and it was difficult to do anything with any of it. Everything was a mess and it hurt me to look in that general direction. I didn't intend to clean as much of it as I did but that is how things went which is why I don't have a good before picture. I pulled everything out and took down the wood panneling:
attachment.php


I then cleaned the lean to area behind that and hung up some of my new to me signs:
attachment.php

I picked most of these up from another house we bought that had them stuffed in the shed out back. I'll add more at a later date but that is all of them I had in the shed at the time.

This is with it mostly cleaned up, I'm still trying to get rid of those old windows and doors but haven't had much luck so far:
attachment.php


A little wider view:
attachment.php


Lastly a pano of the entire shop, it looks huge in this shot, I also have the Hidey Hole Mascots keeping things lively:
attachment.php


In other good news I have the Warthog back together completely, I'll get it in to have an alignment done this week sometime then have some shakedown time before the Hot Rod Power Tour in June. :3gears:
JB
 

Attachments

  • IMG_3604.JPG
    IMG_3604.JPG
    59.7 KB · Views: 1,146
  • IMG_3602.JPG
    IMG_3602.JPG
    124.6 KB · Views: 1,751
  • IMG_3601.jpg
    IMG_3601.jpg
    99.3 KB · Views: 1,133
  • IMG_3600.JPG
    IMG_3600.JPG
    126.5 KB · Views: 1,136
  • IMG_3574.jpg
    IMG_3574.jpg
    105.7 KB · Views: 1,129

jabin

Well-known member
Joined
May 3, 2007
Messages
526
Location
SW Ohio
Wow, it does look huge but it's amazing how quickly it feels small when they fill up with stuff.
Still love the wall and the lights! I'm stealing ideas. :D
 
OP
J

jbmatth

Well-known member
Joined
Jun 3, 2013
Messages
5,681
Location
Northern Ok.
Wow, it does look huge but it's amazing how quickly it feels small when they fill up with stuff.
Still love the wall and the lights! I'm stealing ideas. :D

It still feels big for now, but I really need to get some stuff knocked out to make room for a large project I want to do in the next few years. ;) Also steal away most of my ideas are probably stolen anyway.

Looks like a wind tunnel:lol: You could make a table out of those wooden doors?

No wind tunnels for me, I have a hard enough time keeping the dust down with all of the air leaks in this place. I might be able to do that, I have a lot of other cleaning I need to do.

i think i am jealous. also think it is looking great!:rocker:

jim

You think your jealous and I'm outright jealous of space he has. I can only dream of that much shop space.


Thank you all so much for the kind words, I really appreciate it all. I have spent a lot of time out there working on it lately and have lots of updates to get to, hopefully I'll get to it shortly.

No real pictures of a couple of the big projects but I've been clearing some of the overgrowth on the back section of our property and wow is there a lot to clear out. In doing that Ive started finding little piles of wire, scraps, and barn tin. I've gathered one truck load so far and have another ready to scrap today. Probably around 800 (360 kg) pounds total so far and nothing bigger than 10 (4.5 kg) pounds. One spot I had probably 4 hours in digging up old baling wire, I'd pull one wire and it would be attached underground to a few others that just kept going.

The other is on the roof, I thought after the last storm I had it licked with all of the screws I've installed, that is not the case. During our last downpour it might be a little better than before but there was still plenty of water in the shed. There really aren't any holes so to speak so the only other ingress point is between the layers of tin. The only way I know to really fix this would be to seal it between the sheets which I don't have the time or money for so **** I'm stuck with a leaking roof it seams.

I'm at a crossroads to some extents now. I can either deal with all of the leaks and let stuff get covered in rust. I can spend a ton of money on replacing the roof that still has some major design flaws. Or I can start saving to just build a new shop and use this one for cold storage. I'll still do some work on the shop to make it more user friendly but just don't know how far I will continue to take this space knowing I'd be fighting a loosing battle. I'll still do plenty of projects out there in the mean time but it'll be a few years before I can begin to think about a new shop actually being built. I do have a design though and have it roughly marked out on where it will go. :)

Keep moving forward,
JB
 
OP
J

jbmatth

Well-known member
Joined
Jun 3, 2013
Messages
5,681
Location
Northern Ok.
While working on the Cobra I had to use my old BlackHawk S4 jack at one point.
attachment.php


It has developed a nasty habit of having one of the swivel casters fall off when moving it from one point to another. I determined it was a special screw that was the cause along with several missing ball bearings. I ordered new .25" (6.35 mm) bearings at a whopping $4 for 50 of them, then began to look for a screw that would work. I ended up only being able to find a similar size with the wrong threads. I needed 1/4-20 threads so I decided to make one using a bolt. I used to lathe to turn the head down wot the right diameter, then rounding off the shoulder with a file, and finely I removed the threads. This is what I came up with:
attachment.php


I later make the slot for the flat head with a small cut off wheel and put it all together, it worked like a charm and I'm now back in business.

Another order of business was to haul all of the newly aquired scrap off and to do this I needed to remove the '67-'72 Chevy truck bed from my trailer, I built this:
View media item 60461
It worked like a charm as seen here:
View media item 60462
So why do I have this truck bed? Well I found it cheap and have always liked them lot and have always wanted to make a bed or couch out of one. Well the bed idea was shot down so I'll make a couch at some point down the line using the last of the bed along with the tailgate.

On to the cobra rebuild issues. I had everything installed and even made an appointment to have an alignment done, well that didn't pan out. I put it down on the tires only to have the front tires hit the wheel well. Back up in the air and I adjusted the coilovers all of the way up, and I had the same basic results but without any real contact.

I measured all of the components that could alter the ride height and determined the only real difference is the distance between the mounting point on the LCA and that of the coilover. After lots of phone calls it became clear I had to alter my existing LCA's for spend around $500 to get a new set. (That wouldn't have worked anyway for reasons I'll explain later.) Well I pulled them off and got to work.
Here is what I started with, I needed to move this bolt hole to the left 1.5" (38mm):
View media item 60463
I used some 5/16" x 2" (8 mm x 50 mm) flat bar I had around to make the brackets in the vise and using a big freakin' hammer:
View media item 60464
It may have been 3/8" I don't know for sure now but either way it took a lot of pounding and beating to get it to conform to my persuasion. I then blasted it, marked and drilled holes, deburred, and test fit once more before welding it in place:
View media item 60465
A couple of shots of the welding cloud that was hanging around:
View media item 60466View media item 60467
Also my welds are at least looking better:
View media item 60468
I didn't get a picture of them all painted but they looked pretty good so I installed them, adjusted the coilovers all of the way up and....the tire was still hitting the fender.
:willy_nil

After a few more hours of phone calls I came to the realization I had to order longer coilovers and springs, even the pricey LCA's I almost bought wouldn't have worked because I needed more spring than my existing coilovers could give. Also at full droop the shock was topped out at exactly the ride height I wanted so I had to order those. Well ****, two steps forward and one step back. They should be delivered on Wednesday.

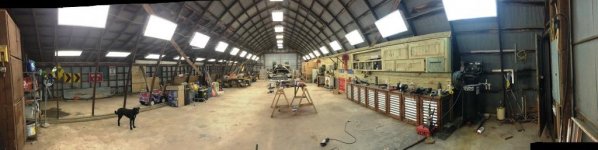
So this past week I was bested by the coilovers, the roof, the wire, and even had my daughters get sick in the middle of all of that. I hadn't mentioned it before by Charlie my Black and Tan was hit again a few months ago and passed away, I suspected it would happen and was prepared because he spent way too much time out by the road. Well on Thursday I found out that the mail carrier had hit my lab Koda who just recently decided to start chasing cars. Koda was in the previous panoramic posted earlier, I don't have many other photos of him, but he was really starting to shape up into being a great companion. It has been a week of ups and downs all around so I'll just leave it at that.
JB
 

Attachments

  • IMG_3618.jpg
    IMG_3618.jpg
    129.5 KB · Views: 1,012
  • IMG_2152.JPG
    IMG_2152.JPG
    133.9 KB · Views: 1,013

BUGTHUG

Well-known member
Joined
Nov 12, 2010
Messages
2,960
Location
Kansas
you could make a shelf out of the section of pu bed. Hope you get the adjustment figured out soon, hate for you to miss your road trip.:sad:
Sure have a hard time with the farm dogs. Its hard to find a good farm dog that doesn't chase cars and cattle!
 

taumac

Well-known member
Joined
Aug 30, 2011
Messages
8,104
Location
Brooksville, Fl
Sounds like you having some bad luck. Step back and take a breather and evaluate. Real sorry to hear about your dogs. That is never good to deal with. Have you never thought of just rolling on some hot tar over the seems that are leaking? I know there's a product people use down here that they seal tops of mobile homes with. I seen them do it and know there's a product but won't know name or cost of it. Tarps are easy fix also. All might be temp solutions if plan is to build another shop.
 

BUGTHUG

Well-known member
Joined
Nov 12, 2010
Messages
2,960
Location
Kansas
That's a good idea from taumac, go to the farm supply or Wal Mart carries the silver roof sealer. Put it on a hot day and it will really help out.:thumbup:
 
OP
J

jbmatth

Well-known member
Joined
Jun 3, 2013
Messages
5,681
Location
Northern Ok.
you could make a shelf out of the section of pu bed. Hope you get the adjustment figured out soon, hate for you to miss your road trip.:sad:
Sure have a hard time with the farm dogs. Its hard to find a good farm dog that doesn't chase cars and cattle!

It would make a cool shelf but I plan to make a shop couch out of it so I have a place to sit and think from time to time. So far we have been lucky that our dogs don't bother the cattle, because they couldn't stay if that were the case, cattle are WWWAAAAAAAYYYYYYYY to valuable now days, but for some reason they seem to like farm trucks.

Sounds like you having some bad luck. Step back and take a breather and evaluate. Real sorry to hear about your dogs. That is never good to deal with. Have you never thought of just rolling on some hot tar over the seems that are leaking? I know there's a product people use down here that they seal tops of mobile homes with. I seen them do it and know there's a product but won't know name or cost of it. Tarps are easy fix also. All might be temp solutions if plan is to build another shop.

It will be alright in the long run but is frustrating for the time being. I have thought about tar but anticipate that will also be very expensive. I guess I need to un-clinch the strangle hold my sphincter has on my wallet at some point and have it fixed the right way. Now if I could only figure out what the right way is... Oh the "dream shop" I love having what I have now but it would be great to have a semi-conditioned space that is water proof would really up the desire come August or January.

That's a good idea from taumac, go to the farm supply or Wal Mart carries the silver roof sealer. Put it on a hot day and it will really help out.:thumbup:

I'll have to check it out, maybe it'll do some good. How did you fair on the storms yesterday, it looked like you may have gotten pounded pretty hard. We had hail the size of a medium egg at the house, but I was able to pull everything inside prior to that happening. :) Now to get on the roof and check what happened there. On a good note I only had one small puddle on the shop floor this morning.
JB
 

OutlawDrifter

Well-known member
Joined
Jan 20, 2015
Messages
3,871
Location
KS
My condolences on the pups. It's always tough to lose a pet!

In regards to the Cobra. I understand your frustration. A few years back I built a hybrid 8.8 Ford/10 Bolt Fbody axle for my Z28. When all was said and done and the car was back on the ground I noticed in my haste over the few weeks, I had forgot to take a good measurement on the lca brackets and my axle was about 1 inch too far back in the wheel well. So I ended up running it like that for a year until I had the time to redo it, which was fairly involved. Remove old brackets, shorten driveshaft, shorten torque arm, etc. I feel your pain. As stated earlier, take a step back and give yourself some time to process.

In regards to the roof. Mobile home paint, like the stuff suggested earlier, can be had fairly inexpensive and will seal your roof. It comes in 5 gallon buckets and has fibers in it, goes on brown and dries silver. We did this in the converted barn/shop at my father-in-laws with great results. Just get some throw away brooms and brush/sweep it on.
 

BUGTHUG

Well-known member
Joined
Nov 12, 2010
Messages
2,960
Location
Kansas
Oh boy, for a few minutes I thought we were headed for trouble. The clouds started to swirl and drop and come together. I think what saved me was the cold front that snuck under the formation. It dropped about 20* in a few minutes. But it was a SLC. ( scarry lookin cloud) that's what we called them when I use to be a storm chaser for Winfield Civil Defense. I 'll have to see if my pictures show anything good. Other than that, a little hail and wind, then stars.:dunno:
 
OP
J

jbmatth

Well-known member
Joined
Jun 3, 2013
Messages
5,681
Location
Northern Ok.
My condolences on the pups. It's always tough to lose a pet!

In regards to the Cobra. I understand your frustration. A few years back I built a hybrid 8.8 Ford/10 Bolt Fbody axle for my Z28. When all was said and done and the car was back on the ground I noticed in my haste over the few weeks, I had forgot to take a good measurement on the lca brackets and my axle was about 1 inch too far back in the wheel well. So I ended up running it like that for a year until I had the time to redo it, which was fairly involved. Remove old brackets, shorten driveshaft, shorten torque arm, etc. I feel your pain. As stated earlier, take a step back and give yourself some time to process.

In regards to the roof. Mobile home paint, like the stuff suggested earlier, can be had fairly inexpensive and will seal your roof. It comes in 5 gallon buckets and has fibers in it, goes on brown and dries silver. We did this in the converted barn/shop at my father-in-laws with great results. Just get some throw away brooms and brush/sweep it on.

I can see how frustrating that would be to put everything on to only find out you hadn't taken the right measurements initially. I did similar in that I didn't measure the height prior to installing anything. The back will be fine with tires sucked in 1" (2.54 cm) each side but the front has the edge of the tire directly inline with the edge of the fender so it has to be just right to work, and not look like a 4x4 truck. I did a quick search and I have 5 gallons of that product that I found on the side of the road. :) It will cover 50-75 ft^2 per gallon (I'll let ya'll do the metric conversion lol) I would have about $1,500 in materials which really isn't that bad. I could do a test on one section but then I would have a missmatched roof so I'd have to go all or nothing. :)

Oh boy, for a few minutes I thought we were headed for trouble. The clouds started to swirl and drop and come together. I think what saved me was the cold front that snuck under the formation. It dropped about 20* in a few minutes. But it was a SLC. ( scarry lookin cloud) that's what we called them when I use to be a storm chaser for Winfield Civil Defense. I 'll have to see if my pictures show anything good. Other than that, a little hail and wind, then stars.:dunno:

I'm glad you were spared of any damage, it sounds like some pretty nasty tornado's hit down south of Ponca and north of Stillwater. I did get to see one tornado back about 10 years ago while I was working in a cotton field. If it had come my direction I could only hide in a ditch.
JB
 

Crzydmnd72

Well-known member
Joined
Jun 3, 2007
Messages
284
Did you take any pics of the storm as it was coming in? I was all set for a relaxing evening then that storm spun up outa nowhere. We live on the northern end of Ponca, someone posted some great pics taken from Atwoods parking lot. My son went out into the rural county and took a few as well
 

jabin

Well-known member
Joined
May 3, 2007
Messages
526
Location
SW Ohio
Wow, sounds like a tough week for sure. I hope your little girl is feeling better and I'm sorry about the dogs. I good dog is worth their weight. To top off your week, you could roll naked in a bed of glass shards.

Money fixes most mistakes, :evil:
 
OP
J

jbmatth

Well-known member
Joined
Jun 3, 2013
Messages
5,681
Location
Northern Ok.
Did you take any pics of the storm as it was coming in? I was all set for a relaxing evening then that storm spun up outa nowhere. We live on the northern end of Ponca, someone posted some great pics taken from Atwoods parking lot. My son went out into the rural county and took a few as well

Here are the ones I took, the first was on my drive home on our gravel road, the window was up but it was a really cool view:
attachment.php


An hour or so later when it actually started hailing at our place:
attachment.php


Some of the hail with a large egg for comparison, this was about 10 minutes after it fell so they had melted a little bit:
attachment.php


Wow, sounds like a tough week for sure. I hope your little girl is feeling better and I'm sorry about the dogs. I good dog is worth their weight. To top off your week, you could roll naked in a bed of glass shards.

Money fixes most mistakes, :evil:

Everyone is doing fine now people wise, but I know it'll take my daughters a while to get over loosing another of their dogs. Funny you mention the glass, while I was cleaning that corner I filled a big cardboard box with broken glass so I could recycle the aluminum. While moving it to dump into a rubbermaid tote a piece cut the box, my glove, then my finder, luckily I was fully clothed, or was I....:lol_hitti
JB
 

Attachments

  • IMG_3625.JPG
    IMG_3625.JPG
    114.8 KB · Views: 1,522
  • IMG_3623.JPG
    IMG_3623.JPG
    113.5 KB · Views: 911
  • IMG_3626.jpg
    IMG_3626.jpg
    123.7 KB · Views: 913

madoc1

Well-known member
Joined
Dec 11, 2012
Messages
1,242
Location
spicewood, tx
i spent the 61-62 school year in emporia and we would watch the twisters drop out the go up then come down and land nw of us. then we would go in and listen to the radio until they told us where they hit. fascinating to watch.

jim
 
To avoid these ads, REGISTER NOW!
Top Bottom