To avoid these ads, REGISTER NOW!

Third time's the charm - 40*50*12 build

OP
W

wisconsin hillrod

Well-known member
Joined
Nov 28, 2016
Messages
188
Location
Wisconsin
Love the shop, jealous of all the LS's just lounging about lol. i have one sourced for my project but i wont be able to get it for a few months as it is still in a running/driving vehicle that my friend is driving lol.

That's the way to do it. The only swap engine you can really trust is one you drive into your garage and then remove. The LQ9 in my FRC came from LKQ and has been great, but I got burned on a LS2, a L96, and a T56. That was much of the appeal of the donor GTO I bought.


Don’t forget those output/ input seals while your in there. They make the funkiest milkshake you’ve ever seen when they go bad on a C5.


I assume you are talking about the seals around the input and main/output shafts respectively? I've had the "tailshaft" (or whatever it is called on the Corvette T56 off twice and didn't replace the output shaft seal...just lubed it up good when I slide the tailhousing back on. I never do seals around CV axles either unless they were already leaking and have had good luck. Maybe my luck will turn soon ha.

-Hillrod
 
To avoid these ads, REGISTER NOW!
OP
W

wisconsin hillrod

Well-known member
Joined
Nov 28, 2016
Messages
188
Location
Wisconsin
Since I started to set this post up in my T56 post lets talk about supercharging the C7.

I couldn't possibly recall all the ancillary parts I was waiting for but they included a 2015+ water pump, adaptor plates, a LT4 valley cover, LT4 balancer/pulley, assorted pullies, and a z06 hood liner.


51162573693_713cc5788a_b.jpg


51164933203_cec89eae4a_b.jpg


To start I put a wideband on the car and did a bit of datalogging to ensure everything was good. Getting the wire run into the car proved to be much more difficult than it is on my c5, as was the majority of this project.

51164693256_e06fb63f51_b.jpg


Next I had to remove the intake pipe, throttle body, intake manifold, the entire high pressure fuel system, and valley cover.

51164694166_c282aeda86_b.jpg


51164033867_d507ef106c_b.jpg


51165801150_6b97378df7_b.jpg


51165483734_0b6f841442_b.jpg


51165803365_6fd2851033_b.jpg


51164940823_368823b717_b.jpg


Some of the skills you learn in college can pay out later in life. Such as how to make a beer bong haha. Made this to fill the intercooler system. To get the last bit of air out I drilled a hole in a cork stuck it on the end of the hose and then hooked up my Mityvac to pull a vacuum on the system.

51165489039_75c65120ab_b.jpg


51165805950_f10884cab6_b.jpg


I was now ready to start street tuning it!

-Hillrod
 

jbmatth

Well-known member
Joined
Jun 3, 2013
Messages
5,692
Location
Northern Ok.
That will be a very fun ride, so how many supercharged vehicles do you have now? What is the plastic wrap you are using on the fenders, is it just cling wrap?

JB
 
OP
W

wisconsin hillrod

Well-known member
Joined
Nov 28, 2016
Messages
188
Location
Wisconsin
That will be a very fun ride, so how many supercharged vehicles do you have now? What is the plastic wrap you are using on the fenders, is it just cling wrap?

JB

You'd think so...

At the time I had two: The C7 and my Sierra. By mid October I was down to one, and the engine under it was/is hurt. I sold the A&A kit off the FRC in 2019 to help fund the E-Force for the truck but I should have a new A&A kit in my hands tomorrow...been waiting over a month.

It is just plastic wrap from Costco. I had a big roll of it sitting around and it worked pretty good.

-Hillrod
 

jbmatth

Well-known member
Joined
Jun 3, 2013
Messages
5,692
Location
Northern Ok.
And to think I haven't ever owned one, shame on me. I've got some work coming up on my cobra and being fiberglass I can't use the magnetic fender covers, this is a good option.

JB
 
OP
W

wisconsin hillrod

Well-known member
Joined
Nov 28, 2016
Messages
188
Location
Wisconsin
And to think I haven't ever owned one, shame on me. I've got some work coming up on my cobra and being fiberglass I can't use the magnetic fender covers, this is a good option.

JB


I wear gym clothes exclusively in the shop so no buttons or zippers so the thin plastic is enough. I just don't want to be dragging dust across the paint. My concern with conventional fender covers is they can slide around causing scratches themselves. You could put towels on top of the plastic too but I don't.

As of today I'm back up to two superchargers!

51172400532_a75afebfb3_b.jpg


Made 635whp on the old Si unit. This one is a Ti unit that flows 200 more cfm so I'm hoping for 700whp. We shall see...this one might end in tears like the C7 haha.

-Hillrod
 
Last edited:
OP
W

wisconsin hillrod

Well-known member
Joined
Nov 28, 2016
Messages
188
Location
Wisconsin
I'll get back to shop updates here real soon, just have a couple more posts that sort of set up the shop updates.

As I started to scale the MAF in the beginning of the tuning process I started to wonder if I had enough fuel. I knew going in that I was going to be on the edge of the fuel system but at the time the LT4 injectors and high pressure pump were on back order so I was thinking pretty serious about a dual nozzle methanol setup to serve three functions: chemical intercooler, additional octane, and additional fuel. As I worked my way up in RPM and throttle the fuel system did a pretty good job keeping up but I eventually hit a point that the lift pump was not able to keep up and my low pressure side was not reaching commanded fuel pressures which in turn meant the high pressure was also low, which ultimately lead to out of control injector duty cycle.

Ultimately I decided against methanol instead I would try a secondary low pressure fuel system from DSX tuning. For anyone not familiar it is a really slick setup. You "sump" your fuel tank and then run a fuel line to an inline pump which is connected to their controller which is spliced into the canbus network on the car by way of the electric parking brake which is the closest canbus connected thing back there. Since it is on the canbus it is able to watch for command fuel pressure and if memory serves when the ECU asks the main pump for 500kpa, the secondary pump kicks on which is connected via a Y into the fuel line thus providing enough fuel.

I had to get the gas level as low as I could so I went for a drive:

51174401749_87d0f1e5c0_b.jpg


Holed drilled in tank, no fires (yay!), tapped, and fitting glued in place.

51173604261_143186618a_b.jpg


Got everything crammed in there.

51172938502_576313b5ef_b.jpg


Somehow it all fit.

51173840083_683aedc842_b.jpg


I was now ready to push it up to redline and finish up my MAF scaling.

-Hillrod
 
OP
W

wisconsin hillrod

Well-known member
Joined
Nov 28, 2016
Messages
188
Location
Wisconsin
With the DSX fuel system in place I resumed tuning and verified it resolved my issue. I continued tuning only to have the car suddenly start running extremely rough in the middle of a WOT pull. There was plenty of fuel, the tune was actually a bit rich but the car was shaking like crazy with the check engine light flashing. I pulled into the nearest parking lot and scanned the codes and there were over 10.

I limped the car home and began doing research. Initially I assumed something went wrong electronically since I had just added the DSX kit but I eventually had my wife turn the engine over while I had the valve covers off and I saw the intake valve for cylinder 4 was not moving at all. Interestingly the car did not identify a dead miss for cylinder 4 which is something even a c5 can do. I initially believed I could just pull the passenger side head and replace the failed DOD lifter until I took off the valley cover and could clearly see the lobe on the cam was destroyed. Everything I read said you have to pull the engine to replace the cam so out it came.

51177588600_6e83e4215c_b.jpg


51175818557_195095889b_b.jpg


51177288574_a80398c256_b.jpg


I had been aggressively working to pay the car off, and only had about $3,000 left. I began looking into various options to fix it and none of them were cheap so I decided I wanted to push the car in to the back of the shop pay it off and then save up money to do a cam / DOD delete, and forged pistons.

I was pretty frustrated with the situation and aside from the lifter failure (which I do not believe I was at fault for) the car needed the dash pad replaced along with the radio. Both are common issues (dash common for 3LT cars due to leather shrinking.) The car had been a money pit from the beginning pushing timelines back for everything else (cars, shop, house) and I decided I'd see if I could just sell it as is.

In the end someone drove up with a trailer from Kentucky and took my problems away. With the proceeds I was able to pay off my truck and for the first time 8 years I had no car payment!

51177288879_3d5bf768ed_b.jpg


He ended up messaging me a couple months later after having done everything I planned on doing along with the LT4 injectors/pump and made ~750whp. I hope it treats him better.

Now I could turn my attention onto the shop again.

-Hillrod
 

bowtiguy

Well-known member
Joined
Jan 21, 2009
Messages
185
Location
Front Range Colorado & Northern Illinois
Been there, done that. After my 454 LS7 build, I had low oil pressure. Diagnosis: bad casting from the ARE pan. THEN. I had milkshake... dropped dartin resleave. Motor #3 worked until 7k rpm track sessions wiped out the Lingenfelter gt19 ( base comp cams grind) ....and my 1k morel lifters. After that, I sent it down the road. Nothing but billet core LME cams from here on out.
 
OP
W

wisconsin hillrod

Well-known member
Joined
Nov 28, 2016
Messages
188
Location
Wisconsin
Been there, done that. After my 454 LS7 build, I had low oil pressure. Diagnosis: bad casting from the ARE pan. THEN. I had milkshake... dropped dartin resleave. Motor #3 worked until 7k rpm track sessions wiped out the Lingenfelter gt19 ( base comp cams grind) ....and my 1k morel lifters. After that, I sent it down the road. Nothing but billet core LME cams from here on out.

Ouch! My FRC had a Luniti 427 stroker in a Darton MID sleeved LS1 block when I bought it. I'm not entirely sure what was wrong with it but it was a milkshake too. It has been sitting on a stand for 7 years now. The junkyard 6L with a mild cam that replaced it has been a far better fit for me and for the 3 years it was boosted it made more power too. That said I'd probably want a big cube n/a engine if I was doing any kind of endurance racing.

-Hillrod
 
OP
W

wisconsin hillrod

Well-known member
Joined
Nov 28, 2016
Messages
188
Location
Wisconsin
I always figured I didn't need AC in the shop. It was never a big issue at my parent's or my old house. However, in the shop once the interior was finished I found that once the summer heat made its way in it was basically impossible to get it back out. Nothing I tried made a dent on the miserable heat and humidity that stuck around for 2+ months a year. My theory is that unlike my old house and my parent's house I have almost no shade for the building so the heat comes in all day long and the insulation under the concrete prevents the heat from being able to dissipate into the ground the way it did in my former garage.

Within months of finishing the interior in 2019 I got a bid for AC. $7,000 for a 2.5 ton unit with some spiral ducting hanging from the ceiling. For whatever reason I thought it would be a lot less than that and as a result It wasn't in the cards at the time. In 2020 I jumped into supercharging the c7 so AC remained on my wishlist.

Here is what I looked like most of last summer:

51178983721_349f990f67_z.jpg


This was a regular occurrence for me, and while I'm sure many people work through worse regularly it made me not want to be out there. I investigated installing a DIY mini split system but ultimately concluded the conventional system with spiral ducting was the only way to go.

Come fall 2020 the C7 was sold and the truck paid off so I saved that car payment money all fall/winter with the plan of doing AC in the spring. As the snow was starting to melt I reached back out to the HVAC contractors with a new plan: See what it would cost to install the AC system they quoted in 2019 while also replacing my Mr Heater with a conventional furnace. To my surprise after almost 2 years, and adding a furnace to the plan, the bid came back at $8,000. Sold!!!

Per the contract:
"Line voltage electrical to condenser by owner's electrician."

Now I had to figure out how to get 240v power and an AC disconnect box mounted outside on the back wall of the shop before they showed up on install day.

-Hillrod
 
OP
W

wisconsin hillrod

Well-known member
Joined
Nov 28, 2016
Messages
188
Location
Wisconsin
Early in this thread I mentioned that I reused the 6 space Homeline sub panel as an inception sub panel inside the inception shed. I figured I may as well do this instead of a home run to the air compressor as it would give me options later on should I decide I wanted to add a circuit after the interior was finished. Just like you can never have a large enough garage, you can never have too much power! Looking back I wish I had bought another full size panel and a larger feed back there. But I'm still glad I did what I did so working with what I've got.

The 6 spaces are used as follows: 240v to the air compressor (2), 240v to the 4 post lifts (2), 120v to the heater (1), and 120v for the inception shed outlets and lights (1). I needed a minimum of 8 spaces in order to have the two I'd need for another 240v circuit for the AC. I couldn't even get tricky with the double 120v circuit breakers as that would only net me 1 space. The largest panel I could fit in the small cavity had 8 spaces which is just enough to add 240v for AC. If I need more 240v circuits later I'll have to get creative. Probably chain the old Homeline panel off of the new one.

51179005916_9ab80bf1db_z.jpg


Count em! 8!

51178323897_f66948ee86_z.jpg


The next step was to run the new wire and mount the AC disconnect box. I spent a lot of time looking at old pictures and measuring to make sure beyond a reasonable doubt that all the holes I needed to drill would land in the right spot. Ultimately I decided I would mount the disconnect box at the top of the wainscot so the top of the panel was tight against the trim to help hold it in place. This would permit one construction screw to bite into the 2*6 grit to hold the panel tight against the wall. Then the wire would run safely through the sharp steel siding into the wall through a short 3/4" EMT conduit which itself would help hold the box in place. Next I would drill a 1/2" hole through the insulation and OSB from the outside in using the conduit as a drill guide. Finally, before removing the drill bit I would tape the wire to it and fish it through the wall when I removed it. That last bit worked...just barely.

51179214013_3a20a38361_z.jpg


51178992081_99a530c010_z.jpg


51178992036_c6042e8ae1_z.jpg


51179787494_9201be9bc9_z.jpg


Done with more than a week to spare! Just had to wait for AC install day...

-Hillrod
 

Earp69

Well-known member
Joined
Sep 20, 2016
Messages
859
My condenser called for 30 amp service, that looks like 12 gauge you ran? I could be wrong or yours may only call for 20 amp

Sent from my SM-N970U using Tapatalk
 
OP
W

wisconsin hillrod

Well-known member
Joined
Nov 28, 2016
Messages
188
Location
Wisconsin
My condenser called for 30 amp service, that looks like 12 gauge you ran? I could be wrong or yours may only call for 20 amp

Sent from my SM-N970U using Tapatalk

I was asking them if I should run 10-2 or 12-2 but they said 12-2 with a 20 amp breaker is fine for the 2.5 ton unit. The house is also a 2.5 ton unit and is also run with 12-2. I had the same concern so I actually checked the house unit and it was only pulling ~7.5amps when running. Seems they only pull more on initial startup but it won't be for long enough to trip the breaker.

51184268411_7d71a895c7_z.jpg


-Hillrod
 
OP
W

wisconsin hillrod

Well-known member
Joined
Nov 28, 2016
Messages
188
Location
Wisconsin
I was told to be ready for the crew at 8am...they arrived at 7:38am. I don't think I looked too good when I greeted them but that's how it goes for those of us who do overnight work ha. I left two cars on lifts to show where the duct work could and could not go. We debated a few options ultimately deciding on one straight trunk down the middle stopping 10' short of the front wall due to a garage door bracket in the way.

By 3:30pm they had everything done except cutting in the registers and capping the end of the air duct:

51187367126_e62b178b2d_z.jpg


51188432400_8d5e3c2943_z.jpg


I really appreciate their attention to detail. They avoided drilling any extra holes in the ceiling by replacing existing screws.

51187368046_c337bdedb6_z.jpg


There is easy access to replace the filter and do repairs from the mezzanine.

51187587458_ce542f5a4b_z.jpg


Looks clean outside too.

51188168854_bae98ebc83_z.jpg


They finished up the next day. I tested it to verify everything works but have yet to actually use the AC. The weather turned unseasonably cold so I've been enjoying the new quiet heat for about a month now but summer heat will be here soon and with the new shop AC I'll be the coolest guy I know hahaha.

-Hillrod
 
To avoid these ads, REGISTER NOW!

zmotorsports

ALLIANCE MEMBER
Joined
Oct 20, 2009
Messages
21,473
Location
Northern Utah
WOW! That ***** about the C7 but at least you didn't get burned too badly and able to pay off a few other things along with putting in your A/C system. I don't have A/C in my shop and even in triple digit heat here it's not that bad in my shop as it is north facing and I utilize my fans. We also have relatively low humidity here in Northern Utah or I'm sure I would feel differently.
 
OP
W

wisconsin hillrod

Well-known member
Joined
Nov 28, 2016
Messages
188
Location
Wisconsin
I know that you know that you're going to love the A/C and the drop in humidity.


🍺

I *almost* made it through May without turning it on but when I did it felt so good.

I'm very jealous, one day I'll **** it up and build a new shop and have AC, but not anytime soon.

JB

Thanks! It is three years of my life I will never get back but I hope to enjoy it for at least the next 30! I was talking to a friend recently who will have his house paid off in the next year or so and it occurred to me that had I thrown all the shop and car money at the mortgage instead it would be paid off. Woof. Oh well, 10 years to go!

WOW! That ***** about the C7 but at least you didn't get burned too badly and able to pay off a few other things along with putting in your A/C system. I don't have A/C in my shop and even in triple digit heat here it's not that bad in my shop as it is north facing and I utilize my fans. We also have relatively low humidity here in Northern Utah or I'm sure I would feel differently.

The C7 was fixable and I'd probably have done better financially in the long term had I fixed it then sold it instead of selling it broken but I'm very happy with this timeline where I have AC this summer instead of it being pushed back yet again.

I'd like to think I wouldn't need AC if I lived somewhere dry since I don't recall suffering in Arizona the couple times I've visited in summer even when it is 100+ out but I'd probably be a sissy there too ha.

Great shop and stories. Congrats on the AC!

Thank you!


-Hillrod
 

rmckee

Well-known member
Joined
Jan 2, 2012
Messages
457
Location
Wake Forest, NC
Great read and awesome to watch the thought go into each mod / stage. I’m sort of in the same boat, first house at 23 had a 17x18 garage, third house at 28 has a 22x22 attached, and am I’m now building a 24x40 detached spec’d (at least) one lift on property to allow for the growing stable of vehicles to be kept inside.
Appreciate you taking the time to document all 3 garage builds!
 
OP
W

wisconsin hillrod

Well-known member
Joined
Nov 28, 2016
Messages
188
Location
Wisconsin
Great read and awesome to watch the thought go into each mod / stage. I’m sort of in the same boat, first house at 23 had a 17x18 garage, third house at 28 has a 22x22 attached, and am I’m now building a 24x40 detached spec’d (at least) one lift on property to allow for the growing stable of vehicles to be kept inside.

Appreciate you taking the time to document all 3 garage builds!
Thank you! I planned ahead as best I could but had to wing a number of things ha.
 
OP
W

wisconsin hillrod

Well-known member
Joined
Nov 28, 2016
Messages
188
Location
Wisconsin
In late May we spent two days up north and came home to mid 80s with ALL THE HUMIDITY. After power washing all the mud and bugs off of the truck, I put it away in the shop. Having the big door open for a minute or so plus the heat of the truck itself was enough to make it slightly uncomfortable in there.

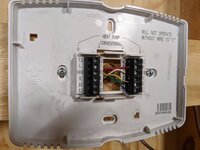
Soooo…a good excuse to use the AC for the first time! Turned it on, fan starting running everything looked good..but the cool air never came. I thought about it a bit and realized I never heard the compressor kick on.

I headed out back and noted the outdoor unit was not running. I verified I had 240v at the AC disconnect so I started to suspect the refrigerant had leaked out since the unit had power and it seemed unlikely any components would have broken from sitting a few weeks since it was charged and tested. I have an AC gauge set for automotive AC but nothing for home systems so I decided to check the only other thing I could think of before making a call:

51204562944_dc5689fe30_z.jpg
See the problem?


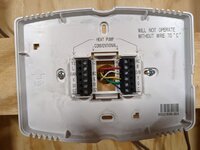
51203994973_2bbb752541_z.jpg
Fixed!

Technically not my fault as they added the Y wire when they installed the AC but it was a simple fix. Been loving the AC ever since!

-Hillrod
 
OP
W

wisconsin hillrod

Well-known member
Joined
Nov 28, 2016
Messages
188
Location
Wisconsin
As of today I'm back up to two superchargers!

51172400532_a75afebfb3_b.jpg

Made 635whp on the old Si unit. This one is a Ti unit that flows 200 more cfm so I'm hoping for 700whp. We shall see...this one might end in tears like the C7 haha.

-Hillrod
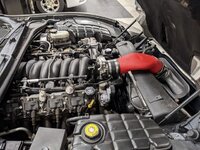
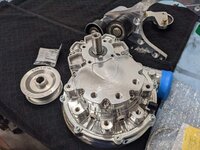
I had talked to A&A Corvette previously about the improvements made to their new kits over the original kit I had. Back in 2018 I was seriously considering selling my old kit and upgrading to a new one. In a round about way I did just that -- sold the old kit in 2019 and called and ordered a custom "tuner" kit in April as I didn't need a fuel system, or a crank pin kit. I opted to upgrade to the slightly larger Ti headunit and went with the larger/louder Raceport BOV. After waiting about a month the kit showed up and it was time to get to work.

Starting point:
51255643573_9b66e50140_z.jpg

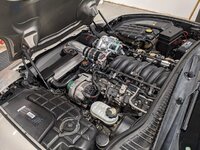
Since I already had the fuel system done and crank pulley pinned from the last supercharger my list was a little shorter this time: Lower the radiator cradle down, install supercharger brackets/belt/supercharger itself, swap in 2 bar map sensor, move/modify the horn, trim a couple panels, install intercooler/panels, run charge pipes, slight PCV tweak, and vacuum line to BOV. The supercharger/belt and intercooler install are both two person jobs which a friend and I knocked out.

Had to pull the intake to swap from 1 bar to 2 bar MAP sensor.
51254708597_fa429acd47_z.jpg

51254708587_c807301142_z.jpg

51256484820_510457dc8b_z.jpg


Loaded up the old tune which got it close enough to run/drive:

The Raceport BOV is LOUD haha. Maybe too loud time will tell.

-Hillrod
 
OP
W

wisconsin hillrod

Well-known member
Joined
Nov 28, 2016
Messages
188
Location
Wisconsin
A little update:

51255440976_7934358052_z.jpg

51254709037_b805ae7daf_z.jpg

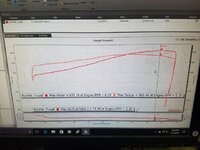
I am really pleased with the results. I was hoping to crack 700whp and ended up 719. But I am just as pleased with the amount of torque it is making under the curve. 450 ft lbs of torque at the tires @ 3,000rpm is amazing and it just keeps on pulling from there! It even made slightly more torque than the last kit did hp!

For comparison sake, this is the dyno graph from the original system with the smaller head unit and non ram air intercooler:

30680901363_f861e41f17_z.jpg

-Hillrod
 

Pressingonward

Well-known member
Joined
Mar 9, 2016
Messages
522
Location
SW WA
Just read through your thread. Very nice shop build and cool toys!

Have you considered a top-side creeper for working on your trucks? I haven't used one, but they look pretty slick. Another nice option that I have used once or twice is a step that hooks onto the front tire - easy to use and won't move around on you like a normal step stool.
 
OP
W

wisconsin hillrod

Well-known member
Joined
Nov 28, 2016
Messages
188
Location
Wisconsin
Impressive numbers, well done and enjoy.

JB
Thanks! It has been a blast.
Just read through your thread. Very nice shop build and cool toys!

Have you considered a top-side creeper for working on your trucks? I haven't used one, but they look pretty slick. Another nice option that I have used once or twice is a step that hooks onto the front tire - easy to use and won't move around on you like a normal step stool.
Thanks! Someone had a suggestion I take the front tires off and let the truck kneel down and that has worked amazing for me. Up until then I was looking into top-side creepers among other options. My biggest issue with a top side creeper is how much room it would take up when I am not using it. Perhaps they make foldables ones? Hrmmmm...

-Hillrod
 
To avoid these ads, REGISTER NOW!
Top Bottom