To avoid these ads, REGISTER NOW!

Third Times the Charm?

zjohnson1

Well-known member
Joined
Oct 21, 2014
Messages
86
Location
Newnan, GA
I think it's finally time I started a thread to help me track progress since the ball is rolling. I've bounced around a bit over the last few years since graduating college, 27yrs old and on house #3, but I think we've finally found our "dream home". It's an early 1950's 2400sq ft brick ranch with about 5 acres on the right side of town. It checked all the boxes except the one most important to me: no garage- like none at all... Luckily the lot is perfect for putting one pretty much anywhere I want. So the initial plan is this: Get rid of the 2 10'x25' storage units that are just burning cash by putting up a 30x40 shop. This will be geared towards automotive/metal work and eventually I'll add another building dedicated for woodworking and an attached carport/garage for cover when carrying in groceries and normal day to day stuff.

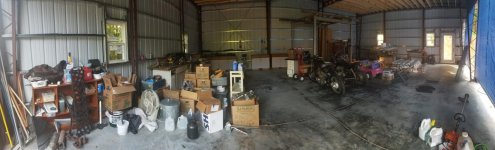
Priority 1 is getting all my tools here because it's difficult to do a full house reno while running back and forth between storage units on opposite sides of town for every little tool. Also to keep things interesting my wife and I have an 8 week old daughter (our first) so everything in the house has to be done quickly and with minimal mess/dust. Enough with the intro though, I'll just pic dump because that's the interesting stuff. Sorry most of the progress is house related up to this point so that's what most photos are of


Treasure in the woods found move in weekend


20181028_162645.jpg


"New" tractor because I've finally got enough land to warrant it. *note chains had already been removed, it was properly secured

20181111_132433.jpg

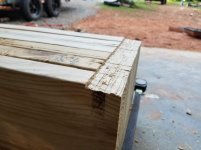
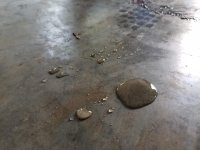
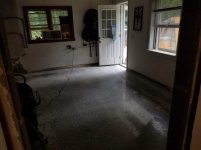
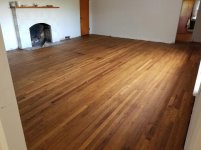
Who covers up floors like this?

20181119_074130.jpg


20181119_172111.jpg

20181120_193700.jpg


20181123_192712.jpg

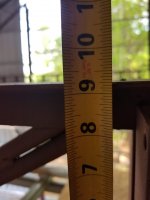
The 1 full bathroom was "okay" but upon further inspection the toilet had been leaking for years and years, there were 3 layers of floor that were just put over to make it "solid". Subfloor joists were rotten so I decided to just go ahead and do everything right. Luckily our house is basically a nuclear bomb shelter and the walls are all plaster skimmed cinderblock. Because f*** hanging pictures... Benefit is it's super energy efficient and it kills sound like you wouldn't believe

20181125_135332.jpg


That seems like a long enough first post so I'll stop there. House projects are getting to a slowing point so I'll shift the focus to be more "garage" oriented but I always enjoy threads with this kind of content so I hope y'all don't mind. Sorry for the ******* order of things but it's been a hectic couple of weeks getting things livable as you can imagine and I'm not the best at photographing progress since I'm a one man army and I try to do everything myself if at all possible
 
Last edited:
To avoid these ads, REGISTER NOW!
OP
Z

zjohnson1

Well-known member
Joined
Oct 21, 2014
Messages
86
Location
Newnan, GA
Shop Content because that's what this place is all about. I hope all the photos show up correctly, I haven't been on a forum since the old photobucket days so if I'm doing something wrong please feel free to point it out.

I finally got my permit approved so this is what's going up. We broke ground this week so photos will be getting posted soon


Lot with shop.jpg

front view of shop.jpg

Side view of shop.jpg
 

J-man67

Well-known member
Joined
Aug 10, 2012
Messages
218
Location
Delaware
Second post was ok... First, not so much lol. The pictures were loading up to a strange 244% and then not displaying. Anyway, sounds like you have a solid plan and are well on your way! Congrats on the dream home and baby!

0e7701c2216e9ea1b1415541960e35e7.jpg8ea2e9f6e21fad4755981dad3db27fc3.jpg

Sent from my SM-N950U using Tapatalk
 

Attachments

  • 0e7701c2216e9ea1b1415541960e35e7.jpg
    0e7701c2216e9ea1b1415541960e35e7.jpg
    17.4 KB · Views: 5
  • 8ea2e9f6e21fad4755981dad3db27fc3.jpg
    8ea2e9f6e21fad4755981dad3db27fc3.jpg
    34.3 KB · Views: 9
OP
Z

zjohnson1

Well-known member
Joined
Oct 21, 2014
Messages
86
Location
Newnan, GA
Cont.: Fixing photos from first post

20181127_180808.jpg

Oh and up to this point we had no running water. Pipes were completely rusted shut. Despite being on a crawlspace each interior cinderblock wall extends all the way through to the ground effectively blocking off all access which forced me to plumb through the attic. I invested in a rotary hammer

20181213_213315.jpg

And an outdoor tankless water heater

20181218_124621.jpg

Refer back to bomb shelter comment

20181222_132851.jpg

20181222_145031.jpg


20181226_103950.jpg

20181229_173857.jpg
 
OP
Z

zjohnson1

Well-known member
Joined
Oct 21, 2014
Messages
86
Location
Newnan, GA
Cont. again

At this point my little munchkin arrived

20190101_132733.jpg


And the bathroom looked like this

20190104_162553.jpg

So quick quick like a bunny I got things back together

20190106_114000.jpg

20190107_182223.jpg

20190108_004802.jpg

20190116_173827.jpg

20190120_200308.jpg
 
OP
Z

zjohnson1

Well-known member
Joined
Oct 21, 2014
Messages
86
Location
Newnan, GA
Okay I think the problem was my photos were too large since I was linking directly from google photos. Redid everything by attaching image to post then inserting in line. Should be fixed now. For future reference is this the correct way of doing it, setting max at 7 images per post?
 

RSr

Well-known member
Joined
Jul 20, 2010
Messages
155
Location
Pittsburgh, PA
I'm not sure if there is a right or wrong way but its a lot easier to read through a thread with photos that don't require clicking to view the larger images. I've seen others do it but not sure how it works when uploaded to the forum vs linked to third party hosting. I try to keep my posts to 7-10 photos max to match peoples attention span. I'd also recommend trying to take more photos in landscape (wide) than portrait (tall) mode, they layout better on a computer screen.

Good luck on all the projects and the expanding family. :thumbup:
 

LXCam

ALLIANCE MEMBER
Joined
Apr 23, 2013
Messages
19,088
Location
AZ
Okay I think the problem was my photos were too large since I was linking directly from google photos. Redid everything by attaching image to post then inserting in line. Should be fixed now. For future reference is this the correct way of doing it, setting max at 7 images per post?


Looking good New papa. And ya 7 is all I get get too loading to the site. So when do you break grounds on the getaway shed?
 
OP
Z

zjohnson1

Well-known member
Joined
Oct 21, 2014
Messages
86
Location
Newnan, GA
Alright got the last of my pics uploaded to get us up to date. Last week we upgraded the wifes 01 4runner to an 03 GX470 (120 Series Land Cruiser Prado). Pretty excited about that since it shares a chassis with my FJ Cruiser and shes happy that it's got all the bells and whistles and is safer for the baby

20190209_155301(0).jpg

Doggo looking over her domain. Destruction of this area to come soon

20190211_075003.jpg

Finished up the floors in the kitchen. Total PITA and the wood was/is in terrible shape but at least it's all smooth and one color now. This was a test run for the rest of the house which we're fairly pleased with. Floors are old white pine patched at some point (quite obviously) with yellow pine. I decided to stain it special walnut to blend the two a bit then coat with waterlox

20190224_183410.jpg


Tree guys came and cleared out a few of the major trees in the way of our future round a bout driveway and shop site

20190225_171554.jpg

Looking towards the future shop

20190225_171601.jpg


Missed one tree that could cause issues so I downed it on a lunch break and started cutting it up

20190226_120225.jpg

20190226_122127.jpg
 
OP
Z

zjohnson1

Well-known member
Joined
Oct 21, 2014
Messages
86
Location
Newnan, GA
Concrete guys dropped off equipment while I was on my lunch break so the pressure was on to get the tree knocked out that night

20190226_172441.jpg

Success

20190226_190456.jpg

The next day when I got home they had made good progress

20190227_171629.jpg

20190227_171744.jpg

These photos were Wednesday. Thursday I was home sick and it was pouring down rain so no progress was made. Today they sent a few guys to check level of the area and make a few tweaks on placement per my request. The weather really hasn't been cooperating with us so the plan is to have forms set by Monday to start the pour. Building is set to arrive on the 21st of this month so I'm getting pretty excited. Plan is to build a retaining wall where my wife is standing then have a 10' gap to the shop exterior wall. This area will get covered so I can park the tractor and trailers underneath. So much left to do but no that we're breaking ground it seems more real

And just to keep things fun, some of what will be going in the garage

20181229_143255.jpg

20190128_184329.jpg

20181025_151502.jpg

That's my last 2 months or so in a nutshell so everything going forward is current
 
OP
Z

zjohnson1

Well-known member
Joined
Oct 21, 2014
Messages
86
Location
Newnan, GA
A few updates this week. Columns were dug out and gravel went down Wednesday. Form was fine tuned yesterday and inspector came by to give approval. Vapor barrier was then laid and the trucks showed up this morning with a crew of about 5 guys to get this thing poured. Starting to get excited now :willy_nil

20190306_172313.jpg

20190306_172606.jpg

20190306_172732.jpg

20190307_172155.jpg

20190308_073206.jpg

20190308_073209.jpg
 

matt_i

Well-known member
Joined
Mar 14, 2008
Messages
10,722
Location
SE Michigan
You have a lot going on there! Hope you are getting some sleep :)

Nice job on the fast bathroom reno!
 
OP
Z

zjohnson1

Well-known member
Joined
Oct 21, 2014
Messages
86
Location
Newnan, GA
They were able to get the slab pored Friday. Weather went from a high of 40's from the last 2 weeks to 75* all weekend. Not ideal for a slow cure but not so bad, plus we got light showers all weekend which was perfect. The pour came out great. I ended up going with a fiber reinforced concrete rather than rebar mesh which I think will be great for my location, could potentially have 0 cracking if everything goes as planned since the soil is highly compacted red clay (old farm land). Today they broke off the forms and did the relief cuts so now it's a waiting game for the building to show up on the 21st of this month

20190308_185035.jpg

20190309_160323.jpg

20190311_121052.jpg
 

rakane

Well-known member
Joined
Feb 8, 2018
Messages
175
Location
Warren, Oregon
Very nice. I'm also going with a fiber reinforced concrete, but still putting a bit of rebar near the large door opening.

Meanwhile is a 30' Grady White.
 
OP
Z

zjohnson1

Well-known member
Joined
Oct 21, 2014
Messages
86
Location
Newnan, GA
Building materials showed up on a truck Thursday morning. I had a buddy come up to give me a hand and in about 2hrs we had the 10klb load off the truck and semi staged in the yard. Weather couldn't have been better, minus the clouds of yellow pollen that decided to show up this week. It's definitely been a learning experience getting the larger pieces erected but so far so good. Things have been a bit tricky since I've got the extra tall 16' walls but I got a scissor lift and couldn't imagine being able to get this far without it. Saturday evening I borrowed another friend and the girls decided to come out and watch/feed us popcorn and beer. With the progress thus far I'm much more confident I'll be able to get the building erecting without professional help, save perhaps the roof panels since I'm terrified of heights. If anyone has any suggestions for those going up I'm all ears

20190321_092623.jpg

20190321_113947.jpg

20190321_135328.jpg

20190321_151228.jpg

20190321_174933.jpg

20190322_133740.jpg
 
Last edited:
OP
Z

zjohnson1

Well-known member
Joined
Oct 21, 2014
Messages
86
Location
Newnan, GA
Progress has been pretty slow this week with rain and work but I've gotten a bit done. Knocked out the portal frame and windrods. The windrods kicked my ****... Singles were pretty straightforward but the doubles sucked, you tension one side then the other gets tweaked and its rough working 25' in the air (I'm terrified of heights). Should be putting up sheet this weekend though so there's an end in sight.

20190327_124745.jpg

20190325_193835.jpg

Figured y'all would appreciate a few of my most recent hauls. I've been on the lookout for an old tanker desk locally for a few months to no avail. An email at work got passed around about an old steelcase that they were throwing out unless anyone wanted it. It's a little rough but perfect for my needs

20190314_111350.jpg

The cherry on top was these that were gonna end up in the dumpster too. Old engineering samples. They may not all match but I'll definitely be able to see and I can't complain about the price. All but maybe 2 or 3 are LED

20190315_164449.jpg

And last but not least I needed a beer fridge for the shop. Planned on getting a glass front store display type but this popped up on FB marketplace 5 miles away for $50 and it works great. Based on the serial # I think it's a '51, same vintage as my house, and the inside is super clean so I couldn't pass it up

20190319_180625.jpg
 
Last edited:
To avoid these ads, REGISTER NOW!
OP
Z

zjohnson1

Well-known member
Joined
Oct 21, 2014
Messages
86
Location
Newnan, GA
There's been a ton of little detail things to work on but the building is still coming along. I did about 1/4 of the roof and decided that wasn't something I was comfortable with (terrified of heights) so I contracted the rest of the job out to some old school metal building erectors. Ended up being more than I wanted to pay but I've got a dry space to work now without having to take all my tools in the house every night and I know they did the job right. It was helpful to pick their brains a bit for some tips and tricks getting the rest of the building up.

All that's really left is framing doors and windows then sheathing. I'll probably make a run Saturday to pick up the windows and doors at a surplus warehouse in Atlanta but I'm on the home stretch

20190403_172307.jpg

Wife and baby approved
20190403_192034.jpg
 
Last edited:

RSr

Well-known member
Joined
Jul 20, 2010
Messages
155
Location
Pittsburgh, PA
attachment.php


Thats a nice sized shop!, it shouldn't be confined to such small thumbnails :rolleyes: Hit the quote button below to see the code to inline images at a larger size if you want to.
 
OP
Z

zjohnson1

Well-known member
Joined
Oct 21, 2014
Messages
86
Location
Newnan, GA
Progress has been really slow due to extreme weather down here, lots of birthdays and holidays on the weekends, in addition to me watching the munchkin on Saturdays while the wife is at work but I've got enough progress for a post so here it goes

Got all the doors and windows framed/trimmed to prep for siding

attachment.php


First panels going up. Front and back were the max length I could handle solo, the sides are a bit too long and will fold in on themselves so I had to call in reinforcements but I managed everything else solo. Not easy to hold the panel in place, level, and screw in but I made it happen and the seams all lined up perfectly

attachment.php


For some reason I haven't taken a finished pic of the siding but this is close

attachment.php


Mezzanine work started too since I jumped the gun and bought all the wood. Ended up being a little more work than anticipated because the truss was designed to notch the boards 1/8" for flush fit with the metal angle on top, in addition to slight trimming to length. Lots of picking up and putting down long heavy boards but I got there

attachment.php


attachment.php


Then with the help of my furry assistant I got everything elevated and screwed up in place

attachment.php


attachment.php


Hopefully I get the last pressure washing done on the floor this evening so I can start putting down the densifier and sealer over the next few days
 

Attachments

  • 20190502_190734.jpg
    20190502_190734.jpg
    143.3 KB · Views: 891
  • 20190510_194916.jpg
    20190510_194916.jpg
    143 KB · Views: 898
  • 20190429_172909.jpg
    20190429_172909.jpg
    63.1 KB · Views: 890
  • 20190429_190200.jpg
    20190429_190200.jpg
    120 KB · Views: 890
  • 20190416_175953.jpg
    20190416_175953.jpg
    154.2 KB · Views: 904
  • 20190417_190618.jpg
    20190417_190618.jpg
    146.4 KB · Views: 894
  • 20190428_201556.jpg
    20190428_201556.jpg
    149.8 KB · Views: 897
Last edited:
OP
Z

zjohnson1

Well-known member
Joined
Oct 21, 2014
Messages
86
Location
Newnan, GA
The weather finally cooperated and I was able to get the exterior "done".
It needs some more screws and the trim along the front eave needs to be reattached but I'm ready to move in!

attachment.php


I pressure washed the entire floor about 5 times with various attachments, soaps, scrubbing, etc. to try and get all the red clay stains off that were ground in by the scissor lift wheels. I got it about 80% and decided the work outweighed the benefit for a working garage and it chocked it up to character in the floor. I really like how splotchy it is front the power trowel with the darker and lighter areas. Here's the before

attachment.php


I laid down some Ghostshield 4500 densifier which I failed to get photos of but here's the floor already treated with it while I set up for the sealer. I went pretty heavy with the 4500 (it went much farther than anticipated and I wanted to use it up) so there was some crystallization/residue that had to be scrubbed off

attachment.php


I had a helper for the scrubbing

attachment.php


But she wore out quickly and needed a break until momma got home to watch her

attachment.php


Fuzzy pic of the floor 2/3 through sealing. This also went much further than anticipated, I only used about 3.5 gallons and the backpack still had a bit left over. I hit a few spots again that soaked up quickly but the sealer was beading up on the surface which means the slab took about all it could handle. Felt bad dumping what was already in the sprayer so I figured I'd see what it does to the wood on the trailer deck since that's almost shot and the trailer was sitting there. Guess I'll have to come up with a use for the rest of the sealer before it goes bad

attachment.php


attachment.php


Today is the start of move in day and a dumpster/dump run is in my near future for clean up of all the debris around the building. Then landscaping to prevent mud from splashing everywhere, electrical, wall sheathing, and a million other things which I'm sure will never end
 

Attachments

  • 20190520_182543.jpg
    20190520_182543.jpg
    96.4 KB · Views: 778
  • 20190520_184814.jpg
    20190520_184814.jpg
    73.9 KB · Views: 780
  • 20190520_192506.jpg
    20190520_192506.jpg
    149.8 KB · Views: 780
  • 20190520_195741.jpg
    20190520_195741.jpg
    154.9 KB · Views: 775
  • 20190520_181920.jpg
    20190520_181920.jpg
    128.5 KB · Views: 785
  • 20190519_115720.jpg
    20190519_115720.jpg
    147.3 KB · Views: 53
  • 20190520_183733.jpg
    20190520_183733.jpg
    152.5 KB · Views: 752
Last edited:
OP
Z

zjohnson1

Well-known member
Joined
Oct 21, 2014
Messages
86
Location
Newnan, GA
Congratulations on a great place to work. I assume you're doing it in conduit/EMT for the wiring?

Still undecided. Walls will be sheathed in OSB but I haven't made up my mind whether insulation will be blow foamed or polyiso sheet (much cheaper from a secondhand building materials place in town). If sheet I can get away with just using romex behind the wall panels with no conduit. If foam I'll have to run conduit behind walls or externally on the front. If it's exposed on the front it will be emt which gets pricey when compared to the standard sch tubing but access would be easier. Too many decisions... Electrical definitely needs to happen in the next few weeks because it's too dark to do any real work in the shop after 6:30 due to shade from the trees
 
OP
Z

zjohnson1

Well-known member
Joined
Oct 21, 2014
Messages
86
Location
Newnan, GA
Started moving in a few things last night, at which point the floor had been treated about 22hrs prior. The fridge had some residual water which dripped out along with a bit up mud on the dolly wheels that I decided to let sit as a test. The mud (now dry) brushed right off this morning and the water that hadn't evaporated was still beaded up this morning. Very impressed with performance especially for how easy this was to install

attachment.php
 

Attachments

  • 20190521_172733.jpg
    20190521_172733.jpg
    116.8 KB · Views: 777
Last edited:

Motoman1100

Well-known member
Joined
Oct 2, 2014
Messages
443
Location
GA
Looks great! You have to love that beautiful VERY red clay. I'm not far from you in Fayette and am constantly trying to was h it off something, especially the dog.

If you said earlier I must have missed it, but who makes that building? I really like the construction of it. How much weight does that second floor hold? What do you plan on doing with the space up there?

Congrats on the new baby!
 
OP
Z

zjohnson1

Well-known member
Joined
Oct 21, 2014
Messages
86
Location
Newnan, GA
Looks great! You have to love that beautiful VERY red clay. I'm not far from you in Fayette and am constantly trying to was h it off something, especially the dog.

If you said earlier I must have missed it, but who makes that building? I really like the construction of it. How much weight does that second floor hold? What do you plan on doing with the space up there?

Congrats on the new baby!

Thanks! Yea red clay is great for building on but terrible for just about everything else and the stains are the worst. My dogs 'white' feet hardly ever stay that way

Building is from Worldwide Steel. Overall I was very pleased with the company and customer support has been great. I wanted a trussed design since I was erecting by hand myself and that cut weight down to make it more manageable. They were also one of the only companies I could find that offered a fully free spanned mezzanine on a building of my size. They had several options on load bearings but I opted for the lowest which was 50psf. In theory I could park cars up there since it breaks down to each 1/3 @ 22,500lbs but that was never my plan.

One section will house racks for car part storage along the walls. The middle of that side will have my drumset, guitars, and a sofa to hang out (open to the shop to be able to look down at toys). Center is a walkway where the stairs go to and the far side is getting dried in as a theater room similar to the below image (big cube in the middle is a lift)

attachment.php


If you'd like more details or have any questions about the process send me a PM and I can give you my #. If you end up going with them I may have a referral card that could even be some kind of discount? I'd have to check
 

Attachments

  • The Shed_labeled.jpg
    The Shed_labeled.jpg
    18.7 KB · Views: 726
OP
Z

zjohnson1

Well-known member
Joined
Oct 21, 2014
Messages
86
Location
Newnan, GA
Updates have been slow due to vacation and life. I was able to get my first project inside the shop done that wasn't working on the shop. I decided 2 days before leaving for the beach that my cooler needed wheels. My wife said I was ridiculous and couldn't spend any money on it and she didn't want me to work on it. So with no budget and no time this is what I came up with:

attachment.php


Those are recycled lawnmower wheels (sealed bearings) welded to some angle iron spaced back with plate to allow for a better angle while pulling. Handle extension is an old accessory belt ziptied together and duct taped for a nice handle. I used expansion nuts to connect it to the existing rubber feet on the bottom of the cooler for easy removal. Planned out "professional" projects are fun but I live for redneck engineering. Total investment for this was around $4 and took under 30mins. Worked like a charm


Got back home and unloaded one of the storage units. This was the less full of the two. Garage is about twice as full as it is in this photo but I also got the storage racks which helps. Need to finish up the second story and stairs to truly organize but running power will need to happen first

attachment.php


Scored a dumpster door from the new build down the street

attachment.php


Crawlspace door was rotted and our cat kept sneaking in so I came up with a quick solution using scrap boards from the shed. This will eventually be a welded frame with wood inserts to match the garage doors so I wasn't too worried about making it pretty. I'll probably throw some black paint at it and call it a day. Too many things need done to focus on all the details right now. Yard maintenance has finally jumped up on the list so I'll need to regrade around the house and rip out all the bushes, vines, weeds, poison ivy, etc. Finally getting rid of the redneck paradise vibe!

attachment.php


I was able to start laying out my lighting fixtures last night to see what's there. I'll probably put the layout up on screen once I get these 4 rows installed so I can figure out where to run the cross lights for maximum efficacy

attachment.php
 

Attachments

  • 20190606_184245.jpg
    20190606_184245.jpg
    148.4 KB · Views: 655
  • 20190601_182820.jpg
    20190601_182820.jpg
    121.5 KB · Views: 656
  • 20190531_184428.jpg
    20190531_184428.jpg
    103.3 KB · Views: 661
  • 20190527_132231.jpg
    20190527_132231.jpg
    99.7 KB · Views: 660
  • 20190609_190353.jpg
    20190609_190353.jpg
    129.8 KB · Views: 653

Motoman1100

Well-known member
Joined
Oct 2, 2014
Messages
443
Location
GA
Updates have been slow due to vacation and life. I was able to get my first project inside the shop done that wasn't working on the shop. I decided 2 days before leaving for the beach that my cooler needed wheels. My wife said I was ridiculous and couldn't spend any money on it and she didn't want me to work on it. So with no budget and no time this is what I came up with:

attachment.php


Those are recycled lawnmower wheels (sealed bearings) welded to some angle iron spaced back with plate to allow for a better angle while pulling. Handle extension is an old accessory belt ziptied together and duct taped for a nice handle. I used expansion nuts to connect it to the existing rubber feet on the bottom of the cooler for easy removal. Planned out "professional" projects are fun but I live for redneck engineering. Total investment for this was around $4 and took under 30mins. Worked like a charm

Well, well well...who thinks that sweet cooler is a waste of time now? Ha! And congrats on finally getting your stuff put in the garage, I'm sure that feels good.
 
OP
Z

zjohnson1

Well-known member
Joined
Oct 21, 2014
Messages
86
Location
Newnan, GA
Well, well well...who thinks that sweet cooler is a waste of time now? Ha! And congrats on finally getting your stuff put in the garage, I'm sure that feels good.

It always seems to work out that way.haha It's ridiculous until it works then she hits me with the "Why didn't you make it do this or add that". She already gave me the go ahead to rig up the geared rear wheels with a motor for next year so it can be self propelled

It's certainly a good feeling. Probably months of organization ahead of me and many more cabinets to acquire but I'm excited to really make the space mine. This week the focus is electrical rough in since I had a big package show up in the mail. Plan is an outlet every 4' on all walls, each wall running two circuits and alternating every other plug. Each bay will be wired individually for lights with a 4th switch for outdoor. All the 220 outlets will be on 1 wall (the "machine shop" side). Biggest win will be the lighting though

attachment.php
 

Attachments

  • Electrical Order.jpg
    Electrical Order.jpg
    11.8 KB · Views: 623
OP
Z

zjohnson1

Well-known member
Joined
Oct 21, 2014
Messages
86
Location
Newnan, GA
Progress has been very slow with all the house and yard renovations in addition to having a 6 month old baby but here's a little of what's been going on. My apologies as it's mostly house related but shop updates are coming soon

Back half of the house was on a slab so I pulled up all the carpet and tile then had the concrete polished. This will be the finished floor. Hard to tell from photo but it's very pretty in person, super shiny with lots of exposed aggregate. Don't mind the exposed plumbing; it was in a closet that got removed. Manifold will relocate to the attic

attachment.php


attachment.php


I designed a set of stairs for the shop to get to the second story using some existing steel that I have but I needed just a little more to make it work. Found some paint racks on marketplace from a local large equipment auction house that's closing their paint booth. Correct gauge/tube dimensions and I got as much as I could take for $130. I'll need to finish up electrical in the shop asap so I can get welding, currently running 150' extension cord from the house for lights which is definitely not ideal

attachment.php


attachment.php


Back to the house interior. I drew up some blueprints and my cousin worked out a design concept to run with. Picked up a 10x10x9.5' white oak timber to act as a column support for an exposed I beam.

attachment.php


attachment.php


Part of the tree that this beam came from

attachment.php


We also bought everything (cabinets, appliances, etc) to update the kitchen so the house should be wrapping up over the next 3 months at which point I'll be able to hit the garage full steam and get it to a usable state for fun projects to begin. It'll be nice to be able to just relax and live in the 'new' house
 

Attachments

  • 20190725_170745.jpg
    20190725_170745.jpg
    153.9 KB · Views: 577
  • Capture.jpg
    Capture.jpg
    20.3 KB · Views: 567
  • 20190727_142127.jpg
    20190727_142127.jpg
    149.9 KB · Views: 577
  • 20190727_141700.jpg
    20190727_141700.jpg
    150 KB · Views: 573
  • 20190725_115358.jpg
    20190725_115358.jpg
    134.5 KB · Views: 575
  • 20190718_173014.jpg
    20190718_173014.jpg
    120.7 KB · Views: 573
  • 20190716_073734.jpg
    20190716_073734.jpg
    143.8 KB · Views: 574
OP
Z

zjohnson1

Well-known member
Joined
Oct 21, 2014
Messages
86
Location
Newnan, GA
It's been pretty crazy here in the Johnson household lately. Between the shop, baby, house, and work not too much has progressed enough to show. Our AC unit went out due to neglect of the PO despite only being 5 years old (ran without filter for years, return on floor just inside front door) so I took that as an opportunity to re-duct the house through the attic which allows crawlspace access and adds vents to the back of the home that's on slab.

Floor registers were patched while everything was being refinished and the Rubio Monocoat came out perfect. It really brings out the character in these 70yr old floors

attachment.php


In the evenings I've been chipping away at the electrical for the shop. So far I'm at around 30 outlets and the same amount of lights. over 400' of 12/2 wire. 2 8' ground rods 10' apart that still need to be wired to the meter box. Countless holes drilled in the girts with nylon bushings for wire pass through. I'm out of town this weekend but I'm hoping to pick up a few breakers to toss in the box and have the rough in inspection next week so I can finish up electrical and stop using an extension cord for lighting... I'm a little nervous about it since I'm no electrician but based on the questions I've asked the inspectors and the fact that this is a detached garage I think I think I should be okay

attachment.php


attachment.php


attachment.php


attachment.php


attachment.php


Life is just going too fast with a little one, 8 months old already!

attachment.php
 

Attachments

  • 20190901_104938.jpg
    20190901_104938.jpg
    142.5 KB · Views: 523
  • 20190905_195152.jpg
    20190905_195152.jpg
    111.5 KB · Views: 525
  • 20190905_195139.jpg
    20190905_195139.jpg
    116.9 KB · Views: 519
  • 20190905_195022.jpg
    20190905_195022.jpg
    62.5 KB · Views: 521
  • 20190905_194832.jpg
    20190905_194832.jpg
    144.3 KB · Views: 523
  • 20190901_130330.jpg
    20190901_130330.jpg
    109.4 KB · Views: 526
  • 20190820_175838.jpg
    20190820_175838.jpg
    103.9 KB · Views: 538
To avoid these ads, REGISTER NOW!
Top Bottom