To avoid these ads, REGISTER NOW!

Third Times the Charm?

vavet

Well-known member
Joined
Mar 6, 2012
Messages
5,319
Location
Ashland, VA
Just found this thread. Great pics and great progress. I think my fave is in the first post. You bought a house with some land and found a treasure of a nice looking blonde woman out there in the woods?
Jackpot!
 
To avoid these ads, REGISTER NOW!
OP
Z

zjohnson1

Well-known member
Joined
Oct 21, 2014
Messages
86
Location
Newnan, GA
Progress has been very slow lately... I've spent a lot of time clearing out about an acre of the property that was completely overgrown to make space for a big chicken coop and trying to prep for some farm animals (probably sheep to start with). Also doing major reno on the house: took out the non load bearing wall making room to get the beams in the attic which will replace the load bearing wall

attachment.php


attachment.php


Now back to the shop. I have been able to get electrical finished up and pass my inspections. Scored some old 3/4" plywood from shipping skids and decided to use them as removable wall panels. This allows for easy access to add circuits, speaker wire, insulation, etc. I wanted something with a little visual complexity so I staggered the panels which are cut to about 2'x4'. Lots of measuring and trimming to make everything uniform with hole spacing and perfect 1/8" gaps in addition to mounting everything solo but I'm chipping away at it. I've mounted about 40 panels, only around 200 more to go...

attachment.php


attachment.php


Because I don't have enough projects this followed me home last week. Traded a 1980 honda CB650 that I had $400 in. I've got a soft spot for Z's and this is the same yr and color combo as the one I used to have (91 super white on black 2+2 5 speed). It's also the year I was born which is cool. I learned to wrench on these which is good because this one needs a ton of work despite only having 82k miles on the clock. My old z was very clean and this one couldn't be further from it. Reminds me of Brians supra from the fast and the furious when it first showed up all roached out. Planning to make this into a street legal racecar which changes the direction for my datsun build

attachment.php


Little one is getting more and more mobile so I'll have to bust tail and get the house project wrapped up. So many things happening all at once!

Notice all the stuff in the background piling up, it's a white trash paradise right now... Lots of dump runs have been made with still countless more in my future. Just gotta take things a day at a time and it'll all come together (or so I keep telling my self)

attachment.php
 

Attachments

  • 20190930_192312.jpg
    20190930_192312.jpg
    120.4 KB · Views: 690
  • 20191004_183143.jpg
    20191004_183143.jpg
    157.1 KB · Views: 682
  • 20191003_181414.jpg
    20191003_181414.jpg
    151 KB · Views: 685
  • 20191008_205751.jpg
    20191008_205751.jpg
    120.6 KB · Views: 689
  • 20190926_192944.jpg
    20190926_192944.jpg
    109.2 KB · Views: 687
  • 20191001_193810.jpg
    20191001_193810.jpg
    114.1 KB · Views: 690

ravz

Member
Joined
Apr 6, 2015
Messages
19
Looking great! love the 300.. always wanted one of those.

Stupid question, what are those white blocks with the brass inserts>
 
OP
Z

zjohnson1

Well-known member
Joined
Oct 21, 2014
Messages
86
Location
Newnan, GA
Looking great! love the 300.. always wanted one of those.

Stupid question, what are those white blocks with the brass inserts>

They're 3D printed locator jigs with cheap hardware store brass inserts. I made them for drilling the holes in the plywood since they're so close to the edges. It keeps things uniform and perpendicular in addition to preventing tearout/chipping on the front while drilling. I also made a poor mans "track saw" of sorts out of some scraps to make sure I've got perfect edges on the panels

attachment.php
 

Attachments

  • 20191008_200900.jpg
    20191008_200900.jpg
    157.4 KB · Views: 665
OP
Z

zjohnson1

Well-known member
Joined
Oct 21, 2014
Messages
86
Location
Newnan, GA
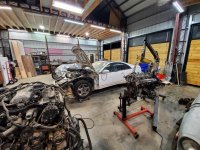
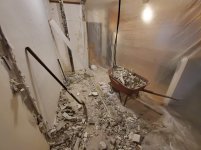
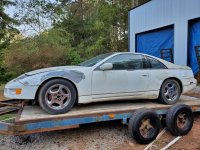
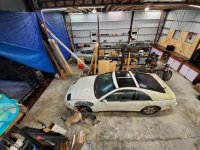
It's been a long few weeks so I was lucky to take off Saturday for the Petit Le Mans at road Atlanta with my Dad, a little tradition we've done the past 4-5yrs. It was a much needed break from all the work and awesome to see all the cars both on and off the track. Sunday was rest and recoup since I'm an old man and my back has been acting up (probably because we had rain for the first time in months). I convinced the wife to hang out with me in "the Shed" and we were able to pick up enough that I could pull the Z inside

attachment.php


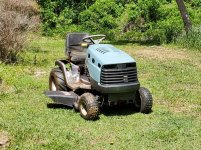
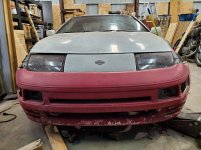
She's a little dirty

attachment.php


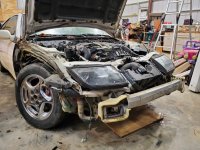
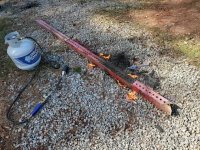
The front end was cobbled together and nothing lines up but all the structure looks undamaged, kid I got it from told me he spun out into a ditch more than once so I imagine that explains the trashed front end and shoddy "repairs"

attachment.php


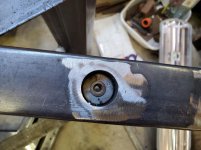
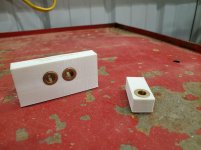
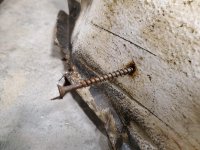
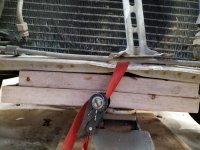
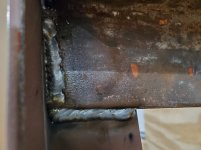
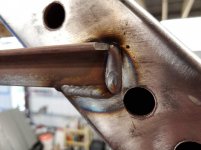
Just one of the many high quality "repairs". Might explain why the fenders sat funny. Pinch welds with the fender mount points were crushed flat, presumably from hopping a curb to go into ditch? Rather than hammer back out and reuse proper existing points (easy) wood screws were the decision

attachment.php


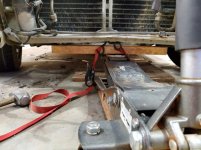
I couldn't help myself and about 30 minutes later the front end was apart. All the pieces went straight in the trash

attachment.php


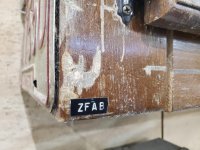
Then I got to looking under hood so I can determine whether or not the motor can be saved. It seems the same backwoods engineer got a hold of the wiring harness. Lots of **** crimp connectors, shorted wires, and electrical tape which covered up this gem. I'll spend a few hours sorting this out and try a compression check later in the week

attachment.php


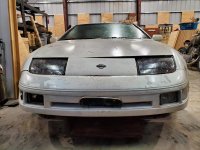
A quick windex bath makes the car look much improved

attachment.php


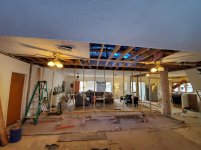
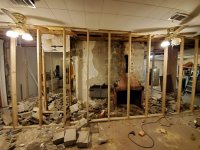
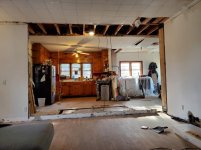
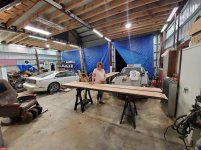
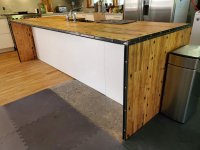
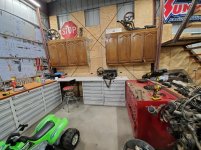
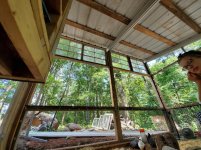
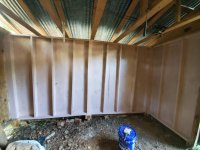
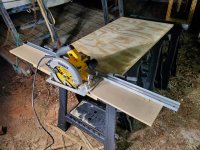
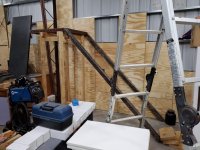
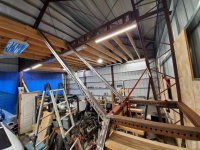
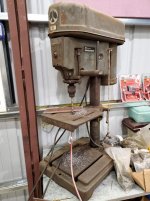
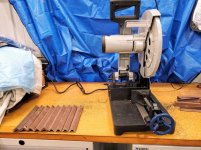
The garage has a long way to go before it's truly ready for car builds but it feels great to have a well lit space to work and it was nice to do something that didn't HAVE to get done.

Working in the garage and not on it is a nice change of pace and makes me feel like things finally coming together
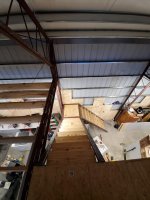
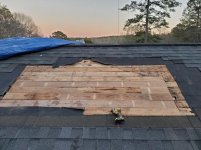
 

Attachments

  • 20191013_215155.jpg
    20191013_215155.jpg
    150.7 KB · Views: 620
  • 20191013_213100.jpg
    20191013_213100.jpg
    102.5 KB · Views: 620
  • 20191013_201118.jpg
    20191013_201118.jpg
    159.5 KB · Views: 618
  • 20191013_194332.jpg
    20191013_194332.jpg
    154.9 KB · Views: 621
  • 20191013_190919.jpg
    20191013_190919.jpg
    150.3 KB · Views: 622
  • 20191013_190146.jpg
    20191013_190146.jpg
    151.7 KB · Views: 620
  • 20191013_185610.jpg
    20191013_185610.jpg
    157.3 KB · Views: 623
OP
Z

zjohnson1

Well-known member
Joined
Oct 21, 2014
Messages
86
Location
Newnan, GA
Progress has been slow but I'm inching along. Using recycled materials I spend about 70% of the time cleaning things up and 30% actually doing the work but I'm on a tight budget so what's a guy to do? Stripping the paint racks took almost 2 days, the paint was miserable to get off. Tried wire wheel, paint stripper, and eventually fire. That did the trick. Cleaned up with an abrasive pad and all is good

Laying the framework for my platform with laser precision

attachment.php


Weld it hot and all is good
attachment.php


Fire
attachment.php


All cleaned up and trimmed. Just need to melt it all together and bolt to the floor. Top pieces will be a little harder but I'll figure something out
attachment.php


I'm not really supposed to be working on the car until my house projects are done so I only touch it after 9PM since that's my unwind and relax time. I got the front end torn down and found quite a bit messed up. I guess when the PO says the car "gently ran off the road" that means he spun out and popped a curb into a ditch as I had suspected... after cleaning out tons of dirt and debris I got to the mangled up radiator core support which I imagine is the root of my issues with hood and fender alighment. After wearing myself out with a hammer and things going very slowly I did a little redneck engineering and came up with a solution to straighten it. This is meant to be a racecar so it's all about having fun and coming up with cheap ways to fix it. As long as things are structurally sound I'm gonna send it

Hooks into a hole to try and pop out the dent a little
attachment.php


The 'straight edge' to pull everything a little closer to correct. Not seen is a long 1/4" plate behind the AC line to help distribute the straps load
attachment.php


Better but still lots of tweaking to do. I need to stop dragging my feet and get this car running. So many projects but so little time
attachment.php
 

Attachments

  • 20191023_205954.jpg
    20191023_205954.jpg
    142.2 KB · Views: 586
  • 20191023_203718.jpg
    20191023_203718.jpg
    145.1 KB · Views: 591
  • 20191023_202237.jpg
    20191023_202237.jpg
    142 KB · Views: 591
  • 20191024_211818 (1).jpg
    20191024_211818 (1).jpg
    141.9 KB · Views: 589
  • 20191024_122544.jpg
    20191024_122544.jpg
    158.7 KB · Views: 589
  • 20191020_182633.jpg
    20191020_182633.jpg
    107.8 KB · Views: 588
  • 20191020_181939.jpg
    20191020_181939.jpg
    135.3 KB · Views: 589
Last edited:

Riley

Well-known member
Joined
Feb 18, 2007
Messages
398
Before you get into "sheep" for a for profit venture, I've had accountants tell me hogs are the per hour investment win. FYI...
 
OP
Z

zjohnson1

Well-known member
Joined
Oct 21, 2014
Messages
86
Location
Newnan, GA
Before you get into "sheep" for a for profit venture, I've had accountants tell me hogs are the per hour investment win. FYI...

Really just for fun, not profit, and fresh milk is an added plus. Sheep should be a little easier to handle (at least initially) and much cheaper than miniature cows like the wife wants. Plus they don't jump on vehicles like goats when they get out and they'll eat briars/poison ivy.
 
OP
Z

zjohnson1

Well-known member
Joined
Oct 21, 2014
Messages
86
Location
Newnan, GA
Scored a set of 8 Lista cabinets with countertops yesterday. It was a transfer the money and leave work now type deal but everything worked out and I left with double what I planned on buying. Still trying to decide if I want to keep all 8 or sell 2 to recoup some $. These are seriously heavy and a major improvement from the beat old 1960s matco box I'm currently using. Drawers are useful but I'd prefer to have a few doors

attachment.php


Semi set up on lunch break today. Still need to extend a top and straighten out the last cabinet that I'm just noticing is crooked in this photo.


attachment.php


Also managed to get the uprights placed and burned in last night. I was really dreading it but everything worked out great and they're within .1° of each other. Should have the stairs completed this week, a few tool malfunctions held me up but I have a nice new EVOsaw on the way to finish up the tread mounts

attachment.php
 

Attachments

  • 20191028_181759.jpg
    20191028_181759.jpg
    148.9 KB · Views: 540
  • 20191029_124433.jpg
    20191029_124433.jpg
    139.7 KB · Views: 540
  • 20191028_140941.jpg
    20191028_140941.jpg
    97.7 KB · Views: 538
OP
Z

zjohnson1

Well-known member
Joined
Oct 21, 2014
Messages
86
Location
Newnan, GA
Out with old busted and in with the new hotness. The Ryobi was the cheapest chopsaw I could buy at a box store and I just threw a Diablo metal blade in it to see how I liked it vs a bandsaw. Blade speed was way too fast but it worked great for what it was. I made hundreds of cuts through some pretty beefy material by just going slow and keeping the blade cool. I love the small form factor but I'll probably figure out a permanent mount setup. Pretty excited to try out the EVO saw tonight, I hope it lives up to the hype

attachment.php
 

Attachments

  • 20191030_211145.jpg
    20191030_211145.jpg
    122.2 KB · Views: 515
OP
Z

zjohnson1

Well-known member
Joined
Oct 21, 2014
Messages
86
Location
Newnan, GA
This saw is amazing! Way less chips escape, the shield protects your face, and the finish is perfect. All these parts took about 20 minutes and that included marking cut lines

attachment.php


The dirty old rockwell came in handy too. I'll get this machine cleaned up and refurbed eventually but this is the first time I've even powered it up and she performed flawlessly hole after hole

attachment.php


My welds are improving, I was a little out of practice but I think I'm getting back in the groove

attachment.php


attachment.php


Since the stairs are finished up I decided to pull the trigger on some Advantech subflooring. I'd rather do it once and do it right when working that high up off the ground. This should be enough for the walkway and one bay, I'll need a little more to finish up. Painted the underside sky blue to help lighten things up and stop birds from nesting in the floor joists

attachment.php


attachment.php
 

Attachments

  • 20191103_173626.jpg
    20191103_173626.jpg
    148.2 KB · Views: 425
  • 20191103_123006.jpg
    20191103_123006.jpg
    129.9 KB · Views: 426
  • 20191102_145208.jpg
    20191102_145208.jpg
    156.1 KB · Views: 428
  • 20191102_121421.jpg
    20191102_121421.jpg
    123.5 KB · Views: 419
  • 20191031_192757.jpg
    20191031_192757.jpg
    96.5 KB · Views: 428
  • 20191031_124256.jpg
    20191031_124256.jpg
    147.7 KB · Views: 431
OP
Z

zjohnson1

Well-known member
Joined
Oct 21, 2014
Messages
86
Location
Newnan, GA
It was a pain lugging these around and trimming by myself but I got them up there. Very happy with my choice to go with advantech over standard OSB or plywood. The floor feels very solid up there and it should help tie the whole building together. Painting prior to installation was also a good call. Hopefully I can finish up a majority of the loft area tonight

attachment.php


attachment.php
 

Attachments

  • 20191104_184542.jpg
    20191104_184542.jpg
    142.2 KB · Views: 395
  • 20191104_184637.jpg
    20191104_184637.jpg
    139.6 KB · Views: 394

Growlertdi

Well-known member
Joined
May 17, 2016
Messages
410
Location
Millersport, Ohio
What an awesome job you are doing on that loft. I would suggest even a temporary handrail for that staircase should be your next install. perhaps some guardrails :) its pretty high up there.

What are your rise & run numbers for that staircase? that open design is going to look awesome once you get it all completed.
 

Bronson

Well-known member
Joined
Aug 2, 2011
Messages
12,657
Location
Texas panhandle
I just found this thread and read the whole thing ,(when I should be working in the shop)
Motorcycles and a 240Z, what's not to like?

No insulation on the shop walls?
Count me jealous, beautiful family!
 
Last edited:
OP
Z

zjohnson1

Well-known member
Joined
Oct 21, 2014
Messages
86
Location
Newnan, GA
What an awesome job you are doing on that loft. I would suggest even a temporary handrail for that staircase should be your next install. perhaps some guardrails :) its pretty high up there.

What are your rise & run numbers for that staircase? that open design is going to look awesome once you get it all completed.

Yep that's pretty soon up on the list, I'm getting better with all the exposure lately but I'm terrified of heights. Plus I want everything to be safe for my little one. Not to mention my wife won't go past the 3rd step until I have rails!

The stairs are set up at a 45° so rise/run are even at 7-3/4. That's max allowable rise for IRC but well within OSHA. Run is a little shallow (1-1/4 shy of code) but it's fairly comfortable even when going quickly and it doesn't feel unsafe. The proportions worked out nicely and I wanted to minimize impact on floor space. The two sections are identical with the platform @ 50% height of top level (I'm 6' tall and I just clear bottom without ducking). 36" outside to outside of the metal stringers and the treads are standard 2x10's

I just found this thread and read the whole thing ,(when I should be working in the shop)
Motorcycles and a 240Z, what's not to like?

No insulation on the shop walls?
Count me jealous, beautiful family!

Insulation will come but I don't have the budget currently. In addition to the shop being built my house is in the middle of a full renovation (all work done by me). And the HVAC went out unexpectedly. And we've got another baby on the way. And I like building go fast things. Lots going on so I just chip away at everything as time/budget allow. Since we'll have two children in the house that took priority and our 5yr plan expedited to finishing up within the first 1.5. When things slow down I'll start looking for some recycled polyisio foam to do the walls; I planned ahead with the removable wall panels so doing insulation after the fact should be easy enough. Plus the temps in this area of GA are pretty mild
 
Last edited:
OP
Z

zjohnson1

Well-known member
Joined
Oct 21, 2014
Messages
86
Location
Newnan, GA
A better angle showing tread detail from the side. I have a tendency to hit my head on things so knocking down all sharp edges was pretty crucial

attachment.php
 

Attachments

  • 20191026_181129.jpg
    20191026_181129.jpg
    128.2 KB · Views: 395
OP
Z

zjohnson1

Well-known member
Joined
Oct 21, 2014
Messages
86
Location
Newnan, GA
Progress on the shop has been slow, not too much to show other than finishing a bit more of the subfloor upstairs and moving some stuff up there. It's probably about 75% done but usable and it'll stay that way until next year since the house is the priority right now. I've been scooping up a few more cabinets as deals pop up and I should be getting a roll around toolbox this weekend but no significant time to organize, clean up, or do any real finish work. It's a tease and it feels like the craziness will never end but I just have to chip away at it one day at a time. I miss being able to come home and just wrench or turn on the TV but it'll all be worth it in the end. Something I've had a hard time with in these major projects is being such a perfectionist. I'm learning that sometimes things are "good enough" and I need to keep moving forward in order to make progress. In my mind I rationalize it by knowing that I'll probably go back and make everything perfect when time is a luxury I have again but for right now it feels good to be moving quickly and knocking out the milestones

attachment.php


attachment.php


I was able to get time to fill the cabinet but I'll have to take it all back out to wipe down the dust and probably paint the cabinet itself. I got another for auto detailing supplies but I failed to take a picture of that and I haven't even had the time to use the supplies in over 6 months... But the day will come and I'll be ready!

attachment.php


Big thing this week was finally tearing through one of the load bearing walls in the house

attachment.php


attachment.php


attachment.php


Between that wall and what I've removed of the chimney so far I'm at close to 11k lbs of material removed via dump trips, all the wood has been burned or saved if it's usable.

And back on topic to "The Shed" as my wife calls it since this is Garage Journal

One of my first fab projects in the almost complete garage: I whipped these base and top mounts up for the load bearing column which should be going in tomorrow

attachment.php
 

Attachments

  • 20191129_125616.jpg
    20191129_125616.jpg
    127.8 KB · Views: 341
  • 20191129_125528.jpg
    20191129_125528.jpg
    124.4 KB · Views: 343
  • 20191126_124021.jpg
    20191126_124021.jpg
    99.2 KB · Views: 339
  • 20191129_145354.jpg
    20191129_145354.jpg
    135.2 KB · Views: 341
  • 20191201_144056.jpg
    20191201_144056.jpg
    84.4 KB · Views: 342
  • 20191203_203909.jpg
    20191203_203909.jpg
    130.4 KB · Views: 344
  • 20191205_193229.jpg
    20191205_193229.jpg
    132.5 KB · Views: 345
Last edited:
To avoid these ads, REGISTER NOW!
OP
Z

zjohnson1

Well-known member
Joined
Oct 21, 2014
Messages
86
Location
Newnan, GA
I've been in home reno mode last few months so unfortunately there's no garage updates, gotta push through so I can get back to the shop. I've held off with a lot of pics but here is a bit of progress for those that may be interested.

Also special shout out to Motoman1100 who came to check out the garage and stayed for the better part of a day helping patch up the giant hole in my roof left by the removal of both fireplaces. No way I would have been able to sister those joists in solo and he went so far above and beyond for a random stranger on the internet

Did some concrete work to make a level pad for the column and set anchors
attachment.php


Column in place
attachment.php


No more wall
attachment.php


Other wall coming out
attachment.php


In progress photo of removing the brace walls. Much more open but still lots to do. Note momma and walking baby in background watching
attachment.php


Roof patch in progress
attachment.php


All shingled up just in time for torrential rain, note the wet spots on roof
attachment.php


There were a lot of hiccups along the way which started projects unrelated to the end goal. They certainly slowed progress but I decided they were necessary for making the house right and bringing up to code (to be expected from a 70 yr old house) but while everything is torn apart there's no easier time to fix it
 

Attachments

  • 20200101_143930.jpg
    20200101_143930.jpg
    129.7 KB · Views: 627
  • 20191223_201634.jpg
    20191223_201634.jpg
    141.9 KB · Views: 627
  • 20191208_153619.jpg
    20191208_153619.jpg
    116.9 KB · Views: 623
  • 20191207_204201.jpg
    20191207_204201.jpg
    104.7 KB · Views: 613
  • 20191207_174456.jpg
    20191207_174456.jpg
    129.1 KB · Views: 620
  • 20200105_174424 (1).jpg
    20200105_174424 (1).jpg
    146.4 KB · Views: 621
  • 20200107_124452 (1).jpg
    20200107_124452 (1).jpg
    148.1 KB · Views: 617

Motoman1100

Well-known member
Joined
Oct 2, 2014
Messages
443
Location
GA
Thanks for the shout, it was great meeting you and helping out a bit. I told my wife when I got home, "that guy is fearless with what he'll tackle in his home remodel!" Ha.

Looking forward to seeing the final product and if you need a hand with something big just let me know.

Cheers!
 

J-man67

Well-known member
Joined
Aug 10, 2012
Messages
218
Location
Delaware
Wow! I remember replying to this thread almost a year ago mentioning the pics were not displaying. Not sure why I haven't made it back to see everything since then, but it was sure a nice break from work to get caught up! Amazing progress and great job tackling everything. I have a 1954 built cement fortress as well. It's funny noticing much of the same construction. They surely did it a little different back then. I personally think your progress is amazing. That's how you have to do it to get it done so you can ENJOY it. Thats the goal. Anyway, thanks for sharing and looking forward to seeing more!

P. S. I own and operate a large residential exterior company and I can say, that roof repair is solid!

Sent from my SM-N975U using Tapatalk
 
Last edited:

Whitey1

Well-known member
Joined
Oct 26, 2013
Messages
132
Location
Ohio
Wonderful build thread and thanks for sharing. I personally love the mix of home and garage build along with the toys you build in the garage.. You do great work on them all and the transformations are amazing.
 
OP
Z

zjohnson1

Well-known member
Joined
Oct 21, 2014
Messages
86
Location
Newnan, GA
Garage progress has been nonexistent with the baby and house projects. I'm only one guy with a 9-5 and I can only work so fast. My wife is due with baby #2 in a few weeks but she was working weekends until about 2 weeks ago so I've got the baby and work is bottle-necked but life is good :) Because of the little ones house is priority. I won't bore everyone with a million progress photos but I'm proud of it even though it's still very much a "work in progress"

Outlets by stove were existing but will be getting taken out and covered with backsplash

attachment.php


attachment.php


One of the last major things that needs to get done before the baby gets here is the island countertop. I picked up some 40+yr old maple semi decking to make a waterfall butcher block 10' long. That's a project in itself so I was able to get a weekend to pick up and organize the shop a bit (in addition to having all my tools kicked out of the house at once and needing a place to go that didn't clutter everything up - pregnant women nesting is real). I ran more paneling up the walls to accommodate some upper cabinets my sister was throwing out. Scale is deceiving, they've over 4' tall and 5' wide each . And yes they're as heavy as they look so I'm sure I looked ridiculous hanging them up. French cleats made from some old tongue and groove siding made it a solo job. These photos are pre organizing the cabinets so please excuse the mess

attachment.php


attachment.php


Then it was back to work cleaning up and joining all the wood which I hope to have finished up this weekend.

attachment.php


Yes that is a massaging chair set up for break time. I'm getting old and I like it:pimpflash
attachment.php


attachment.php
 

Attachments

  • 20200323_180433.jpg
    20200323_180433.jpg
    156.4 KB · Views: 436
  • 20200318_211945.jpg
    20200318_211945.jpg
    154.8 KB · Views: 442
  • 20200227_174441.jpg
    20200227_174441.jpg
    146.7 KB · Views: 432
  • 20200315_133608.jpg
    20200315_133608.jpg
    154.5 KB · Views: 435
  • 20200313_195729.jpg
    20200313_195729.jpg
    153.6 KB · Views: 435
  • 20200319_193718.jpg
    20200319_193718.jpg
    147.2 KB · Views: 434
  • 20200316_195240.jpg
    20200316_195240.jpg
    112.7 KB · Views: 433
OP
Z

zjohnson1

Well-known member
Joined
Oct 21, 2014
Messages
86
Location
Newnan, GA
Been pretty crazy so not too many shop updates, mostly house and yard stuff but I finally got back into it. Main push was to finish the house before baby #2 got here which I did

Finished the island counter which was a shop project

attachment.php


Spring is upon us so I cobbled together 3 broken mowers to make 1 good one with a few redneck engineering upgrades

attachment.php


And the big project I've been wanting to get to for a while now

attachment.php


attachment.php


attachment.php


attachment.php


The shop has doors! They're not insulated yet and the windows aren't in but they're sooo much better than the tarps that were there. They'll need a little tweaking to line up perfectly, I tried shimming while tacking together but the floor was just so far out of level that they came out a little wonky - good enough for now and it's livable but not perfect. Dead square and gaps are tight though. It'll be awesome to not have rain as an issue and I'll be able to keep the shop more of a "clean space". Plus NO MORE BIRDS
 

Attachments

  • 20200426_162526.jpg
    20200426_162526.jpg
    155 KB · Views: 382
  • 20200426_195302.jpg
    20200426_195302.jpg
    153.3 KB · Views: 385
  • 20200421_205109.jpg
    20200421_205109.jpg
    122.8 KB · Views: 376
  • 20200413_150017.jpg
    20200413_150017.jpg
    179 KB · Views: 380
  • 20200422_163911.jpg
    20200422_163911.jpg
    151 KB · Views: 377
  • 20200413_094433.jpg
    20200413_094433.jpg
    146.9 KB · Views: 382
Last edited:
OP
Z

zjohnson1

Well-known member
Joined
Oct 21, 2014
Messages
86
Location
Newnan, GA
Got a little work done this weekend. Things are definitely slower with the second little one here

Made a high tech weld fixture with scraps and hot glue

attachment.php


Turned out pretty good. Everything came out square and almost dead on (within 1/64) the same dimensionally

attachment.php


My cheap "glass" solution was acrylic light diffuser lenses. $10/sheet but they weren't quite wide enough so theres a 6" splice in it. Tried the MEK trick to fuse the panels but it proved too finicky so I taped them for install and I'll throw some clear caulk on eventually, or perhaps some aluminum seam strips

attachment.php


And of course my frames are all the same size but each set of doors is slightly different. I thought 1/8" undersized for the smallest opening would be sufficient to fit everything but my amazing weld fixture shifted or I just held tolerance too tight. Either way 2 panels need to be disassembled to section out a little more which is why 2 doors are missing glass. Always something to hold up a project

attachment.php


Due to the frustration I had to do something productive so I finally painted the man door

attachment.php


And during baby naps Sunday I got some more of the new chicken coop foundation knocked out. This is about 2 Sundays worth of work - I hate digging. It'll be made out of all recycled materials from the property including the cinderblocks which I found in the woods

attachment.php
 

Attachments

  • 20200503_193117.jpg
    20200503_193117.jpg
    149.6 KB · Views: 310
  • 20200502_182422.jpg
    20200502_182422.jpg
    111.7 KB · Views: 313
  • 20200502_182132.jpg
    20200502_182132.jpg
    147.3 KB · Views: 312
  • 20200502_144418.jpg
    20200502_144418.jpg
    144.8 KB · Views: 310
  • 20200501_201541.jpg
    20200501_201541.jpg
    146.9 KB · Views: 309
  • 20200501_123931.jpg
    20200501_123931.jpg
    151.7 KB · Views: 307
OP
Z

zjohnson1

Well-known member
Joined
Oct 21, 2014
Messages
86
Location
Newnan, GA
Life gets crazy and I've been busy working on the house, cars, shop, and spending time with the new little one which has kept me from posting but I figure it's probably about time. I won't bore y'all with house progress since that's not what we're all about but "The Shed" as my family calls it has been getting put to work. It's nowhere near the point that I'm satisfied but progress is progress. I'll share some random photos of a few highlights, obviously these aren't even the tip of the iceberg

Scored 2 trailer loads of recycled "blue board" insulation. Basically enough to do my entire shop with 2 layers and still have about 30% left over

attachment.php


For anyone else with trussed columns like mine, I figured out that jacks hook in here just about perfectly

attachment.php


I'm a huge fan of the "toolbox widget" organizers but I couldn't swing $5-600 just to make a drawer look pretty so I came up with these. 3D printed with magnets pressed in the bottom. This was proof of concept - there's close to 100 wrenches in there now with overflow in another drawer. When I get more time one of these days I'll figure out solutions for my screwdriver and wrench drawers but until then I make due. It is a working garage after all

attachment.php


I've also been getting a little more practice with my Evosaw. Made some table bases for my 12' dining table and another set for my parents, design tweaked slightly. I really wanted them to have recessed adjustable non marring feet to make up for my uneven 70yr old floor. This caused way more work but turned out pretty clean

attachment.php


attachment.php


attachment.php


To keep the wife happy I used a few leftover materials and made a potting bench. All the ones I saw looked fragile so she just got an outdoor workbench! Far end out of frame will get a beefy stainless drawer and a sink plumbed up with the hose

attachment.php
 

Attachments

  • 20200704_122442.jpg
    20200704_122442.jpg
    155.5 KB · Views: 281
  • 20200617_200648.jpg
    20200617_200648.jpg
    151.1 KB · Views: 283
  • 20200525_133613.jpg
    20200525_133613.jpg
    155.4 KB · Views: 279
  • 20200614_202715.jpg
    20200614_202715.jpg
    152.2 KB · Views: 285
  • 20200522_194344.jpg
    20200522_194344.jpg
    112.8 KB · Views: 283
  • 20200509_153740.jpg
    20200509_153740.jpg
    152.7 KB · Views: 281
  • 20200525_133610.jpg
    20200525_133610.jpg
    149 KB · Views: 283
Last edited:
OP
Z

zjohnson1

Well-known member
Joined
Oct 21, 2014
Messages
86
Location
Newnan, GA
To follow up from a few posts back I got the chicken coop about 80% done. Still needs some sheet metal on the roof trimmed and the top sealed up all the way but they live in here now and are safe from the coyotes. Also chicken tax because I'm proud of my pretty rooster

attachment.php


attachment.php


attachment.php


After using the shop as intended I decided the flow was wrong and the layout needed some tweaking. I set up a horseshoe in the front corner that will be good for electronic and motor work. The far side will stay the fab shop where grinding and dusty wood work gets done. I've also acquired several more motors and transmissions for the White Z car

attachment.php


attachment.php


And since things on the house are wrapping up I can FINALLY get back to wrenching on cars late night so naturally I acquired another one... This is going to be a sacrificial lamb and is only getting used for clean body panels and miscellaneous little pieces that were broken on mine. A whole car for $300 made a lot more sense than nickel and diming all the little sensors, panels, etc. The body is straight but this may be the dirtiest car I've ever seen in my whole life. The guy let his buddies scavenge it for parts so everything was taken apart and busted up. They took out the power steering reservoir/lines and put them straight on the carpet still full of fluid. This thing makes pull-a-part junkyard cars look nice but it will serve its purpose

attachment.php


attachment.php
 

Attachments

  • 20200823_200335.jpg
    20200823_200335.jpg
    151.8 KB · Views: 291
  • 20200823_200345.jpg
    20200823_200345.jpg
    161.4 KB · Views: 295
  • 20200820_212034.jpg
    20200820_212034.jpg
    159.5 KB · Views: 295
  • 20200820_212025.jpg
    20200820_212025.jpg
    158.5 KB · Views: 293
  • 20200620_153156.jpg
    20200620_153156.jpg
    153.6 KB · Views: 292
  • 20200620_163153.jpg
    20200620_163153.jpg
    155 KB · Views: 293
  • 20200823_164114.jpg
    20200823_164114.jpg
    143.3 KB · Views: 296

Bolson32

Well-known member
Joined
Dec 6, 2016
Messages
541
Location
Lake Elmo, MN
Can't believe this is the first I'm seeing this thread. I love everything about it. Those doors look amazing man, can I ask how much wiggle room you left yourself inside the rough opening?

I'm going to build wood carriage doors for my workshop and I'm curious how much space people are leaving. I've seen, half inch on each side plus half in the middle as the most common I think.
 
OP
Z

zjohnson1

Well-known member
Joined
Oct 21, 2014
Messages
86
Location
Newnan, GA
Can't believe this is the first I'm seeing this thread. I love everything about it. Those doors look amazing man, can I ask how much wiggle room you left yourself inside the rough opening?

I'm going to build wood carriage doors for my workshop and I'm curious how much space people are leaving. I've seen, half inch on each side plus half in the middle as the most common I think.

Man I can't tell you how long I went back and forth on that.haha It's the little things that stress me out the most since they have such an impact on the finished product. I think I ended up going with 3/8 gaps all around, so since I've got 2 doors in each opening 1-1/8" overall undersized. 1/8" was obviously ideal but I'll eventually put in gaskets so I wanted some extra. I wanted to do 1/4" but didn't trust myself to be that precise welding together 10' long sticks since my floor is not even close to flat
 
OP
Z

zjohnson1

Well-known member
Joined
Oct 21, 2014
Messages
86
Location
Newnan, GA
Wanted to give a special thanks to Motoman1100 for making the trip out to bring me a few boxes of goodies. Thanks Alan! One of these days I'll have a nice enough setup that we can wrench a little

In the lot was a Dymo Labeler which I had to test out. First time printing out "Zfab", I don't have a business or anything but I made a logo so I can start signing things I build/work on/etc with my brand. Haven't officially printed my design yet but wanted to try things on for size

attachment.php


I try not to get into every little nitty gritty detail but thought this may be useful for others with metal R siding. I've found a few threads talking about mounting light fixtures but have yet to find a good solution that wasn't a ton of work. I was looking a different kinds of junction boxes and came across the "Non-metallic flanged fixture wall box" It's got protrusions on both sides and a back plate that unscrews so either side can become the front. I chose a girt and drilled a 4" hole just above it. The short protrusion of the box rests on it and the flange sandwiches between it and the siding. I screwed from the outside into the girt and the top/sides got a healthy serving of liquid nails. The outside got a quick bead of caulk to seal up the edges and then I was able to use basic fixture mounting plates for a quick easy install that clears the ribs

I know that was a wall of text and my pics don't 100% match my description so hopefully it all makes sense

attachment.php


attachment.php


attachment.php


attachment.php


attachment.php
 

Attachments

  • 20200831_213020.jpg
    20200831_213020.jpg
    38.5 KB · Views: 188
  • 20200829_223326.jpg
    20200829_223326.jpg
    75.4 KB · Views: 192
  • 20200829_223252.jpg
    20200829_223252.jpg
    150.8 KB · Views: 190
  • 20200829_223237.jpg
    20200829_223237.jpg
    117 KB · Views: 188
  • 20200830_183228.jpg
    20200830_183228.jpg
    150.3 KB · Views: 192
  • flange box.jpg
    flange box.jpg
    44 KB · Views: 193

Bolson32

Well-known member
Joined
Dec 6, 2016
Messages
541
Location
Lake Elmo, MN
Man I can't tell you how long I went back and forth on that.haha It's the little things that stress me out the most since they have such an impact on the finished product. I think I ended up going with 3/8 gaps all around, so since I've got 2 doors in each opening 1-1/8" overall undersized. 1/8" was obviously ideal but I'll eventually put in gaskets so I wanted some extra. I wanted to do 1/4" but didn't trust myself to be that precise welding together 10' long sticks since my floor is not even close to flat

Okay great, I think I'm actually going to do a 1/2", I can trim out the inside with 1x4s to put the seals on and should have plenty of wiggle room to open and close. I know my door frame isn't perfectly square either so I'm thinking this should leave plenty of room for error while still being able to seal it up fine.

I'm glad other people belabor little things just like me!
 

Jayman17

Well-known member
Joined
Feb 6, 2017
Messages
3,793
Location
Seattle, Wa
Wanted to give a special thanks to Motoman1100 for making the trip out to bring me a few boxes of goodies. Thanks Alan! One of these days I'll have a nice enough setup that we can wrench a little

In the lot was a Dymo Labeler which I had to test out. First time printing out "Zfab", I don't have a business or anything but I made a logo so I can start signing things I build/work on/etc with my brand. Haven't officially printed my design yet but wanted to try things on for size

attachment.php


I try not to get into every little nitty gritty detail but thought this may be useful for others with metal R siding. I've found a few threads talking about mounting light fixtures but have yet to find a good solution that wasn't a ton of work. I was looking a different kinds of junction boxes and came across the "Non-metallic flanged fixture wall box" It's got protrusions on both sides and a back plate that unscrews so either side can become the front. I chose a girt and drilled a 4" hole just above it. The short protrusion of the box rests on it and the flange sandwiches between it and the siding. I screwed from the outside into the girt and the top/sides got a healthy serving of liquid nails. The outside got a quick bead of caulk to seal up the edges and then I was able to use basic fixture mounting plates for a quick easy install that clears the ribs

I know that was a wall of text and my pics don't 100% match my description so hopefully it all makes sense

attachment.php


attachment.php


attachment.php


attachment.php


attachment.php

Do you know if that box comes in rectangular shape as well ?
Where did you get it? Thanks,

Jay
 
OP
Z

zjohnson1

Well-known member
Joined
Oct 21, 2014
Messages
86
Location
Newnan, GA
Do you know if that box comes in rectangular shape as well ?
Where did you get it? Thanks,

Jay

I found this: http://www.aifittings.com/catalog/siding-mounting-blocks/siding-box-kits-for-fixtures-and-gfcis/

It's not quite the same but I would imagine it could be made to work. I ended up buying from eBay since shipping was the fastest although a lot of major online vendors have them. Even the box stores could special order since I was able to find them on their websites.
 
OP
Z

zjohnson1

Well-known member
Joined
Oct 21, 2014
Messages
86
Location
Newnan, GA
Snapped a pic last night of the lights all finished up. Makes "The Shed" look almost complete. Crusher run is next on the list so I won't have to keep boards over top of the mud pits

attachment.php


Also spent a few hours cleaning out the little barn/garden shed thing that the PO's son built when he was in high school (late 70's/early 80's). He's my neighbor now so I decided I wanted to work with what's already there and just improve, studs are crooked and not even close to evenly spaced but it's just for lawn equipment so whatever. So much **** came out and I got rid of the nasty old shelving that was in there. Decided to combine all the spare gallons of paint we've amassed over the years from previous houses that will never get used now and ended up with 5 gallons of a nice baby blue and 2.5 of a weird pink. Wife wanted the blue for some projects so I get the pink. Figured the inside of the garden shed could use some brightening up. Definite improvement

attachment.php
 

Attachments

  • 20200902_201623.jpg
    20200902_201623.jpg
    150.6 KB · Views: 115
  • 20200902_180324.jpg
    20200902_180324.jpg
    147.1 KB · Views: 115
To avoid these ads, REGISTER NOW!
Top Bottom