alpinewhite
Well-known member
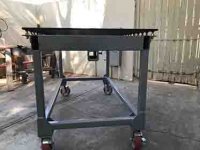
OP, could you post new pics of what it looks like today? Plus, any regrets (even minor) on the design?

Would you be willing to list the precise specs for all the steel you used? I'm a noob to this and am confused on the right ODs, thickness, and kind of steel to order. Also, lengths.
I'd give my left nut for a pre-filled shopping cart on something like http://www.onlinemetals.com/
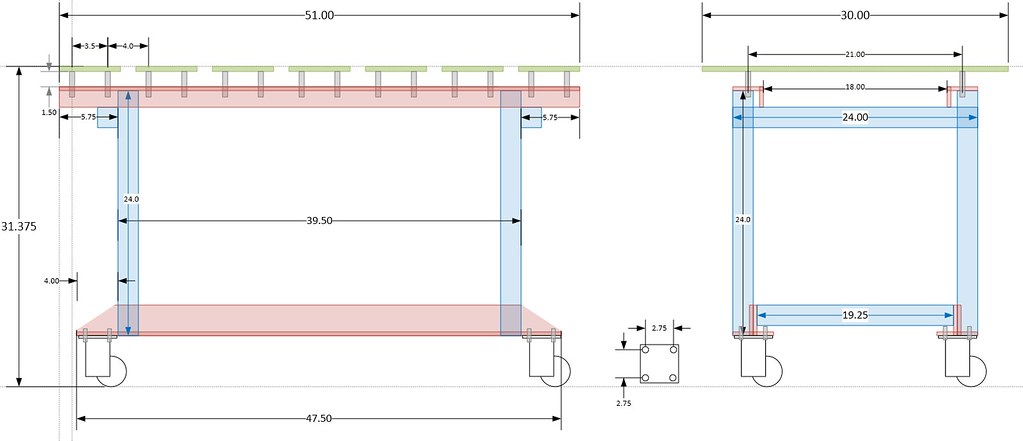
You happy with the choice of going with 1.5" between your 6" top plates?
OP, could you post new pics of what it looks like today? Plus, any regrets (even minor) on the design?
Couple more quick questions if you don't mind. I've got my steel and am doing my drawing...
How far apart did you place the bolts on the 6x1" planks?
How far elevated are the bolts (distance from plank down to beam)?
What size bolts are those? Wish you had gone beefier?
Thanks again.
Funny story, My wife and I had a yard sale this summer. I ended up chatting with a fellow about fabrication and stuff. He told me he had seen an awesome welding table on the internet that some guy down in the States somewhere had built. He thought it was the greatest thing ever so he was going to build one just like it. He started to describe it to me in detail. When I realized he was describing my table but was a little off with the geography, I smiled and invited him into the garage. He was absolutely blown away with the coincidence. We had a good long laugh.
Brink, Thank You for the great compliment.
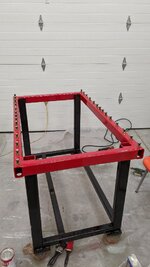
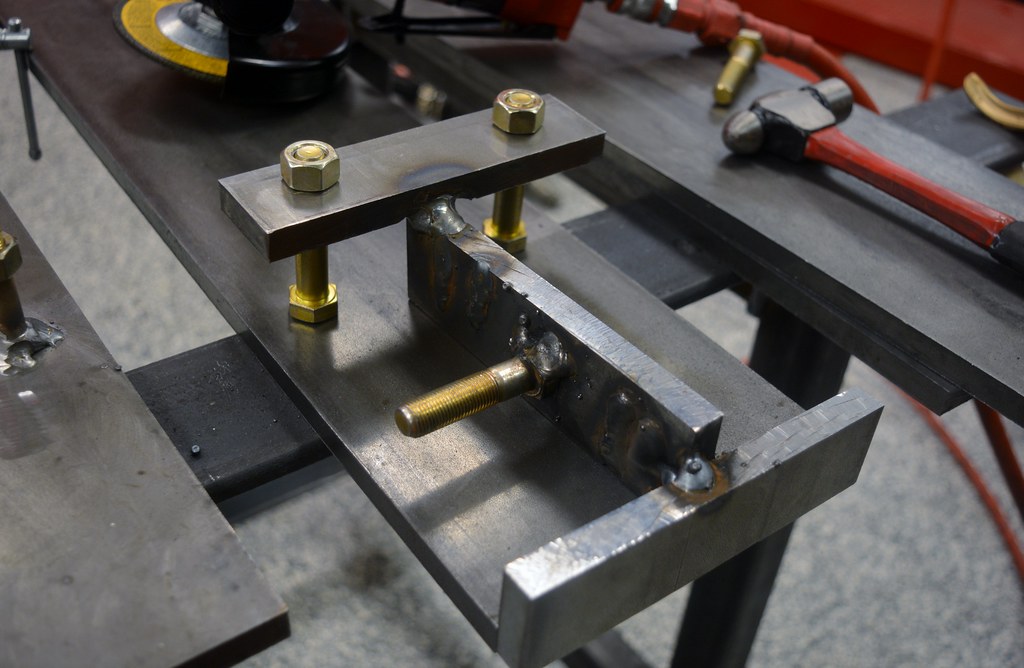
As you know, my bolts are centred 1'' from the end and 1'' in from the side of each slat.
For my jig, I just cut a piece of 1''x1/4'' flat bar 6'' long. I made a notch (half of a 1/2'' hole) along the side for each bolt. I just held the bolts into the notches as I aligned the jig with the end of the slat and clamped it. I remember butting the slat and the jig up against something to ensure they were even, but I don't remember what it was. You can weld one side of the bolt head then remove the jig and weld the other. Or you can just use the jig while you tack the bolts then remove it and weld all around.
Remember the head of the bolt will sit flat against the slat if you grind any markings off it first.
And please do share the pictures of your table here when you are done.
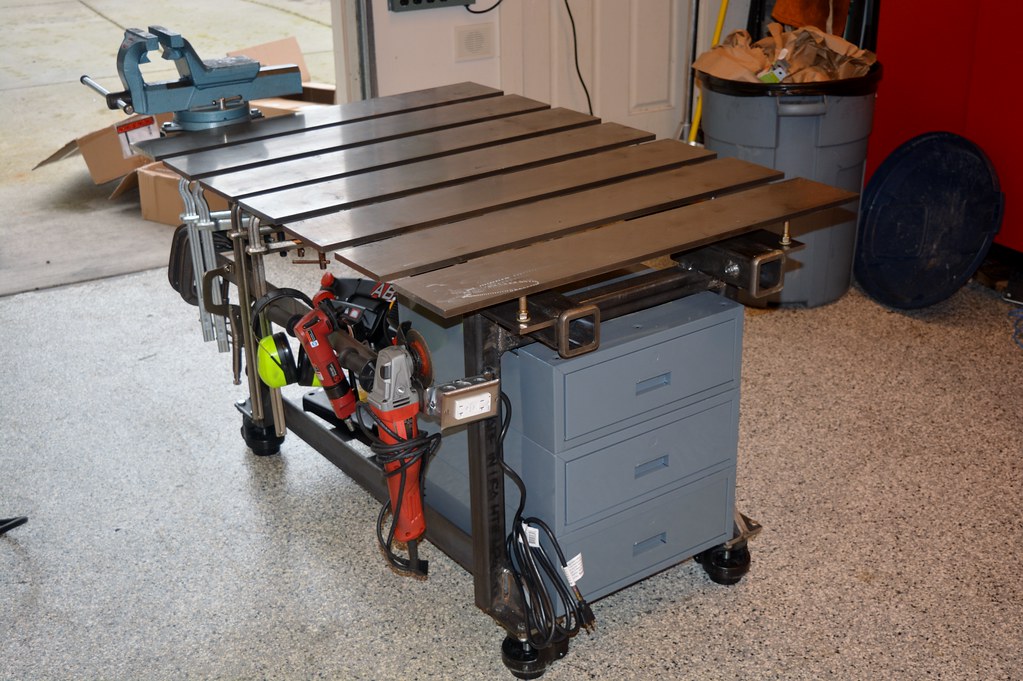
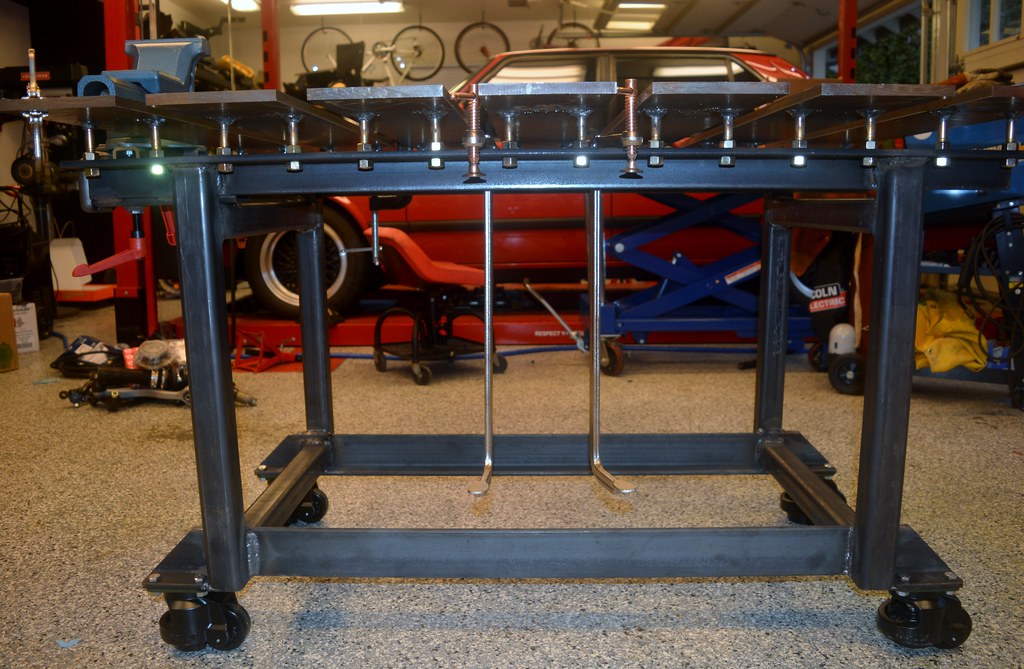

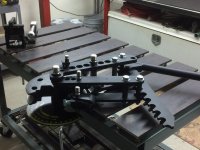
Kudos again for inspiring me with your design. Mine is done (modulo paint) and I've been using it pretty extensively:
AMC,
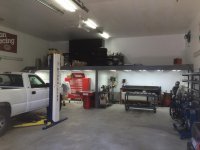
Thanks for sharing you project. They say imitation is the greatest form of flattery, well tonight I finished drilling out the 1/2" and 1 1/8" holes in the front and back top 2x4. I hope to start tacking and welding this weekend. In one of your earlier posts you said you used a jig to align the bolts you welded to the slats. This part makes me the most nervous. I would hate to get everything built and the bolts not align to the hole. Any lessons learned with the bolt weld jig? Or details on the jig you used? Thanks in advance. I will post a pic of your design living in another shop once I have something worth photographing
Thanks for the idea.

86 Turbo track car.944 Turbo or 944 S2? Need more pics.