To avoid these ads, REGISTER NOW!

Above 1200 Sq/FT "Thisland" - a 50x100 build thread

Wokspaces above 1200 squarefeet.

mdim

Well-known member
Joined
May 19, 2008
Messages
143
Part of the reason I'm taking notes here is, as you say, the plans are terrible. Being able to see in pictures how all the pieces go together is super useful. Right now I just have a pile of parts (with bushes stacked on top to keep the cows from walking on it...lol...)

building.jpeg
 
To avoid these ads, REGISTER NOW!
OP
P

Psychoholic

Well-known member
Joined
Aug 3, 2009
Messages
53
Location
Bogart, GA
We went out there on Thursday and finished the door frames for the front person doors and the end wall roll up door so they were able to sheet over those. We had made a mistake with the center purlins that run the length of the building which made the roof panels not fit so the contractor had to flip all of those around (the documentation on these buildings really is quite terrible) which burned up most of their day on Friday. Yesterday they were able to start on the roof!

IMG_0582.JPG

IMG_0578.JPG

In order for them to finish the end wall to the left (if you're looking at the building from the front) I need to finish the mezzanine as the window frame on that wall rests on the base angle attached to the mezzanine joists. I didn't want to rent more equipment so I had our forklift brought out from our current shop and by some stroke of absolute dumb luck it fits under the mezzanine!

Yesterday was the first time I've been out there working on it by myself and let me say that installing a 31' long double beam by yourself suuuuuuucks. Because we also upgraded the psf load rating of the mezzanine for storage the Z shaped joists are a lot heavier duty than the purlins and girts elsewhere in the building. That forklift if it wasn't already one of the most useful things I own certainly solidified it's spot towards the top of that list.

IMG_0574.JPG
IMG_0576.JPGIMG_0579.JPGIMG_0580.JPG

I really need to go out there and finish the mezzanine but I have a mountain of side work and primary work today so for once the rain this week will actually help me out a bit. Not sure if they are working today but if they work only tomorrow they wouldn't be ready for that end wall anyway so I should be able to knock it out Saturday.
 
OP
P

Psychoholic

Well-known member
Joined
Aug 3, 2009
Messages
53
Location
Bogart, GA
@mdim We have made just about every mistake possible I think when putting this thing up after reading the documentation a dozen times and watching the videos enough times I can start to quote them like I wrote the scripts for them. I am more than happy to dive deep into any of the parts that we eventually figured out where you might have problems or feel free to DM me if you have ANY questions and I'll let you know what we figured out.
 
OP
P

Psychoholic

Well-known member
Joined
Aug 3, 2009
Messages
53
Location
Bogart, GA
Some morning musings on some of the lessons learned and just helpful hints for anybody putting up their own cold formed steel building (CFS). In no particular order.
  • Drill bits. You will go through a LOT of drill bits. We have tried basically every variant on the market and I think the cobalt ones seem to work best. Self tapping screws are nice but we found it easier to just pre-drill every hole so you don't burn out the screw or work harden the hole you've made.
    • For sake of not breaking bits we found it's also kind of nice to choke them as deep into the chuck as they'll go (even with some of the flutes and landings covered up by the chuck teeth)
  • Various length bit drivers. They have some convertible ones that are really nice that let you switch between 2 different sizes. Sometimes the short ones work better and others you need the clearance from the longer ones. The long ones are particularly good for leverage when installing the x-bracing to get it tight.
  • Have 2 of every tool. We had at least 2 drills, 2 impact drivers, 2 1/2" impact guns and plenty of batteries on chargers going all the time. Having to 'hey, throw me that wrench' gets tiresome real fast. Offset wrenches are wonderful things when having to hold a nut blindly on the reverse side of a column or rafter.
    • We did pony up the money to upgrade our ragtag collection of tools (Ryobi and Rigid mostly) to Milwaukee M18 tools. Not cheap but notably superior.
  • Tool belt will save your back and tons of time. I bought one with suspenders that I could put a drill on one side and an impact in the other plus a whole pouch full of ONLY THE SCREWS I WAS WORKING WITH. Kept a few markers, measuring tape, and speed square with me almost at all times too.
  • This sounds borderline trite but buy one brand of measuring tape and use only those through the entire project. Also a 100' tape is really helpful for doing layout since you're not having to move between spots you can just anchor on one side and walk down the length of the wall marking column locations without imparting micro length changes. Probably doesn't matter much but it does help.
  • When laying out your base on the foundation with a transit make sure you decide if you're using edge of bracket or using centerline of the bolt hole AND KEEP THAT CONSISTENT.
    • Your foundation might have some wave to it so it's best to use a chalk line to set your end wall markings.
    • Make sure you have measured for square from each corner of the layout. Take the extra time to make sure your layout is freaking perfect.
    • After putting down your chalk line spray over it with a clear enamel paint. This will keep the chalk line looking fresh until long after the building is up.
  • Cutting apex and knee braces. You'd think for a kit this inclusive and expensive they'd already be cut. Best thing to do is to measure them after building a column/rafter set on the ground and then do your measurements. Make a template from those and cut them all in one session so you don't forget the orientation and screw up a part you have to have made (ask me how I know this one).
    • In the event you do screw one up and have to steal something like a garage door jamb piece and turn it into an apex brace the cost of the part is trivial (like $145) but shipping is like $1200 because they have to send it on a flatbed truck. I found a local supplier outside of Atlanta and was able to pick it up.
    • We used a combination of a Sawzall with diablo blades and a grinder with cut off wheels on it. This worked really well.
  • Organize your parts on the ground! Putting the girts in 2 different piles based on length, purlins, and various general pieces like window frames and door frames into their own piles will save you a ton of time looking around.
  • Mark all of your heights on the ground! Measuring where girt and purlin placement is going to go on the ground and extending the line across the full width of a column or rafter will save you mountains of time later.
  • Wear ear muffs whenever bolting 2 pieces together. When you hit a column with an impact it seems to create a giant speaker that reverberates around the earth twice.
  • Get several spud wrenches of different sizes and have 2 good sized dead blow hammers.
  • Invest in better clamps. The cheap sets you get from an end cap at Harbor Freight or Northern Tool are 'ok' but not great. The ones without the pads on the clamping surface from Milwaukee are superior and they have a handy rope hole that you can use to pull material up to you.
  • An articulated boom lift, a reach fork truck (commonly referred to as a Lull), and a scissor lift are expensive rentals but 100% worth the money. Our building is REALLY tall so you probably could do some stuff on a ladder but being able to run a girt or eve purlin up on each side makes it go a lot faster and safer.
  • Put all your mounting brackets on while the piece is on the ground. Mounting an eve purlin bracket while up in the air and having to hold it in some kind of weird way kind of ***** and you have a lot of column flex while it's upright.
  • When flying end wall rafters the bracket itself won't hold it together without bending. If you screw a stiffener piece to the face of it you can lift it with the lift forks.
  • Leave your column to rafter brackets snug but not tight when flying rafters. This gives you some negotiation room for alignment.
  • GET SOME GIANT RATCHET STRAPS! When we had to fix the roof we found that tying 2 x 50' 3000# ratchet straps together and being able to pull the columns really helped arc the roof so we could get it nice and flat. These also come in handy when flying the initial few columns so they have some lateral structure and won't wiggle so much.
    • A few lift slings and shackles will save your life and sanity.
  • Cut your x-bracing with a cut off wheel on the ground. We found it to be quite effective to measure them and mark a few spots on the foundation and just pull the bracing out to those spots and cut them.
  • When you can have someone drive you around in the boom lift. Having 2 people in the bucket makes for fast work when you aren't having to shift between driving and doing.
  • Install your door frame BEFORE you install the headers for the openings. Most door frames either snap or screw together so if you install the header first you won't be able to get the door in place.
    • Bonus tip. If you use the actual assembled door frame to set your door jambs it will fit perfectly every time.
  • Purlins on the roof the long edge of it faces towards the sides of the building and not to the middle (yup, we got this one wrong too).
  • Buy insulation. We weren't originally going to insulate our building but after walking into my neighbors building with insulation we decided to pull the trigger on it (almost $9k worth of it). Now that it's partially installed I put my hand on the siding on the inside on a non insulated piece and an insulated piece and the temperature difference was incredible. It's expensive but worth it.
  • Understand which trim pieces go where. We spent probably 30 minutes the other day trying to install some eve trim only to discover that where I was putting it doesn't take eve trim because we have gutters.
  • Wear PPE. The amount of metal shavings from drilling holes and tapping screws is impressive. Pretty much daily my wife would find some random piece of metal in my beard. Metal is sharp and there is a lot of it, buy good gloves with leather but offer good dexterity. Don't cheap out on your protective gear. Comfortable steel toed boots are a must especially when you just feel like kicking something into place and you end up walking 5+ miles on a 5k sq/ft pad in a single day.
  • Whatever you think this is going to cost add about 30% to that.
  • However long you think it will take if doing it yourself with some buddies multiply that by 5.
  • Everything is huge and heavy. Make sure you a very aware of how you pick things up so you don't wrench your back.
  • Take lots of pictures every day. Might not seem like it but it's nice to look back at the progress you've made so you can appreciate how far you've come even when it feels like a slog sometimes.
  • Miller High Life tall boys are the appropriate beer for this type of construction.
  • Rewatch the videos of what you are doing that day before you go do it. Do this even if you've watched them a dozen times as sometimes just seeing the technique helps keep it fresh.
  • (Objective opinion) - if you can swing it pay someone else to do it.
Hope this maybe helps someone in the future.

Chris
 
OP
P

Psychoholic

Well-known member
Joined
Aug 3, 2009
Messages
53
Location
Bogart, GA
Went up there after work to check the progress (it's been raining like hell) and they finished the roof!!

IMG_0604.JPG


It's kind of weird though that the building somehow looks bigger now that it has walls and a roof but it feels freaking enormous and a little disorienting. Those 18' walls really are massive when standing next to them. The entire thing feels somewhat like a giant rodeo arena when standing inside.
IMG_0606.JPGIMG_0607.JPGIMG_0610.JPG

I can't wait for everything to be done so I can have the concrete guy come back out and finish so i can do the final grade and get some of the water away from the building.

IMG_0605.JPG
 

Attachments

  • IMG_0608.JPG
    IMG_0608.JPG
    255.7 KB · Views: 46
  • IMG_0609.JPG
    IMG_0609.JPG
    330.2 KB · Views: 61
OP
P

Psychoholic

Well-known member
Joined
Aug 3, 2009
Messages
53
Location
Bogart, GA
Just a quick update. Since they are waiting on me to finish the mezzanine they couldn't do the opposite wall so they started working on the trim and gutters. Looking good!
 

Attachments

  • IMG_0620.JPG
    IMG_0620.JPG
    341.7 KB · Views: 58
  • IMG_0621.JPG
    IMG_0621.JPG
    247.6 KB · Views: 64
OP
P

Psychoholic

Well-known member
Joined
Aug 3, 2009
Messages
53
Location
Bogart, GA
Went out to the shop today with a buddy and we finished installing the mezzanine joists. Because I opted to upgrade the PSF static load rating of the mezzanine those joists are kind of substantial relative to the girts and purlins so they are kind of 'fun' to install over a 15' wide span. And since the window opening (we're putting a ducted fan in there) frame sits on top of the edge of the mezzanine joists they couldn't proceed with that wall until I'm done installing the window. You could shoot a freaking laser down the side of the mezzanine where the joists stick proud of the beam!

IMG_0626.JPGIMG_0629.JPGIMG_0627.JPG

The contractors did come up with a creative way to get around my continuous mud problem that I have developed. As soon as the building is finished being skinned I can get my concrete guy out to finish then I can start moving water around through judicious use of gravity and elevation.

IMG_0625.JPG
 
OP
P

Psychoholic

Well-known member
Joined
Aug 3, 2009
Messages
53
Location
Bogart, GA
These guys are doing absolutely incredible work! They only have a few downspouts to secure and trimming the doors and I think they are done and ready for us to install the doors.

IMG_0686.JPG
IMG_0668.JPG
IMG_0667.JPG

Concrete guy has a pour scheduled for Wednesday to pour the walkway from the person door on the left to the end of the side pad. We are doing a 7' deep and it ends up being about 96' wide walkway down the front of the building. Since the septic tank is in the most inopportune spot right in front of that roll up door on the left we couldn't do a driveway out of there so this is the next best thing.

I am getting a bit worried about the door installation though. I measured the posts and it's going to be a tiiiiiiiight fit to get the brackets and everything in there but we'll see. I have a really good friend who installs them for a living and I might end up having to call him in to help.

More updates as I have them.
 

Attachments

  • IMG_0685.JPG
    IMG_0685.JPG
    348 KB · Views: 33
OP
P

Psychoholic

Well-known member
Joined
Aug 3, 2009
Messages
53
Location
Bogart, GA
Contractors are done with the siding, roof, trim, and gutters! Electrician is coming out today to figure out where to put the meter and panel(s) (we are hoping for a single 400A panel but we'll probably get 2 x 200A. Unfortunately the power company can't or won't bring me 3 phase power so we're going to have to do some interesting things with about half of our equipment). Concrete dude should be out there this week ready to pour the front walkway and the rear landing for the back door and air compressor. This weekend we are installing the doors and some lights!

Soooooo clooooooose.

IMG_0697.JPG

IMG_0700.JPG
IMG_0702.JPG
IMG_0705.JPG
 

Attachments

  • IMG_0704.JPG
    IMG_0704.JPG
    254.9 KB · Views: 50
OP
P

Psychoholic

Well-known member
Joined
Aug 3, 2009
Messages
53
Location
Bogart, GA
Thanks @NickH !

It's a big ole ******* for sure. Originally we were going to do a 14' tall building (wanted enough clearance for the racks I already have) but the mezzanine just made sense for longer term storage so we added it and made it tall enough to walk around which is why ended up with an 18' eve height.

It's still so wild to see it looking like a building finally. There were so many times so far through this process that it just felt like I had made a terrible mistake (although every time I've been writing checks lately that feeling comes back pretty quickly. We ran out of financed money months ago so everything we've spent so far this year has been obliterating my personal savings).
 

Conrad

Well-known member
Joined
Nov 15, 2020
Messages
51
Location
Rockies
@Psychoholic I'm so glad to have found your build thread. I purchased a cold formed steel building from the same manufacturer (ACT) and its been a challenge just getting it. I haven't erected it yet, but all of your advice and experience is incredibly valued and has been noted by me (and I'm sure others in the future) so it's not in vain. Thank you, really.

Any progress update you can share? Also I'm curious your reasons for going with this type of construction vs pole barn or red iron?
 
OP
P

Psychoholic

Well-known member
Joined
Aug 3, 2009
Messages
53
Location
Bogart, GA
@Psychoholic I'm so glad to have found your build thread. I purchased a cold formed steel building from the same manufacturer (ACT) and its been a challenge just getting it. I haven't erected it yet, but all of your advice and experience is incredibly valued and has been noted by me (and I'm sure others in the future) so it's not in vain. Thank you, really.

Any progress update you can share? Also I'm curious your reasons for going with this type of construction vs pole barn or red iron?

So after researching both CFS and red iron I felt that since we're primarily a fabrication shop and I'm a fair carpenter that putting it together wouldn't be that hard. Honestly if I had to do a second one I'd probably do another CFS because we learned so much the first time that I bet we could get the framing done in 2 weeks with the right crew. Although if I do another building I'm going to find a way to just pay someone for a turn key version. :)
Mostly it was about lead times and customization. When I was getting the building quoted out the lead time on red iron was 6+ months and the cold form was ~3 months. Price was very similar but the skills required to put one together were vastly different in my opinion. I also liked the idea of the building sitting on the concrete more than sitting on J bolts in the concrete which left pretty much no room for error in the initial concrete layout. I really do think that cold form is the way the industry will end up going for medium span and more complex designs.
 
OP
P

Psychoholic

Well-known member
Joined
Aug 3, 2009
Messages
53
Location
Bogart, GA
Time for a big ole fat daddy update!

We passed the electrical inspection last week and they should be running from our transformer to the 2 x 200A panels in the next few days. Spent last weekend doing a bunch of landscaping and grading (seriously, if you don't buy a tractor with a loader when putting up a building you are shooting yourself in the foot later) and spreading more straw than I've ever moved in my life. I was finding that **** in my shoes for days. This past weekend we fixed the person doors and installed all the roll up doors. All we should have left for the 'certificate of completion' is to seed/straw all of the exposed disturbed red dirt and fix the trim around the one person door off that concrete driveway and I think we'll be good.

To quote Clark Griswald Sr 'she's a beaut'.

IMG_0972.JPG
 

Attachments

  • IMG_0970.JPG
    IMG_0970.JPG
    282.4 KB · Views: 54
  • IMG_0971.JPG
    IMG_0971.JPG
    172.4 KB · Views: 54
  • IMG_0940.JPG
    IMG_0940.JPG
    481.7 KB · Views: 55
  • IMG_0828.JPG
    IMG_0828.JPG
    226 KB · Views: 56
  • IMG_0942.JPG
    IMG_0942.JPG
    397.6 KB · Views: 68
  • IMG_0817.JPG
    IMG_0817.JPG
    178.4 KB · Views: 68

Olafur

Well-known member
Joined
Jun 2, 2011
Messages
2,577
Location
Iceland
Turning out really nice. Great shop with nice surroundings. Thanks for sharing and congratulation.
 

getawheel

Active member
Joined
Mar 19, 2008
Messages
38
Location
FL
I have seen the term 'Person Door' more than once in this thread and have to ask, what the hell is that? A pet door for people?
Or newspeak?
 
To avoid these ads, REGISTER NOW!
OP
P

Psychoholic

Well-known member
Joined
Aug 3, 2009
Messages
53
Location
Bogart, GA
I have seen the term 'Person Door' more than once in this thread and have to ask, what the hell is that? A pet door for people?
Or newspeak?
One of those funny little tidbits you pick up at some random point. The term 'mandoor' was actually a Dutch word for basically a foreman for slaves. In more modern parlance a 'man door' sometimes specifically means a door cut into a bigger garage style door. A door entering a garage space or shop space sometimes gets referred to as a 'pedestrian door' or 'personnel door' or 'wicket door' or even 'access door'. Figured it was easier to refer to a 'person door' and not give any illusion that my roll up doors would have additional doors IN them so much as adjacent to.


That and it drives my contractor friends nuts with my 'woke BS' speech and that alone is worth the price of admission.
 

Chrisb62

Well-known member
Joined
Jul 30, 2019
Messages
1,091
Location
southwest fl
That and it drives my contractor friends nuts with my 'woke BS' speech and that alone is worth the price of admission.

I was going to reply with this very same idea, but deferred because I didn't want to speak on your thread without knowing how it would be received. Now it is clear.........:beer:
 
OP
P

Psychoholic

Well-known member
Joined
Aug 3, 2009
Messages
53
Location
Bogart, GA
Spent the day today doing more landscaping along the driveway. We should be scheduled for the inspection tomorrow!

093434F0-286A-4958-870F-FF67F170CAB3.jpeg

Also I’m happy to say that after 8 days I’m starting to see some grass sprouting up but only exactly where the power company will be running wire in the next few days.

82C52156-89F4-48BF-820C-AC0FB0E6BBFB.jpeg
 

welder57

Well-known member
Joined
Feb 26, 2011
Messages
414
May i ask what is the loading (Live Loads & Dead Load) for the Mezzaine? What type of decking materials are you putting on it? Building looks great.
 
OP
P

Psychoholic

Well-known member
Joined
Aug 3, 2009
Messages
53
Location
Bogart, GA
May i ask what is the loading (Live Loads & Dead Load) for the Mezzaine? What type of decking materials are you putting on it? Building looks great.
The mezzanine was upgraded from 40 to 50 psf. We're going to be using 3/4" T&G OSB for the flooring. Considering I need about 28 sheets of it it might be a bit before I go buy enough to put up.
 

clinto

Member
Joined
Feb 11, 2010
Messages
6
Location
Statham, Ga.
Great work @clinto and @Psychoholic, I love the deuce and a half as a work truck.

The Deuce and a half is the best truck on the planet. I don't know how anyone gets anything done without one.

The one above is a cargo truck I added a dump conversion to for a friend of mine and he graciously let me use it to help finish grading my property, which is adjacent to Psychoholic's and do a little dirt moving on his.

20211001_113129.jpg

And my dump truck
IMG_2435.jpg

And my other deuce
20170928_142414.jpg
 
OP
P

Psychoholic

Well-known member
Joined
Aug 3, 2009
Messages
53
Location
Bogart, GA
Spent the day on Sunday trying to clean the dirt off the floors but my pressure washer broke (chemical injector fitting split and caused water to fountain out of it). Ended up just using the prodigious water pressure, a spray nozzle, and a lot of squeegee work to get about of half of the shop done. Also cleaned up the remaining construction debris for 7/8 of the shop so we can start wiring this weekend.
IMG_0999.JPG

IMG_0998.JPG

Wiring this thing is going to be 'interesting'.

I want to have the lights in 2 banks (3 x 8' LED strips per rafter set) where we split the shop in half and each half has it's own set of lights. I also want to have 2 light switches per front person doors so you can control the lights from either side. Right now my plan is to run 3/4" EMT conduit on the top of the top girt and run 1/2" EMT down to outlets on the faces of the bottom girts (2 x 4 socket boxes per bay). For the front wall I'm going to run 1" conduit along the ceiling off the middle oriented panel to serve as basically a power bus and carry most of my power to the front wall then do the same 3/4" approach.


Wiring up the exterior lights and cameras, then pulling the big wires for the heavier equipment (plasma table, air compressor, mill(s), lathe, etc) will come later. Just need to get the stuff that needs access to the middle of the floor done first before we make our banzai run at moving stuff in.

Also got tired of taking stuff out to the dumpster so I picked it up with the tractor, set it on the pad then brought it in with the forklift. Much easier.

IMG_0997.JPG
 
Last edited:

DeeDubz

Well-known member
Joined
Nov 20, 2019
Messages
1,427
Location
Socal
My floors were muddy like that when My build was done. We just happened to get a **** ton of rain in January when they set to build. It took me a few days to get the mud off the floor. I didnt have a pressure washer then. That would have helped.
 
OP
P

Psychoholic

Well-known member
Joined
Aug 3, 2009
Messages
53
Location
Bogart, GA
We have power!
After doing some reading about the lights I bought we decided to just wire them all on the same circuit and daisy chain 3 together per rafter set. The 5 lights that are up right now are pulling almost 2.9A total so the 15A circuit is enough to handle all 15 lights. Pulling solid core 14 gauge wire 75' through 1/2 EMT was about as fun as you'd expect (next time I'll do stranded wire instead of solid). Still need to the rest of the lights up and the connecting cables will be here today. Still going to run power down the back wall and need to start installing the flood lights and security cameras (pulled a different circuit for that).
I will say that Youtube videos of bending conduit with bump outs looks a lot easier than it is for the first time but after a while it started to make more sense.


I do believe we're about ready to start moving in which is good because I told my current landlord we'd be out by July 1st.


IMG_1033.JPG
 

loganb

ALLIANCE MEMBER
Joined
Dec 29, 2011
Messages
5,494
Location
Omaha, NE
Heads up, about the time you get pretty speedy at putting the box offsets in is the time you run out of EMT and have to switch brands due to the original brand being out and your finally calibrated arm has to be adjusted.

Progress is looking great!
 

GeddyT

ALLIANCE MEMBER
Joined
Jun 17, 2015
Messages
1,239
Location
Bellingham, WA
When I did mine, I standardized on 3/4" EMT. It was the smallest size through which I could pull a 6 AWG run, and it would be plenty big enough to pull the small stuff. It also allowed me to only have to purchase a single bender and work out the bend calculations for one size. The difference in cost is negligible for the ease of pulling.

And I wouldn't abandon the solid wire so fast, as the added PITA in pulling is more than made up for when it comes time to actually wire things up at the business end of the wire thanks to this little product:

ic%2Fimages%2Fproduct%2Funsorted2%2FWAG-7731042500.jpg

Wago connectors. Strip, stab, done. Wire nuts made me hate wiring, but Wago connectors completely changed that for me. So much nicer to use, and they're not super expensive. It's possible to use them with stranded wire, but solid wire stabs in a million times easier. There's another version with tabbed clamps that are a bit more expensive but really nice in that you can reuse them if you mess up or want to change something. They're also nice for twisted wire. They look like this:

Retail_Product_221_413.jpg
 
OP
P

Psychoholic

Well-known member
Joined
Aug 3, 2009
Messages
53
Location
Bogart, GA
When I did mine, I standardized on 3/4" EMT. It was the smallest size through which I could pull a 6 AWG run, and it would be plenty big enough to pull the small stuff. It also allowed me to only have to purchase a single bender and work out the bend calculations for one size. The difference in cost is negligible for the ease of pulling.

I only did the 1/2 for the 14g wire for the lights for that exact reason. One of my shop mates (who does commercial HVAC for a living) loaned me his 1/2 and 3/4 benders. Pretty much everywhere else in the shop is getting 3/4" and we're likely going to run the 1" conduit (with bought bends instead of actually bending it ourselves) for some of the bigger equipment towards the back of the shop so I'm not having to pull 6g wire through 3/4 along with 12g. :)
 
OP
P

Psychoholic

Well-known member
Joined
Aug 3, 2009
Messages
53
Location
Bogart, GA
LET THERE BE LIGHT!

IMG_1054.JPG

When looking at different lighting solutions we saw quite a few that we thought would be good but most of them involved some kind of 2nd mortgage to afford. Saw some absolutely incredible LED panels that were about $220 each but we'd need probably 15 of them and honestly I am BROKE. We found these on Amazon and bought a 20 pack of them a few months ago for around $400.


Then we mounted them with 3 of these per light with some 25# zip ties and some pretty decent self tapping metal screws:


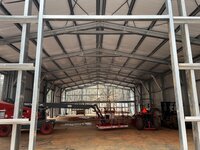
At first I was going to run outlets to everywhere that needed lights but upon looking at them for a second we ordered some 3 meter interconnect cords for them and were able to string 3 together down each rafter set with an outlet at the left end. It is freaking bright in there and the color temperature is perfect for a shop. Right now we are pulling just over 9 amps total for 15 lights and will probably put 3 more lights over the mezzanine just to round it out.

IMG_1055.JPG

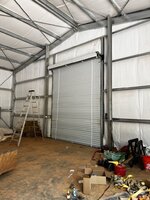
As is my custom I was about to over complicate the **** out of the electrical in there but thankfully one of my shop mates convinced me of a far less work intense way to achieve the same goal. We ran 13 20A outlets down the back wall and the side wall (behind the fan in that picture) on 3 different circuits and labeled them appropriately so you know which bank of outlets you're turning off in the breaker panel. Still a ton of wiring and conduit left to do for things like the powder coating oven, phase converter for the 3 phase mill and lathe, the plasma table, the multiple welders, bathroom, air compressor, lifts, security cameras, etc but this gets us enough to start moving in next weekend!

Worth noting too - that insulation is absolutely lovely. Walking in the shop even in the hottest part of the day (it was 85F+ yesterday) has to be a solid 10+ degrees cooler than outside and with the big fan running it's downright pleasant to be working in there. If you're on the fence about it I cannot stress enough how much of a positive difference that makes.


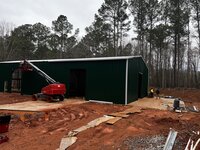
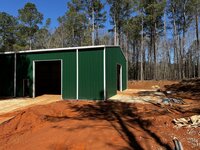
Friday will be one year since I signed the paperwork on buying the land. To go from buying to moving in in almost exactly a year apparently is absolutely unheard of.
 
To avoid these ads, REGISTER NOW!
Top Bottom