To avoid these ads, REGISTER NOW!

TIDYING UP MY "MAN CAVE" [part 1]

kerrynzl

Well-known member
Joined
Nov 8, 2013
Messages
5,054
Location
Tauranga, New Zealand
I haven't done a build thread for a while, So I've decided to post up this one on cleaning up my Garage

The saying goes "The rubbish you collect, is in direct proportion to the space available" ,I was desperately running out of room for more tools.

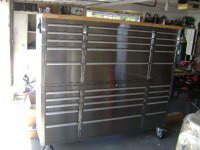
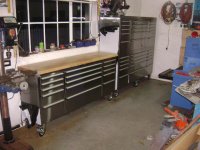
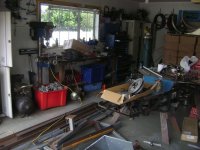
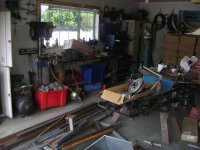
[Photo 1] shows the before situation. I was starting to trip over in my ever diminishing floor space.

After measuring my garage, while on a trip to China I decided to bring back 3 x 72" stainless steel rolling tool cabinets with a shipment of goods.They have double drawer slides etc and are reasonably sturdy

These are now available in the USA and are quite cheap.

https://www.amazon.com/dp/B01067885A/?tag=atomicindus08-20

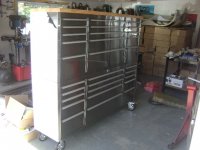
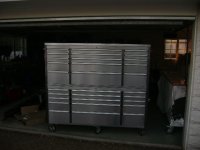
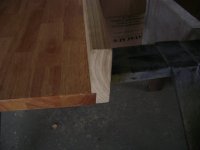
First thing I did was remove the heavy rubberwood bench top off one and then stack another cabinet on top of it. [photos 2 & 3]

I didn't like the look of the wood bench top on top of the stack , I wanted the cabinets to appear like a tool chest not an "out of reach" work bench. The bench top was tough and heavy so it would make a nice storage shelf on top of the cabinets. [I just need to disguise it]


I want the top cabinet to appear like this one in the last photo [more like a tool box with a lid]
 

Attachments

  • 1 Before.JPG
    1 Before.JPG
    143.9 KB · Views: 279
  • 2.JPG
    2.JPG
    142.4 KB · Views: 306
  • 3.JPG
    3.JPG
    141.7 KB · Views: 283
  • $450 stainless steel rolling cabinet 72 inch toolbox.jpg
    $450 stainless steel rolling cabinet 72 inch toolbox.jpg
    20.3 KB · Views: 231
To avoid these ads, REGISTER NOW!
OP
K

kerrynzl

Well-known member
Joined
Nov 8, 2013
Messages
5,054
Location
Tauranga, New Zealand
Now the best advice I can give people on a project [Any Project] is to "Learn to measure **** properly"

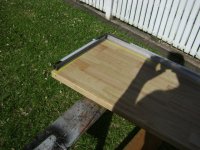
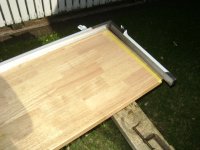
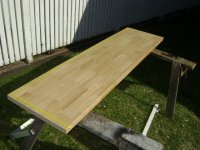
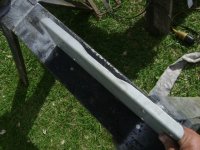
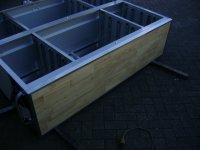
I purchased some stainless strips from a local sheetmetal shop. these were 1.5mm thickness and 80mm wide.[to fold into a 40mm x 20mm channel]

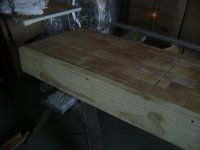
I then cut the bench top down to be 4mm narrower than the width of the stainless cabinet [this allowed for the 1.5mm thickness and 0.5mm thickness for the glue]

I also ran a planer around all 4 sides [top and bottom] to allow for the radius in the fold.

I didn't alter the depth of the bench top but decided to push it rearwards to have a rear overhang. This is to allow the bench top to fit directly up against a wall stopping things falling down behind it.

3 sides of the stainless were welded together and the ends were "boxed" .The welds were then polished smooth. Because the ends were boxed this had to be spread apart to fit over the bench top and glued .

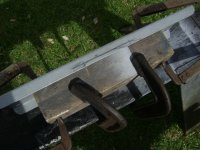
The top was masked 20mm from the edges and glue applied to the edges of the bench top and inside the sides of the stainless trim

This required a few sash clamps and patience to hold it together while the glue cured. [ patience= 2 days]
 

Attachments

  • 7.JPG
    7.JPG
    140 KB · Views: 141
  • 6.JPG
    6.JPG
    136.7 KB · Views: 142
  • 5.JPG
    5.JPG
    142.5 KB · Views: 142
  • 4.JPG
    4.JPG
    144.2 KB · Views: 139
OP
K

kerrynzl

Well-known member
Joined
Nov 8, 2013
Messages
5,054
Location
Tauranga, New Zealand
Once the glue is cured , I ran a knife around the edges and peeled off the masking tape.

Then the 4th side which is a straight piece of channel was carefully measured and cut to fit. This was glued and clamped into place.

The joins will be on the rear side of the bench top.
 

Attachments

  • 11.JPG
    11.JPG
    143.7 KB · Views: 100
  • 10.JPG
    10.JPG
    144.8 KB · Views: 104
  • 9.JPG
    9.JPG
    143.8 KB · Views: 99
  • 8.JPG
    8.JPG
    142.8 KB · Views: 103
OP
K

kerrynzl

Well-known member
Joined
Nov 8, 2013
Messages
5,054
Location
Tauranga, New Zealand
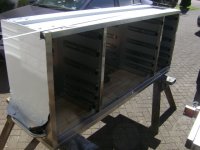
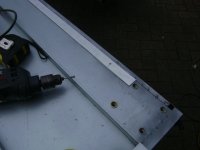
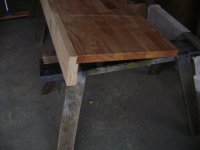
Once the glue is cured and clamps released the top was placed upside down on 2 builders trestles, and the cabinet was placed upside down on top of the bench top.

I used a black sharpie to mark all the holes on the front and sides so I can drill a very shallow holes in the stainless trim.

Because the cabinet now is spaced by 1.5mm because of this trim , I needed to cut a 25mm x 1.5mm spacer from aluminium for the rear of the cabinet and also the dividers. [see photos 2-5]

The cabinet and were lowered closer to the ground on to 50nn x 50mm blocks ,then the cabinet was then screwed to the bench top.
 

Attachments

  • 17.JPG
    17.JPG
    138.5 KB · Views: 76
  • 16.JPG
    16.JPG
    136.7 KB · Views: 78
  • 15.JPG
    15.JPG
    134.5 KB · Views: 75
  • 14.JPG
    14.JPG
    142.3 KB · Views: 75
  • 13.JPG
    13.JPG
    138.8 KB · Views: 78
  • 12.JPG
    12.JPG
    143.8 KB · Views: 95
OP
K

kerrynzl

Well-known member
Joined
Nov 8, 2013
Messages
5,054
Location
Tauranga, New Zealand
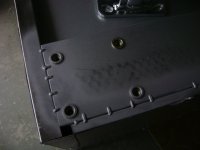
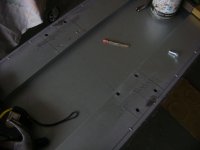
While the whole cabinet was upside down, I needed to clean up the underneath.

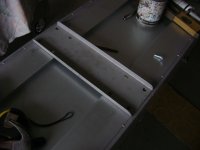
The corners all had 4 x rivnuts on each corner. The flange on these rivnuts were approx. 1.5mm above the surface., so I needed to make a 1.5mm spacer along the 4 sides to evenly support the weight when it is attached to the bottom cabinet.

I used the same 25mm x 1.5mm aluminium for this

I went around all the spot welds between the corners only and flattened them with a 60 grit flap disk [some spot welds needed to be re-welded] I touched up all these welds with aerosol zinc paint.

The aluminium spacers were drilled for countersunk pop rivets and glued in place, they were placed 10mm from the edge so they weren't visible from the outside [the rivets were only needed to save time while the glue cured]
 

Attachments

  • 18.JPG
    18.JPG
    139.2 KB · Views: 66
  • 19.JPG
    19.JPG
    139.7 KB · Views: 66
  • 20.JPG
    20.JPG
    142.2 KB · Views: 60
OP
K

kerrynzl

Well-known member
Joined
Nov 8, 2013
Messages
5,054
Location
Tauranga, New Zealand
Because I am placing one cabinet on top of another, there will be 4 spare caster wheels not being used [2 fixed and 2 swivel]. So I decided to use the 2 swivel casters to the centre to allow for the extra weight of tools in 2 cabinets,

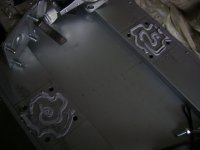
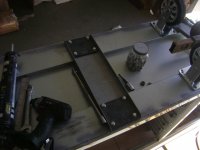
The floor of these cabinets is a one piece folding with a 18mm offset "Z" along the front and back edges . I needed to add a stiffening rib in the centre to support the casters. I folded up some pieces of 2.0mm thickness galv steel with a 25mm flange on each side to allow the casters to fir inside [photo-1]

I also cut and drilled 6 x mounting plates to the same bolt pattern [photo-2] These will be used on the 3rd cabinet work bench not the stacked cabinet.

Upon trial fitting I discovered a slight issue. The 25mm flange was 2 wide to allow the casters to swivel 360 deg with the safety latch unlocked, so I marked and trimmed the stiffening rib. [photos 4-5]
 

Attachments

  • 25.JPG
    25.JPG
    137.4 KB · Views: 53
  • 24.JPG
    24.JPG
    140.6 KB · Views: 51
  • 23.JPG
    23.JPG
    138.2 KB · Views: 48
  • 22.JPG
    22.JPG
    142.7 KB · Views: 48
  • 21.JPG
    21.JPG
    137.6 KB · Views: 51
OP
K

kerrynzl

Well-known member
Joined
Nov 8, 2013
Messages
5,054
Location
Tauranga, New Zealand
The stiffening rib was glued and held in place with 8 x rivnuts. This modification was also done simultaneously on the 3rd cabinet which will become a work bench.

Because of the 2mm thickness of the stiffener rib the 4 corner casters needed 2mm thickness washers under them as packers to stop the cabinet rocking on the centre casters [16 washers in total]
 

Attachments

  • 26.JPG
    26.JPG
    139.2 KB · Views: 53
  • 27.JPG
    27.JPG
    138 KB · Views: 46
  • 28.JPG
    28.JPG
    137.2 KB · Views: 45
OP
K

kerrynzl

Well-known member
Joined
Nov 8, 2013
Messages
5,054
Location
Tauranga, New Zealand
While the top cabinet was still upside down, the bottom cabinet was placed upside down upon it and carefully lined up. All the holes that were for screwing the old bench top were marked with a sharpie on to the base of the top cabinet.

The 2 cabinets were then riveted together from the underside using 3/16" monel rivets with washers on the opposite side.
 

Attachments

  • 32.JPG
    32.JPG
    144.5 KB · Views: 48
  • 31.JPG
    31.JPG
    144 KB · Views: 42
  • 30.JPG
    30.JPG
    140.8 KB · Views: 42
  • 29.JPG
    29.JPG
    142.3 KB · Views: 48
OP
K

kerrynzl

Well-known member
Joined
Nov 8, 2013
Messages
5,054
Location
Tauranga, New Zealand
The cabinet is now stood up and on it's casters. Now the tedious job of putting all the drawers back in place.

Sometimes skirting boards in some buildings won't allow the cabinet to be pushed up against the wall, so [photo 3] shows the rear overhang to stop things falling behind the cabinet .

The tool cabinet was rolled into place and the "work bench" cabinet was trial fitted for the next step. The bench top was only sitting on top for measuring an Up-stand behind it to fit under the window frame.
 

Attachments

  • 36.JPG
    36.JPG
    132.9 KB · Views: 120
  • 35.JPG
    35.JPG
    142.6 KB · Views: 84
  • 34.JPG
    34.JPG
    142.4 KB · Views: 92
  • 33.JPG
    33.JPG
    144.4 KB · Views: 88
OP
K

kerrynzl

Well-known member
Joined
Nov 8, 2013
Messages
5,054
Location
Tauranga, New Zealand
As mention on posting #7 , a stiffening rib was already added to the "work bench" while I was doing this to the main cabinet.

Because this cabinet is going to be used as a work bench I decided to not use casters, but adjustable "machinery feet" on welded legs. This way I can swing off a Vice without the work bench chasing me around the garage.

[Photo 1] shows the bases I made to replace the casters , I welded some legs to them with nuts on the ends for adjustable machinery feet.

After the bench top was removed , an up-stand was cut from wood and a rebate cut into it. This was glued and also screwed in from behind. After that, it was given a couple of coats of clear polyurethane .
 

Attachments

  • 41.JPG
    41.JPG
    141.2 KB · Views: 48
  • 40.JPG
    40.JPG
    139.8 KB · Views: 43
  • 39.JPG
    39.JPG
    139.9 KB · Views: 42
  • 38.JPG
    38.JPG
    141.4 KB · Views: 42
  • 37.JPG
    37.JPG
    142.7 KB · Views: 44
OP
K

kerrynzl

Well-known member
Joined
Nov 8, 2013
Messages
5,054
Location
Tauranga, New Zealand
The work bench top was screwed back on . The machinery feet were bolted on and adjusted for height [I used a jack and done this in place from underneath].

Then I drilled holes into that lovely bench top and added 2 vices [there is a plate of steel on the underside of the bench top for each of these vices]

I also removed 2 handles between the cabinets so they can **** up close to each other.

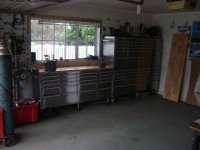
[Photos 1-2] is the finished result and [photo 3] is a reminder of what I started with

Part 1 is now finished

The whole job was quite easy and only required welding on the stainless trim on the upper bench top [optional] and repairs to 2 spot welds from grinding them flat. So a DIYer with average skills could easily tackle a project like this.

Having access to a sheetmetal brake ,rivnut gun, and lots of clamps etc really helps.

I managed to sell my old 3 stack tool chest and the corner cabinet to recover a sizeable portion of my original investment.

The Biggest Headache for me ["being a Garage Rat"] is transferring all my tools to their new home and remembering in which drawer they are now parked in [We are all creatures of habit here]

I now have 1 spare bench top, 2 handles, 2 swivel casters, and 4 fixed casters as leftovers for my next project
 

Attachments

  • 42.JPG
    42.JPG
    142.8 KB · Views: 127
  • 43.JPG
    43.JPG
    140.8 KB · Views: 152
  • 1 Before.JPG
    1 Before.JPG
    143.9 KB · Views: 122
Last edited:
To avoid these ads, REGISTER NOW!
OP
K

kerrynzl

Well-known member
Joined
Nov 8, 2013
Messages
5,054
Location
Tauranga, New Zealand
Wow lots of tool storage. Are all the drawers filled up?

All the drawers are full except 3 small drawers on the RH upper .I keep those for current/ unfinished projects [eg: an engine rebuild , storing small parts I normally lose]

My dad passed a few years back and I rescued a lot of his old tools so I really needed the space
I rescued a mint condition Stahlwille socket set he purchased in 1950 [I grew up using that]:thumbup:

The large bottom drawer of the lower R/H cabinet was donated to my wife for some garden tools.
 

z-edition 006

Well-known member
Joined
Aug 27, 2011
Messages
237
Location
Norway
All the drawers are full except 3 small drawers on the RH upper .I keep those for current/ unfinished projects [eg: an engine rebuild , storing small parts I normally lose]

My dad passed a few years back and I rescued a lot of his old tools so I really needed the space
I rescued a mint condition Stahlwille socket set he purchased in 1950 [I grew up using that]:thumbup:

The large bottom drawer of the lower R/H cabinet was donated to my wife for some garden tools.

Ok thats nice :thumbup:
 
OP
K

kerrynzl

Well-known member
Joined
Nov 8, 2013
Messages
5,054
Location
Tauranga, New Zealand
I like the double tool box set up
The garage looks very inviting

The double toolbox is very easy to do. Especially if you don't bother with the stainless around the top.

You don't need to buy a 3rd cabinet like I did, because you can use the leftover casters and bench top to make a work bench.

I chose stainless steel , because I'm tired of looking at fake Snap-on cabinets that pop up worldwide. In NZ [due to our UV] the powder coated red's last about 12 months before they fade to pink.

Seeing that you are a car guy, I'll show you another photo of the toolbox from a different angle :thumbup:
 

Attachments

  • 20190117_204836.jpg
    20190117_204836.jpg
    148.7 KB · Views: 65
To avoid these ads, REGISTER NOW!
Top Bottom