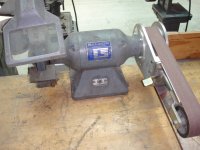
Pictures of my broken Eastwood buffer motor number 2:

This picture shows the two holes that have machine screws screwed into them through holes in the cast base to attach the armature housing to the base. Notice the screw cockeyed in one hole - the threads are totally stripped out.

These are the mounting screws to hold the base to the arm. housing.

This shows the base and the arm. housing mounting arm broken off.

This is a picture of the first buffer that failed showing how I increased the hole size and used an actual bolt to attach the arm. housing to the base.

This shows how flimsy the cast iron base is and how I am attempting to JB Weld the pieces back in place like I did on the first buffer that failed.
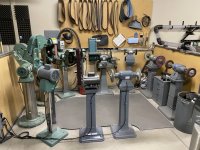
As mentioned, I attempted repairs on the first buffer that failed but had not attempted to put it back in service. Today, I decided I would try to put it back into service to see if I could get some service out of it and perhaps learn something that might help in my decision making.
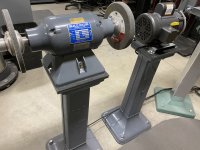
First, I reassembled the buffer on my stand and turned it on with no wheels installed. Ran smooth as silk..

This is the wire wheel I have been running on the buffer for some time. I installed it on one end of the buffer and started it up and it ran smooth as silk, leading me to the conclusion that the wire wheel is not the cause of my problems.

This is the buffer wheel I had been running. It is actually a stack of two loose 1/2" pads. I installed it and turned the buffer on to instant vibration. So, I shut it down and replaced this wheel stack with a new 1/2" loose wheel and tried again. This time, there was little to no vibration. Apparently the stacked buffs were causing most of the problem.
I was able to use the buffer for off and on for about an hour to polish up some sockets and wrenches. One of the main things that I use this for is cleaning threads up on the wire wheel.