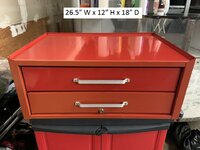
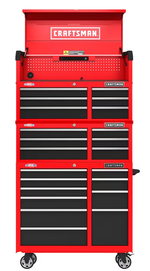
I made my own 41" intermediate box out of a Craftsman top box, is there any interest in me posting details? Maybe I'll just post it anyway, someone might find it useful. Just so you know, options for a 41" intermediate box are limited. The Westward Intermediate box (49EV14) is slightly longer than the Craftsman box, so you would have to use a sheet of wood to bring it above the lip on the Craftsman lower roller chest and the drawer fronts would have to be painted semi-gloss black if you wanted to match the Craftsman. Also the price on the Westward intermediate box is about $450, compared to the Craftsman top box @ $350 (I got mine on sale for $319). So you not only save some $$ by using a Craftsman top box, the paint and drawer handles will match.
I purchased a 2nd Craftsman top box & cut the top off, just above the inner shelf.
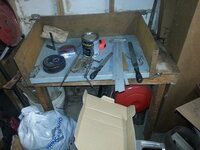
You will need: Sharpie marker, long straight edge, 4" minimum dia. cutoff wheel, Rust-Oleum Toolbox Red spray paint, rust fix spray, small 90° framing square, 1" aluminum T-Bar extrusion 8' long like McMaster-Carr 1668T23, a propane or mapp gas hand torch or even oxy-acetylene which I don't have (I used my mapp torch), and a socket or crescent wrench to remove the nut on the inside for the locking lever. Here are the steps:
1) Remove the drawers on both top boxes for access & weight reduction, there is a plastic finger on each side by the slide rollers that move up/down to release the drawers. Set the top box aside as the following steps will only involve the box that you'll be making into the intermediate box. In other words, don't remove the handles or cut the box you want on top, only remove the drawers!
2) Remove the side handles. Drill the rivets out from the outside, then on the inside, bend the red inner handle down to about 45° so that it can be slid & released from the black outer handle (there's a diamond hole where the red tabs can come out).
3) Remove the L-shaped drawer locking lever by removing a nut on the inside.
4) You can remove the locking racks from the backside of the cabinet, or fix them in the upward position. I found some spare vertical blind weight plates that wedged under the bottom hook perfectly so mine are still there.
5) Measure & mark all around the outside with a Sharpie, my measurement came out @ 14.050". Make sure to measure the shelf from the front as well as the back, mine wasn't flat & that's why I had to add 0.050" all around.
6) Taking great care to cut accurately and straight, I used a large cutoff wheel & walked around the outside of the chest until the top was free & set it aside.
7) I deburred all of the edges & treated with some rust-fix spray. You can paint the edges if you want with Rust-Oleum Toolbox Red spray paint which matches the Craftsman red nicely, I chose not to since it would be covered.
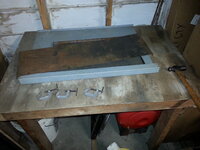
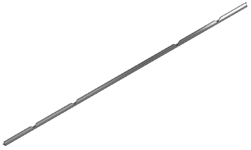
8) Since these boxes get their strength from the outer wall, you should put something between the intermediate & top box to keep the top box's weight from wanting to deform/collapse your new intermediate box. I ordered 8' of 1" aluminum T-Bar extrusion, cut it up, bent & painted it so that it would sit on the middle box's outer walls and support the top box nicely. The box measures 40.5" front and back & 16" on the sides. I made 'V' cuts on the backside (lip side) of the extrusion just over 90° to allow for some bend spring-back while forming, leaving 1/8" extra at the bends and these were my measurements from one end where I put my notches: 11.75", 27.875", 68.5", & 84.625". There will be a gap in the back which I don't mind. You can order a longer piece if you don't want a gap.
9) after making the 'V' notches on the backside of the aluminum, you'll need to anneal it before bending it, otherwise it will crack at the bend. To anneal the aluminum, mark liberally on all sides of the aluminum at the four locations where you're going to bend it. Using the torch, and moving around briskly so as not to create any hot spots that will ruin the aluminum, heat the first bend area on all sides until the Sharpie disappears. Move to the next bend location & repeat. DO NOT QUENCH THE ALUMINUM, let it air cool.
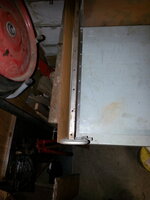
10) Bend the aluminum once it's cool enough to handle & check with a framing square to ensure the bends are at 90°. You will have to over-bend so that once it springs back a little it's at 90°. This is why you need your notches to be more than 90°. Check the fit on the top of your now-cut intermediate box. Mark & cutout the notch for the Craftsman logo - or remove the logo. Just in case there are some differences between boxes, I won't give you the logo location dimensions, please measure your particular box.
11) Sand, clean and paint the aluminum. I has some 320 grit handy & that worked great to get the paint to stick.
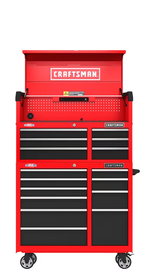
12) Set the newly-cut intermediate box on the rolling bottom chest, and place the aluminum on top of that.
13) Finally, place the top box on top of the intermediate box. A friend comes in handy here so that you don't scuff up the aluminum while you set it in place.
14) Put all of the drawers back in
Time to measure & cut the box was 45 minutes. Time to measure, cut, anneal & bend the aluminum took 1hr. Time for the paint to dry 36 hours (gotta love Rust-Oleum). This all could have been completed quicker had I not kept re-measuring and double checking.