lilscorpion
Well-known member
Over time, not all of the links in this Journal Post or the original post have survived and are now missing. Here are some links to albums where you should be able to find most of them in picture album format. Please enjoy.
Wrench Organizers - https://www.icloud.com/sharedalbum/#B0i5Uzl7VG51byG
Powder Coating Booth - https://www.icloud.com/sharedalbum/#B0iGrq0zwG3XBzh
HDPE Shelving Organizers - https://www.icloud.com/sharedalbum/#B0i5n8hH4q7W2u
Container Shelves - https://www.icloud.com/sharedalbum/#B0iGI9HKKGekeT5
Gas Bottle Stand - https://www.icloud.com/sharedalbum/#B0i5yeZFhG5UVPp
Folding Bench - https://www.icloud.com/sharedalbum/#B0i59UlCq0QqDL
French Cleat Clamp Rack - https://www.icloud.com/sharedalbum/#B0iJ0DiRHGBh6sH
Domino Offset Base - https://www.icloud.com/sharedalbum/#B0i5ON9t3lBbWp
HPLV Drawer Organizer - https://www.icloud.com/sharedalbum/#B0iGqkRUiGDg4E1
Lathe Tooling Organizer - https://www.icloud.com/sharedalbum/#B0iGfnH8tZHwlh
MFT Horses - https://www.icloud.com/sharedalbum/#B0i53qWtHg1SGV
MFT Table - https://www.icloud.com/sharedalbum/#B0iGgZLKuJFiK5s
MFTC - https://www.icloud.com/sharedalbum/#B0iGtnIORjVVDT
Kurt Vise Stops - https://www.icloud.com/sharedalbum/#B0i5VaUrzGJBbaM
Nail Gun Rack - https://www.icloud.com/sharedalbum/#B0iJEsNWnGMwac7
Knee Mill Accessory Arm - https://www.icloud.com/sharedalbum/#B0iGf693ZMPqjZ
Portable Drying Rack - https://www.icloud.com/sharedalbum/#B0i55Z2WMK8ptC
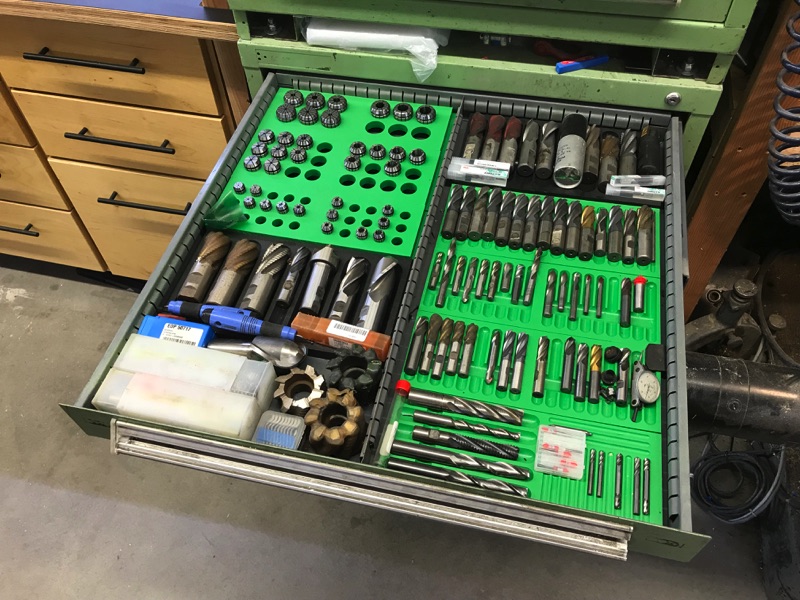
R8 Tooling Organization - https://www.icloud.com/sharedalbum/#B0iGDdyTvGRlBAD
Powered Sys-Port - https://www.icloud.com/sharedalbum/#B0i5fk75v9Szrg
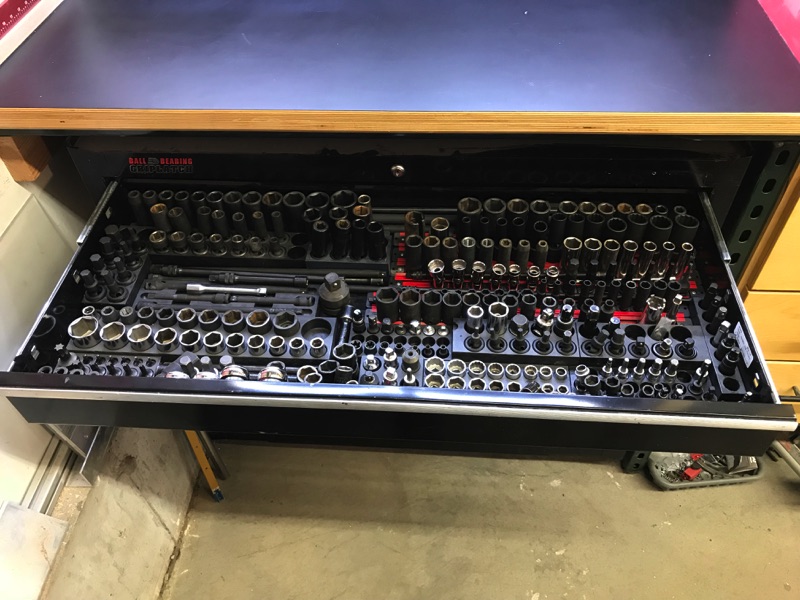
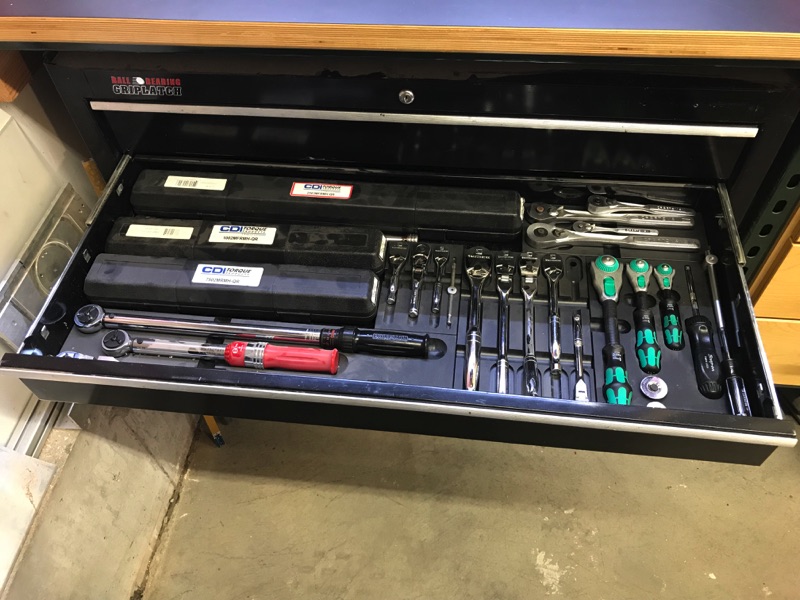
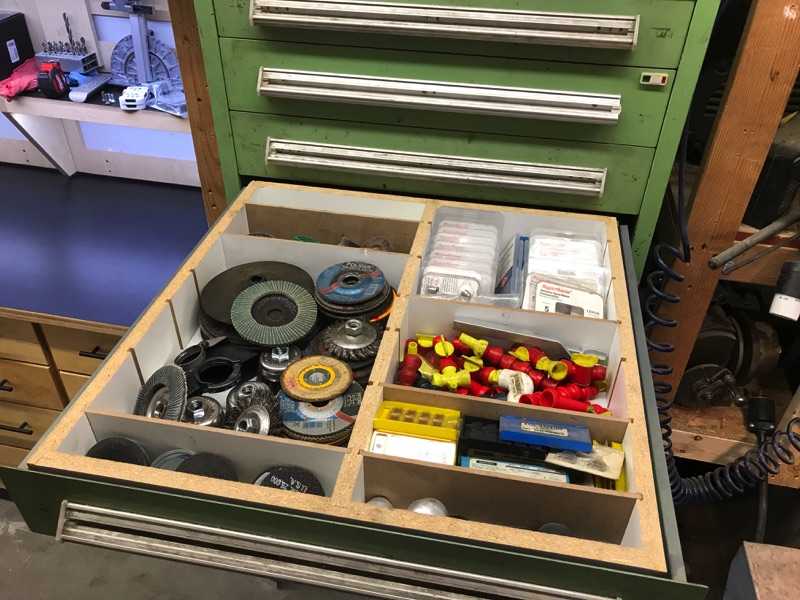
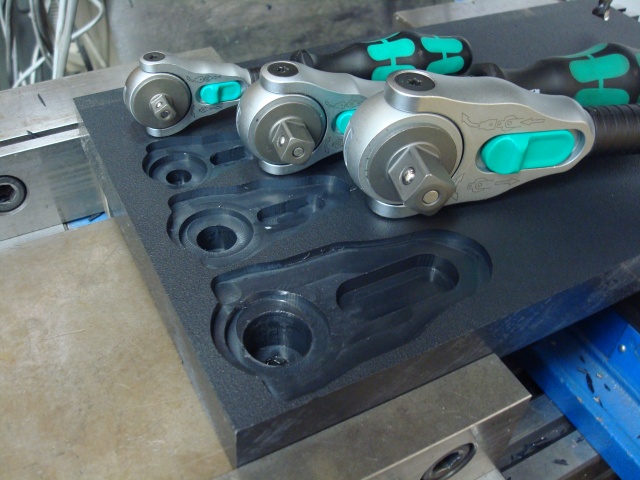
Ratchet Trays - https://www.icloud.com/sharedalbum/#B0i5idkMwfXxoo
Router Plate - https://www.icloud.com/sharedalbum/#B0i5GH8MqrUlSw
Bandsaw Router Plate - https://www.icloud.com/sharedalbum/#B0iGFssfGGTXrSi
Jigsaw Router Plate - https://www.icloud.com/sharedalbum/#B0iGRMtznGWnpb7
Router Stations - https://www.icloud.com/sharedalbum/#B0iGdIshaGUxwv8
Sys-Shelves - https://www.icloud.com/sharedalbum/#B0i5aVbMKGsnpKS
Sys-Toolbox - https://www.icloud.com/sharedalbum/#B0iGQOeMmJIkpvk
Begin Original Post ———-
Some of you may have seen my previous thread that showed some things I've done in the past. For those of you who haven't, it's located here - Tooling Organization. To give some idea of timing, that thread was started November 11, 2012 which was (as of now) just more than 5 years go. Tooling Organization documented my organizational evolution from around November of 2010 until December of 2017. Roughly 7 years of evolving my organizational strategy, the last 7 years. This thread, this go-round, is the documentation of me taking my organization to the next level incorporating my learnings in recent years in cabinet fabrication and years of tucking away ideas I've found here and there and the documentation of my Tooling Organization from January 2018 - Now.
It has been somewhere between 2 and 3 years since I've made any effort on optimizations or organization in the shop. In those two years I've continued to acquire tools and use the shop for a variety of projects including remodeling nearly every room in the house, parting out a 1972 Chevy Pickup, building a Jeep, and a variety of other projects. The shop has served me well but during this time I've learned that my organization is less than ideal -
I have been contemplating/half planning a complete work space overall for a couple years now tucking ideas away for that moment where I just couldn't take it anymore. To be completely transparent, I have absolutely no idea how long this is going to take. I'm speculating it's going to take me 3 - 6 months but my wife his hopeful that it'll only take 2. Either way, it has to be done otherwise I’m gonna lose my mind.
I never did put together a shop tour so, to start is a 3 part recap of my space makes sense otherwise there's no way you'll understand the transformation. In the interest of time, I’m going to skip what I think is normal organization and/or normal stuff - like a drawer that I keep sandpaper in or a drawer full of hammers. I'll stick to the interesting ones or the ones that are a factor within the transformation. It’s likely going to take me more than a few days and few posts to get the current state documented so I apologize in advance of some of it is old hat.
Shop Tour Part 1
I have a 3 car garage. It’s double wide and one side is a tandem. It was, as both my wife and I agree, about the only compromise we made when buying this house. I previously had a 4 car and I really wanted a 5+ when we were looking but...it ended up the way it ended up. As a result, I've been chasing optimization ever since I moved in about 8 years ago.
As far as garages go, it’s not a small garage but you could never park (reasonably) a real car in the back of the tandem. Even if you did, you’d lose your damn mind trying to shuffle cards out of the way to get it out. I’ve watched a few of my neighbors do it for years and it looks stupid. Anyway, a 3 car…not a lot of space for how much stuff I have. I’ll start with what’s primarily shop space - the back half of the tandem. Here’s what the back half of the tandem looks like if you’re standing in front of it.

To the right is a a lathe I purchased shortly after I moved into this house about 8 years ago.
It’s a big-boy Mori Seiki MS-850 gap bed manual lathe that can swing an impressive 25+ inches if you remove the bed insert, more than 17” with it still in place. It took me about 10 years to find such a machine in its condition in the local market.

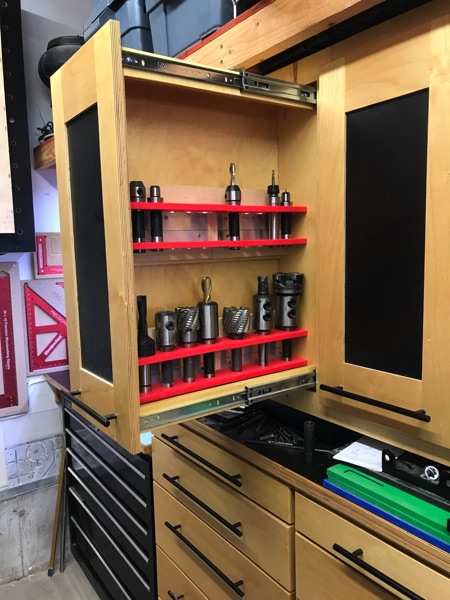
The cabinets above the lathe are the result of a wild hair I had back when I did the first attempt on shop organization. They’re telescoping cabinets which allow me to pull them towards me before opening the doors. Idea was to be able to get stuff out of the cabinets without getting grease or oil off of the lathe on my clothes. These are no shabby cabinets. They’re glued, stapled, and screwed running on dual 100lb slides.
The one doing the most work is my lathe tooling cabinet. Within that cabinet alone is 19 Aloris CA tool holders, some really big chucks, and a few big boy routers.

They were designed to make it all the way out over the lathe. This may give a better perspective. At full extension these hinges are straining just a little (but hanging in there).

There’s three of these telescoping cabinets that I’ve struggled to fill with stuff. Not because I don’t ave stuff to put in them, but because the size I arbitrarily made them isn’t conducive to much stuff. Their either too deep or not deep enough or too narrow. Neat idea, kinda fail.
In front of the lathe is a project I’ve been putzing around with for probably 3 years (maybe longer). It’s a reverse engineered MFTC that were the rage on FOG (festoolownersgroup.com) some years back. If you’re really paying attention you’d notice there’s another one not quite as far along up on the side-box just up and right in the below picture. Yeah, when I build stuff, I tend to build two.") Ironically I’m nearly done but can’t seem to get up the motivation to spend the few hours to assemble the work surface. I’ll do a specific post about it in a bit.
Ironically I’m nearly done but can’t seem to get up the motivation to spend the few hours to assemble the work surface. I’ll do a specific post about it in a bit.

Beyond the lathe is a pair of drawer bases that were the first two built back on my first build out when I believed that organization was, more or less, nothing less than having a **** ton of drawers. Being my first attempt, the cabinet assemblies were made out of white melamine (laminated particle board), the drawers were 1/2-inch baltic birch drawer sides, 1/2-inch baltic birch bottoms, and 100lb full extension drawer slides. Now here’s the neat thing - the drawer sides were assembled using only glue and narrow crown staples and they’ve held up extremely well to a considerable amount of weight i’ve asked them to hold.

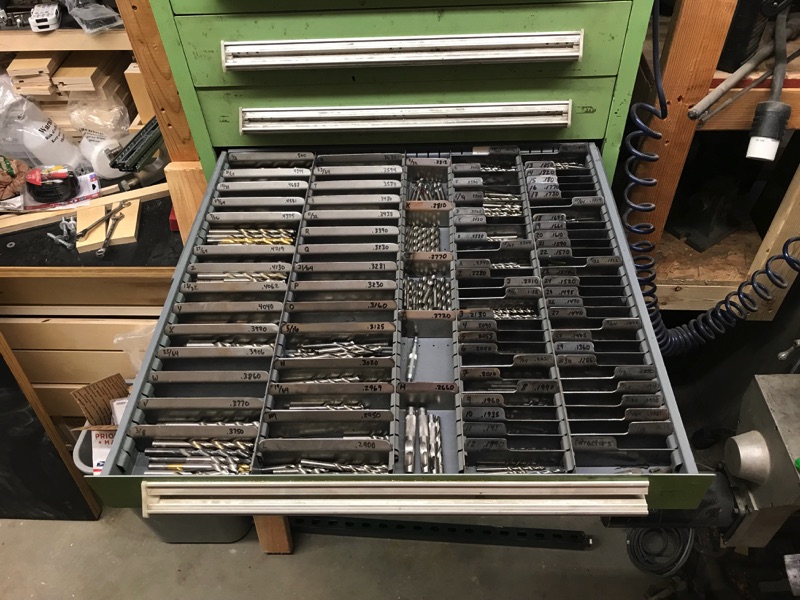
This drawer base houses some of the more novel ideas I had around drawer organization. For those who’ve read my older Tooling Organization thread, this may be a recap and I apologize. Concepts were ‘Drawers within Drawers” kinda like the old tackle box my dad had for fishing. This one has all my hole saws and bits. Not a light drawer.


This one is plumbing supplies.


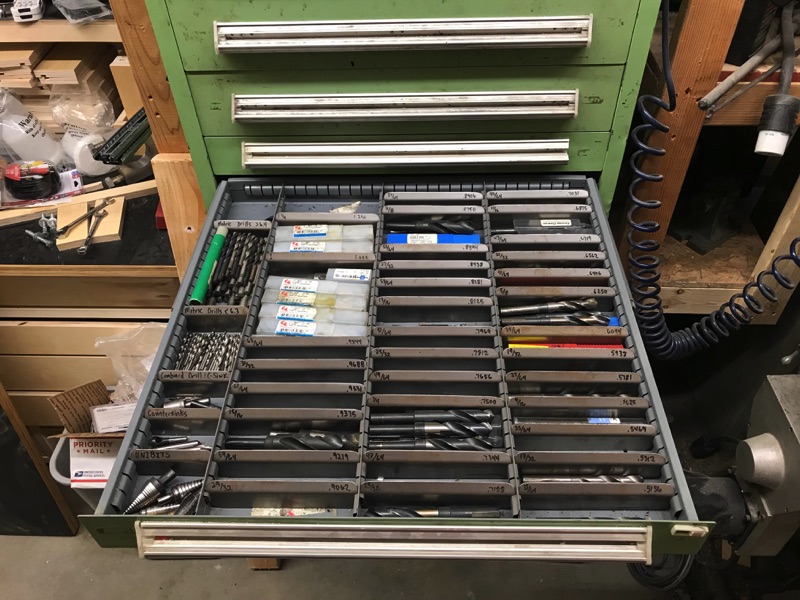
Top two drawers are much shallower and designed to hold measuring tools, calculators, files, some router table parts, sawzall and jig saw blades, etc.


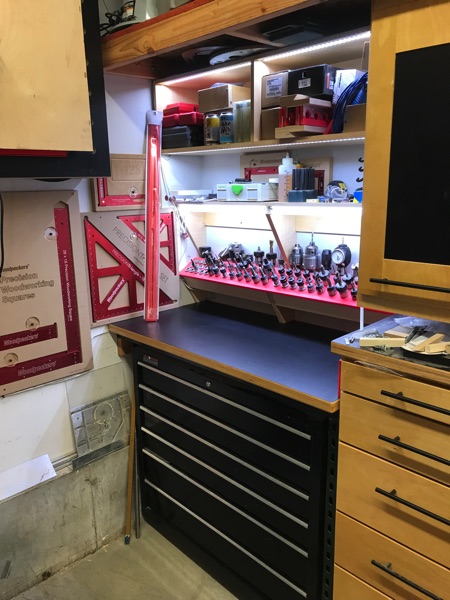
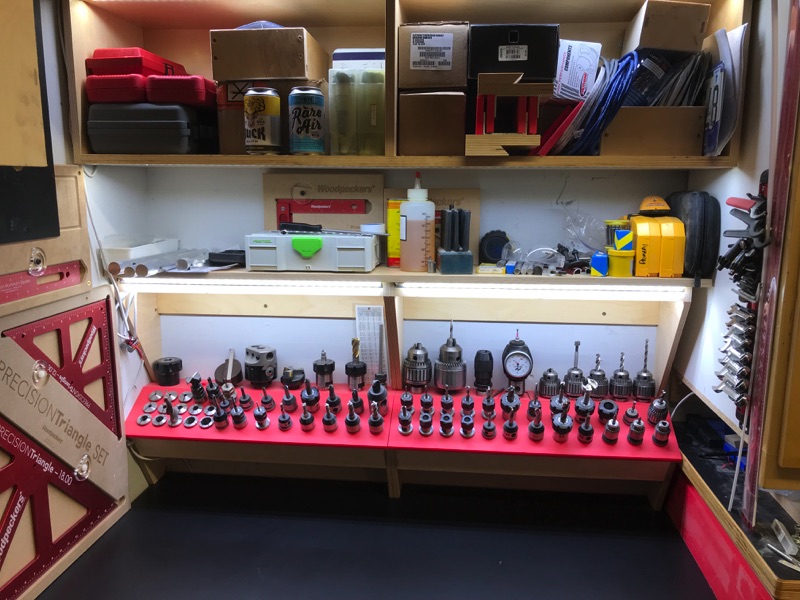
Above that drawer base is a few more telescoping cabinets that were designed specifically for my nail guns, knee mill tooling, and saw/saw parts.


Wrench Organizers - https://www.icloud.com/sharedalbum/#B0i5Uzl7VG51byG
Powder Coating Booth - https://www.icloud.com/sharedalbum/#B0iGrq0zwG3XBzh
HDPE Shelving Organizers - https://www.icloud.com/sharedalbum/#B0i5n8hH4q7W2u
Container Shelves - https://www.icloud.com/sharedalbum/#B0iGI9HKKGekeT5
Gas Bottle Stand - https://www.icloud.com/sharedalbum/#B0i5yeZFhG5UVPp
Folding Bench - https://www.icloud.com/sharedalbum/#B0i59UlCq0QqDL
French Cleat Clamp Rack - https://www.icloud.com/sharedalbum/#B0iJ0DiRHGBh6sH
Domino Offset Base - https://www.icloud.com/sharedalbum/#B0i5ON9t3lBbWp
HPLV Drawer Organizer - https://www.icloud.com/sharedalbum/#B0iGqkRUiGDg4E1
Lathe Tooling Organizer - https://www.icloud.com/sharedalbum/#B0iGfnH8tZHwlh
MFT Horses - https://www.icloud.com/sharedalbum/#B0i53qWtHg1SGV
MFT Table - https://www.icloud.com/sharedalbum/#B0iGgZLKuJFiK5s
MFTC - https://www.icloud.com/sharedalbum/#B0iGtnIORjVVDT
Kurt Vise Stops - https://www.icloud.com/sharedalbum/#B0i5VaUrzGJBbaM
Nail Gun Rack - https://www.icloud.com/sharedalbum/#B0iJEsNWnGMwac7
Knee Mill Accessory Arm - https://www.icloud.com/sharedalbum/#B0iGf693ZMPqjZ
Portable Drying Rack - https://www.icloud.com/sharedalbum/#B0i55Z2WMK8ptC
R8 Tooling Organization - https://www.icloud.com/sharedalbum/#B0iGDdyTvGRlBAD
Powered Sys-Port - https://www.icloud.com/sharedalbum/#B0i5fk75v9Szrg
Ratchet Trays - https://www.icloud.com/sharedalbum/#B0i5idkMwfXxoo
Router Plate - https://www.icloud.com/sharedalbum/#B0i5GH8MqrUlSw
Bandsaw Router Plate - https://www.icloud.com/sharedalbum/#B0iGFssfGGTXrSi
Jigsaw Router Plate - https://www.icloud.com/sharedalbum/#B0iGRMtznGWnpb7
Router Stations - https://www.icloud.com/sharedalbum/#B0iGdIshaGUxwv8
Sys-Shelves - https://www.icloud.com/sharedalbum/#B0i5aVbMKGsnpKS
Sys-Toolbox - https://www.icloud.com/sharedalbum/#B0iGQOeMmJIkpvk
Begin Original Post ———-
Some of you may have seen my previous thread that showed some things I've done in the past. For those of you who haven't, it's located here - Tooling Organization. To give some idea of timing, that thread was started November 11, 2012 which was (as of now) just more than 5 years go. Tooling Organization documented my organizational evolution from around November of 2010 until December of 2017. Roughly 7 years of evolving my organizational strategy, the last 7 years. This thread, this go-round, is the documentation of me taking my organization to the next level incorporating my learnings in recent years in cabinet fabrication and years of tucking away ideas I've found here and there and the documentation of my Tooling Organization from January 2018 - Now.
It has been somewhere between 2 and 3 years since I've made any effort on optimizations or organization in the shop. In those two years I've continued to acquire tools and use the shop for a variety of projects including remodeling nearly every room in the house, parting out a 1972 Chevy Pickup, building a Jeep, and a variety of other projects. The shop has served me well but during this time I've learned that my organization is less than ideal -
- Buying new tools without getting rid of any of the old ones
- The cabinetry I built to organize was designed to be universal (all drawers are nearly the same depth and width and i"m finding that, as a result, many of them are either too packed and/or the contents are shaped in such a way that a lot of the space ends up wasted.
- Many of the drawers contain extremely occasional use items and/or items that I'll likely never use. eg - I found half dozen parts that fit a '72 Blazer I had in the 90's.
- Small piles that never get dealt with become big piles. Being I only typically get a portion of the weekend to spend time in the garage, I rarely want to spend this limited time cleaning.
I have been contemplating/half planning a complete work space overall for a couple years now tucking ideas away for that moment where I just couldn't take it anymore. To be completely transparent, I have absolutely no idea how long this is going to take. I'm speculating it's going to take me 3 - 6 months but my wife his hopeful that it'll only take 2. Either way, it has to be done otherwise I’m gonna lose my mind.
I never did put together a shop tour so, to start is a 3 part recap of my space makes sense otherwise there's no way you'll understand the transformation. In the interest of time, I’m going to skip what I think is normal organization and/or normal stuff - like a drawer that I keep sandpaper in or a drawer full of hammers. I'll stick to the interesting ones or the ones that are a factor within the transformation. It’s likely going to take me more than a few days and few posts to get the current state documented so I apologize in advance of some of it is old hat.
Shop Tour Part 1
I have a 3 car garage. It’s double wide and one side is a tandem. It was, as both my wife and I agree, about the only compromise we made when buying this house. I previously had a 4 car and I really wanted a 5+ when we were looking but...it ended up the way it ended up. As a result, I've been chasing optimization ever since I moved in about 8 years ago.
As far as garages go, it’s not a small garage but you could never park (reasonably) a real car in the back of the tandem. Even if you did, you’d lose your damn mind trying to shuffle cards out of the way to get it out. I’ve watched a few of my neighbors do it for years and it looks stupid. Anyway, a 3 car…not a lot of space for how much stuff I have. I’ll start with what’s primarily shop space - the back half of the tandem. Here’s what the back half of the tandem looks like if you’re standing in front of it.
To the right is a a lathe I purchased shortly after I moved into this house about 8 years ago.
It’s a big-boy Mori Seiki MS-850 gap bed manual lathe that can swing an impressive 25+ inches if you remove the bed insert, more than 17” with it still in place. It took me about 10 years to find such a machine in its condition in the local market.
The cabinets above the lathe are the result of a wild hair I had back when I did the first attempt on shop organization. They’re telescoping cabinets which allow me to pull them towards me before opening the doors. Idea was to be able to get stuff out of the cabinets without getting grease or oil off of the lathe on my clothes. These are no shabby cabinets. They’re glued, stapled, and screwed running on dual 100lb slides.
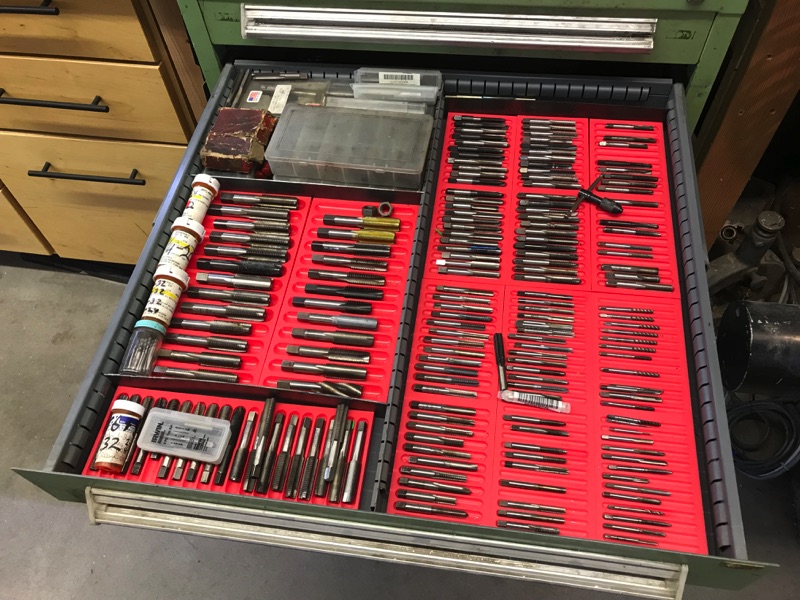
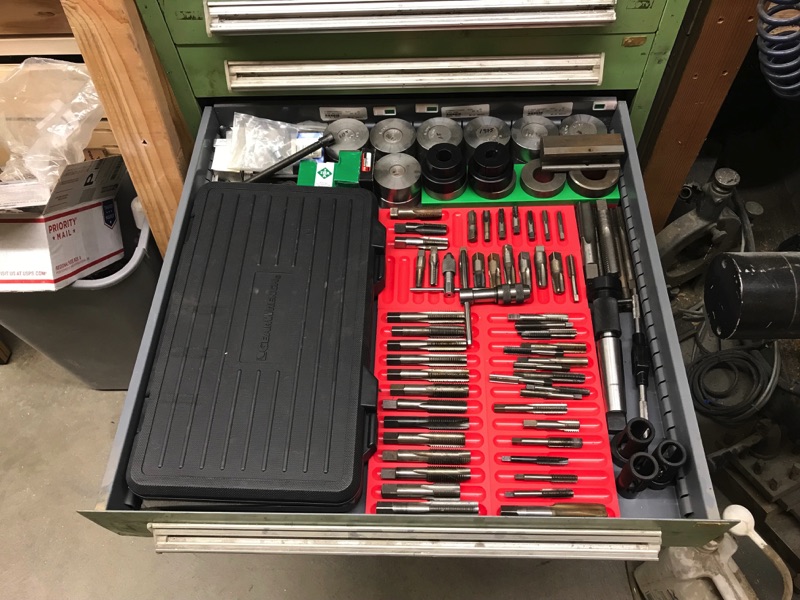
The one doing the most work is my lathe tooling cabinet. Within that cabinet alone is 19 Aloris CA tool holders, some really big chucks, and a few big boy routers.
They were designed to make it all the way out over the lathe. This may give a better perspective. At full extension these hinges are straining just a little (but hanging in there).
There’s three of these telescoping cabinets that I’ve struggled to fill with stuff. Not because I don’t ave stuff to put in them, but because the size I arbitrarily made them isn’t conducive to much stuff. Their either too deep or not deep enough or too narrow. Neat idea, kinda fail.
In front of the lathe is a project I’ve been putzing around with for probably 3 years (maybe longer). It’s a reverse engineered MFTC that were the rage on FOG (festoolownersgroup.com) some years back. If you’re really paying attention you’d notice there’s another one not quite as far along up on the side-box just up and right in the below picture. Yeah, when I build stuff, I tend to build two.
Ironically I’m nearly done but can’t seem to get up the motivation to spend the few hours to assemble the work surface. I’ll do a specific post about it in a bit.Beyond the lathe is a pair of drawer bases that were the first two built back on my first build out when I believed that organization was, more or less, nothing less than having a **** ton of drawers. Being my first attempt, the cabinet assemblies were made out of white melamine (laminated particle board), the drawers were 1/2-inch baltic birch drawer sides, 1/2-inch baltic birch bottoms, and 100lb full extension drawer slides. Now here’s the neat thing - the drawer sides were assembled using only glue and narrow crown staples and they’ve held up extremely well to a considerable amount of weight i’ve asked them to hold.
This drawer base houses some of the more novel ideas I had around drawer organization. For those who’ve read my older Tooling Organization thread, this may be a recap and I apologize. Concepts were ‘Drawers within Drawers” kinda like the old tackle box my dad had for fishing. This one has all my hole saws and bits. Not a light drawer.
This one is plumbing supplies.
Top two drawers are much shallower and designed to hold measuring tools, calculators, files, some router table parts, sawzall and jig saw blades, etc.
Above that drawer base is a few more telescoping cabinets that were designed specifically for my nail guns, knee mill tooling, and saw/saw parts.
Last edited: