Lilscorpion, have you ever done a step by step of how you do your big base cabinets? I've seen your drawer assembly in this thread and appreciate that greatly but just looking through picture here don't understand some of the assembly I've seen. Thanks for this thread greatly, it's inspiring.
I don’t think I have but I looked back and I should have enough pictures that you can get a really good idea of how they go together.
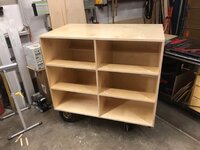
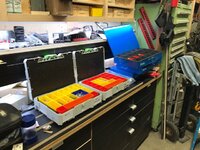
Finished first to help you get context -

The way I design them I’m attempting to eliminate as much guess work and special cuts as possible.
Basic dimension rules -
(1) I typically use ~5” for to kick height and I use uni-strut to make the bases. Let me know if you e not seen that post and I’ll dig them up.
(2) I like my counter top to be at 36” (I’m 6’ 1” and shrinking says my wife)
(3) I always make the tops and the bottoms of the bases the full length of the cabinet. All vertical panels are screwed in from the top and the bottom so no screws are in shear. Instead the actual panels are supporting all weight.
(4) I’ve learned that the 3/4-inch Baltic birch I use has a typical thickness of 11/16
(4) side measurements are: total height - toe kick - thickness of the top and the bottom together.
36 - 5 - 1 3/8 = 29 5/8
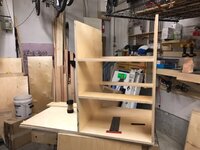
If you plan to put drawers in the base, you need to add a few “spreaders” to keep weight if the drawers from splaying out the sides. If you don’t, the slides may end up having problems opening and closing.
To make the spreaders, I use the same math. In the above pic, I have 3 verticals so I need to subtract 3 * 11/16 from the overall width of the cabinet and then I can decide how wide each of the sides of the cabinet should be. In the above case I made them equal so, divide by 2.
After getting the length right I then rip the spreaders to 5 1/2-inches wide. Each spreader will be anchored with 2 screws through the side panel on either side. I use pocket screws if access isn’t possible.

Spreaders aren’t really necessary in the rear of the cabinet if you screw the back on. I use a few floating back so I add in rear spreaders too. Here’s a pick to better illustrate how they go in.

Free floating 1/4-inch ply back rides in a 1/4-inch dado 1/2-inch in from the rear of the panels.

I inset it 1/2-inch so I can add a “nailer” to the top and the bottom of the cabinet.

The nailers serve three functions -
(1) they give the cabinet meat to attach to the studs in the wall.
(2) they pull the cabinet square when attached like I do with pocket holes.

(3) pocket holes naturally cause material to push away from the screw. As luck would have it. The nailers also push the floating panel into the dado taking up any slip the panel may have in the groove. This makes the insides look beautiful.
** Using this design, the back panel and the nailers do need to be taken into account when determining the depth of the cabinet. If you want to run 24-inch deep drawers, you’ll need to make the cabinet 24 5/8-inches deep.
I use no glue for one good reason - I can take any cabinet apart and modify it down the road (or an hour later when I realized I screwed something up).
Note: if you wish to have a permanent shelf in your cabinet, use a full depth board in place of the 5-inch spreaders.
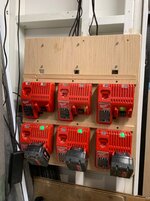
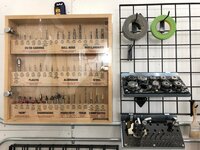
I use the same steps to build all of my cabinets I just change the dimensions as needed. The pictures shown above were actually of a built-in I made for my daughter. The cabinet itself was the bottom right piece in the built-in below which received 8 drawers.

Hopefully this helps.


 Who knows now.


")