trbomax
Well-known member
This is my method of building either stick or pole walls and cieling/roof units.It is what I have figuredout over almost 50 yrs of being involved in other peoples builds and doing many of my own.The first was a 28x32 stick garage at my parents house in 1961.My dad was the type of person that believed if you wanted something you should either build it yourself or be personally involved.He had a history of building starting in the 1930's with a real log home (not a kit) on little wolf lake in southern michigan. It still is in use today.
A few years later nancy and I married and had to have a home and shop. She came from a dairy farm background where her dad built everything they had.So the two of us started building stuff in 1970 and never stopped! She has been with me on 4 homes and 7 garage shops . We made some misteaks,learned a lot about methods and especially energy use along the way.
The first home was a passive solar that we designed together.I spent well over a year studying insulation methods and ways of heating for free. It was a conglamoration of double walls a lot of rocks and reflective collecters with a forced air wood backup. A few years later I added a6 ton comercial air handeler with AC and electric strips. This house was rather large at 3500 sq ft (for the time and nieghborhood) and the first house I had ever seen with staggered stud construction. We messed up,only useing 2x4's in the walls where they should have been 2x6.Unfaced FG in the double cavitys with 3/4" blue t&g foam secondary outer sheeting over 1/2" ply primary. It had another novel thing (at the time),a poly vapor barrior on the inside under the drywall. But all in all it worked very well. It is still in the family,our oldest son is there now. The hot air collecters have been changed to hot water but other than that,its the same.
The shop for this house was a modest 32 x 55 attached to the rear of the house with a covered porch.It was pretty conventional with 2x6 walls and 4/12 trusses. The walls were r 19 FG with a outer wrap of felt paper under the 5/8 ply sheeting ,An early experiment with house wrap! The truss uperchord was 2x8 (special) and I used r-19 in the upper cavities with the 1" or so airspace above it. We didnt have the fancy foam spacers then,you had to just wing it for the unconventional stuff. It did not have continuos ridge venting and we learned an expensive lesson there! It too was forced air wood heat. At the time I had just graduated college with a degree in mech engeneering and started teaching at a vocational HS in the fab shop,so I designed and built both heating units there. They are both still in service in that home,although the shop is now a recoding studio (lakebottomrecording .com) that my son runs.
After that there werea couple homes that we built with friends based on my passive solar system. Also a couple pole type shops with stud walls between the posts and FG and spray foam,all invarious combinations that did not in IMO work well as a team.
Around 1983 we built a home for my mom useing something completely different,a double 2x4 staggered stud wall attached in the middle with wall girts on 24" cl. 1 1/2" blue foam was used as an isolater between the walls to provide a small thermal transfer signature. The cavities were filled with faced r 13.Everyone warned us that it would rot and fall with a vapor barrior on each side. Over the years untill we sold it after her passing in1994 I made exploritory holes in the walls and never one time got anything moist or a sighn that it had been. The cielings were conventional ,plastic VB underDW and 16 " of blown in cellulose.In the mid 90's it became established that kraft paper was not a VB but instead a VR (vapor retarder) and did allow migration of water vapor. Damn,I figured that out in1970!
Jump ahead to 1999 and we were here,in suburban starvation lake michigan, liveing in our custom built Kenworth W-900 Motor Home with 2 teenagers on 20 a with nothing else on it but us! To make the first summer a short story,we burned up 2 onan gen sets and hauled at least5000 gal of water from the guy next door in a 125 gal FG tank I had made.This was (we thought) going to be the last building so it had to be right! To begin with it (the house) was elevated 4' above grade both to provide a spectacular view from the 14' window wall in the LR over the woods to the NW side. The entire site was dozed out of heavy timber and the NW side had the view!
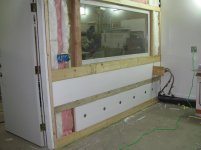
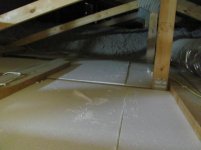
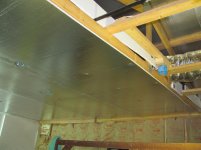
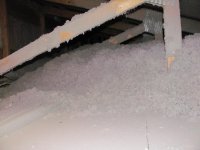
Building up in the air ,in the snow belt (210"per year) presented some challenges in insulation and wind tightness. These walls would be triple staggered stud with a different take. The core wall was a conventional 2x6 stud wall,16"oc. Windows were framed and installed accordingly. R-19 faced batts were used with the paper inthe outside was wrapped with felt paper 50 % overlap stapled to the studs. 2X4 walls were framed outside of this with the 2x4 turned 90 * so as to present the 1 1/2" side out and the centers spaced half way between the 2x6 core wall. The same was done on the other side of the core wall for the inside. The 1 1/2" voids were filled withblue foam cap nailed to the core wall studs. The entire building was then encased with 1/2" FG reinforced foam sheets that were originally intendid as a wrap for trailers and modulars before sideing them.Seams were taped and 5/8" T 111 covered the outside,glued at all joints. 1/2" drywall was screwed thru the 1/2" foam to the 2x4 flat studs and finished in the normal way.The cielings were2x 6 trusses ( 72# /sq' rated and bottom chord rated as well.)Trusses were 4' oc so 1 1/2" foam board was sawed to fit between them and pinned in place with 4" screws thru the sides of the truss chord into the foam. The caulk was sloppy, useing regular painters caulk because it did not melt the foam. I bet there are 500 tubes up there! The liveing side was thencovered with7/16 osb at rt angles to the trusses,glued and screwed,joints cauked with const adhesive and knifed flat. 1/2" DW followed last glued and screwed to the osb but installed at rt angles to it. 20" of cellulose was blown in the attic.The roof covering is steel installed over cheap o foam house wrap,a real no no next time as it sags and then drips on the cellulose. Its about the same and as good as nothing. The tape dont stick and it is not very hot/cold stable. Avoid this **** at all costs because after a year its worthless.
The elevated floors presented a different challenge I was tired of building and it was getting cold so we just used r 19 faced,faceing down We covered that with 1" blue foam spot nailed and then finish fastened with 1 x 3 battens ,1 x 2 when the yard ran out!, 16" oc.
The house is VERY quiet,does not whistle in the wind,heats with an 80% propane furnace for less than $200/month includeing hot water , cooking , and laundry.
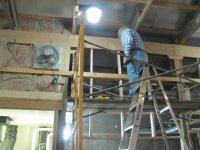
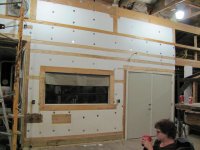
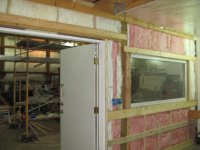
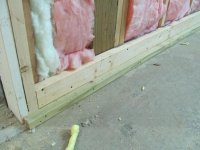
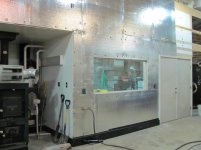
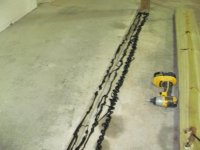
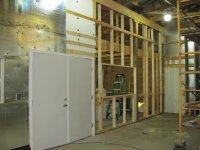
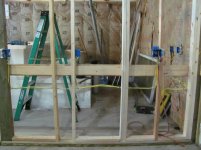
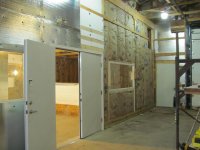
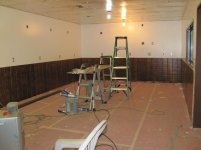
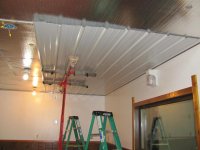
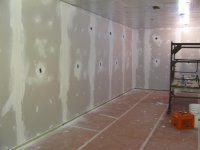
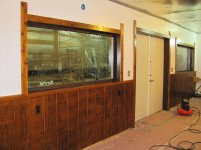
So,if you are still with me,this is how I got to where I am,building my LAST shop in the most energy efficient way I can,with the lowest heating / cooling costs possible. I will be honest when I say that I did not make any attempt on either the house or now the shop build,at being economically built.Cost efficient,yes and low maintanennce,yes but low cost ,no ,that never was a consideration.
In the next post we will explore the wall and cieling techniques used to build as air tight ,windproof,and thermacally effective structure we can.
A few years later nancy and I married and had to have a home and shop. She came from a dairy farm background where her dad built everything they had.So the two of us started building stuff in 1970 and never stopped! She has been with me on 4 homes and 7 garage shops . We made some misteaks,learned a lot about methods and especially energy use along the way.
The first home was a passive solar that we designed together.I spent well over a year studying insulation methods and ways of heating for free. It was a conglamoration of double walls a lot of rocks and reflective collecters with a forced air wood backup. A few years later I added a6 ton comercial air handeler with AC and electric strips. This house was rather large at 3500 sq ft (for the time and nieghborhood) and the first house I had ever seen with staggered stud construction. We messed up,only useing 2x4's in the walls where they should have been 2x6.Unfaced FG in the double cavitys with 3/4" blue t&g foam secondary outer sheeting over 1/2" ply primary. It had another novel thing (at the time),a poly vapor barrior on the inside under the drywall. But all in all it worked very well. It is still in the family,our oldest son is there now. The hot air collecters have been changed to hot water but other than that,its the same.
The shop for this house was a modest 32 x 55 attached to the rear of the house with a covered porch.It was pretty conventional with 2x6 walls and 4/12 trusses. The walls were r 19 FG with a outer wrap of felt paper under the 5/8 ply sheeting ,An early experiment with house wrap! The truss uperchord was 2x8 (special) and I used r-19 in the upper cavities with the 1" or so airspace above it. We didnt have the fancy foam spacers then,you had to just wing it for the unconventional stuff. It did not have continuos ridge venting and we learned an expensive lesson there! It too was forced air wood heat. At the time I had just graduated college with a degree in mech engeneering and started teaching at a vocational HS in the fab shop,so I designed and built both heating units there. They are both still in service in that home,although the shop is now a recoding studio (lakebottomrecording .com) that my son runs.
After that there werea couple homes that we built with friends based on my passive solar system. Also a couple pole type shops with stud walls between the posts and FG and spray foam,all invarious combinations that did not in IMO work well as a team.
Around 1983 we built a home for my mom useing something completely different,a double 2x4 staggered stud wall attached in the middle with wall girts on 24" cl. 1 1/2" blue foam was used as an isolater between the walls to provide a small thermal transfer signature. The cavities were filled with faced r 13.Everyone warned us that it would rot and fall with a vapor barrior on each side. Over the years untill we sold it after her passing in1994 I made exploritory holes in the walls and never one time got anything moist or a sighn that it had been. The cielings were conventional ,plastic VB underDW and 16 " of blown in cellulose.In the mid 90's it became established that kraft paper was not a VB but instead a VR (vapor retarder) and did allow migration of water vapor. Damn,I figured that out in1970!
Jump ahead to 1999 and we were here,in suburban starvation lake michigan, liveing in our custom built Kenworth W-900 Motor Home with 2 teenagers on 20 a with nothing else on it but us! To make the first summer a short story,we burned up 2 onan gen sets and hauled at least5000 gal of water from the guy next door in a 125 gal FG tank I had made.This was (we thought) going to be the last building so it had to be right! To begin with it (the house) was elevated 4' above grade both to provide a spectacular view from the 14' window wall in the LR over the woods to the NW side. The entire site was dozed out of heavy timber and the NW side had the view!
Building up in the air ,in the snow belt (210"per year) presented some challenges in insulation and wind tightness. These walls would be triple staggered stud with a different take. The core wall was a conventional 2x6 stud wall,16"oc. Windows were framed and installed accordingly. R-19 faced batts were used with the paper inthe outside was wrapped with felt paper 50 % overlap stapled to the studs. 2X4 walls were framed outside of this with the 2x4 turned 90 * so as to present the 1 1/2" side out and the centers spaced half way between the 2x6 core wall. The same was done on the other side of the core wall for the inside. The 1 1/2" voids were filled withblue foam cap nailed to the core wall studs. The entire building was then encased with 1/2" FG reinforced foam sheets that were originally intendid as a wrap for trailers and modulars before sideing them.Seams were taped and 5/8" T 111 covered the outside,glued at all joints. 1/2" drywall was screwed thru the 1/2" foam to the 2x4 flat studs and finished in the normal way.The cielings were2x 6 trusses ( 72# /sq' rated and bottom chord rated as well.)Trusses were 4' oc so 1 1/2" foam board was sawed to fit between them and pinned in place with 4" screws thru the sides of the truss chord into the foam. The caulk was sloppy, useing regular painters caulk because it did not melt the foam. I bet there are 500 tubes up there! The liveing side was thencovered with7/16 osb at rt angles to the trusses,glued and screwed,joints cauked with const adhesive and knifed flat. 1/2" DW followed last glued and screwed to the osb but installed at rt angles to it. 20" of cellulose was blown in the attic.The roof covering is steel installed over cheap o foam house wrap,a real no no next time as it sags and then drips on the cellulose. Its about the same and as good as nothing. The tape dont stick and it is not very hot/cold stable. Avoid this **** at all costs because after a year its worthless.
The elevated floors presented a different challenge I was tired of building and it was getting cold so we just used r 19 faced,faceing down We covered that with 1" blue foam spot nailed and then finish fastened with 1 x 3 battens ,1 x 2 when the yard ran out!, 16" oc.
The house is VERY quiet,does not whistle in the wind,heats with an 80% propane furnace for less than $200/month includeing hot water , cooking , and laundry.
So,if you are still with me,this is how I got to where I am,building my LAST shop in the most energy efficient way I can,with the lowest heating / cooling costs possible. I will be honest when I say that I did not make any attempt on either the house or now the shop build,at being economically built.Cost efficient,yes and low maintanennce,yes but low cost ,no ,that never was a consideration.
In the next post we will explore the wall and cieling techniques used to build as air tight ,windproof,and thermacally effective structure we can.
Last edited: