To avoid these ads, REGISTER NOW!

Vintage Counter Restoration

MAYOR28

ALLIANCE MEMBER
Joined
Mar 22, 2010
Messages
786
Location
Southern MD
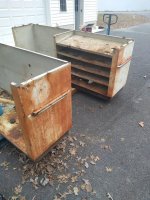
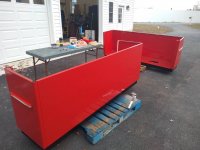
My wife (she's pretty amazing) found these on Craigslist a long while ago. Unfortunately we did not have the space for them inside the shop until recently. That meant they spent the majority of the last year out in the elements. They were already a little rusty, so really the only damage is on the delaminated tops (which I was planning to replace anyhow).

My plan is to do a quick repaint, and paint the pitted chrome with some aluminum paint. The question is this: What color do I paint the main body?


attachment.php


...
 

Attachments

  • IMG_20200413_104155417.jpg
    IMG_20200413_104155417.jpg
    148.7 KB · Views: 1,481
Last edited:
To avoid these ads, REGISTER NOW!

turbowoodworker

Well-known member
Joined
Mar 18, 2012
Messages
3,548
Location
Apex NC
First off, those look too cool to repaint pitted chrome with silver paint. Do your painting then polish the chrome with all its warts. See what it looks like. You can always paint it later, but vintage chrome should stay vintage (IMO).

What does the front look like? Drawers, cabinets?
What color are you looking for, what theme? Ford blue, Harley orange...?
What kind o laminate are you looking to do? There are too many laminate colors to consider.

Pick your preferred color family, see what laminate you can find (afford) and then pick a paint to match.

Great project there. We all want pictures of the progress and final product!
Rick
:beer:
 

turbowoodworker

Well-known member
Joined
Mar 18, 2012
Messages
3,548
Location
Apex NC
Sorry for multiple posts but I had one other thought looking at the picture.

The edging on the old laminate looks like it might be aluminum, typical of the stuff stuck on the sides of Formica tops way back when. I would consider polishing those up (easy) or replacing with more aluminum.
 
OP
M

MAYOR28

ALLIANCE MEMBER
Joined
Mar 22, 2010
Messages
786
Location
Southern MD
First off, those look too cool to repaint pitted chrome with silver paint. Do your painting then polish the chrome with all its warts. See what it looks like. You can always paint it later, but vintage chrome should stay vintage (IMO).

What does the front look like? Drawers, cabinets?
What color are you looking for, what theme? Ford blue, Harley orange...?
What kind o laminate are you looking to do? There are too many laminate colors to consider.

Pick your preferred color family, see what laminate you can find (afford) and then pick a paint to match.

Great project there. We all want pictures of the progress and final product!
Rick
:beer:

I hadn't considered trying to polish the chrome. I was actually thinking of trying to get them re-chromed, but don't know of any local places to do that. As for color scheme, I will put another picture down below with the current garage set up. I have a green(ish) floor, galvanized metal wainscoting, and off-white-washed walls. My other cabinets are black (or going to be black) and aluminum colored hammer-tone. I have a lot to repaint since I got a bunch of file cabinets free lately......


Might want to ask these questions of your wife. Sounds like she might be very helpful.

Yessir! She certainly has a vote.

The edging on the old laminate looks like it might be aluminum............. I would consider polishing those up (easy)

Yep, keeping those. A little polish and reinstall on the new tops!
 
OP
M

MAYOR28

ALLIANCE MEMBER
Joined
Mar 22, 2010
Messages
786
Location
Southern MD
What does the front look like? Drawers, cabinets?

What kind o laminate are you looking to do? There are too many laminate colors to consider.

Pick your preferred color family, see what laminate you can find (afford) and then pick a paint to match.


I forgot to answer the laminate question. I am planning on remaking the tops with an mdf or plywood core and press-board/masonite on the very top. That way I can replace the very top layer easily. I may also add a set of MFT table holes ('dog' holes) to half of one top.


I will need to get a picture of the back side of the cabinets. They are just open cavities. Looks like one was modified with some sort of angled shelving that I was going to remove. I will most likely build a bunch of finger-joint plywood boxes to store tools and equipment in these spaces. Things like tablesaw jigs, and larger tool fixtures, not hand tools.
 

driftpin

Well-known member
Joined
Dec 22, 2016
Messages
11,327
Location
Miami-Dade/Broward Co. Florida
One cheap & easy treatment for pitted chrome, which I've used (when you discover the cost of re-chroming, you're gonna 'just say, no') is to use a bicarbonate of soda (NaHCO3) blaster to scour the pits. Be careful of disposal of the bicarbonate of soda as it kills the grass. Then use a 'ball' of aluminum foil and rub it into the pits, vigorously. This costs next-to nothing, the NaHCO3 scours the pits thoroughly, better-than any paste can, and it leaves no residual material. I think you will be surprised at how-well it works.

As a comment on your color choice, I think choosing something to 'pop' in the room will add to the look. I assume your cabinet backs will be to the wall, so except for the front perimeter edges, you won't see the cabinets' color, except for the end cabinet, assuming it stops before the wall.
 
OP
M

MAYOR28

ALLIANCE MEMBER
Joined
Mar 22, 2010
Messages
786
Location
Southern MD
One cheap & easy treatment for pitted chrome, which I've used (when you discover the cost of re-chroming, you're gonna 'just say, no') is to use a bicarbonate of soda (NaHCO3) blaster to scour the pits. Be careful of disposal of the bicarbonate of soda as it kills the grass. Then use a 'ball' of aluminum foil and rub it into the pits, vigorously. This costs next-to nothing, the NaHCO3 scours the pits thoroughly, better-than any paste can, and it leaves no residual material. I think you will be surprised at how-well it works.

As a comment on your color choice, I think choosing something to 'pop' in the room will add to the look. I assume your cabinet backs will be to the wall, so except for the front perimeter edges, you won't see the cabinets' color, except for the end cabinet, assuming it stops before the wall.

I will have to look into the bicarbonate of soda.

The cabinets will actually be out in the open, facing the 'middle' garage bay. So you will see the large painted face all the time. They will kind of be a focal point. I can post a rough layout later today.

...
 

cdestuck

Well-known member
Joined
Nov 13, 2013
Messages
1,462
Location
Altoona, Pa
Take your wife to Lowe’s or H-D. Paint dept, oil base Rustoleum quarts and pick from the colors available. Easy peasy.
 

MoonRise

Well-known member
Joined
Nov 5, 2010
Messages
4,033
Location
NJ
Oh no, you absolutely HAVE to have the metal cabinets media blasted down to clean steel, then some body work with hammer and dolly and some body filler and block sanding until it is as smooth as a mirror, then several coats of primer, more block sanding, then multiple coats of basecoat in a transchromatic midnight purple metallic, then some wet sanding, then several coats of clearcoat, followed by more wet sanding and then buffing and polishing until it as deeply glossy as the finish on a Boesendorfer Concert Grand 290 Imperial in full classic ebony gloss black.

And the counter just MUST be some Swedish green marble.

https://en.wikipedia.org/wiki/Swedish_green_marble

:lol:

What vibe/feel do you want to achieve with these cabinets?

Utilitarian? Classic 'shop' green/gray industrial.

Somewhat funky? Gulf livery pale-blue and orange.

https://modular4kc.com/2011/04/22/design-friday-the-color-of-gulf-racing/

Really utilitarian? Black hammertone.

Oriental vibe? Deep red with black trim.

Don't just "quick repaint" them though. Take at least some time and effort to clean up the rust and such before repainting.

The aluminum trim rim could be removed from the old counters and cleaned up and then at least somewhat buffed/rubbed/polished to the desired gloss/sheen anywhere from a brushed-type finish all the way to a gloss polished look.
 
OP
M

MAYOR28

ALLIANCE MEMBER
Joined
Mar 22, 2010
Messages
786
Location
Southern MD
Don't just "quick repaint" them though. Take at least some time and effort to clean up the rust and such before repainting.


Definitely will take some time to clean up the rust. Just not doing the suggested full body work....:lol_hitti They would be too nice to work on then.....
...
 
OP
M

MAYOR28

ALLIANCE MEMBER
Joined
Mar 22, 2010
Messages
786
Location
Southern MD
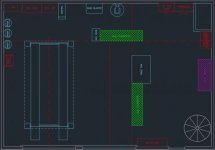
Attached is the planned layout. The 'counters' are the bright green hatched rectangles.

attachment.php


...
 

Attachments

  • plan-a_layout-1.jpg
    plan-a_layout-1.jpg
    19.2 KB · Views: 854

HotrodHR

Well-known member
Joined
Nov 22, 2009
Messages
445
Location
North Alabama
Pick a color, any color... but if it was mine I would do the "bodywork" as some mentioned and shoot an automotive type single stage or basecoat/clearcoat paint, redo the top with some retro looking Formica. Polish the aluminum pieces (start by sanding to remove deep scratches, followed by finer and finer sand paper, and then polish - plenty of YouTube demos online).

For the chrome trim, try to find some in your area that does Spectra chrome or cosmic chrome parts painting - this stuff looks pretty good. Eastwood offers a DIY product, I haven't used it though so I can't speak to how good it is.

I get trying to keep stuff original, but this is a case where a partial restoration or repair will just make this look like an old repainted counter... restore it and you'll have a cool retro counter... you might even want to add some pinstripe details to add to the cool factor.

:beer:
 
OP
M

MAYOR28

ALLIANCE MEMBER
Joined
Mar 22, 2010
Messages
786
Location
Southern MD
Pick a color, any color... but if it was mine I would do the "bodywork" as some mentioned and shoot an automotive type single stage or basecoat/clearcoat paint, redo the top with some retro looking Formica. Polish the aluminum pieces (start by sanding to remove deep scratches, followed by finer and finer sand paper, and then polish - plenty of YouTube demos online).

For the chrome trim, try to find some in your area that does Spectra chrome or cosmic chrome parts painting - this stuff looks pretty good. Eastwood offers a DIY product, I haven't used it though so I can't speak to how good it is.

I get trying to keep stuff original, but this is a case where a partial restoration or repair will just make this look like an old repainted counter... restore it and you'll have a cool retro counter... you might even want to add some pinstripe details to add to the cool factor.

:beer:


Good idea on the Spectra Chrome.

I will do some body work on it in areas that are very rusty, I am just not going to do a full automotive restoration. I want to use the shop, I'm getting rather tired of working on the shop. Trying to knock out these projects so I can get things to the final location and start working!


...
 

K'ledgeBldr

Well-known member
Joined
Aug 22, 2011
Messages
1,925
Location
Johns Creek, GA
+++ on the Spectra Chrome.
It's a great alternative to replating- especially for something that won't be exposed to the elements.

Check with body shops for the Spectra.
 
OP
M

MAYOR28

ALLIANCE MEMBER
Joined
Mar 22, 2010
Messages
786
Location
Southern MD
Back from the dead! Time to resurrect this thread!

The wife and I finally got around to tackling this project. Went a little deeper than intended, some disassembly of the interior, but I am very happy with the results so far.
 
To avoid these ads, REGISTER NOW!
OP
M

MAYOR28

ALLIANCE MEMBER
Joined
Mar 22, 2010
Messages
786
Location
Southern MD
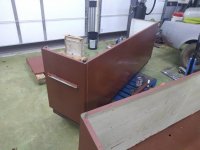
Started with stripping most of the major rust off the cabinets. Angle grinder and wire wheel, plus a quick wash made them ready for paint.

Overall, they were not in bad shape, considering they sat outside for nearly 20 months.

These are before stripping:

attachment.php


attachment.php


attachment.php


...
 

Attachments

  • IMG_20201121_133307193.jpg
    IMG_20201121_133307193.jpg
    119.9 KB · Views: 409
  • IMG_20201121_133329345.jpg
    IMG_20201121_133329345.jpg
    131.9 KB · Views: 584
  • IMG_20201121_133333868.jpg
    IMG_20201121_133333868.jpg
    123.5 KB · Views: 408
Last edited:
OP
M

MAYOR28

ALLIANCE MEMBER
Joined
Mar 22, 2010
Messages
786
Location
Southern MD
Started off with Rust-Oleum Rusty Metal Primer.


attachment.php


attachment.php


We also decided to disassemble the shelves so that I could reconfigure them during the rebuild. Here they are primed.

attachment.php


...
 

Attachments

  • IMG_20201121_171445798.jpeg
    IMG_20201121_171445798.jpeg
    66.6 KB · Views: 405
  • 873246489.jpeg
    873246489.jpeg
    96 KB · Views: 403
  • IMG_20201122_122238476.jpg
    IMG_20201122_122238476.jpg
    147.5 KB · Views: 406
Last edited:
OP
M

MAYOR28

ALLIANCE MEMBER
Joined
Mar 22, 2010
Messages
786
Location
Southern MD
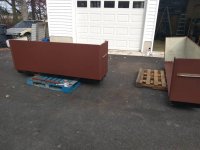
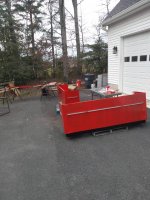
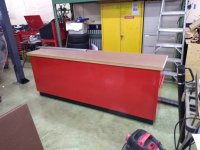
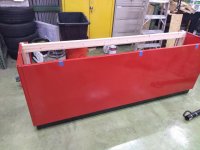
Final Color! We decided on red to match the tool cabinets in the shop. Eventually the other metal cabinets (file cabinets throughout) will be painted black and silver, so I wanted these to stand out a little.

This is Rust-Oleum Ford Red from Tractor Supply. It is close to the Harbor Freight Red, but not an exact match. But it was on sale for $34 a gallon, so the price was right.

First coat (eww):
attachment.php


Second coat (looking better):
attachment.php


Reassembly:
attachment.php


Trying to place it in its final home:
attachment.php


...
 

Attachments

  • IMG_20201122_143008734.jpg
    IMG_20201122_143008734.jpg
    129.9 KB · Views: 403
  • IMG_20201122_154135692.jpeg
    IMG_20201122_154135692.jpeg
    94.8 KB · Views: 584
  • IMG_20201123_135706645.jpeg
    IMG_20201123_135706645.jpeg
    88.1 KB · Views: 583
  • IMG_20201122_171124192.jpg
    IMG_20201122_171124192.jpg
    98.6 KB · Views: 401
Last edited:
OP
M

MAYOR28

ALLIANCE MEMBER
Joined
Mar 22, 2010
Messages
786
Location
Southern MD
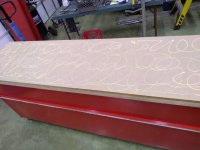
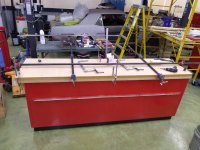
I riveted the shelves back in (only 2, trying to decide what to do with the other 2 still). Then it was on to the tops. They will be laminated MDF, 1.5" total thickness with a sacrificial masonite/pressboard top.

attachment.php


attachment.php


Realize too late that the glue makes the tops slide apart as you clamp them, panic, and go find big clamps......
attachment.php


Ready to be cut to final size:
attachment.php


...
 

Attachments

  • IMG_20201123_161815973.jpeg
    IMG_20201123_161815973.jpeg
    78.5 KB · Views: 406
  • IMG_20201123_185147802.jpeg
    IMG_20201123_185147802.jpeg
    78.7 KB · Views: 404
  • IMG_20201123_190647767.jpeg
    IMG_20201123_190647767.jpeg
    102.9 KB · Views: 405
  • IMG_20201123_163747797.jpeg
    IMG_20201123_163747797.jpeg
    93.1 KB · Views: 400
Last edited:
OP
M

MAYOR28

ALLIANCE MEMBER
Joined
Mar 22, 2010
Messages
786
Location
Southern MD
I was nervous to cut the radii on the corners, then I looked at the old tops and realized that it was actually a very small radius, so the task should be much easier. I test fit various sockets into the aluminum trim rings until I found the right size, then used that to file/sand a plywood template.

Unfortunately, the only flush trim bit (top-bearing) I have was not long enough to cut the whole thickness, so we had to make one pass with the template and one without.
attachment.php


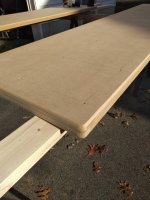
Then I rounded the bottom edge, up to where the trim ring will sit. I will paint this exposed MDF black to contrast the aluminum trim ring.
attachment.php


With sacrificial top cut to size.
attachment.php


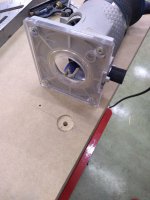
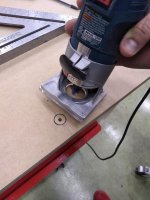
And that is where we stand today. I am waiting on a slot-cutting router bit to make the rabbet for the trim ring. Hopefully that comes in the mail this week, and we can cross this project off the list.

...
 

Attachments

  • IMG_20201128_162958483.jpg
    IMG_20201128_162958483.jpg
    59.7 KB · Views: 400
  • IMG_20201129_142150262.jpg
    IMG_20201129_142150262.jpg
    89.1 KB · Views: 408
  • IMG_20201129_161551361.jpeg
    IMG_20201129_161551361.jpeg
    80.2 KB · Views: 601
Last edited:
OP
M

MAYOR28

ALLIANCE MEMBER
Joined
Mar 22, 2010
Messages
786
Location
Southern MD
I thought I had some pictures of the chrome pieces, but I couldn't find them......will need to take some more.

But, they are in pretty bad shape. So I think I am going to paint them with some Seymour Cast Blast. If I hate the way they look, I will eventually find some way to get them re-chromed.

...
 

Sawdust_

Well-known member
Joined
Mar 2, 2020
Messages
77
Location
NY
I must admit I didn't see where you were going with this project until I saw the final product. LOOKING GREAT!
Well done.
 
OP
M

MAYOR28

ALLIANCE MEMBER
Joined
Mar 22, 2010
Messages
786
Location
Southern MD
The plan for this workbench is to put a vise on the corner closest to the lift post. That will give me a solid vise location for the automotive side of the shop. Then the short side or back side (haven't decided yet) will have a permanent mounting hole patter for a few of my tools. I am thinking the bench-top arbor press, a bench grinder (or two), and a wire wheel setup. I will mount each of those to larger baseplates with the mating hole pattern, then it will be a simple bolt down install. Just need to make some sort of nut-plate for the underside of the top.


attachment.php


Still waiting on USPS to deliver my slotting bits so I can get the trim installed back on the edges......


...
 

Stuart in MN

Well-known member
Joined
Sep 8, 2005
Messages
23,198
Location
Minneapolis
I will mount each of those to larger baseplates with the mating hole pattern, then it will be a simple bolt down install. Just need to make some sort of nut-plate for the underside of the top.

That's a smart idea, then you can take them off and put them somewhere out of the way when you aren't using them.

For the chrome parts I'd try soaking them in Evaporust or similar first, to see if they'll clean up well enough to use as is.
 

Jayman17

Well-known member
Joined
Feb 6, 2017
Messages
3,820
Location
Seattle, Wa
Mayor, very nice results on your workbench resto. The color looks great too.
Please update when you get the trim ring installed and the other pieces of trim as well.

Jay
 
OP
M

MAYOR28

ALLIANCE MEMBER
Joined
Mar 22, 2010
Messages
786
Location
Southern MD
Been stalled since USPS hasn't been able to deliver my slotting bits :argue:

Finished the reinforcing piece on the one (don't worry, I'll paint that screw later):
attachment.php


Marked out a few of the existing mounting holes.
attachment.php


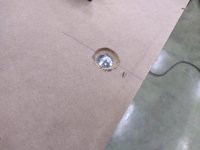
Unfortunately, I could not find long enough #10 CSK machine screws at Ace (the not-so-helpful place this time). So I was stuck with some 1/4 carriage bolts. That meant I had to counter-bore the top a bit.

attachment.php


attachment.php


attachment.php


I love cluttering up horizontal surfaces......
attachment.php


...
 

Attachments

  • IMG_20201204_172928317.jpg
    IMG_20201204_172928317.jpg
    81 KB · Views: 152
  • IMG_20201204_172855709.jpg
    IMG_20201204_172855709.jpg
    84.8 KB · Views: 151
  • IMG_20201204_172514803.jpg
    IMG_20201204_172514803.jpg
    111.7 KB · Views: 150
  • IMG_20201204_172508493.jpg
    IMG_20201204_172508493.jpg
    147 KB · Views: 153
  • IMG_20201204_162345089.jpg
    IMG_20201204_162345089.jpg
    74.5 KB · Views: 149
  • IMG_20201204_162328375.jpg
    IMG_20201204_162328375.jpg
    126.9 KB · Views: 151
OP
M

MAYOR28

ALLIANCE MEMBER
Joined
Mar 22, 2010
Messages
786
Location
Southern MD
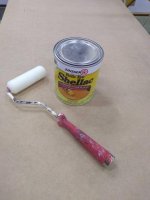
Just in case the sacrificial pressboard got spilled on, I wanted to seal the MDF underneath. 2 quick coats of shellac, and that is done.

attachment.php


...
 

Attachments

  • IMG_20201206_164729873.jpg
    IMG_20201206_164729873.jpg
    62 KB · Views: 117
To avoid these ads, REGISTER NOW!
Top Bottom