To avoid these ads, REGISTER NOW!

Vintage Grinder Sticker Reproduction

LSUmAniac

Member
Joined
Sep 19, 2022
Messages
22
Location
Baton Rouge
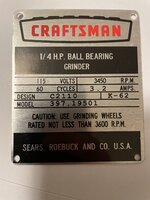
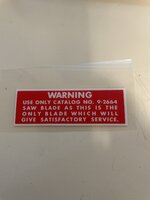
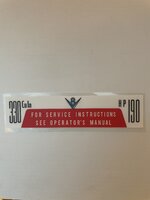
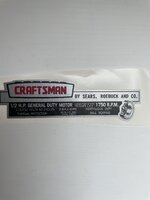
Here it is.

image.jpg

I used a high gloss polycarbonate lamination. Very durable and has a nice gloss finish.
Dude that thing looks sweet, this grinder is gonna like a time capsule when this lable is slapped on, definitely gonna set the whole project off. Thanks again sir
 
To avoid these ads, REGISTER NOW!

Magillg

Member
Joined
Jan 5, 2023
Messages
6
Location
Phoenix, AZ
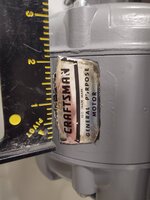
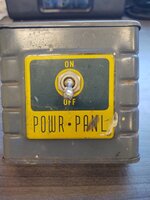
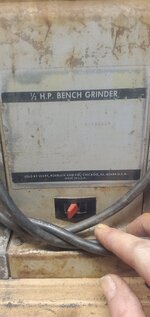
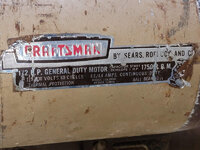
Matt do you have any of the power panel decals? If so I would like 3. Also a craftsman motor sticker. Are you still not charging for this? Thank you!
 

Attachments

  • Craftsman motor.jpg
    Craftsman motor.jpg
    409.3 KB · Views: 47
  • Power Pnl.jpg
    Power Pnl.jpg
    682.4 KB · Views: 37

11b30b4

Well-known member
Joined
Jul 16, 2020
Messages
1,029
Location
GA
Matt, you need to rename this thread to the Vintage Tool Decal Reproduction IMO. Keep up the amazing work.
 
OP
M

mattblast

Well-known member
Joined
Jan 30, 2013
Messages
786
Location
Bridgewater, NJ
@mattblast you are a master. These are awesome.
Thank you.

Here is another for the same drill press.

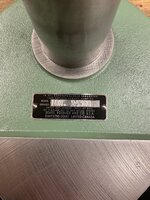
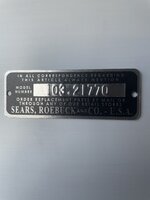
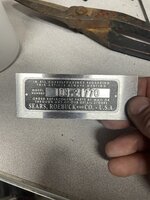
Craftsman 103.24500 drill press model number label. Printed and embossed aluminum to match original. My embossing machine is not exactly the same size, but very close. This is one of the rare situations where I have a physical tag rather than just a photo.

This one is laminated with a high gloss polycarbonate.
7F449B42-0F0C-4FA1-98C9-86996D2A442B.jpeg

4A07A97B-2EF7-4FD8-A839-1296721253B9.jpeg
 
OP
M

mattblast

Well-known member
Joined
Jan 30, 2013
Messages
786
Location
Bridgewater, NJ
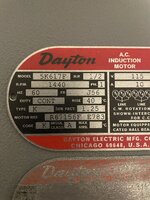
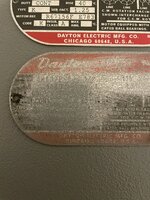
Dayton motor label reproduction for a South Bend drill press restoration. This was especially tricky to design with the heavy wear.


Usually I only have a photo to go by, but this time I had the old label mailed to me. Literally had to take a 10x loupe to the tag to make out the missing details.

0A266715-A42F-4EDE-809D-A4BA6E853AA2.jpeg

4123F6F3-5C0F-4DF6-9BAF-9D5C0E95C210.jpegAF7304C9-CD03-4193-827F-1223B9F2EC20.jpeg

0515C203-8A6B-4C5E-B90F-8E28206E1316.jpeg

4EC9D90F-D930-4942-A561-FAF9F80383FF.jpeg
 
OP
M

mattblast

Well-known member
Joined
Jan 30, 2013
Messages
786
Location
Bridgewater, NJ
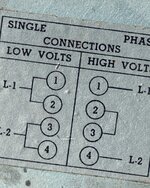
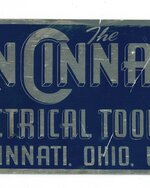
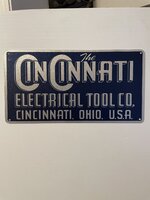
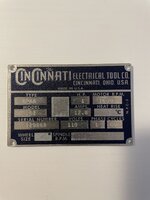
Cincinnati Long Arm Buffer/Grinder Badges for a grinder restoration. These were redrawn as vector paths then printed, laminated, cut, and applied to aluminum sheet that was then shaped and punched.


Before:

30ECC07C-158E-40E7-950B-37740589DA07.jpeg

7CDB3A42-8663-48EE-8C9B-B237BC6B8241.jpeg

2ECBB5FC-8EF2-46B6-9972-9CF4EDC6954D.jpeg

After:

B71195A3-98EA-4ED1-8AC5-C55AD7C1629D.jpeg

74CCF975-8F86-4B2E-9099-48936740C599.jpeg

F90D437A-32D2-412E-BADC-7DAD21F12024.jpeg
 

Attachments

  • 63D8E91F-BED4-4768-B3EC-4844378F92BC.jpeg
    63D8E91F-BED4-4768-B3EC-4844378F92BC.jpeg
    601.4 KB · Views: 11
OP
M

mattblast

Well-known member
Joined
Jan 30, 2013
Messages
786
Location
Bridgewater, NJ
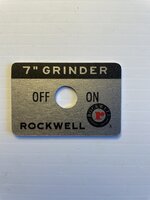
Reproduction tag for 7” Delta Rockwell grinder

Just noticed I made a mistake on this label that I made last week!

Before:
027AF8FE-75AF-44BF-8044-A8B766F880AC.jpeg

After:
810CEE73-8A2D-429F-A678-0C343992B712.jpeg


Let me know if you prefer posts with thumbnails or full size images.

And I’m sure you’ll see my mistake!
 

BigTexasYardSale

Active member
Joined
May 28, 2018
Messages
27
Location
Texas Gulf Coast
A beat up old sticker on a newly restored grinder makes it look bad. Many restorations require that the label be removed (and destroyed in the process) to repaint. When I restore a grinder I go all out - sandblast, paint, new bearings, replace cord, replace rubber feet, etc. I want my old grinders to have no problem lasting another 20 (or 40) years of heavy use before they look worn out.

Besides the old label my restorations look new.

Sometimes I need to remove the old label to sand and paint and sometimes the old label is damaged and needs to be replaced.

Here is a recent Baldor 3/4 HP from 1978 that I picked up for $200 a few months ago and is undergoing a restoration.

fac1484c11b064615569162a348a94b6.jpg

Solid grinder but it was heavily used and ready for a full restoration. This requires that I remove all the old stickers and sand blast it.

09572bd91dba4208cdfe100c2c9b96eb.jpg

Here it is partially restored. Only new parts are the bolts to attach to the stand, the bolts to attach the polycarbonate sheets and the new labels. I still need to attach nameplate and switch cover which I ordered new from Baldor.

b572012564addfecc8760e754af84035.jpg

3ea4c2db7ed8b35bf94254a48366733f.jpg

ce817dd6eff09d22500fe93ef8ae209e.jpg

Baldor also sells the adhesive labels but they are overpriced in my opinion so I made them myself. And besides, Baldor won't sell the UL label.

These labels were drawn on the computer using the old label as a template. I scanned the old label in on the office copy machine then used vector based drawing tools to make a perfect replica. These labels are within 0.01" of original.

I print them on silver or white high performance adhesive vinyl using solvent inks then machine cut them to size (the cutter automatically rounds the corners). The hard part is creating the electronic version of the label. It can take an hour or two for complex ones. The printing and cutting take just a few minutes.

It's actually no more effort to print out 8 then I have a few extras in case I mess up.

5d22e0fecbaa317c31239670a2543285.jpg

These are unlaminated so they are damaged with alcohol based solvents but are water and light resistant. For more durable labels I add a high performance clear laminate prior to machine cutting. That does complicate the cutting process as the machine needs to re-orient the print origin but then the labels are impervious to chemicals.

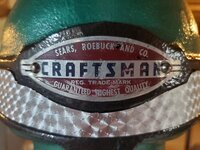
Here's one I did for a craftsman grinder last year (this is the spare one that didn't end up getting used). This one took about 90 mins to draw.

bfb9a98fd70bfb28f2c856333323bcc9.jpg

And some for another machine I'm restoring

d273ae87667072b10f7438abd3095dca.jpg

I use professional sign making software to do the layout (FlexiSIGN) which allows for fast and accurate drawing in vector format and can import and export EPS and PDF files.

All these labels (except the yellow/black ones) are extras that I don't need anymore. If you can use a any let me know and PM me your address and I'll send them.

I may regret saying this but I will also make any adhesive label for a grinder for free (at least until I get overwhelmed). If you need one post up a photo and I'll let you know of that is one I can make.
Beautiful work. Now that's RESTORATION, just like original.
 
To avoid these ads, REGISTER NOW!

frichard

Member
Joined
Mar 4, 2023
Messages
7
If you are still producing Block Grinder decals, I would like to order one.
 

Attachments

  • 20230423_145911.jpg
    20230423_145911.jpg
    356 KB · Views: 22

Coolerman

Well-known member
Joined
May 2, 2012
Messages
133
Location
Paint Lick, KY
Mattblast, I am blown away with your work!
I am restoring a benchtop Craftsman 150 Drill press Model 103.24521.
I am in need of the motor decal. You have already done it for someone here, but mine is a 1750 RPM not a 3450 RPM. Here is the only pic I have of it:
20230331_164954W.jpg

I did not paint my motor in the OEM brown colors. It is RED. If possible I would like the background of the decal that is shown as brown in the above pic to be black to match my paint scheme better.

PM me. I also may be interested in the Craftsman 150 head band you posted. It would match my paint scheme much better than the OEM head band.
 

GJ'er

Member
Joined
Apr 12, 2023
Messages
18
Unreal! I recreated a model label for a drill press I have been restoring, and I thought I have gone way too far down the rabbit hole but this is on another level.

There are levels to everything folks and this right here is on a whole other level.
 
OP
M

mattblast

Well-known member
Joined
Jan 30, 2013
Messages
786
Location
Bridgewater, NJ
Mattblast, I am blown away with your work!
I am restoring a benchtop Craftsman 150 Drill press Model 103.24521.
I am in need of the motor decal. You have already done it for someone here, but mine is a 1750 RPM not a 3450 RPM. Here is the only pic I have of it:
20230331_164954W.jpg

I did not paint my motor in the OEM brown colors. It is RED. If possible I would like the background of the decal that is shown as brown in the above pic to be black to match my paint scheme better.

PM me. I also may be interested in the Craftsman 150 head band you posted. It would match my paint scheme much better than the OEM head band.
Here it is. I couldn’t get the position perfect due to the angle of the photo but this should be very close.

Before:
IMG_2152.jpeg

After:
IMG_2135.jpeg
 

poeseph311

Member
Joined
May 19, 2023
Messages
7
Thank you.

Here is another for the same drill press.

Craftsman 103.24500 drill press model number label. Printed and embossed aluminum to match original. My embossing machine is not exactly the same size, but very close. This is one of the rare situations where I have a physical tag rather than just a photo.

This one is laminated with a high gloss polycarbonate.
7F449B42-0F0C-4FA1-98C9-86996D2A442B.jpeg

4A07A97B-2EF7-4FD8-A839-1296721253B9.jpeg
Hi @mattblast; your work is amazing@. Would you be able to make me one of these model number labels but with "103.24530"? And a Headband for the 100 series drill press? I see you have made one for the 150 but the 100 is slightly different shape and doesn't say "Craftsman" on it.
 

mcb74

New member
Joined
Oct 24, 2022
Messages
1
A beat up old sticker on a newly restored grinder makes it look bad. Many restorations require that the label be removed (and destroyed in the process) to repaint. When I restore a grinder I go all out - sandblast, paint, new bearings, replace cord, replace rubber feet, etc. I want my old grinders to have no problem lasting another 20 (or 40) years of heavy use before they look worn out.

Besides the old label my restorations look new.

Sometimes I need to remove the old label to sand and paint and sometimes the old label is damaged and needs to be replaced.

Here is a recent Baldor 3/4 HP from 1978 that I picked up for $200 a few months ago and is undergoing a restoration.

fac1484c11b064615569162a348a94b6.jpg

Solid grinder but it was heavily used and ready for a full restoration. This requires that I remove all the old stickers and sand blast it.

09572bd91dba4208cdfe100c2c9b96eb.jpg

Here it is partially restored. Only new parts are the bolts to attach to the stand, the bolts to attach the polycarbonate sheets and the new labels. I still need to attach nameplate and switch cover which I ordered new from Baldor.

b572012564addfecc8760e754af84035.jpg

3ea4c2db7ed8b35bf94254a48366733f.jpg

ce817dd6eff09d22500fe93ef8ae209e.jpg

Baldor also sells the adhesive labels but they are overpriced in my opinion so I made them myself. And besides, Baldor won't sell the UL label.

These labels were drawn on the computer using the old label as a template. I scanned the old label in on the office copy machine then used vector based drawing tools to make a perfect replica. These labels are within 0.01" of original.

I print them on silver or white high performance adhesive vinyl using solvent inks then machine cut them to size (the cutter automatically rounds the corners). The hard part is creating the electronic version of the label. It can take an hour or two for complex ones. The printing and cutting take just a few minutes.

It's actually no more effort to print out 8 then I have a few extras in case I mess up.

5d22e0fecbaa317c31239670a2543285.jpg

These are unlaminated so they are damaged with alcohol based solvents but are water and light resistant. For more durable labels I add a high performance clear laminate prior to machine cutting. That does complicate the cutting process as the machine needs to re-orient the print origin but then the labels are impervious to chemicals.

Here's one I did for a craftsman grinder last year (this is the spare one that didn't end up getting used). This one took about 90 mins to draw.

bfb9a98fd70bfb28f2c856333323bcc9.jpg

And some for another machine I'm restoring

d273ae87667072b10f7438abd3095dca.jpg

I use professional sign making software to do the layout (FlexiSIGN) which allows for fast and accurate drawing in vector format and can import and export EPS and PDF files.

All these labels (except the yellow/black ones) are extras that I don't need anymore. If you can use a any let me know and PM me your address and I'll send them.

I may regret saying this but I will also make any adhesive label for a grinder for free (at least until I get overwhelmed). If you need one post up a photo and I'll let you know of that is one I can make.
Hi, would you be able to do up more stickers to sell? I have a 8107w that I’ll be restoring and will require new stickers. Thank you
 
OP
M

mattblast

Well-known member
Joined
Jan 30, 2013
Messages
786
Location
Bridgewater, NJ
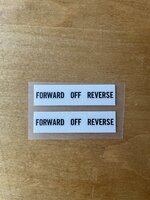
FORWARD / OFF / REVERSE label for Rusnok milling machine. Sometimes only a simple label is needed for a restoration. Printed on 3M white with a scuff resistant polycarbonate lamination, then contour cut to size.

Before:
IMG_4012.jpeg

After:
IMG_2233.jpeg
 

poeseph311

Member
Joined
May 19, 2023
Messages
7
Hi @mattblast; your work is amazing@. Would you be able to make me one of these model number labels but with "103.24530"? And a Headband for the 100 series drill press? I see you have made one for the 150 but the 100 is slightly different shape and doesn't say "Craftsman" on it.
@mattblast I was able to fix up the headband but the model number label is beyond repair. If it's too much trouble to change the number, I could just buy another copy of the one you already made if that works for you. Thanks in advance!
 
OP
M

mattblast

Well-known member
Joined
Jan 30, 2013
Messages
786
Location
Bridgewater, NJ
@mattblast I was able to fix up the headband but the model number label is beyond repair. If it's too much trouble to change the number, I could just buy another copy of the one you already made if that works for you. Thanks in advance!

Send me a photo of the original and I’ll see if I can make an exact match.
 
OP
M

mattblast

Well-known member
Joined
Jan 30, 2013
Messages
786
Location
Bridgewater, NJ
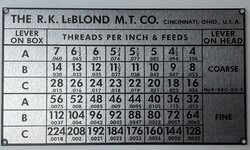
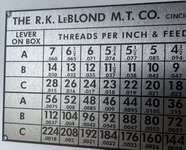
here is my most recent label reproduction.

LeBlond Metal Lathe Threads per Inch and Feeds chart reproduction. Printed on clear and applied to aluminum with a scuff resistant lamination added. This took a couple hours of design time to get everything lined up perfectly and figure out what the damaged sections were supposed to be.

Before
6E98C0EDFEA042338CF63DDC9EB73256.png

After
IMG_2266.jpeg


IMG_2267.jpeg

IMG_2268.jpeg
 

poeseph311

Member
Joined
May 19, 2023
Messages
7
Send me a photo of the original and I’ll see if I can make an exact match.
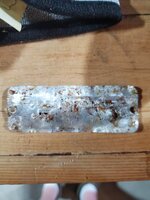
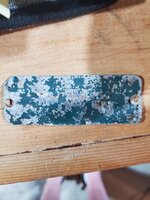
Thanks @mattblast . Unfortunately the model number label is fubar. I can only barely read the stamped numbers on it. If you need a pic of it in order to reproduce, I could just take a copy of the 103.24500 that you made for someone else. Attached are pics of my mangled number plate. Also the craftsman logo if you are able to reproduce that too, it didn't clean up as well as I had hoped.

Thank you again!
 

Attachments

  • 20230620_094740.jpg
    20230620_094740.jpg
    565.4 KB · Views: 22
  • 20230620_094746.jpg
    20230620_094746.jpg
    839.4 KB · Views: 22
  • 20230620_094802.jpg
    20230620_094802.jpg
    670 KB · Views: 20

Old Radar

Well-known member
Joined
Apr 17, 2019
Messages
2,755
Location
San Antonio, TX
^^^ Judging from the back of the label, I read 102124530. Spacing would suggest there is at least one character in front of the first one. You might try holding a light at a low angle to see if anything else becomes visible in shadow.
 
To avoid these ads, REGISTER NOW!
Top Bottom