andyvh1959
Well-known member
I installed Lifeproof brand vinyl planking in my kitchen remodel. This was my 1st ever floating vinyl planking installation, leanred some things.
Now, I've done sheet vinyl flooring, small tiles on mortar, large tiles on mortar, basically processes that involve glueing or mortar to bond the flooring product to the substrate. Doing any of those floors always meant you lay a chalk line in the middle of the room and start the flooring from there, so the edges on each side of the room are the same width. The Lifeproof product instruction says to start from a corner. I felt that would bother me, so I started from a center line and had the last edge pieces the same width. I think the reason Lifeproof instructs to start from a corner has to do with how the planks lock into each other to make tight joints rather than aligned to a center line.
The idea of floating a floor over substrate had me a bit doubtful, yet so many people claim no issues. At least this planking weighs a good amount per plank. My kitchen floor had been tiled with 2.5" square tile. I used a powered chisel to remove the tile and much of the motar under the tile. Some areas left some mortar, but it was all pretty level, so I laid the vinyl planking over the residual motar, making sure nothing projected up to cause the planking not to lay flat. The instructions from Lifeproof said it could handle 1/4" variations. If I were to do it again I would have gone over the floor with a drum sander after getting the tile off the substrate to remove or grind down all the residual mortar. Now in some areas I can sense just a bit of flexing as I walk on the vinyl planking, some clicking sound as I walk over joints.
Other things: I found it is critical to fully engage the long side locking edge of the planking by angling it into engagement. Yes with careful blocking and hammer I could push/force the edges to lock in, but far better to angle/swing it into engagement. A few areas on the kitchen floor "click" as I walk on them, indicating the edges are not fully/tightly engaged. In some areas I had to cut or notch to fit, I wasn't able to use the plank end overlap/lock edge. On those I created a lap by cutting back a bit of the underside of the cut piece to lap onto the adjoining piece, and if it laid a bit "proud" I used some Gorilla Glue (the water activated type) to flow some glue under the lap.
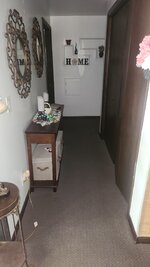
I'll soon be applying the same flooring in the dining room and main hallway of the house. This time I will make certain the entire substrate is completely clean and flat. Since the dining room starts from the last edge of the kitch floor I'll start just my locking in the next pieces. For certain I'll make sure any long edge is fully engaged by angling/swinging it into place before setting it down.
Now, I've done sheet vinyl flooring, small tiles on mortar, large tiles on mortar, basically processes that involve glueing or mortar to bond the flooring product to the substrate. Doing any of those floors always meant you lay a chalk line in the middle of the room and start the flooring from there, so the edges on each side of the room are the same width. The Lifeproof product instruction says to start from a corner. I felt that would bother me, so I started from a center line and had the last edge pieces the same width. I think the reason Lifeproof instructs to start from a corner has to do with how the planks lock into each other to make tight joints rather than aligned to a center line.
The idea of floating a floor over substrate had me a bit doubtful, yet so many people claim no issues. At least this planking weighs a good amount per plank. My kitchen floor had been tiled with 2.5" square tile. I used a powered chisel to remove the tile and much of the motar under the tile. Some areas left some mortar, but it was all pretty level, so I laid the vinyl planking over the residual motar, making sure nothing projected up to cause the planking not to lay flat. The instructions from Lifeproof said it could handle 1/4" variations. If I were to do it again I would have gone over the floor with a drum sander after getting the tile off the substrate to remove or grind down all the residual mortar. Now in some areas I can sense just a bit of flexing as I walk on the vinyl planking, some clicking sound as I walk over joints.
Other things: I found it is critical to fully engage the long side locking edge of the planking by angling it into engagement. Yes with careful blocking and hammer I could push/force the edges to lock in, but far better to angle/swing it into engagement. A few areas on the kitchen floor "click" as I walk on them, indicating the edges are not fully/tightly engaged. In some areas I had to cut or notch to fit, I wasn't able to use the plank end overlap/lock edge. On those I created a lap by cutting back a bit of the underside of the cut piece to lap onto the adjoining piece, and if it laid a bit "proud" I used some Gorilla Glue (the water activated type) to flow some glue under the lap.
I'll soon be applying the same flooring in the dining room and main hallway of the house. This time I will make certain the entire substrate is completely clean and flat. Since the dining room starts from the last edge of the kitch floor I'll start just my locking in the next pieces. For certain I'll make sure any long edge is fully engaged by angling/swinging it into place before setting it down.