To avoid these ads, REGISTER NOW!

Warehouse Motors - 36' X 48" in process

Bentwheelbob

Member
Joined
Jun 16, 2011
Messages
9
Location
Charleston, WV
Warehouse Motors - 36' X 48' in process

After lurking around for a bit, I have decided to "come out of the garage" and confess publicly my actions. I am in the process of constructing a 36'X48' garage behind my existing house so that my wife can reclaim her privileges to the existing 3 car garge and I can reclaim my rights to the woodworking shop in the basement under the existing 3 car garage. After procrastinating for over a year and blaming it on the inability to find time to engage an architect, my wife bought me a drafting table for Christmas and thus the challenge was made. Although I am not an architect in real life (i did sleep in a Holiday Inn one time), my wife and I have built four homes based on plans heavily modified by yours truly, a bottle of white out and and a Flair marker. My love for woodworking has most likely been our saving grace. Through the course of this past winter I spent many hours consuming precious brown liquid such as this in front of the fire while drawing my plans:

bourbon.jpg

I live in a fairly high rent subdivision, so the first plan requirement was that the design and construction had to match my existing house and conform to the convenants and restrictions of the development. Secondly, the garge needed to have sufficient interior height to allow a car to be raised high enough on a lift that a 6'-4" person (me) could walk under it without bringing blood. Lastly, I did not want any interior posts or loadbearing walls. Piece of cake with enough bourbon and firewood.

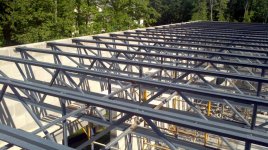
What I ended up with is a 36' wide X 48' deep garage of CMU construction that will be clad in brick. The joists are steel girder members that free span the 36' width and this necessitated the CMU construction with the benefit of eliminating any need for internal support. The ceiling above the girders will be 6" X 1.5" t&g southern yellow pine. This will also serve as the floor in the living space above. On the interior, I plan to paint the steel joists hunter green and brick two of the inside walls. The other two interior walls will be stucco finished with the type of material used in dryvet or EIFS construction. I have yet to decide what type of floor finish to use and look forward to engaging some of the "experts" on the board. I have done epoxy several times and love the clean finished look, but I am leaning toward acid etch with a clear coat as being more in line with the old school warehouse look I am going after on the interior. Below are a couple of photos that show several design elements I am trying to achieve.

Capital Market.jpg
Capital Market 2.jpg

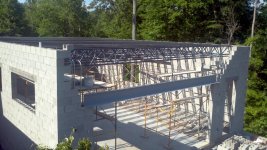
I am currently 1.5 months into the build process. The rough masonry is finished, the steel is in place and I am waiting for the framers to show up and raise the roof. I'll post some ramblings and photos of the process so far at my next opportunity, but will include in closing one photo of my current status as well as photos of the plans.

Front Elevation
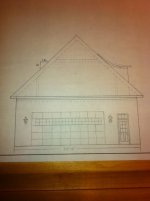
front elevation.jpg

Side Elevation East

plan - side elevation eastt.jpg

First Floor Layout

Plan - 1st Floor Layout.jpg

Current Status

Steel joists and header.jpg

I appreciate having such a cool website to share my fun and enjoy the experience of others that are chasing their dream. I'll be back soon with more.
 
Last edited:
To avoid these ads, REGISTER NOW!

toxicz28

Well-known member
Joined
Sep 23, 2006
Messages
738
Location
NY
Cool garage! Love the floor plan and your drawings look professional. But I have to say, they're called bar joist or trusses if you will, not girders. Sorry, but this just irks the OCD Ironworker in me. Good luck with your build. :thumbup:
 
OP
B

Bentwheelbob

Member
Joined
Jun 16, 2011
Messages
9
Location
Charleston, WV
Thanks Toxic, my builder would love you. I alternate between incorrectly referring to them as girders or girder trusses and he never fails to correct me and remind me that they are bar joists. I have the same problem with girts and purlins.
 
OP
B

Bentwheelbob

Member
Joined
Jun 16, 2011
Messages
9
Location
Charleston, WV
Re: Warehouse Motors - 36' X 48' in process

OK, the framers showed up today and got the plate installed on the CMU. I'm not sure if it would be considered a top plate or a sole plate since it is on top of a one story masonary structure. Hopefully they will start getting the rafters underway tomorrow, but the weather does not look good.

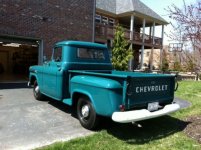
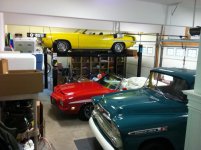
I live in West Virginia and the only flat land available is that which is man made. The lot where my home is built slopes downward from front to back. I have a walk out basement as a result of the natural grade and since I live on a corner lot I have an upper driveway which accesses the side entry 3 car house garage and a lower driveway which accesses the back side of the house including the walk out basement below my house garage that functioned as my woodshop prior to my getting bitten by the car bug. The new garage will be accessed by the lower driveway and will be adjacent to and on the same elevation as my basement. The photo below shows my 1959 Chevy Apache sitting within the perimeter of the new garage and the following photo shows the condition which afflicts my existing garage and led to this extreme expenditure of money that could better be spent buying cars or tools.

'59 Chevy Apache.jpg

The garage door in front of the truck is located in my basement woodshop.

existing garage.jpg

As you can see, there is little room for my wifes SUV. This lack of garage parking for the boss's SUV is compounded by the fact that her SUV is black, the season is summer and garage entry faces south.

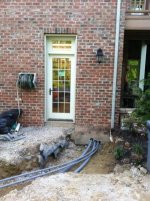
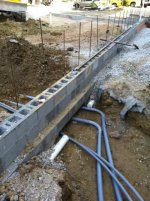
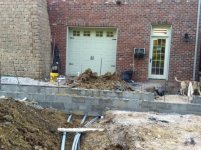
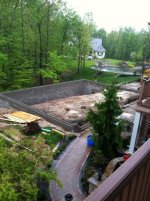
I'll try to move this along a bit and post a string of photos showing the footers and the utility runs going to the new garage. I was fortunate in that the mechanical room in the existing house is located adjacent to the basement workshop. As a result, we were able to run electric, water, gas, phone, cable and alarm feeds from the existing mechanical room, across the ceiling of my workshop and out through the below grade wall section. This required cutting out a chunk of the concrete floor in my workshop and core drilling six holes below grade. From this point, the utilities went through/below the footers on the new garage and were routed to the mechanical room location and stubbed up waiting for the slab pour. Several of the photos below were taken from the upper deck of my house. The corner of the new garage closest to the house is where the '59 Apache was parked in the earlier photo.

Footers

Footers.jpg

Conduit run from existing house

conduit existing house.jpg

Conduit under new foundation/footer

conduit under footer.jpg

Conduit inside slab perimeter

conduit.jpg

Foundation

Foundation.jpg

Well, that's a wrap for tonight. I'll try to get back to this tomorrow and post from the slab through the rough masonary. No promises though, I'm a gypsy coal peddler and there are some coal hungry Chinese buyers coming through tomorrow. If the price is right, I'll probably feed them some good American beef washed down with their choice of fine Kentucky Bourbon or Napa grape squeezings. You've got to shake your head at how small the world has become.


As you can see, there
 

mrb

Well-known member
Joined
Dec 31, 2008
Messages
3,734
very cool. Do you have a picture showing how the bar joists connect to the CMU walls? How is the wood deck on top of them attached?
 
To avoid these ads, REGISTER NOW!
OP
B

Bentwheelbob

Member
Joined
Jun 16, 2011
Messages
9
Location
Charleston, WV
Re: Warehouse Motors - 36' X 48' in process

MRB - the bar joists land on steel bearing plates that are grouted into the CMU's. I've got a photo below of the bearing plate. As for attaching the wood deck/ceiling, nailers will be bolted onto the top flange of the joist (is that the correct term Toxic?) with the bolt going through the opening where the flange is split. I have also attached a photo that shows a little better detail on the joist/bearing plate connection and the top of the bar joists showing the flange where the nailer will be bolted.

Bearing Plate

bearing plate.jpg

Bar Joist and Bearing Plate

steel joist bearing plate.jpg

The plan is to get the roof framing and shingles in place (12/12 pitch to match existing house), paint the bar joists dark green, and then install the SYP t&g flooring. The flooring is prefinished with clear poly, so we need to get things dried in before it goes down. The item I am still debating is whether to paint the nailer with the bar joists so it looks like part of the metal structure, or poly the nailers. I am leaning toward painting them since the top of the joists are 14'-4" above the slab and from that distance I think they will blend in once painted. While I am talking dimensions, the bar joists are 18" tall, which leaves me 12'-10" overhead clearance. All lighting et cetera will be recessed into the cavities between the joists.
 

toxicz28

Well-known member
Joined
Sep 23, 2006
Messages
738
Location
NY
It's actually called a chord, but that irks me less than the girder misuse. :lol_hitti How did you attach to the bearing plates, weld? I noticed the bridging too, guessing that its welded as well.
 
OP
B

Bentwheelbob

Member
Joined
Jun 16, 2011
Messages
9
Location
Charleston, WV
Re: Warehouse Motors - 36' X 48' in process

After a brief intermission to take customers tarpon fishing and celebrate Independence Day, I am back. The tarpon fishing in St. Pete was great with a 150lb fish being the biggest, and every year we put on a fireworks show at our mountain cabin and that went off without a hitch. No injuries worse than a severe hangover were recorded. Here is a photo of the biggest tarpon and the fireworks pre-ignition - everything is fused together and lights with one fuse.

150lb Tarpon.jpg
Loaded Wagon no drunks.jpg

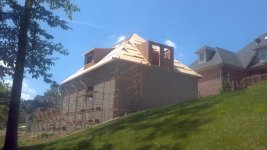
While I was off playing, the framers arrived and we are now under roof. The garage is really taking shape and the interior feels cavernous with the roof on. The roofers started yesterday and I hope when I get home today that the shingles will be complete. I have included some photos below.

Photos from back of garage. The deck from the existing house will be extended to second floor dormer and provide access to the space above. My 10 year old daughter has layed claim to this space getting in front of any "in-law" patronage.

roof framing northeast.jpg
roof framing north.jpg

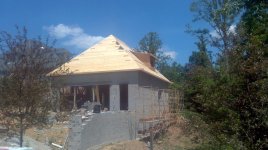
The next two shots are from the front of the garage. Please excuse the mess, but this is a tight space and there is no room for a dumpster.

roof framing  southeast.jpg
roof framing southwest.jpg
 
OP
B

Bentwheelbob

Member
Joined
Jun 16, 2011
Messages
9
Location
Charleston, WV
Re: Warehouse Motors - 36' X 48' in process

OK, I'm back and things have been moving along on the garage. Maybe not as quickly as I would like, but steady forward progress has been made and I feel I am doing good just to keep up with everything. When I left off, the framers were finishing up and I was waiting for the roofers to show up. We are well past that point at this time. The framing is all finished, the roof is on, and the masons have all the exterior brick finished on the structure and are working on the retaining wall. An insulation crew has come and gone leaving the block walls filled with core-fill foam insulation, and the painters arrived today and have begun prepping the bar joists for paint.

The bar joists should be finished by Tuesday and before the week is over I hope the flooring will be installed on top of the bar joists and the siding crew will be under way with the dormer siding and the soffitt insulation. The electricians should also be on sight this week running conduit for interior electrical. Lastly, I think the masons will finish the retaining wall this week and assuming they do will begin bricking the two interior walls that will be brick finished. I'll close with a few current pictures

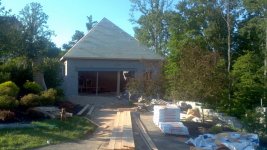
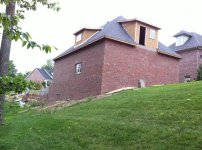
Here is a picture from the southeats corner showing a god front and side elevation of the garge and retaining wall.

brick & shingles southeast.jpg

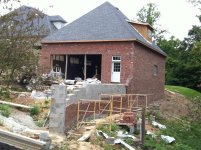
This shot is from the northeast corner.

brick& shingles northeast.jpg

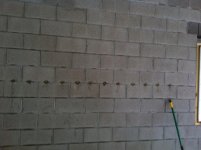
The next two shots show the holes that were drilled for the insulation and the insulation squeezing out electrical rough in holes approximately 8 feet above the holes.

insulation holes.jpg

insulation.jpg

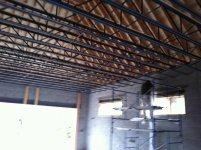
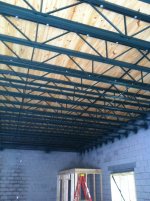
The final two photos show the interior of the garage and the painters prepping the bar joists. The first picture includes the two interior walls that will be bricked. The bottom of the joists are 12'-10" from the floor.

bar joist paint prep.jpg

bar joist paint prep 2.jpg

That's all for now. I spent all day cleaning up trash and am wiped out. Time to kick back, watch Mecum and dream. Enjoy the rest of the weekend.
 
OP
B

Bentwheelbob

Member
Joined
Jun 16, 2011
Messages
9
Location
Charleston, WV
Re: Warehouse Motors - 36' X 48' in process

I've lifted the anchor and the garage is again under sail. After getting most of the exterior done and turning the corner to the interior, I began questioning some of my earlier interior decisions and dropped anchor to slow down to thinking speed. I've mostly sorted through those questions and progress has resumed over he past week. The exterior brick is finished and the bar joists have been painted. In addition, the 6/4" t&g southern yellow pine that serves as the first floor ceiling and second floor finished flooring has been installed and the mechanical room and restroom has been framed. Tomorrow, the upstairs knee walls get framed. See progress below.

The wall is finished except for the post cap

Brick complete southeast.jpg

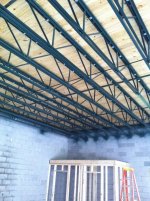
The SYP ceiling looks better than I hoped especially with the green painted joists

painted joists ceiling and framing.jpg

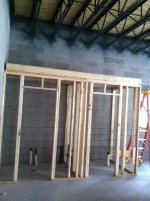
The room on the left is the mechanical room which will have a tankless water heater, 200 amp service panel and central air compressor. The room on the right is the restroom.

painted joists ceiling and framing 2.jpg

More of the same.

painted joists ceiling and framing 3.jpg

This is an older rear view that I don't had been posted before. The deck from the existing house will extend over to the second floor gable door with stairs down to ground elevation. The building supply salesman was here today making up a material list for the lumber and timber tech deck components.

block_framing_rear_view_with_house[1].jpg

Suffice it to say that this build has gotten out of control.
 

Coyote Red

Well-known member
Joined
Jul 9, 2011
Messages
130
Location
Gold Country, CA
Yes, this is a good one. Please update more often! Also, want to share any details on the "slowdown"...? changes or alterations...?
 
To avoid these ads, REGISTER NOW!
Top Bottom