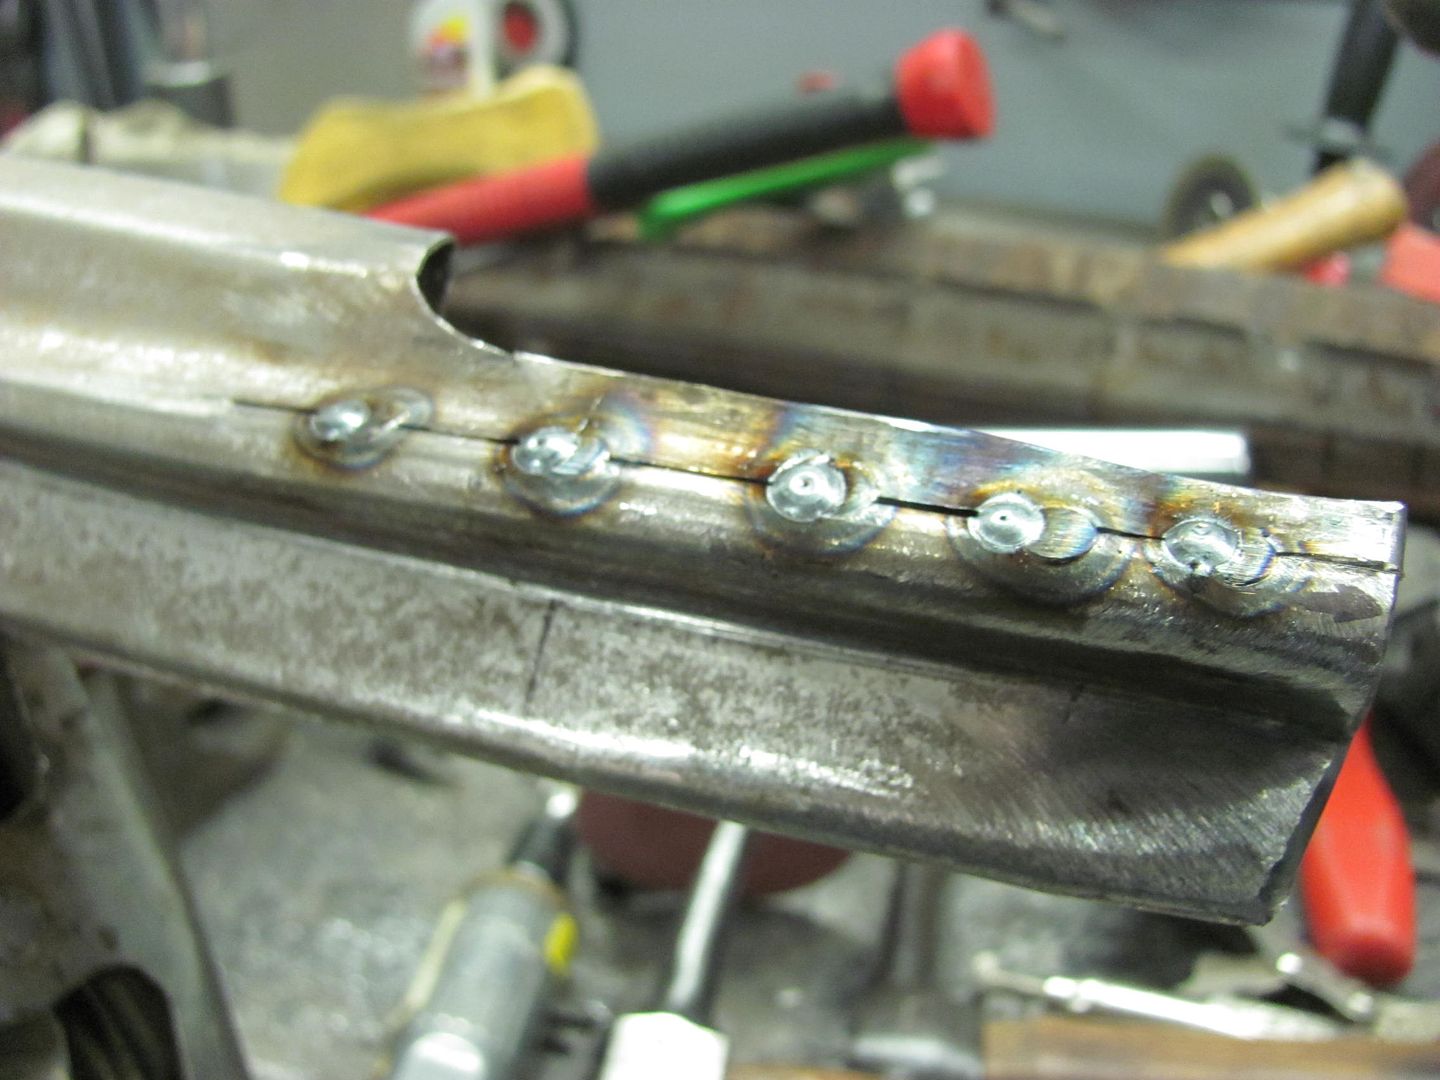
It sounds like you are using a Mig? My first question would be do you have full penetration welds on the back side? If you do, I would consider the welds good, and work to eliminate the warping by planishing. If you don't have full penetration welds, then vibration from road travel may likely crack welds back apart a couple years down the line.
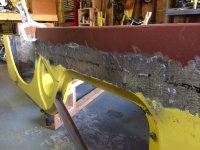
Looking at your grinding pattern, this appears to be too coarse a grinding disc, one I would say is better suited for structural steel work. Too much speed, too coarse a disc will add more heat and distortion. Too large a pad will obscure the view of your work, and it is likely you will be hitting either side of the welds and thinning out the panel thickness. So in the future, I'd set that tool aside.
On the distortion you are seeing, the weld is shrinking as it cools, so it draws the metal that is surrounding it. Even on a fairly flat panel like you have, it will pull puckers. What normally occurs on a panel that has a slight crown (most door panels or quarter panels) as the weld and HAZ (heat affected zone) cool and shrink, they will tend to decrease the overall length along the weld. On a crowned panel this will show up as a valley in the panel as the "arc" of the crown shrinks and forms a straight line. This exact defect may not occur with flatter panels as you have there. But as a result of the weld and HAZ shrinking horizontally, and the adjacent unaffected areas above and below having a tendency to resist this movement, the area in between will start to buckle, or cause a wave effect. To visualize this effect, lay a piece of paper flat on a table and using your index fingers, push two corners of the paper toward each other. This simulates the shrinking caused by the weld. You'll notice the paper creates a wave or buckle as you push the corners together. This simulates the buckles in the area surrounding the HAZ. When reading your panel, don't be fooled as these buckles may be misread as a stretch, or high, but it's actually unaffected panel being manipulated/pulled by the adjacent shrinking.
To address these repairs, planish the weld/HAZ to stretch using hammer and dolly, removing the waves/buckles and also restoring the crown, if the panel has any. This repair will also very likely include some metal bumping (off dolly) to raise/lower highs and lows as the metal begins to relax. Hope this helps in reading the panel and some of the secondary effects (waves/buckles) of the shrinking that you'll see. Planishing the welds as you go will help to keep these effects in check, where it will be less likely you'll see all the waves and buckling. It's when you have all these forces/reactions combined (from not planishing) that some may have a harder time reading the panel....
Hopefully all that helps you to realize the forces that took place to get you where you are. My suggestion going forward is to check for full penetration welds. If you don't have it, start over. Re-welding from the back side will only add the problem, introducing more heat and more shrinking.. If you do have full penetration welds, (look at my shop thread in my signature, it shows some fender shaving with good examples of weld penetration with front and back views) then some planishing of the welds should stretch the area to remove the buckling you have between the weld and unaffected panel. I will say it is hard to see the damage in your pictures, so perhaps a straight edge alongside would better show the damage in any future pictures. Rather than discuss better methods here and throw too much at you at one time, let us know if you have full penetration welds so we can focus on the fixing phase of this repair. Once you get to the other side, or worst case replacing this one again, then we can address the fit-up and welding procedures in more detail...