Wow! I can't believe it's been over four months since I touched this thread. Life and being crazy busy at work have a way of doing that I guess.
Recent snowfall on Mt. Lemmon.
The picture does not do it justice. It is gorgeous to view and more white. Most of the mountains around us have snow.
So now that the temps around here are able to let me, it's time to give my poor trailer some attention. Storing it behind my shop didn't help either; out of sight, out of mind. First order of of work, I recently bought four new radial tires to replace the bias ply **** that came with the trailer. (Geez those were terrible tires

)
The deck on this poor thing is shot. I tried putting a sealer on the deck a while back to delay the wear but I got what I paid for and it pealed off. (Lesson learned) Time to buy new lumber; a mix of 4x6's and 4x8's. (A little side note, I really miss a good lumber yard. The big box stores really have ****** lumber.)
The way the manufacturer installed the planks, they had
no room for expansion. The past two seasons saw those boards buckle and jack over themselves. They also installed the planks in such a way that you either have to cut a section out and slide the ends out of the C channel or remove the steel keeper at the front of the trailer that was stitch welded on. I chose the former so that I can make the planks a little shorter, shove them in the C channel at the rear, lay them down then move them forward an inch to give them room to expand.
Here's a view of the rear channel
Here is a view of the front
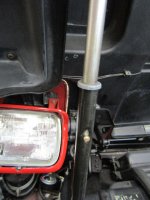
Here is the current state of the trailer. I know, embarrassing, huh?
The planks are held down with 5/16"-18 x 2-1/2" flat head Torx drive screws. I'm going to try to salvage those, we'll see. I will need to drill holes in the new planks to accept those.
So I brought the planks home and cut them to length. They came in 16' (4.8m) lengths, I needed 13' 11" (4.2m).
So here they are as I'm putting the sealer on. The sealer that I'm using is designed to actually soak into the wood and has a UV inhibitor in it, which around here is REALLY needed.
Sure is nice to have a warm dry shop to do this. The temps have only been in the high 40's low 50's (8°C - 11°C) outside with some rain at times. There are a total of 12 planks needed. The first 6 are done and in the Cobra garage.
Before the new planks get installed, the plan is to sand the trailer down and prime and paint it. Will need to move it in the shop to paint it.
More to come!


 )
)