To avoid these ads, REGISTER NOW!

Welding: Blowing holes in sheet metal

To avoid these ads, REGISTER NOW!
OP
V

Vegaman_Dan

Well-known member
Joined
Jun 1, 2012
Messages
2,453
Location
Pacific, WA
Checked polarity and the welder is set to positive for the tip. Verified this is correct for this guage and wire size. I've got the settings on the welder spot on. I also verified this welder is rated to go all the way down to 24 guage, so it should be suitable for this task.

I'm not entirely sure how to tell if the welder is dropping low enough. I may take it to Central Welding Supply and see if they can tell me. They have been stellar for support questions on hardware items and gas.

Still need to get some spare sheet metal of the same gauge to test with further.

Picked up a handy gauge / wire size tool last week that will be handy to check out material thickness at the hardware store- I never trust the labeling there as it's frequently wrong.
 

that-guy

Well-known member
Joined
Sep 6, 2012
Messages
603
Location
NoVA
i've been welding this german automotive bodies for a few years with my Lincoln 140. i use 75/25, .023 mild wire, "A" amps, 4-5 wire speed, and about 12cfh on the gas. keep your tacks nice and slow, and if at all possible, use a copper welding spoon behind the metal to help build your puddle...can you post a picture of your mig gun??? my issue when i started out was having this small plastic gas nozzle on my gun that came with it, and that was restricing gas flow like crazy, then i got a standard metal one and it made a world of difference

on most of the smaller migs, such as yours, you will get the small plastic nozzle that is meant for flux core since it needs no gas, but when you add gas to the equation, you need a larger opening to get the gas out to protect the weld

this is a link to show the smaller flux core plastic nozzle

http://www.northerntool.com/shop/tools/product_200606836_200606836

this is a link to the correct nozzle for proper gas coverage

http://www.northerntool.com/shop/tools/product_200606861_200606861

its clear how much larger the opening is on the gas nozzle as it is to the flux core nozzle
 
Last edited:

MarkG

Well-known member
Joined
May 23, 2012
Messages
1,219
Location
Elgin, IL
A YouTube video is worth a thousand words, I guess. I'll do some Googling for MIG welding thin metal. Using a series of overlapping tacks was one method I ran across for avoiding blowing holes.

Are you guys saying you wouldn't use any gun manipulation at all on thin stuff, just a straight stringer bead? This is that thin wall 1" tubing Menards sells----pretty lightweight stuff.

Thanks.
 

justanengineer

Well-known member
Joined
Apr 5, 2011
Messages
7,722
Location
Motor City
I do, but I don't like the idea of brazing bodypanels. I've seen the way the paint can react later with metals that can't expand at the same rate and would want to avoid that.

I wouldnt braze, I would gas weld the panels...its what the Brits are known for, especially in the racing community. Its a slow process, but after TIG its probably the second best process for work like this.
 

Nor'Easter

Well-known member
Joined
Nov 30, 2012
Messages
718
Location
Maine
If it hasn't been suggested already, you could try a copper backing plate. It will absorb some of the heat and keep from blowing out. Obviously you need access to both sides of the panel. You'd need something thick, 1/2" or over.
 

creativecars

Well-known member
Joined
Nov 15, 2010
Messages
4,300
Location
Indiana- where horse and buggies still roam
You mentioned you cut the rust away?? How far away?? What are you trying to weld to it, a patch panel?
I have seen times where there was rust coming through and if you only went a little beyond the rusty hole area you were still trying to weld to metal that was ALMOST rusted though. In that way the metal (what is left of it) is very thin and extra resistance (heat) from the rust on the back side would cause… instant burn through. If this is the case you may want to cut out a larger area and build a larger patch.
It sounds as though your welder is up for the job and you have understanding of the welding process, so I am back to the vehicle.
 

FMC

Well-known member
Joined
Aug 24, 2012
Messages
259
back to basics? inspect ground clamp connection for broken wires and if ground clamp is the typical crapo deluxo standard get a better copper one.
You should remember to "pop" weld when drop out happens, wait a second for the color of the blob to change then just do a very short pop with the trigger, this will build up the area , repeat until hole is filled.
start weld on new metal and drift over to old metal. Set machine at lowest setting and turn down speed... adjust until proper weld is achieved ie either raise settings or adjust torch speed, push or pull? pushing the pool is hotter so more drop out potential, dragging or moving the torch away from the weld puddle is cooler so there are lots of ways to skin the cat but by far the best is still scrap metal and practice, good luck!
 
OP
V

Vegaman_Dan

Well-known member
Joined
Jun 1, 2012
Messages
2,453
Location
Pacific, WA
on most of the smaller migs, such as yours, you will get the small plastic nozzle that is meant for flux core since it needs no gas, but when you add gas to the equation, you need a larger opening to get the gas out to protect the weld

All metal, no plastic insert. I haven't seen any welder with that insert as you've shown links to. It works fine larger stuff without issue.

And no, there isn't space behind it to get a welding spoon in place. Not without cutting out tons of metal to get to it- and then I'd be facing the exact same problem trying to weld back in the structure.
 
OP
V

Vegaman_Dan

Well-known member
Joined
Jun 1, 2012
Messages
2,453
Location
Pacific, WA
If it hasn't been suggested already, you could try a copper backing plate. It will absorb some of the heat and keep from blowing out. Obviously you need access to both sides of the panel. You'd need something thick, 1/2" or over.

It's been suggested multiple times in this thread. I have one, and if there was room behind the panel to do it, I'd have used it by now. I did use it to rebuild the lip of the trunk after cutting out a lot of rotted metal back to good solid material.
 
OP
V

Vegaman_Dan

Well-known member
Joined
Jun 1, 2012
Messages
2,453
Location
Pacific, WA
I have seen times where there was rust coming through and if you only went a little beyond the rusty hole area you were still trying to weld to metal that was ALMOST rusted though. In that way the metal (what is left of it) is very thin and extra resistance (heat) from the rust on the back side would cause… instant burn through.

**THIS** is entirely possible. I would hate to reskin the trunk lid, but I may have to simply work on larger areas. trying very hard to retain the crown of the curve. What I may try is cutting a vertical strip to splice in, perhaps 1-2" above the current line. Something I can match the existing arc of the crown and try tacking that in. I can weld the replacement metal patches together in my tests, and it's *supposed* to be 22ga. I picked up some more 22 ga sheet to practice on, so it's time to try some ideas.

I'm still not convinced the welder is stepping down low enough, but that's what tests on separate piece are for.
 

FunkyfullWidth

Well-known member
Joined
Oct 3, 2011
Messages
1,238
Location
Three Rivers, ma
How old is this welder? I've had good luck by taking the skins off a welder and blowing either duster or compressed air through the switches and other electrical components. either way it can't hurt to do. I know on my hobart 140, it seems like the 1 setting is basically useless. Have you tried welding the panel using the number 2 setting?
 

creativecars

Well-known member
Joined
Nov 15, 2010
Messages
4,300
Location
Indiana- where horse and buggies still roam
**THIS** is entirely possible. I would hate to reskin the trunk lid, but I may have to simply work on larger areas. trying very hard to retain the crown of the curve. What I may try is cutting a vertical strip to splice in, perhaps 1-2" above the current line. Something I can match the existing arc of the crown and try tacking that in. I can weld the replacement metal patches together in my tests, and it's *supposed* to be 22ga. I picked up some more 22 ga sheet to practice on, so it's time to try some ideas.

I'm still not convinced the welder is stepping down low enough, but that's what tests on separate piece are for.

If you cut that 1 or 2" out of the lid, would you let us know if it is rusty (pitted) on the back side? if so,you will be glad you cut out more. The never sleeping rust wont be back so soon.
 
OP
V

Vegaman_Dan

Well-known member
Joined
Jun 1, 2012
Messages
2,453
Location
Pacific, WA
How old is this welder? I've had good luck by taking the skins off a welder and blowing either duster or compressed air through the switches and other electrical components. either way it can't hurt to do. I know on my hobart 140, it seems like the 1 setting is basically useless. Have you tried welding the panel using the number 2 setting?

I keep the welder spotless inside. I've been down that road before. :)

I'll be testing this evening with higher settings to see if there is a change between the first and second settings.
 
OP
V

Vegaman_Dan

Well-known member
Joined
Jun 1, 2012
Messages
2,453
Location
Pacific, WA
The possible problems of this situation are:

Welder not stepping down low enough.
Technique is poor or needs work.
Metal is the wrong gauge.
Original metal rusted to thinner gauge than original.


In order to eliminate the welder and technique, I picked up some sheet stock from my bins and did some spot welds using recommended settings:

.023 wire
Voltage: Position 1
Wire speed: 5.5
Gas: 75%/25% Argon mix
1/4" stickout

I did tiny spot welds of around 1/8" on two test pieces, one of 22 gauge and another of 24 gauge.


I didn't experience any problems. Frustrating because it worked exactly as it should and always has in the past. Nice small little welds, minimal buildup, good penetration. I came back and filled in between the spots in the center of the test piece at a slow pace to minimize distortion. I tap the welds after a few are done to relieve stress. I'm not sure if it actually works or not, but that's the way I learned so I've always done it.

So, with confidence that the welder and technique were okay, it must be the metal. I chopped a 2" square piece out of the trouble area that would include virgin metal that was above the repair area.


Okay, the top is the original metal and the lower portion is the patch. You can see how it blew out previously and all attempts to fill it in have just eaten it away. But this was my first chance to really see the back of the metal since it's in a restricted space. And what I found was very informative.


What you see here is the surface rust of the original surface- that is just surface rust though. What I see here is that the blowouts are happening not on the original metal but on the patch! Well hell, what's going on here? I got the calipers out and found the original untouched metal is 22 ga, but the patch panel material I was using was 24 ga! Ah, no wonder it's burning through the thinner stuff. In areas that the original metal was melting away needed to be cut back further to good metal.

What this means is that I'm going to have to cut the entire width of the trunk lid skin about 4" from the bottom. This also means having to form a new lip for the bottom as well. There is a brace that prevents access to the back, but will hold the shape nicely. I think I may cut it a bit higher so the seam is accessible from the inside of the trunk lid too just to make it easier. I may have to make it in a bunch of 3-4" wide strips sitting parallel, though I may try using a shot bag and teardrop to help coax the shape.

Fun stuff ahead! I have a plan. It still is going to be a serious challenge, but just more satisfying when I fix it.
 

ADSR

Well-known member
Joined
Jan 12, 2013
Messages
10,713
turn that wire up to like 35+

You're burning through because you have the heat but no wire.
 

FMC

Well-known member
Joined
Aug 24, 2012
Messages
259
yikes! your trying to weld the wings back on a butterfly, only pretty new cars are 22g and thats not a "mild steel" the surface rust is actually pretty good long term rust and has reduced the area from 20g to this thin stuff, honestly your going to have to go big or stay home determine where the metal isn't thinned out and trim for a new patch, find another panel or re skin what you have, with that much rust your going to chase it forever
 
To avoid these ads, REGISTER NOW!
OP
V

Vegaman_Dan

Well-known member
Joined
Jun 1, 2012
Messages
2,453
Location
Pacific, WA
yikes! your trying to weld the wings back on a butterfly, only pretty new cars are 22g and thats not a "mild steel" the surface rust is actually pretty good long term rust and has reduced the area from 20g to this thin stuff, honestly your going to have to go big or stay home determine where the metal isn't thinned out and trim for a new patch, find another panel or re skin what you have, with that much rust your going to chase it forever

The metal isn't thinned at this point at the top. It's full thickness as the rest of the good metal is on the trunk lid.

Note I said I was blowing holes through the *new* metal, not the old. The original stuff was actually holding up as it was thicker than the patch panel was. I'll make new patch panels out of proper gauge stuff.

Triumph Spitfires are very thin skinned. They weren't built like other cars of the time. And getting a new panel- well, that's $800 on sale. Yes, they are that expensive, so it's worth repairing what I have.
 

that-guy

Well-known member
Joined
Sep 6, 2012
Messages
603
Location
NoVA
turn that wire up to like 35+

You're burning through because you have the heat but no wire.

def not...for the low heat required for such material, you don't want your arc to be there for too long, which blows through the metal, or gets it so hot that it distorts. so you want thin wire so it melts quickly, and also has a lesser build up, resulting in less cleanup afterwords
 

ADSR

Well-known member
Joined
Jan 12, 2013
Messages
10,713
I weld thin as hell sheet metal all the time. On my miller 130xp the heat would be at 1 and wire around 35. I could weld that metal shown with a solid bead no problem. with a wire speed of 5.5 and 023 wire, i can see why there are holes no matter what the heat is at.
 

WoodsTruck

Well-known member
Joined
Jan 12, 2013
Messages
1,025
Get this figured out?

My neighbor drug home a TR3 that I will be helping to weld some patch panels in and would like some info before I get into trouble.
 

Slednut

Well-known member
Joined
Dec 20, 2012
Messages
2,553
Location
Washington state
I've just started welding in panels for the first time. I found right away that if there's any rust on the back side of the original panel I simply have to cut away more material.
 

brownbagg

Well-known member
Joined
Mar 20, 2006
Messages
5,208
stick some copper behind it, it will act like a heat sink and **** some of the heat out of the metal
 

bgarrett

Well-known member
Joined
Feb 11, 2006
Messages
4,393
MIG welding gives you very hard welds that you can not hammer and dolly. You will be forced to use bondo--yuck.
MIG welds are very hard and using the grinder on them is slow and the noise will hurt your ears.
TIG is the only way to go on car body
 

E.rodz

Well-known member
Joined
Nov 11, 2009
Messages
2,435
Location
st.paul MN.
here is a little trick for you you can fudge you welder output voltage to lower the amp output by putting a long extension cord on the welder. or use a thinner gauge extension cord it will drastically reduce your output power. it should help you get in the range of your thin metal with that welder. also put a thicker piece of metal right next to where your welding just tape it on or use a magnet it will serve as a heat sink when you cant access the back side.
 

Hohn

Well-known member
Joined
Aug 25, 2016
Messages
2,684
Location
Diesel Central, Indiana
(if someone can let me know about that divot, please let me know!

The divot is the result of different cooling rates. Since the point where the wire is feeding is the source of heat, it is the last to cool off.

That means that it remains molten slightly longer that the rest of the puddle. So as the other parts cool and solidify, they contract. The "pulls in" more metal from the only part still molten-- the part right where the wire fed in.

This is the same reason you can get craters and crater cracks with TIG if you cut the arc too quickly or fail to add filler towards the end of a bead.
 

Hohn

Well-known member
Joined
Aug 25, 2016
Messages
2,684
Location
Diesel Central, Indiana
Wire speed controls the amperage (penetration). Voltage controls the arc length (bead width and height).

I am learning about welding, so forgive me if I'm in error here.

A MIG welder is a CV (constant voltage) source. So the current will vary somewhat.

The commenter who remarked about "blowing through because of all arc and no wire" is confusing me. The arc is carried by the wire. If there is no wire, there is no arc. A super slow wire feed speed should cause COLD welding or lack of arc, right? If you slow it way down, you'd end up with a really ugly "pulse" mig at about every other second, right?


I know some people find workarounds, but IMO Mig just isn't the right process for thin materials. Much better to torch or tig, from what I can tell.

Which is not exactly helpful if a MIG is all you have....
 

Showkey

"MEMBER EMERITUS"
Joined
Aug 9, 2014
Messages
8,638
Location
Wausau WI
MIG welding gives you very hard welds that you can not hammer and dolly. You will be forced to use bondo--yuck.
MIG welds are very hard and using the grinder on them is slow and the noise will hurt your ears.
TIG is the only way to go on car body


Or......Easy Grind Mig wire
 

MP&C

Well-known member
Joined
Oct 21, 2009
Messages
4,404
Location
Leonardtown, MD
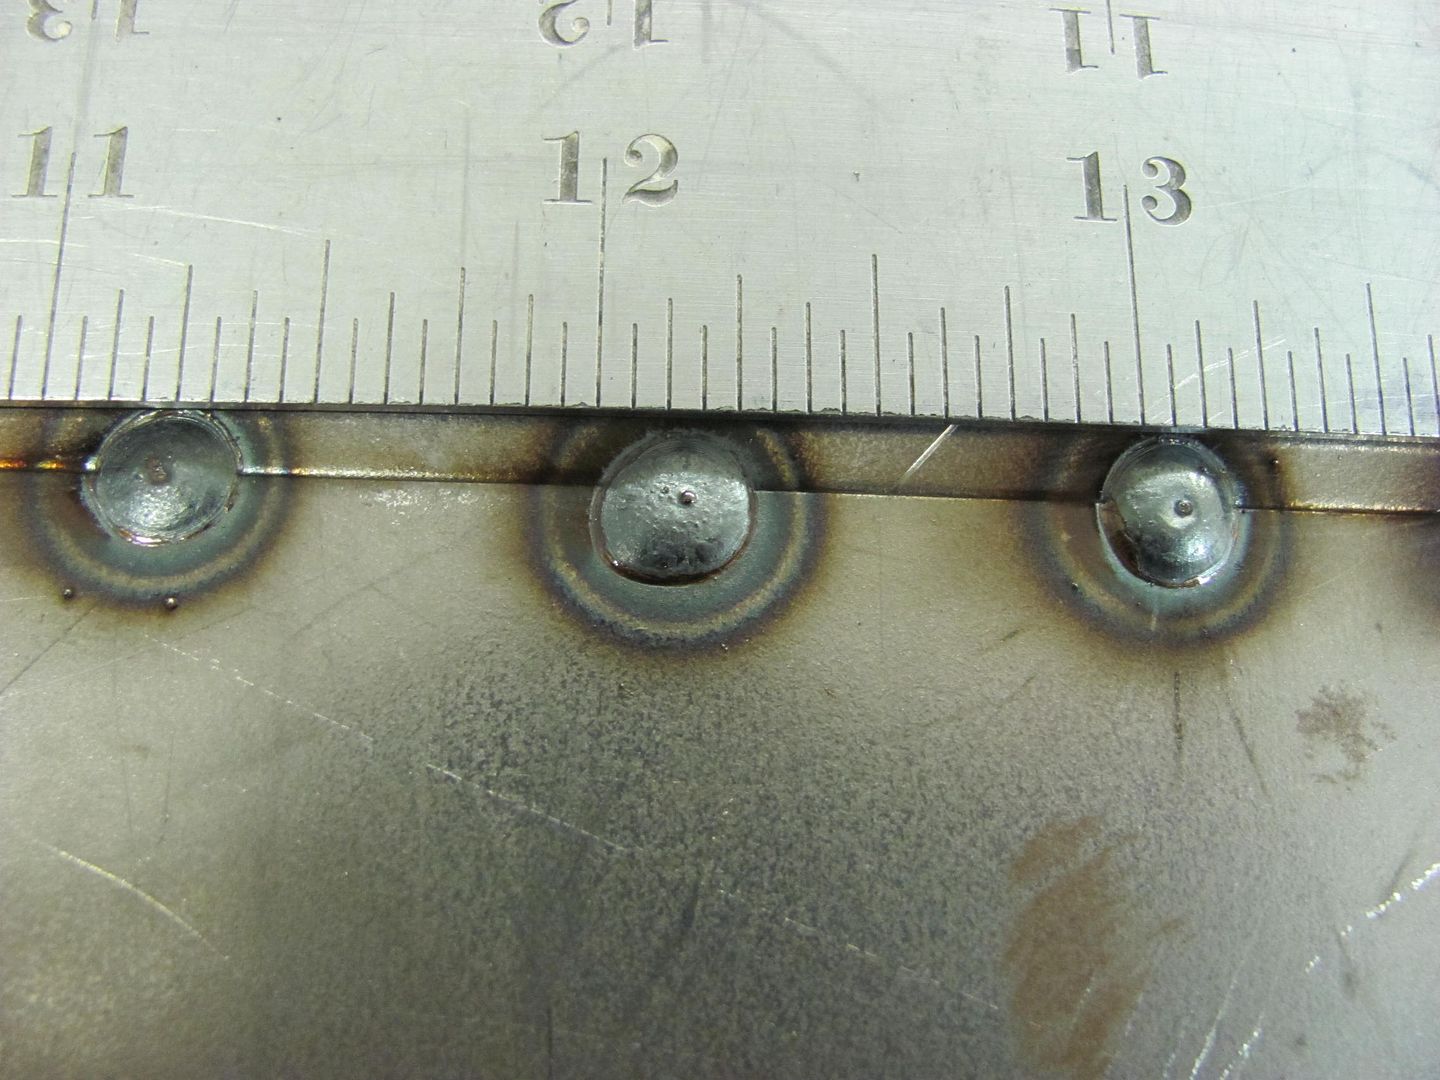
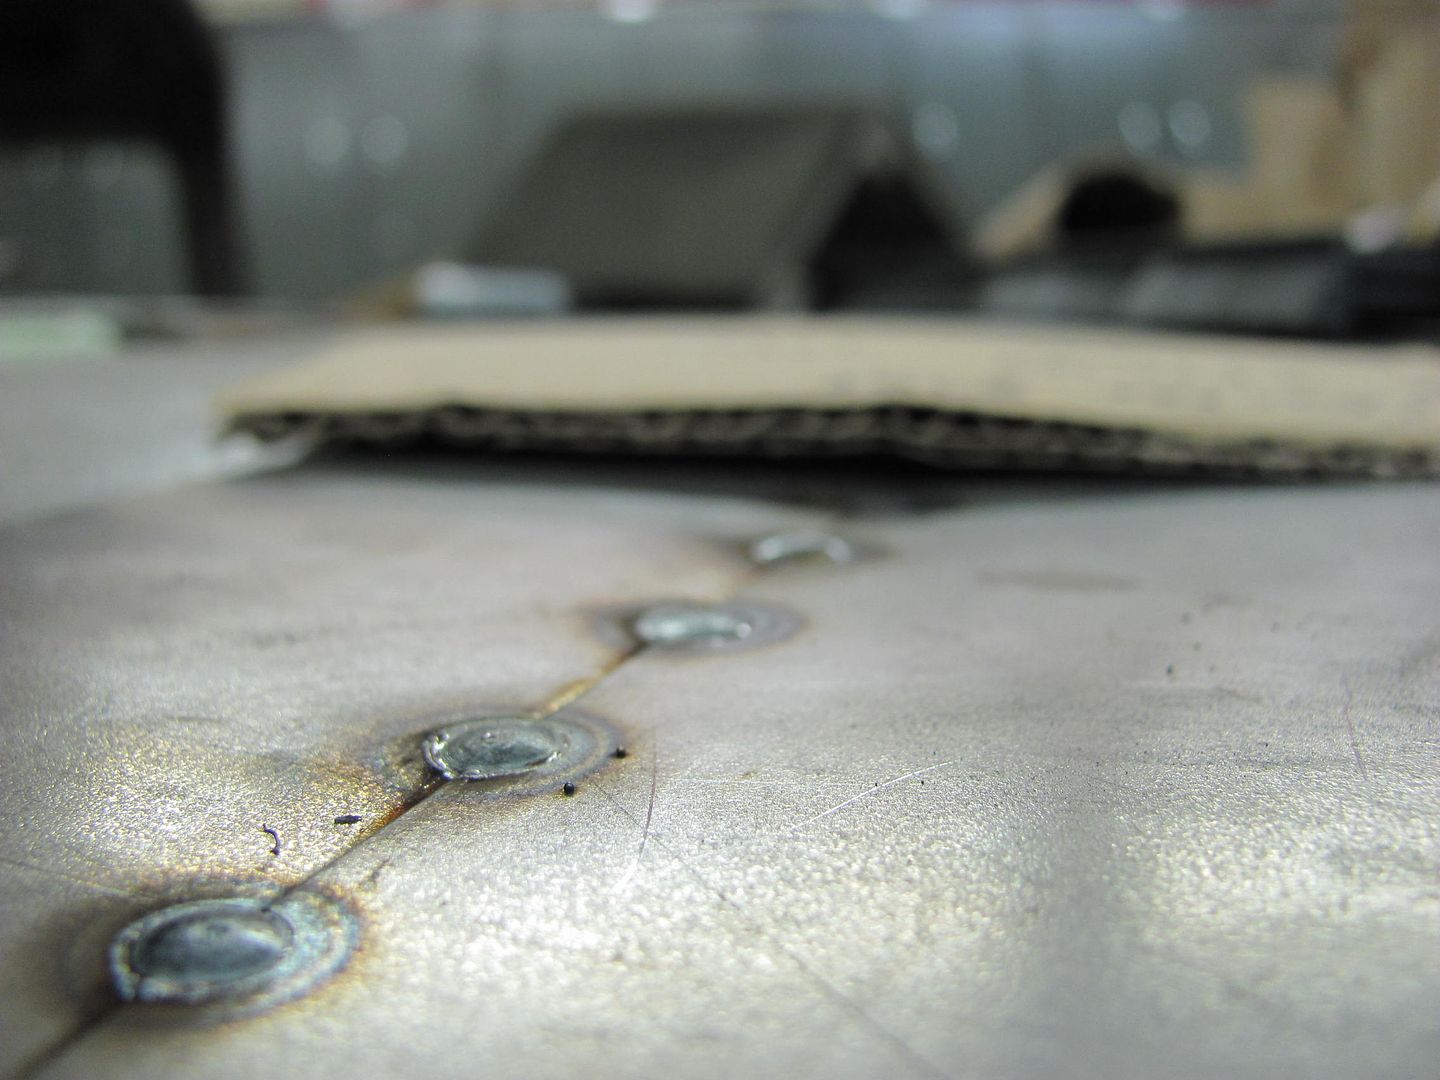
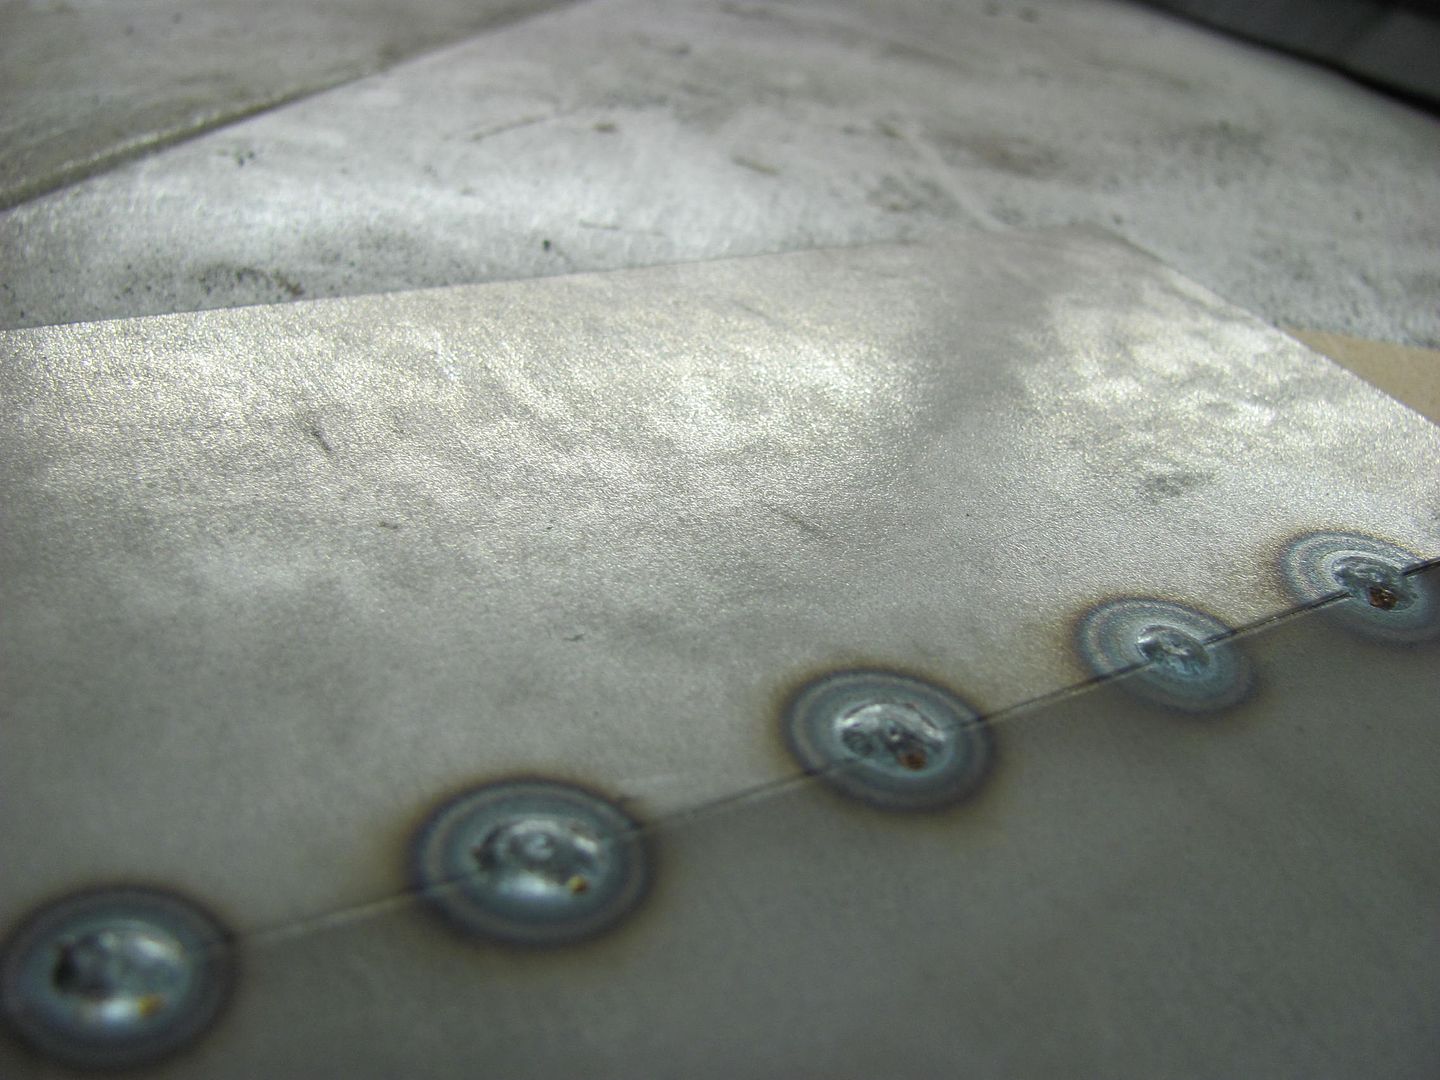
Dan, I'm guessing at this time you are at the lowest setting. If you are continuing to blow holes, increase the wire feed speed and DECREASE the time of trigger pull. See how that works. Keep increasing the wire feed until you see it helping. Make sure your **** joint is tight.

A given amount of heat is going to burn said amount of steel. If you aren't putting said amount of steel into the puddle as filler material, it will find that amount of steel as you WILL blow holes all day long. Another method of "heat control" is length of trigger pull. I did some test coupons in my shop thread where the machine was set for 3/16 thick steel (using .035 wire) but I performed the welds on 19 GA steel (.039 thick as measured) with ZERO blowout. Trigger pull duration was key:


Put the .035 ER70S-7 back in, dialed in the settings for 3/16 thick steel, and ran some test welds...
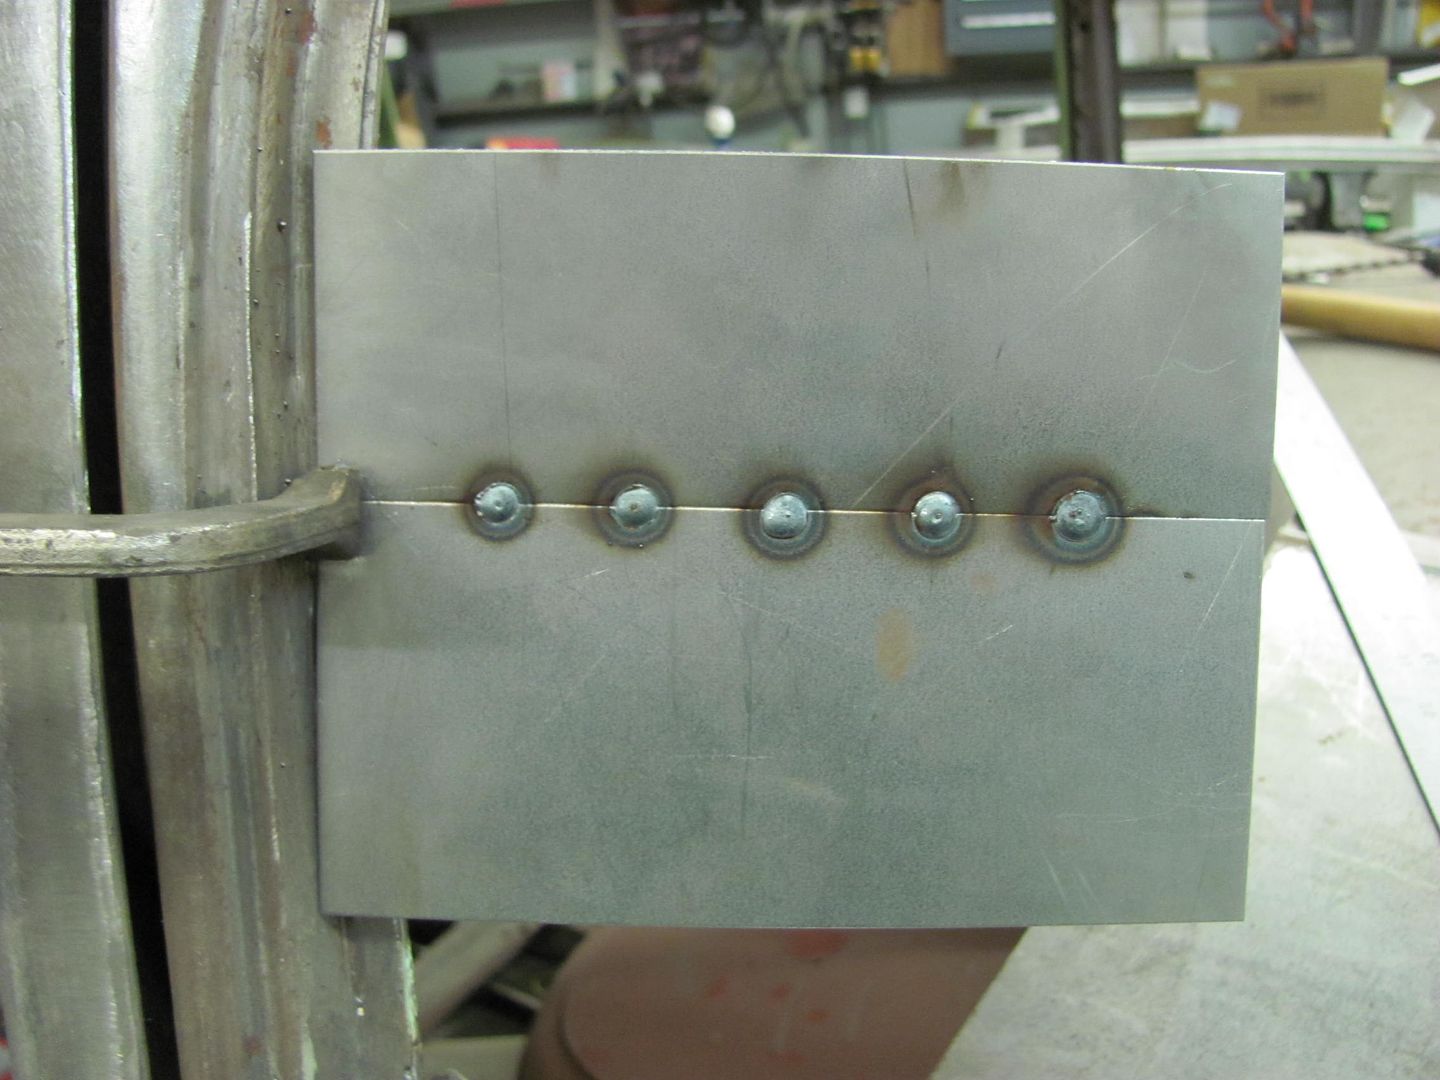


Picture648.jpg


Front side....


Picture645.jpg


Picture646.jpg


Rear side....


Picture647.jpg


MIG welding gives you very hard welds that you can not hammer and dolly. You will be forced to use bondo--yuck.
MIG welds are very hard and using the grinder on them is slow and the noise will hurt your ears.
TIG is the only way to go on car body


This would suggest otherwise...


http://fergusoncoachbuilding.blogspot.com/


Now I'll agree that TIG or O/A will give you a softer weld, easier to planish, less work in cleanup. But the entire weld sequence starts with panel fitup, proper trimming, weld location to take advantage of body features that will minimize weld distortion, etc. There is so much more to welding than just the machine. And just because someone uses a TIG doesn't mean they can't do as bad or worse hack work than someone with a MIG.

MIG is indeed much more work in planishing and dressing any welds. Can it be planished? I've planished MIG welds for over 25 years and have yet to see the first crack. I've also shown and stressed that full weld penetration is key in providing a good MIG joint. That would lead me to believe that all the Chicken Little "weld cracking" I hear is a result of someone using cold weld joints, improper weld penetration, or other such weld deficiencies. So although more work, I think anyone could use the MIG with acceptable results..

To be fair, the TIG and O/A would provide a better weld with easier clean up, easier planishing, and less distortion, providing someone has done well in panel fitup, tight/accurate **** joints, weld locations optimal, etc. I did some recent TIG practice coupons to show how panel shape and bead detail location would help maintain panel shape and limit weld distortion. Some of these were done using filler, some fusion welded with no filler to help limit distortion. Just as a comparison, if I had indeed used MIG on these it would have taken at least 4x as long to perform the weld, planishing, and dressing. Where I had used a straight sheared seam, it would typically take more time for trimming and panel fitup to get the seams tighter for a TIG or O/A weld. But any extra time here should be more than made up for in time lost in the cleanup phase.

Is the TIG or O/A welding a better choice for panel repair? It CAN be and SHOULD be, if the entire weld process from panel fitup and weld location through welding and final finish is done properly for said methods. Although in most cases MIG is an inferior choice and involves much more (dirty, messy) work and TIME, it is still a viable method for people to use. The MIG welding shown in Randy Ferguson's link above looks far better than some TIG welding I've seen through the years. (mine included) I think one has to be comfortable with the entire weld process, from panel fitup through metal finishing in order to get adequate results. Whatever that weld process may be.
 
Last edited:

EdT

Well-known member
Joined
Sep 21, 2010
Messages
1,104
Location
North Georgia
Regardless of the specific process (OA, MIG, TIG, etc.) it takes time to develop a process that works well for you. As you can see above there are a lot of ways to get the job done. Some are easier than others, but they all require some practice and understanding of how each variable affects the end result. So, it takes a lot of practice to find what works well for you. Controlled experiments like the ones Robert runs are very useful to develop a method that works. Each time you change something you have to go back and see how it affects the result. You can get to "good" a lot faster if you try stuff in an organized manner rather than just diddling the dials w/o any idea of why you're diddling them. IMHO, each individual welding machine is a little different even within the same brand and model number. So the settings that others have found successful may be near what you need, but it's unlikely that they will be exactly the same for your machine. From personal experience I can tell you that if you can't get it to work on a test piece it's not going to magically get better on the real thing. If you've perfected your process for 18 GA metal and the real thing is something else, you'll get a different result. If you decide to buy a different brand of wire, it will probably produce a different result. Each variable contributes to the end product in some way and all these things become important when trying to weld thin sheet metal. It's a lot more sensitive than welding heavy sections. I don't think there are many shortcuts to developing a process that works for you.
 
To avoid these ads, REGISTER NOW!
Top Bottom