Bad dad
Member
As a dyslexic I read that as 'Light Dining Spoon' and imagined something for eating soup being used in the garage, what a ****** eh?

Robert,
I just ordered a Martin 1024 surfacing spoon, which I'm hoping will be a good "*******"?
I have their Light Dinging spoon. I've never understood the "light dinging spoon" - where you hit the spoon with a hammer. How does one hit the spoon and hold a dolly behind at the same time. Are there a situations where you use the hammer-on-spoon in your work with no dolly support? I guess that "light" spoon can also be used as a *******?
Gus
....and just like your hammers and dollies, not all are made for all circumstances. A ******* about twice as long as the one shown above would come in handy to span creases like shown on the lower fender in my previous post.
") and sometimes a bit more force seems to be called for.
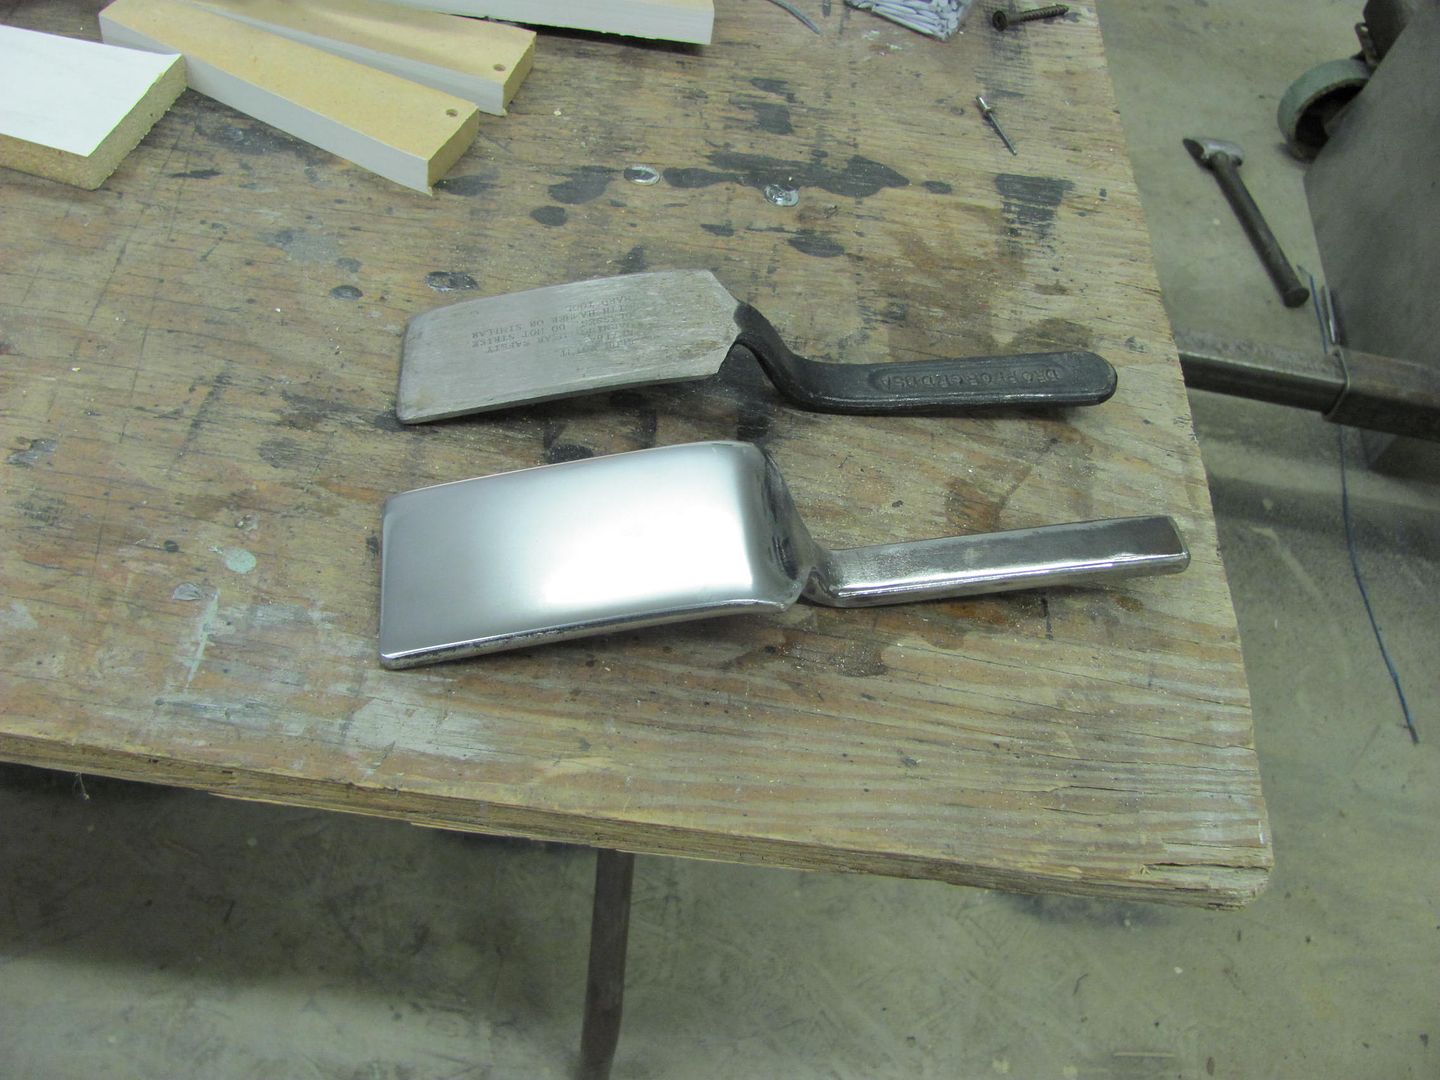
and sometimes a bit more force seems to be called for. . More crown on the surface of the spoon than the lighter version. Shown next to the Martin1036 light dinging spoon. They should probably be cleaned up to personal preference, but all the Martin tools I've seen have a nice finish to them.
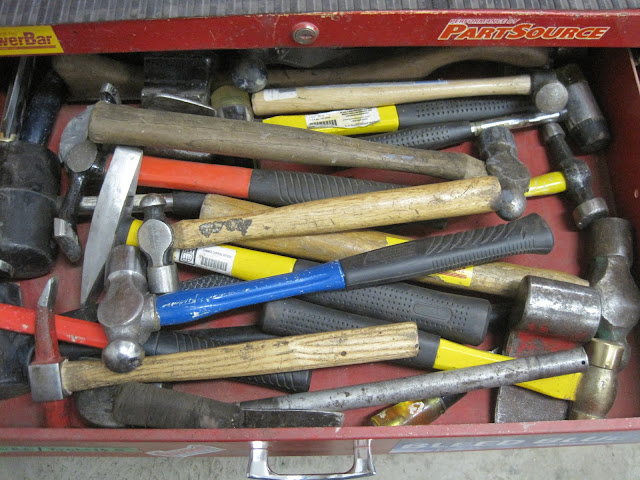
Gee gelierb, ya got some nice body tools there - wish mine where that nice!!
.thanks guys, i just bought a lincon 140 mig & im learning to weld. i think i just got the best lessen on welding. i have one question, a 59 f100 cab is 18 ga. wire thickness .035 or .030 flux core. whats best?
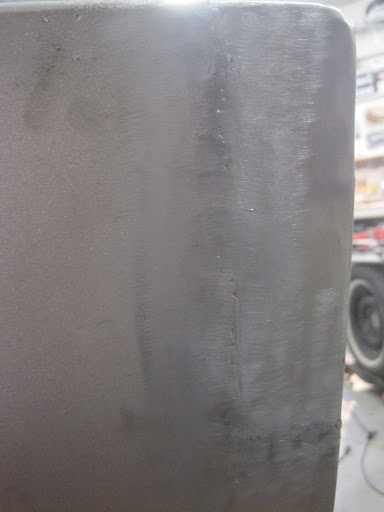
thanks rusty kustoms & mp&c. i just bought a lincon 140 mig. im learning to weld. i think i just got the best welding lesson yet. i have a question, 59 f100 cab is 18 ga. wire size .035 or .030 flux core, whats best for me to use?With sheet metal the gap is not necessary, I try to have little to no gap when doing patches. The clamps work great when you need them but that is pretty rare. The trick is to do tacks, alternate around the panel and give plenty of time to cool, let them air cool and NEVER accelerate the process with water, damp rag, compressed air. Accelerating the cooling process will create brittle and weak welds that can crack later in time. As shown above you should occasionally grind down your tacks to see where you are at. Make sure the metal is clean, no paint, oils, etc., this will keep the weld clean. One thing that I will point out is in the pictures above the metal has epoxy primer on it, this will be debated but this is generally a bad idea. If it is absolutely necessary then make sure it is ground off about 1" away from the weld area, not only will it dirty the weld but it ends up needing to be ground off later anyways. As for wire size, .023 is pretty much standard, .035 can be used on the thicker metal but not all cars have 18ga. sheet metal. Clecos are a bad idea, this is not their intended use and flanged patches are a huge no no, they will retain moisture in the flange and fail in short order due to corrosion.
Don't feel bad - at least you probably know how to use yours. I'm still trying to figure out which end of that ******* to hold on to
 That being said, I was just reading through the various posts and it struck me that one of the simplest ways of "shrinking" hasn't been discussed yet - that of using a cross-hatch hammer, dolly and/or a slap-file. While a lot of guys don't know why some body hammers have the "tenderizing" ridges on them, once you find out and use them appropriately, you'll be amazed at what they can do!
The problem with flux core is the smallest you can easily get is .030, which takes more heat to melt than .023. More heat, more chance to warp, more chance to burn through. That said, you should look for E70S6 wire and use 75/25 Argon/CO2 mix gas for the easiest welding.
... I was just reading through the various posts and it struck me that one of the simplest ways of "shrinking" hasn't been discussed yet - that of using a cross-hatch hammer, dolly and/or a slap-file. While a lot of guys don't know why some body hammers have the "tenderizing" ridges on them, once you find out and use them appropriately, you'll be amazed at what they can do!
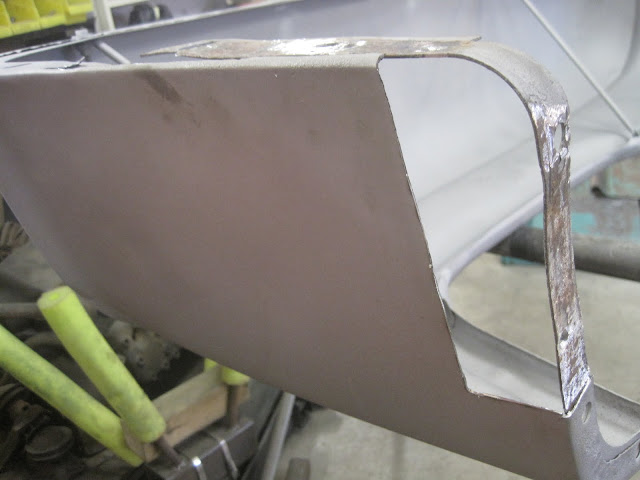
) is very limited, but I've had success, even with small amounts of heat, shrinking and removing oil-canning, etc. I've never had anything good come about using a shrinking hammer/dolly - do those things really work? I have one shrinking hammer and no plans to buy more. All I've managed to do is destroy the finish on sheet metal with no shrinking in the process. Robert - I can see your "personal preference" comment is going to create a lot of extra work for me. It's not easy trying to live/measure up to your level of skill and attention to detailAs a matter of personal preference I try to locate any such welds where they are accessible for planishing, so by default they are also accessible for dressing the welds. I try to clean the welds up, inside and out, so the panel appears as original. Not all panel installation circumstances work out that way, but at least it's something to strive for...
- GusI've never had anything good come about using a shrinking hammer/dolly - do those things really work? I have one shrinking hammer and no plans to buy more. All I've managed to do is destroy the finish on sheet metal with no shrinking in the process.
Robert - I can see your "personal preference" comment is going to create a lot of extra work for me. It's not easy trying to live/measure up to your level of skill and attention to detail
Gus, When you say shrinking hammer, are you referring to the waffle faced hammer? They are very finicky in that there is a very fine line between shrinking and you should have stopped 5 minutes ago and now it's stretched worse than when you started. I have tried them, but refuse to use ...

I believe a shrinking disk works by heating the metal with friction rather than a torch. I've never used one but it's supposed to give way more control.
Do you quench it like you do when you use a torch?
Yes I am currently too lazy to look this up on the web. Plus it seems relevant to the discussion.
Gus, When you say shrinking hammer, are you referring to the waffle faced hammer? They are very finicky in that there is a very fine line between shrinking and you should have stopped 5 minutes ago and now it's stretched worse than when you started. I have tried them, but refuse to use them. To me there are other preferred methods of shrinking, from low crown body hammers using off-dolly technique, shrinking discs, up to using localized heat, that won't distort the flatness of the metal where the use of filler is a requirement and not just a choice.
Your vehicle, your choice of how far to take the finish level or methods to get to that point. I will say that once someone gets proficient at metal finishing, it CAN BE faster than applying and finishing body filler. I have yet to get to that level of detail myself, right now I'm about at the high build primer and/or a slight bit of evercoat 416 to get things real smooth. But we all need something to shoot for. The more you strive to refine your skills, the better your finish level will become.
The biggest advantage of the disc is that it only heats the high spots, so that is where the shrinking gets concentrated. Not always the case when using a torch.
...
The strange thing about shrinking discs (IMO/no experience) - no one seems to manufacture/market them. I've seen a few plans for "make-your-own" and a few websites that sell a limited run, custom made kind of thing. In general, they don't seem to be anything you would find in a typical tool supply catalog? ... ...


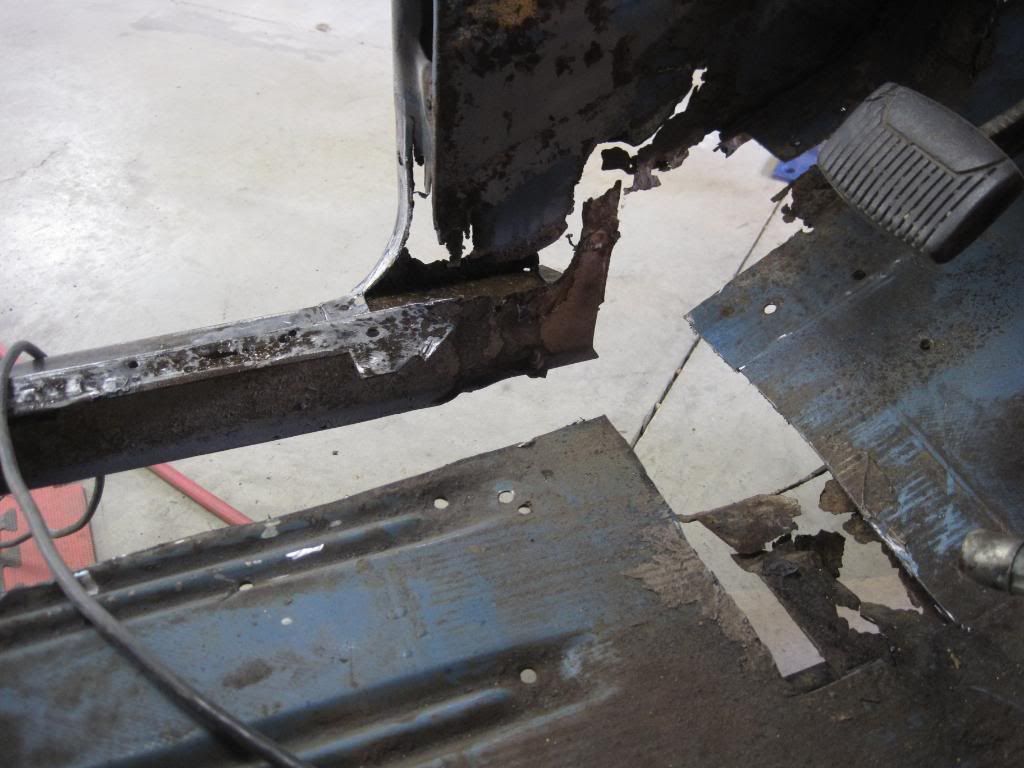
As my luck normally runs, there was more damage than meets the eye, and the rear of the passenger rocker also needed repair.
Isn't Sunchaser tools still making them? I believe they were the originators... could be mistaken though.
As you mentioned, I also know a guy who purchased one and loves it. I did not get to see it in action though.


These look great.1. For grinding the welds, 3M makes a 3/16" thick 3" grinding wheel for a bit more surface area. It is part # 01991. It would definitely help from gouging the metal, have less side flex and last longer than a 1/16" wheel.
Would this be a good (or acceptable) foundation whatever primer/base layers come along later? Anyone have experience with these rattle cans?...some 2K epoxies in spray cans, that would help for small areas, rather then use a brush or dirty your gun, as mentioned...


House of Kolor used to have Chromate in their KP epoxy, and it stuck well to anything. With the introduction of regualtioins and restrictions, they have removed the chromates, hence the CF (chromate free) in the ...
When I said out "of the question these days" I just meant I can't buy itI would be curious to ask why you say PPG DP is no good. Not that I'm using it or defending it, but trying to learn something. I've heard some people say they can wipe it with laquer thinner and the paint comes off on the rag, and yet others say that once fully cured, nothing touches it. ????
. A local paint supplier told me it's unavailable (at least in California anyway)? I had always heard it was the best and wanted to use it.when i said out "of the question these days" i just meant i can't buy it