To avoid these ads, REGISTER NOW!

Welding in patch panels

To avoid these ads, REGISTER NOW!

IONH

Well-known member
Joined
Feb 12, 2010
Messages
2,043
Location
Central Massachusetts
The overlapping of the patch panel will trap moisture and start the rust all over again. A **** weld would be a better repair.

How do you guys feel about gluing patch panels in?

I just finished a DIY auto-body class for beginners at the local vocational school and the teacher said that welds may likely have some air holes in them which will cause rust, regardless of the method of welding used.

Instead, he suggested using glue when you can have an overlapping connection. Paint the glue on both surfaces with an acid brush and no air holes will be there to begin rust.

Also, he demonstrated on the frame straightening machine that two pieces glued together held up to a larger force than the welded joint. The welded piece broke next to the weld likely because of the super heating of the material which happened during the welding process.
 

madosta

Well-known member
Joined
Sep 4, 2012
Messages
807
Location
Michigan
How do you guys feel about gluing patch panels in?

I just finished a DIY auto-body class for beginners at the local vocational school and the teacher said that welds may likely have some air holes in them which will cause rust, regardless of the method of welding used.

Instead, he suggested using glue when you can have an overlapping connection. Paint the glue on both surfaces with an acid brush and no air holes will be there to begin rust.

Also, he demonstrated on the frame straightening machine that two pieces glued together held up to a larger force than the welded joint. The welded piece broke next to the weld likely because of the super heating of the material which happened during the welding process.

Wow. This is something new to me. Sounds neat.
 

IONH

Well-known member
Joined
Feb 12, 2010
Messages
2,043
Location
Central Massachusetts
Wow. This is something new to me. Sounds neat.

I thought so too! I was definitely impressed with the frame machine demonstration.

Plus, with glue, no concerns of shrinking the metal as you weld it.

Don't forget to apply some kind of undercoating so the back side of the panel doesn't rust (just like when welding).
 

wrench3047

Active member
Joined
Nov 25, 2011
Messages
31
The glue may be stronger, but will deteriorate over time. The weld may not have been done as well as it could been, too hot. To many variables to say its better, I've seen welded panels crack and glued panels fall off. Gluing has its place, but should be riveted in my opinion.
 

MP&C

Well-known member
Joined
Oct 21, 2009
Messages
4,396
Location
Leonardtown, MD
Where even present day manufacturers use adhesives in joining panels, on exposed exterior sheet metal you will only find it in areas such as the tops of the roof and any overlap is also in a channel where it can be covered by a flowable seam sealer. They do not use it in the flanging and overlapping of an exposed exterior panel if it needs to be finished as an "invisible" seam. Plain and simple, the reason is that any attempts to step flange a panel and join to another, whether using adhesives or welding or ??, and finish it off as an "invisible" repair, will result in a ghost line visible in the paint as the thicker layers will have a different expansion rate than that of the single thickness. This ghost line will show through any filler and paint used to finish off the seam as the vehicle is exposed to varying temps. Anyone looking at your work will see exactly where the repair was made, as can be seen in the wagon tailgate in this video:


There is no question as to the strength of present day adhesives, but I would hope your autobody instructor did not suggest such a repair, especially without discussing the ghost line that will affect the final finish. If he is getting air holes in his welds, then perhaps it's because he can't perform the weld repair correctly. If his goal is teaching you guys how to bandaid some Geo Metro **** box for an Earl Sheib and sell it quickly before the defects are noticed, well he's on the right track. But just like the youtube link in post 281, for all the work that goes into the production and training curriculum, teaching others to perform substandard repairs, or not disccussing all the pitfalls, is a dis-service to the class/audience. While I understand the appeal of the adhesive method, especially to DIY'ers who may not yet posses proper welding skills, just try to sell your classic car with a bunch of overlapped repairs like that, and see what it does to the value.
 
Last edited:

welder4956

Well-known member
Joined
Apr 8, 2010
Messages
3,053
Location
Birmingham, AL USA
Also, he demonstrated on the frame straightening machine that two pieces glued together held up to a larger force than the welded joint. The welded piece broke next to the weld likely because of the super heating of the material which happened during the welding process.

The welded patch failed exactly the way it was supposed to. The weld should always be stronger that the metal on either side of it. This would have been a more meaningful test if it was performed on a tensile test machine and the breaking strength values compared. You would probably find that the welded patch failed at a higher strength than the glued patch.
 

IONH

Well-known member
Joined
Feb 12, 2010
Messages
2,043
Location
Central Massachusetts
You know what they say.. those who can DO, those who can't TEACH.

He was a good instructor and this was for the basics of DIY Auto Body. I was the only person in the class with any welding experience, so for the realistic audience of the class, I can understand why gluing would be a far superior option to welding for everyone in the class except maybe me. The others aren't going to take the time to perfect their welding skills for a small repair here or there.

We did not talk about any "ghosting" effects of using glue. I'll have to research that some more to learn more about it. The instructor works on classic car restoration in his free time, so those cars probably rarely see temps below 50*F and are often left with orange peel to appear "original." Maybe those types of vehicles would not have seen it quite as much.
 

MP&C

Well-known member
Joined
Oct 21, 2009
Messages
4,396
Location
Leonardtown, MD
Wondering what your thoughts are about using a TIG welder for auto patch panel repair


Tig, and even O/A gas welding, can give you far better results than using a Mig. Not will, but can. If someone does not have the manual deterity to be proficient at using the heat and applying filler rod, and this may be especially noticeable if the panel fitment is inconsistent, then you would not realize a proficient weld. However, if you can trim your patch properly for a zero-gap fitment, and perform a non-stop, fusion weld from one end to the other, this will give you about the most narrow and consistent HAZ possible, and a weld that does not require anywhere near as much clean up afterward, as compared to the Mig. However, this fusion weld is not really compatible in using a Mig on sheetmetal. But as most enthusiasts have and use a Mig, much of the discussion on this thread has centered around Mig and dealing with the issues of using a Mig. But by all means, done properly, Tig and especially O/A gas welding can yield far superior (and less time consuming) results. With either process, practice, practice, practice. Once satisfied with your results, then time to attempt it on your car..
 
Last edited:

IONH

Well-known member
Joined
Feb 12, 2010
Messages
2,043
Location
Central Massachusetts
An old wives tale.
Absolutely no truth in that at all.:lol_hitti
Sure you can come up with an example but it's not the norm.
In fact it's really an insult to those who choose to teach.

There are some really great teachers out there. Having an Engineering degree from a school known for Engineering in Boston, I would say that about 30% of my core (Engineering) class professors weren't very good and were quite possibly teaching because they were not good enough to do the actual job. I've been in the field for 10 years.
 

theoldwizard1

Well-known member
Joined
Feb 22, 2011
Messages
43,072
Location
SE MI
Where even present day manufacturers use adhesives in joining panels, on exposed exterior sheet metal you will only find it in areas such as the tops of the roof and any overlap is also in a channel where it can be covered by a flowable seam sealer.
Ford started using "adhesives" when joining overlapping floor pans on Mustangs years ago because because the engine torque was causing the spot welds to pop (and they didn't want to spend the assembly time to double the amount of spot welds).

There is no question as to the strength of present day adhesives, but I would hope your autobody instructor did not suggest such a repair, especially without discussing the ghost line that will affect the final finish.

Certainly an adhesive attached repair panel is not appropriate in a restoration, but you have to admit, it is a lot better than shoving some 'glass cloth in the hole and piling on Bondo !

As for "ghost lines", well you are the pro so I'm not going to argue.
 

rmadursk

Member
Joined
Nov 12, 2010
Messages
14
I'm working on a 91 Honda CRX and have had a couple problems that I have been dealing with on it. The rear quarters were almost rusted away and I have welded in repair panels but there isn't enough room to get a dolly behind the panel. I have a stud gun that I've use to pull the valley back out and occasionally it cracks when I do so. Typically the place where it cracks is where I have ground down the weld dots and made the VERY thin metal even thinner, which makes fixing the crack challenging. On the other side of the car I used a flanging tool that I had made from some vise grips to make a small (1/8") flange on the original panel to increase the volume of metal being welded and that worked extremely well, no more cracks or blow through.

Is there anything I can do (other than a stripe over it) to minimize the ghosting being discussed?

Thanks,

Ron Madurski
 
Last edited:

MP&C

Well-known member
Joined
Oct 21, 2009
Messages
4,396
Location
Leonardtown, MD
Not everyone starts their project using the optimal methods, and with all the dis-information you can find online, especially manufacturers selling the flanging tools claiming what an advantage they are for installing panels, it's easy for anyone to make the same mistake. Case in point, here is a quarter panel I installed years ago, and based on the flanging hype and the fact that the manufacturer of the repop quarter installed the stepped flange, I took for granted that using the flange was the preferred method.


55210wagon025.jpg


Luckily I hadn't fully welded the seam when I found out about the ghost line issues, especially as long as those quarters are, as well as add to the headache of trying to planish out the seam afterward.

I didn't get pictures of the complete process, but my fix was to use a .035 cutoff wheel to cut the "new" quarter at the bottom edge of the "upper/old" quarter, then grind the plug welds from the back side that went into the remaining flange to release it from the old quarter. Then, hammer and dolly the stepped flange back flat again, which was about perfect to make up the thickness of the cutoff wheel. Then, the two were **** welded together, as I should have done from the beginning.


Picture345.jpg


Picture531.jpg


Picture014-1.jpg


So my suggestion is to **** weld it as it should have been done. If there is no room for a dolly behind, did you trim any off the top of the patch panel that would have given more room if left there? The weld seam you desribe as going into a valley is because the weld has shrunk horizontally along the crown of the quarter. As a low crown arc loses it's length with the ends anchored, the arc will indeed form a straight line, hence the valley that you are seeing. Where the stud gun will pull the valley for you, it likely is also pulling crown down out of the adjacent panel in trying to make up the difference, which will make more headaches in finishing the panel. It is also applying a small amount of heat, for more shrinking around the studs.

The optimal welding procedure for installing that panel with minimal distortion would have been using a soft flame with an O/A torch and a fusion weld, no filler added. Next best, likely the TIG, using a fusion weld as well, no filler added. If you are experiencing cracking from using the stud gun, IMO you have insufficient weld penetration through the panel, and had it not cracked now it would have eventually, given a couple years of road travel. I don't know if the repair panels can be worked any more at this point, pictures of what you are working with would go a long way in giving further recommendation. Best results would be a full factory quarter. If they are not available, they can be fabricated, but will no doubt be expensive.
 
Last edited:

budss396

Well-known member
Joined
Oct 22, 2012
Messages
51
Location
Evansville, In
.023 solid wire with shelding gas.
never use flux core on auto bodies. flux is acidic and will cause rust-through.
when using clecos I dont overlap the whole panel, instead I cut away the flange except for a few tabs. once the panel is tacked in I remove the clecos and cut off the tabs.
 

TwetoGAC

Member
Joined
Dec 8, 2012
Messages
13
I have not read the whole thread but I have discovered that brazing is the best way to do patch work on an auto body. No distortion or warpage so it makes the filler work easier. When i first started doing auto-body work I used TIG and MIG and found that I just gave myself more work to do fixing the warpage.

My 2 cents worth.
 
To avoid these ads, REGISTER NOW!

MP&C

Well-known member
Joined
Oct 21, 2009
Messages
4,396
Location
Leonardtown, MD
OK, you guys have been hearing me talk about fusion welding and since I was in the shop today I decided to show a sample of the TIG fusion welding. This takes me a bit out of my comfort zone, as I normally pick up the MIG, but here we go. Separate halves tacked together:

Picture128-2.jpg


Note the lack of/minimal amount of HAZ around the tacks. This was accomplished by holding the electrode as close as you can without touching and using a quick zap. If held farther away from the panel, you see more blue HAZ surrounding the tack. Here is the fusion weld, no filler added.

Picture114-1.jpg


Picture115-1.jpg


Back side.....

Picture116-1.jpg


Then, using this anvil to planish out the weld and HAZ:

Picture104-1.jpg


Results in this:

Front

Picture117-1.jpg


Back

Picture118-1.jpg


Nice and flat, no grinding required (in this case)

Picture119-1.jpg


Picture120-1.jpg


This method requires having an absolute tight joint, so fitment will be more time consuming, but just imagine all the time just saved over dressing out a MIG weld...
 

Modifieddriver

Well-known member
Joined
May 29, 2009
Messages
820
Location
Moonville, South Carolina
MP&C,

Just read the entire thread. Learned a bunch.

I was trained by my Dad in the art of O/A welding when I was in my mid-teens. He did body work prior to WWII. O/A is my preferred method of welding auto body sheet metal. I have a Miller Vintage Series MIG, and I do a bunch of rosette welding with it on flanged panel joints. I use a Roper-Whitney punch to create my holes on the un-flanged panel. I'm aware of the ghost line, but for vintage oval track race cars, we aren't looking at cosmetics way on down the road. They usually don't last too long, if you know what I mean.

The metal forming techniques you use seem to mirror those in the book The Key To Metal Bumping by Frank Sargent. Those techniques are exactly the same as those taught to me by my Dad.

I'm always amazed that just when you think you have it figured out, I read a series of technical articles, like yours here, and expand my knowledge.

Want to mention, if the flanged panel joint on that '55 Chevy was completely under the stainless quarter molding, would you still **** weld it? I think I'd cheat and do it flanged.
 

MP&C

Well-known member
Joined
Oct 21, 2009
Messages
4,396
Location
Leonardtown, MD
MP&C,

Just read the entire thread. Learned a bunch.

I was trained by my Dad in the art of O/A welding when I was in my mid-teens. He did body work prior to WWII. O/A is my preferred method of welding auto body sheet metal. I have a Miller Vintage Series MIG, and I do a bunch of rosette welding with it on flanged panel joints. I use a Roper-Whitney punch to create my holes on the un-flanged panel. I'm aware of the ghost line, but for vintage oval track race cars, we aren't looking at cosmetics way on down the road. They usually don't last too long, if you know what I mean.

The metal forming techniques you use seem to mirror those in the book The Key To Metal Bumping by Frank Sargent. Those techniques are exactly the same as those taught to me by my Dad.

I'm always amazed that just when you think you have it figured out, I read a series of technical articles, like yours here, and expand my knowledge.

Want to mention, if the flanged panel joint on that '55 Chevy was completely under the stainless quarter molding, would you still **** weld it? I think I'd cheat and do it flanged.

I can see your point in making quick repairs on a race car, but many of those also use pop rivets all over in attaching panels, which I wouldn't do on a restoration either. If the present owner ever went to sell the car, regardless of how wide the stainless was to cover a seam, most prospective buyers would be crawling all under a car to find/see the extent of any rust, or if there was any. If I were that prospective buyer and came across a flanged seam, IMO it is a substandard repair and would likely kill the deal if the price was not significantly lowered to cover corrective repair. But that's just me, others may not be as bothered by it. But I wouldn't want any of my customers to have that de-valuing experience either, which is another reason I removed that flanged repair.
 
Last edited:

MP&C

Well-known member
Joined
Oct 21, 2009
Messages
4,396
Location
Leonardtown, MD
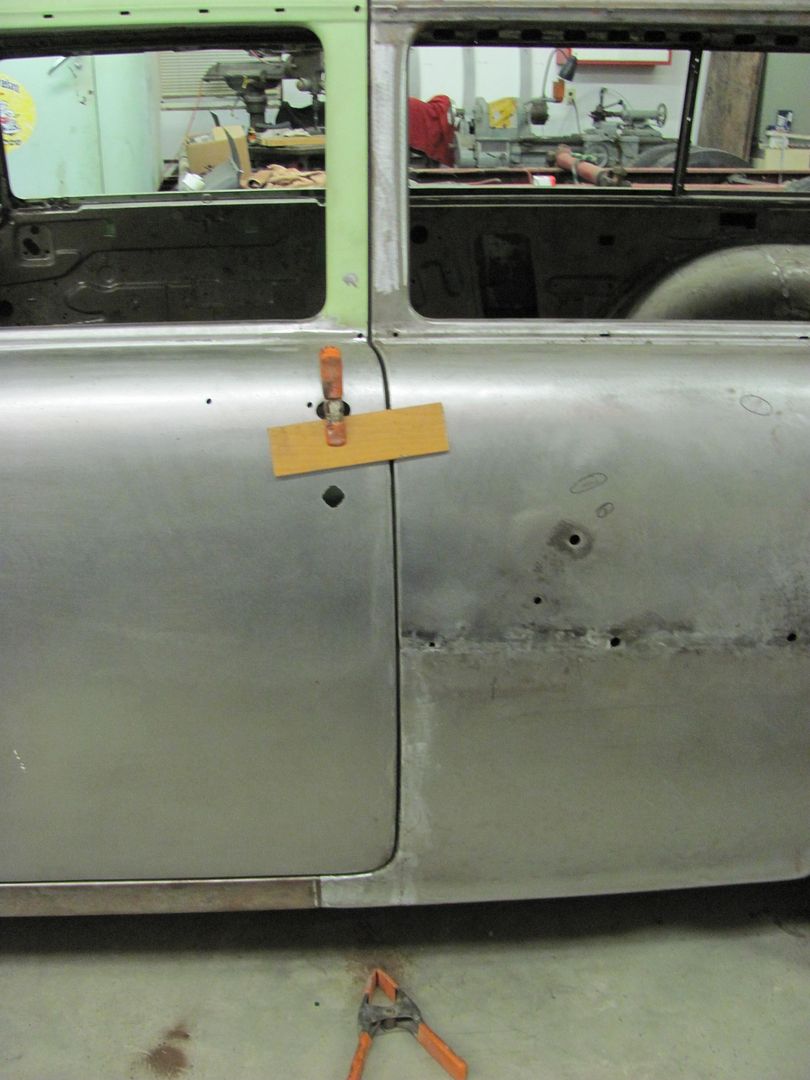
I pulled the chrome trim off the passenger side door on my Lincoln and the patch panel wasn't even welded there.
It was just screwed on along where the chrome was....


If you can still use that panel to weld in properly, count yourself lucky. I always get the ones with galvanized sheet metal pop riveted on and mudded over. Of course they left the dirt in place that started the rust to begin with. Now it had started to rust through the galvanized metal!
 

PeteMoore

Well-known member
Joined
Jan 25, 2011
Messages
453
Location
N.Ireland
Unfortunately I dont have a step-by-step due to time constraints.

Also it was far from metal finished, but again, given time, i would like to have given it a go.

wing1j.jpg


wing2u.jpg


wing3.jpg


wing4q.jpg


Not so much a patch panel, but proof you can remove just about any dent
 

PCO6

Well-known member
Joined
Dec 25, 2008
Messages
4,573
Location
Newmarket, Ontario
PeteMoore - ^^^ Looks familiar. Lots of patch panels in this one - new floors, sills, fender bottoms, etc.

You did a nice job on your fender. :thumbup: That's one thing I didn't have to do.

Midget015.jpg


Midget001.jpg
 

PCO6

Well-known member
Joined
Dec 25, 2008
Messages
4,573
Location
Newmarket, Ontario
PeteMoore - Nice work. :thumbup: It looks like yours was quite a bit more gone than mine. We get our share of rust buckets around here. It's often easier to replace complete panels than chase around the tea bag as you say.
 

PeteMoore

Well-known member
Joined
Jan 25, 2011
Messages
453
Location
N.Ireland
Fortunately, I get to come into work each day and pick the panels off the shelf ;)

Paying for them is harder though. Still, they are addictive little cars
 

jarhead

Well-known member
Joined
Jul 9, 2006
Messages
704
Location
Colorado, near Morrison
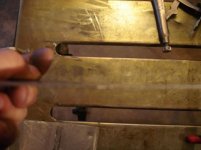
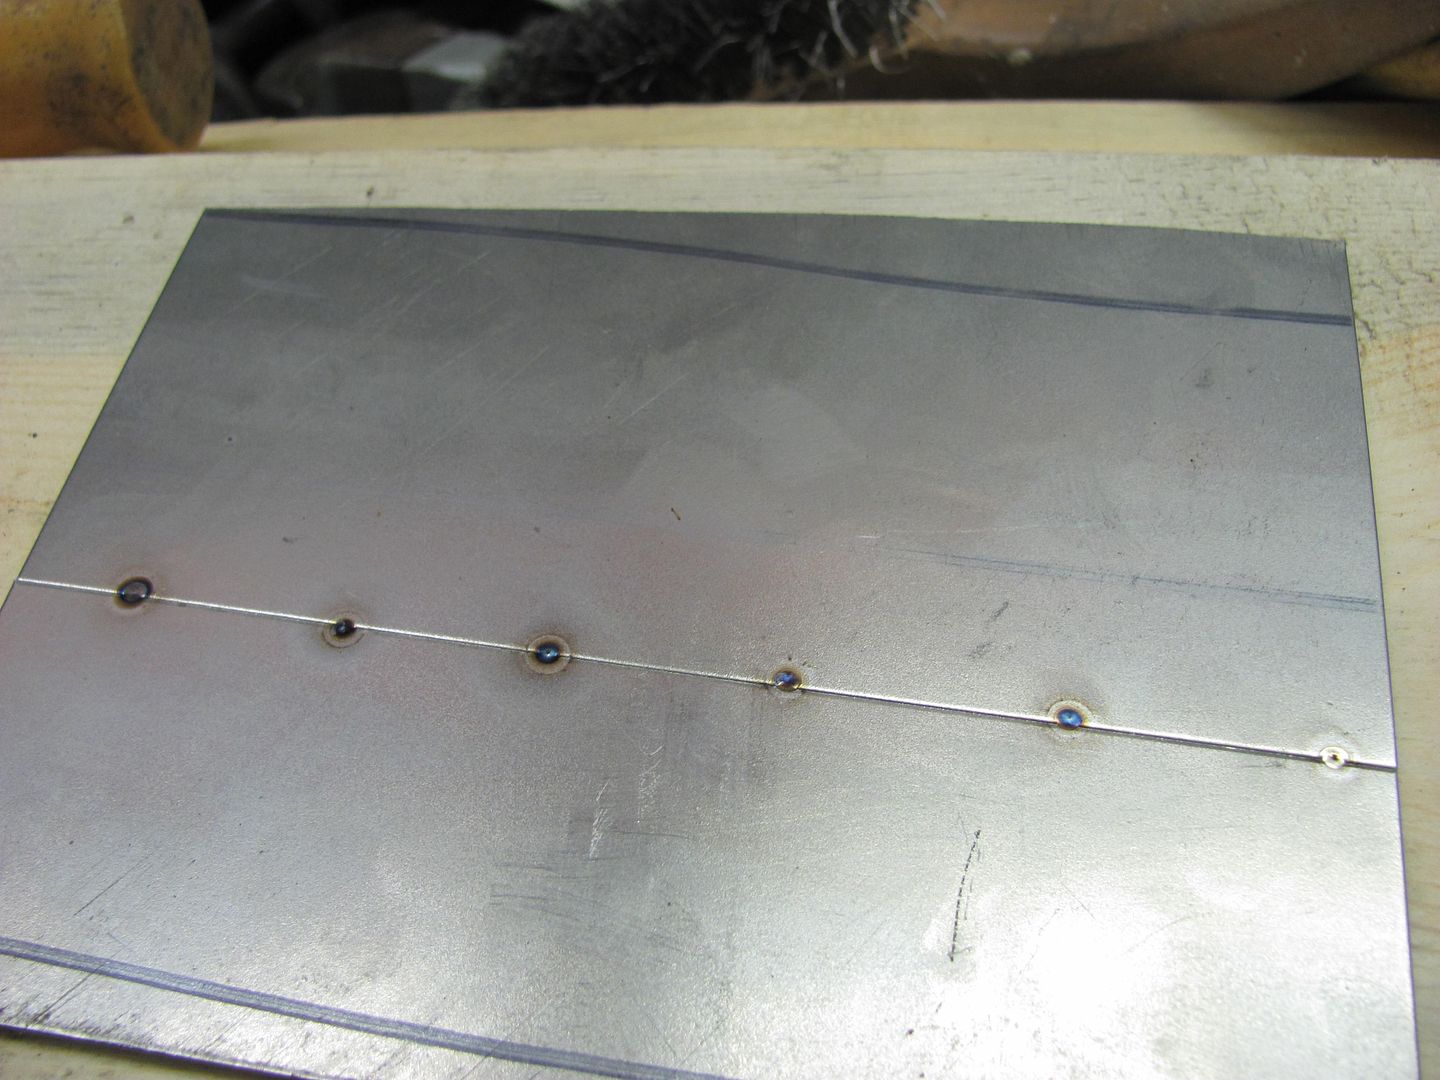
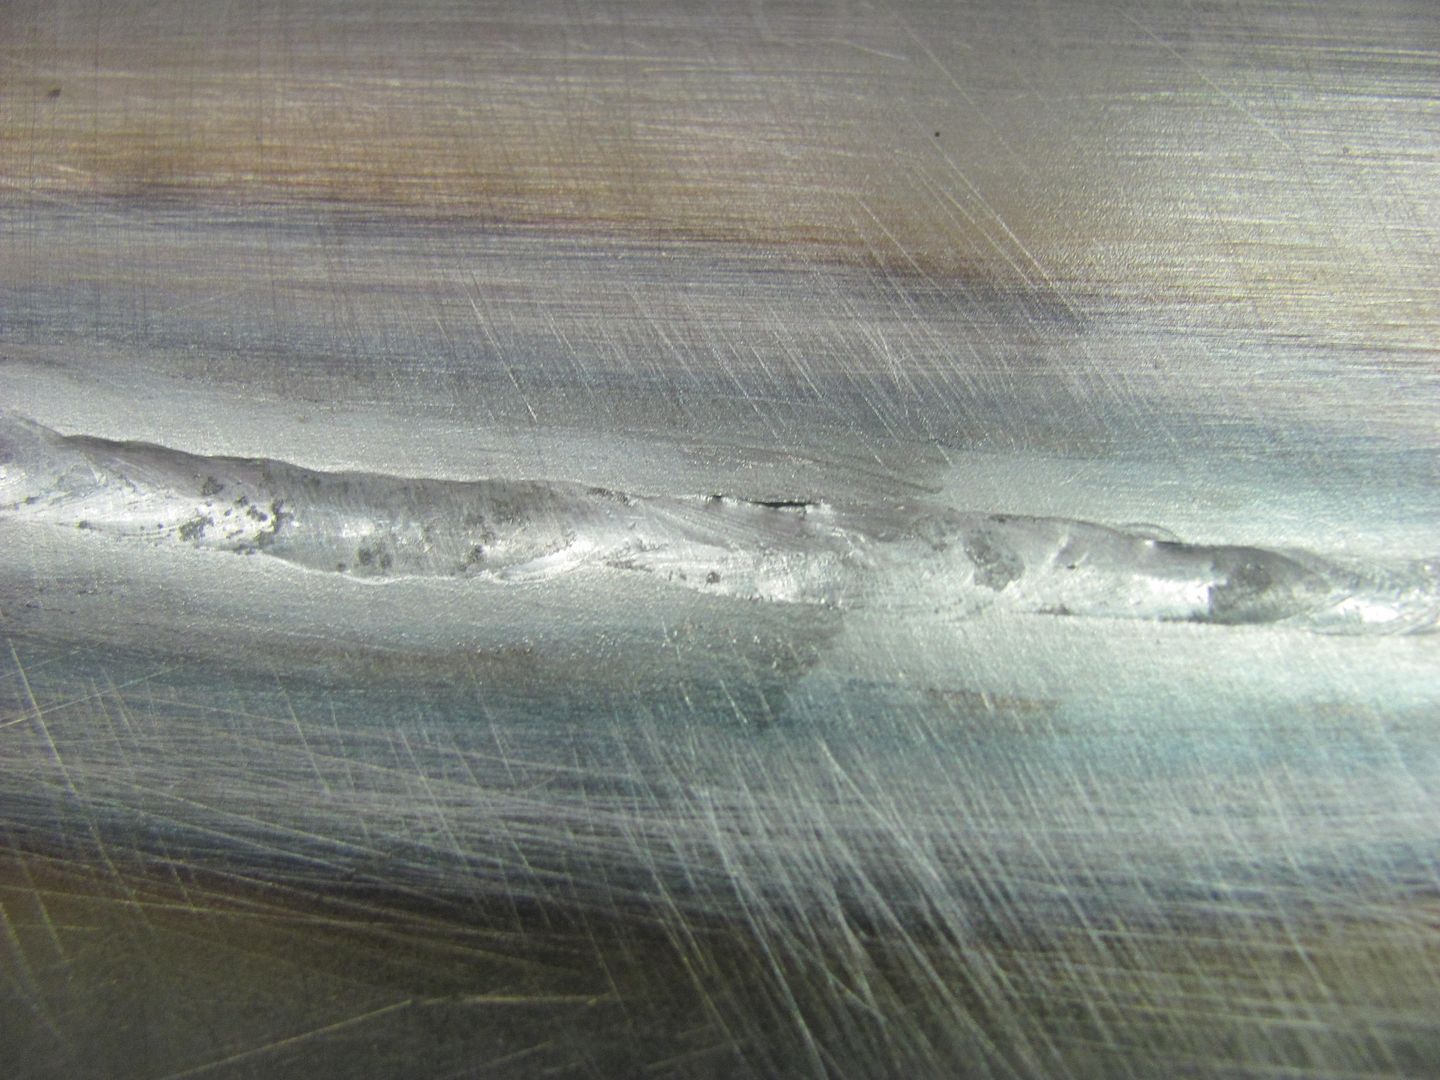
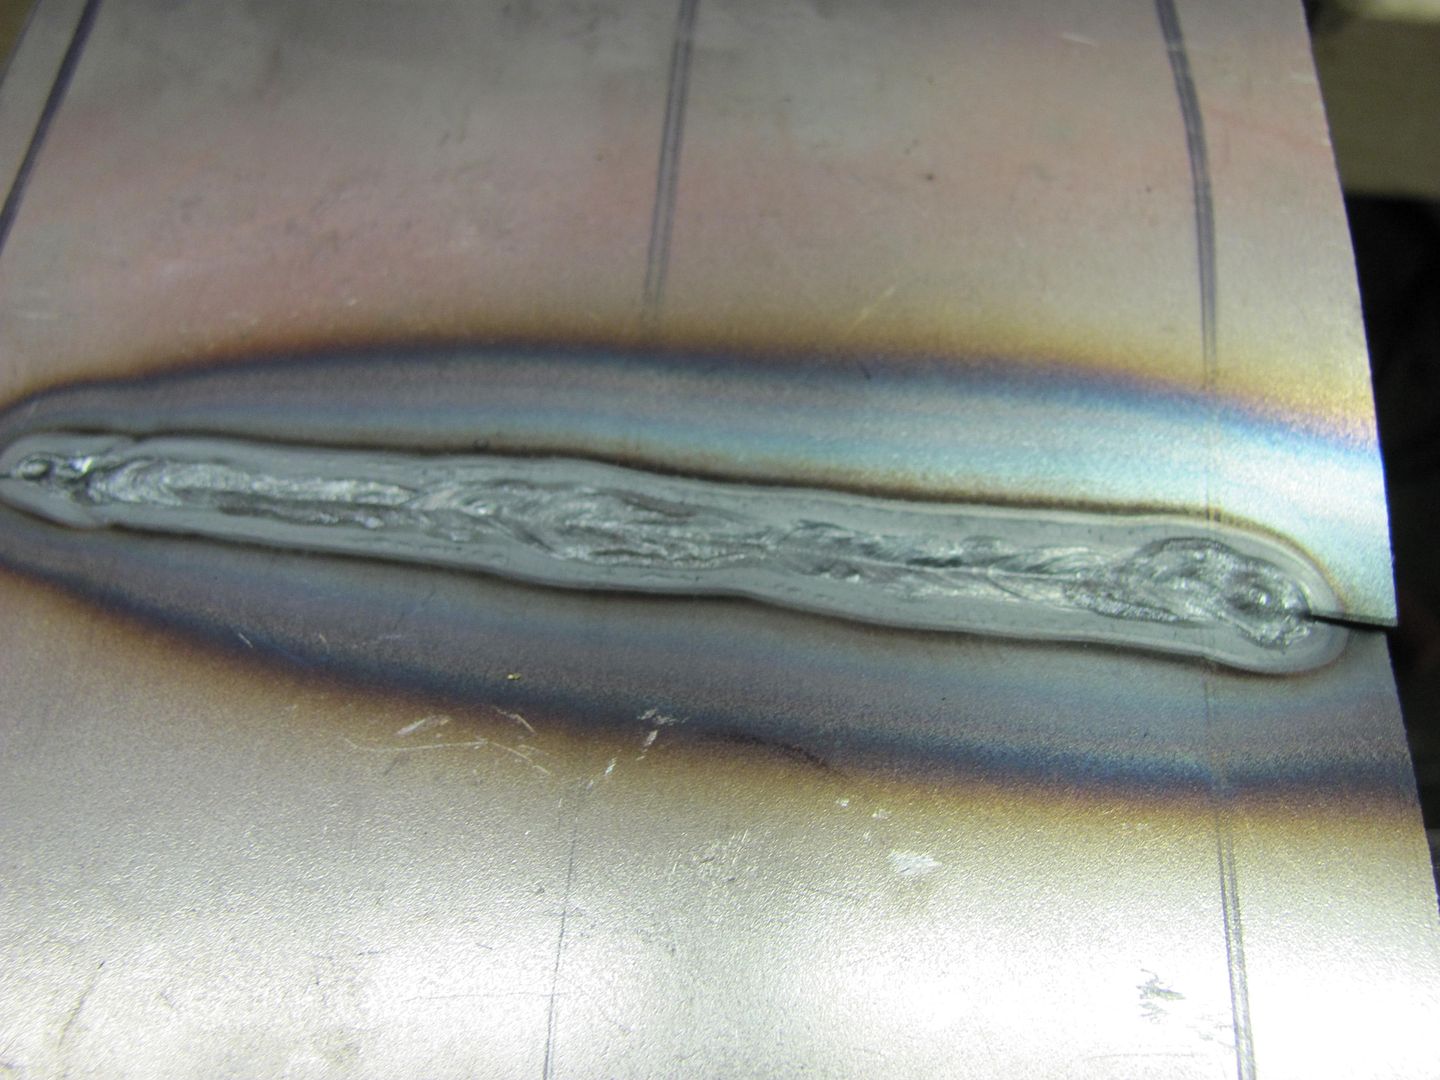
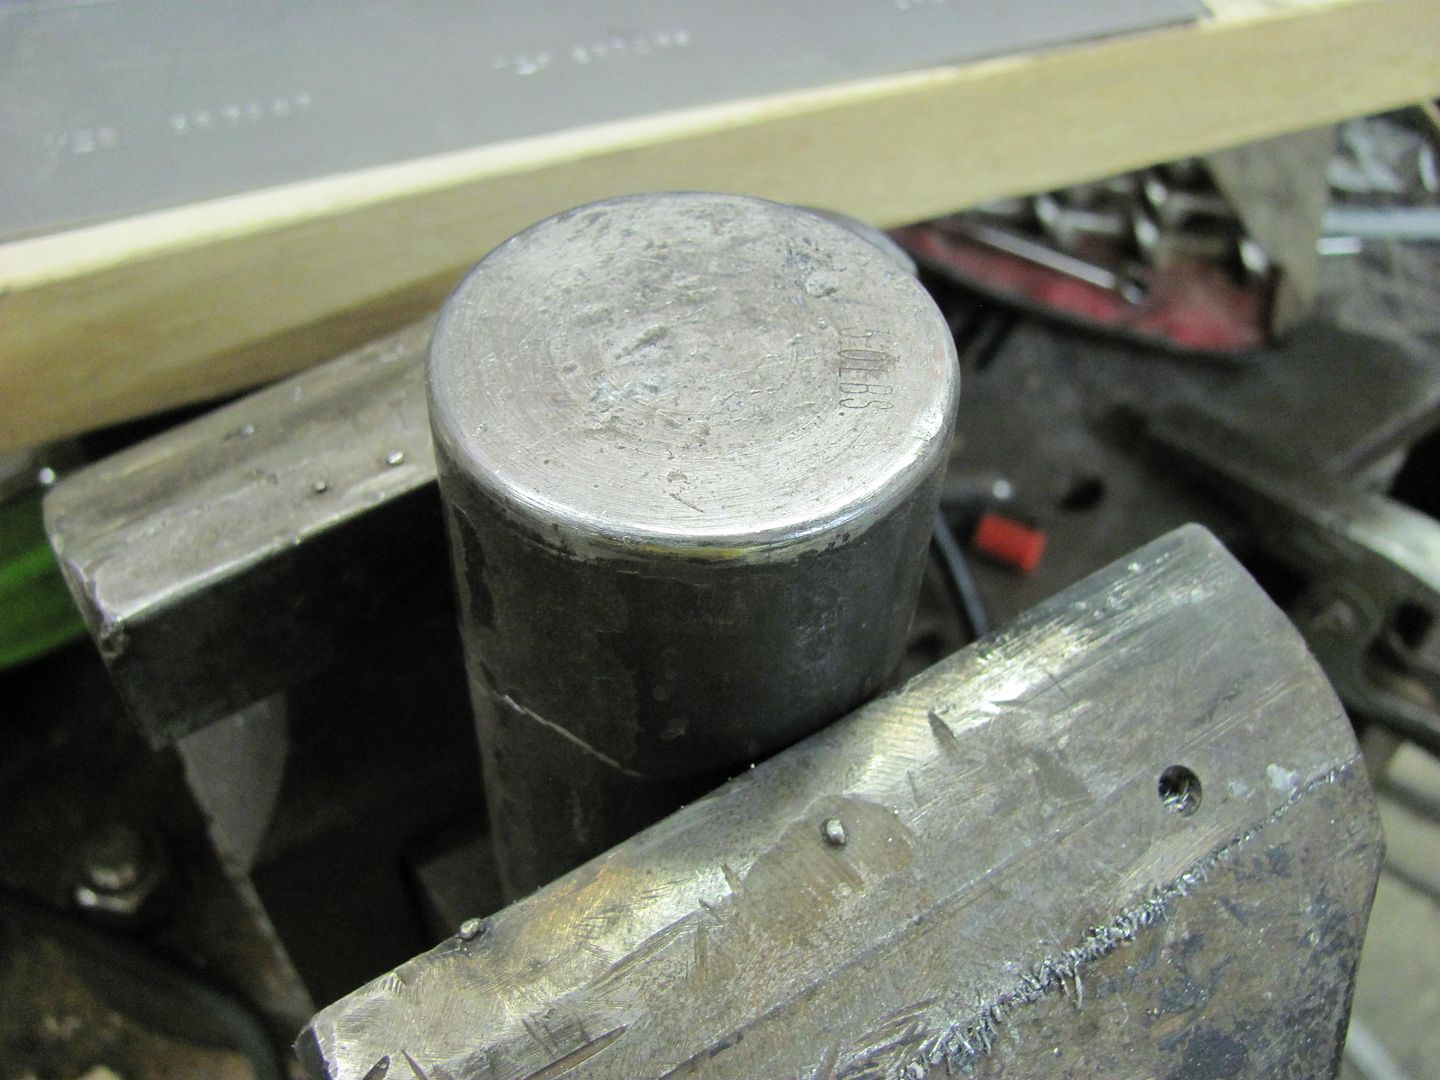
As most people have a mig in their home shop, I think you'll quickly find that the tighter your **** joint is, the less chance you have of blowing holes. Next, your heat setting used should be determined by the obtaining of a full penetration weld when welding the dots. If you don't get a full penetration weld, and it just looks like the bead is sitting on top of the metal, your heat is not sufficient. By the time you grind the welds down there will be little holding your patch in and a year or so of road vibration will undo all of your hard work. Now, if you do find you are still blowing holes, before turning down the heat, increase the wire feed. It's like this, if you have enough heat to perform the weld but not enough filler going in, somethings gotta give, hence a blowout. The less the gap, the less the chance of a blowout. Wider gap = more weld filler = more heat = more shrinking = more hammer and dolly work in the end. As far as the TIG welder, they seem to be even more prone to blowing out holes (yes, I have both), and for the novice welder, a very tight gap is almost a neccessity.

OK, Got it...well maybe...

been working on my Torino tunnel, thought I had it, had to start over :mad: 
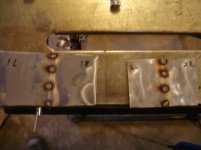
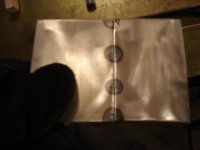
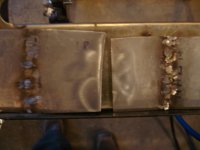
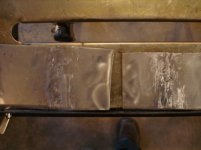
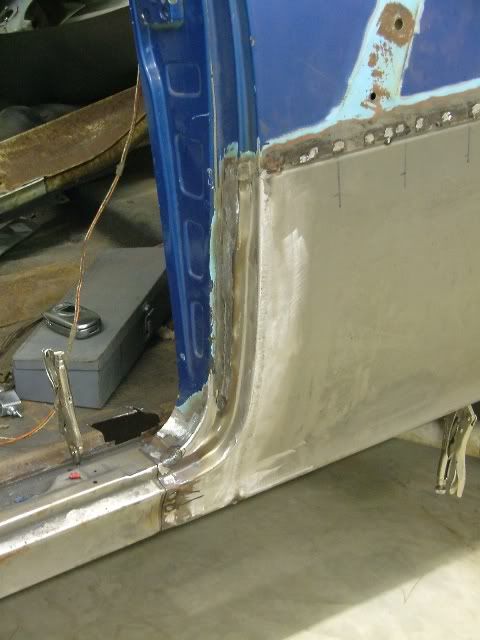
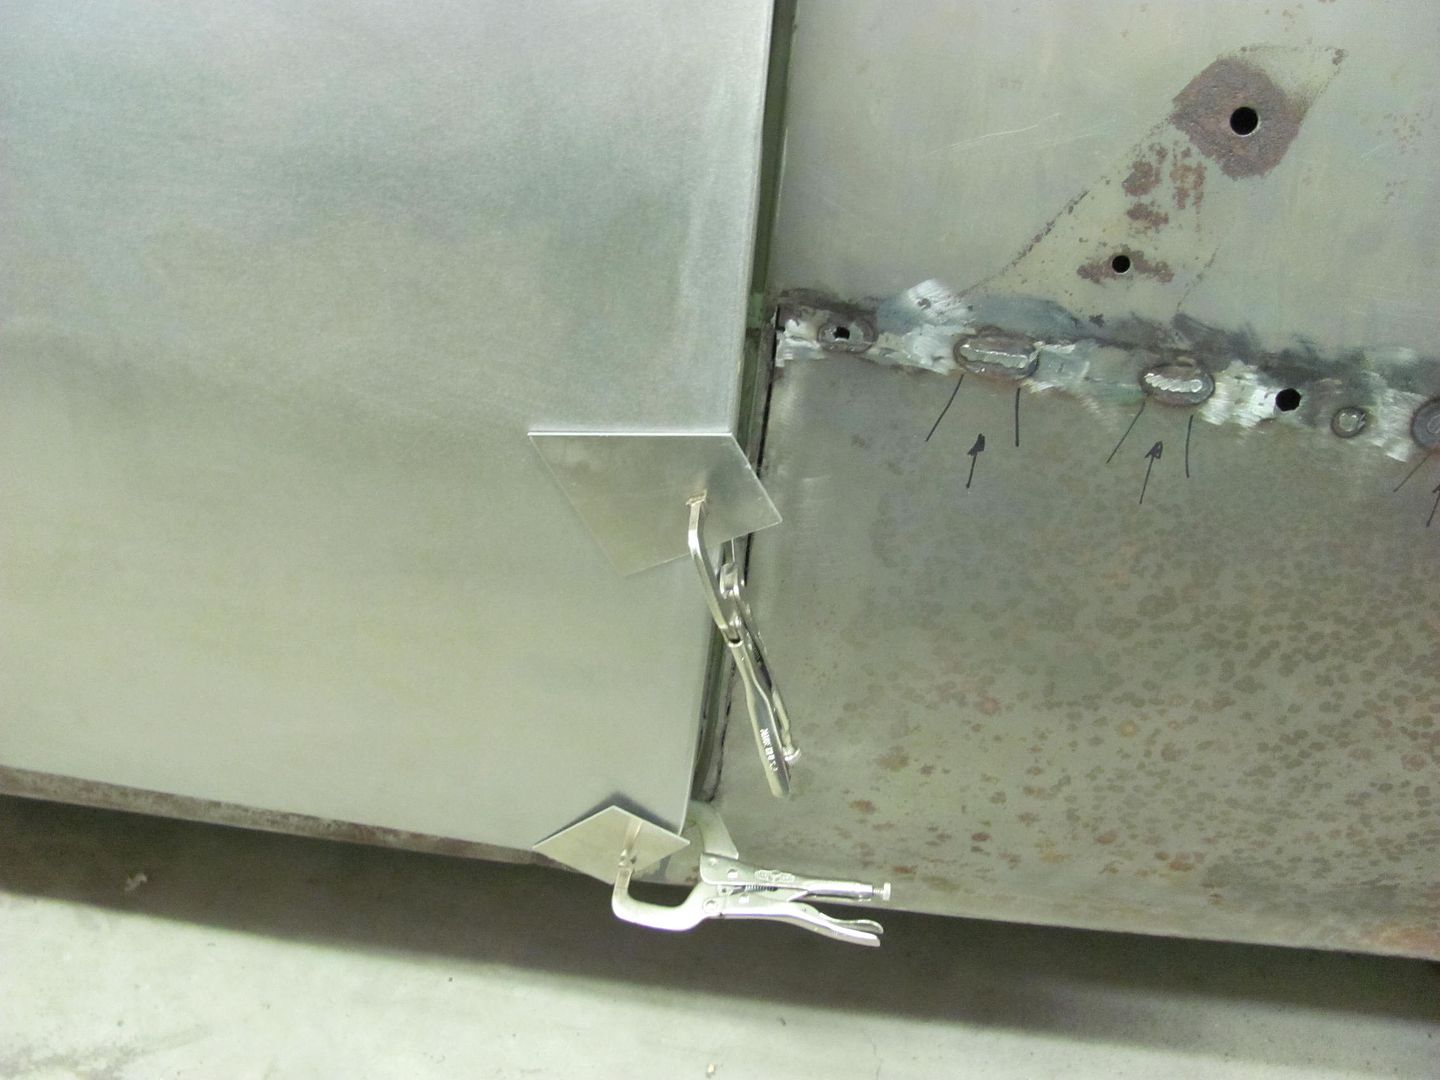
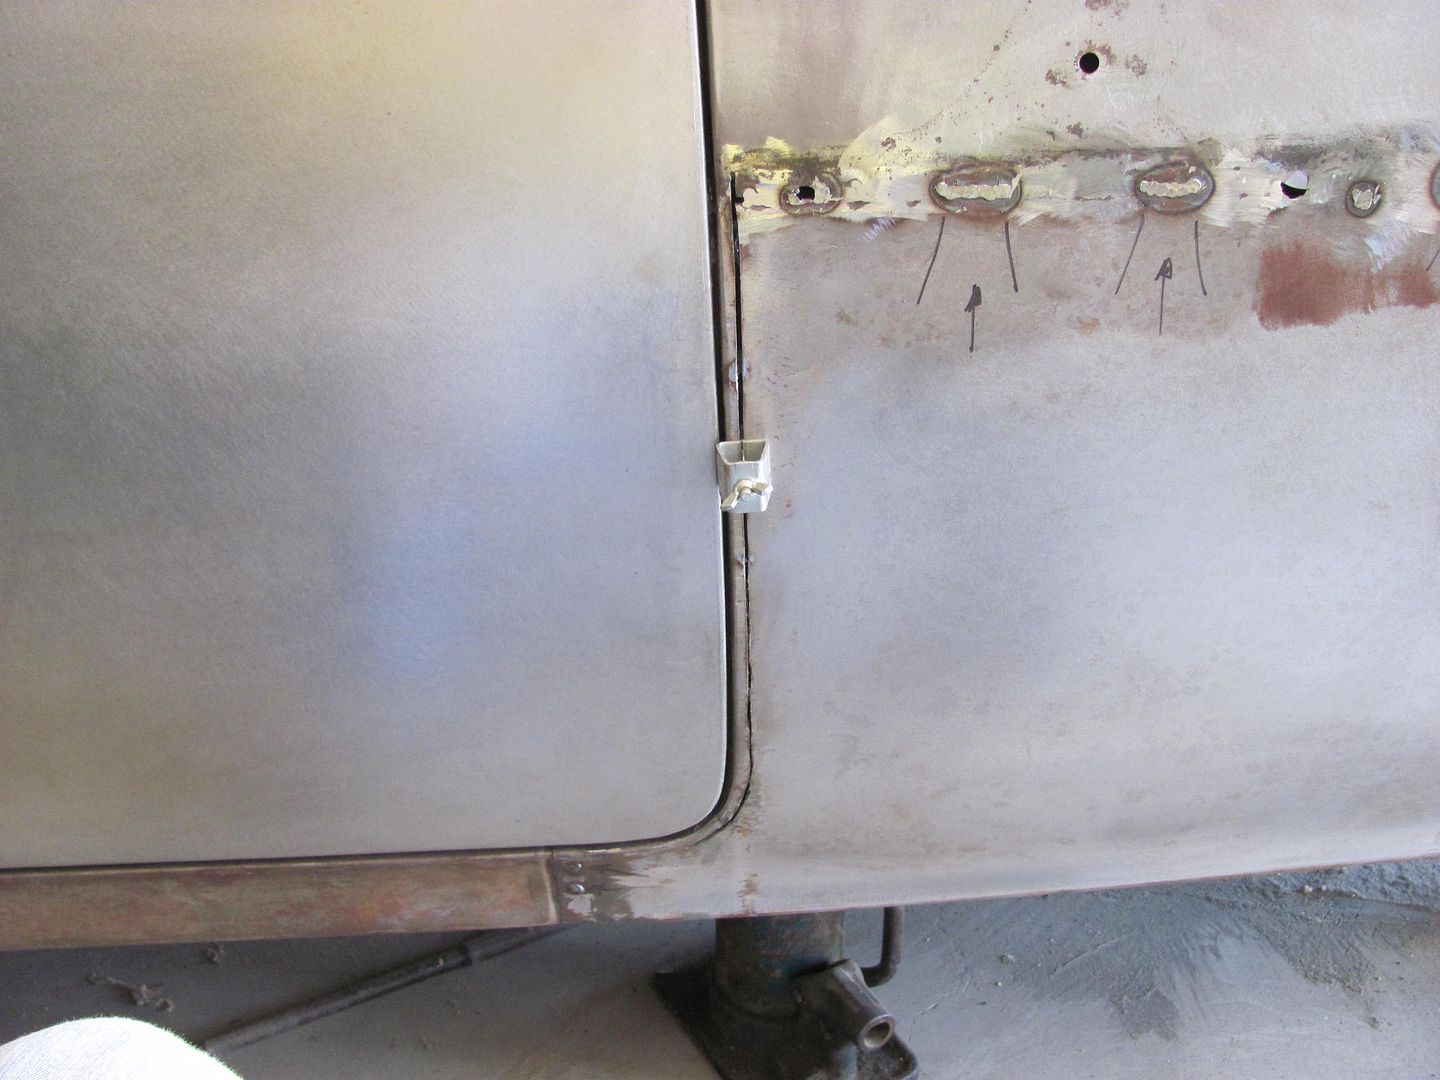
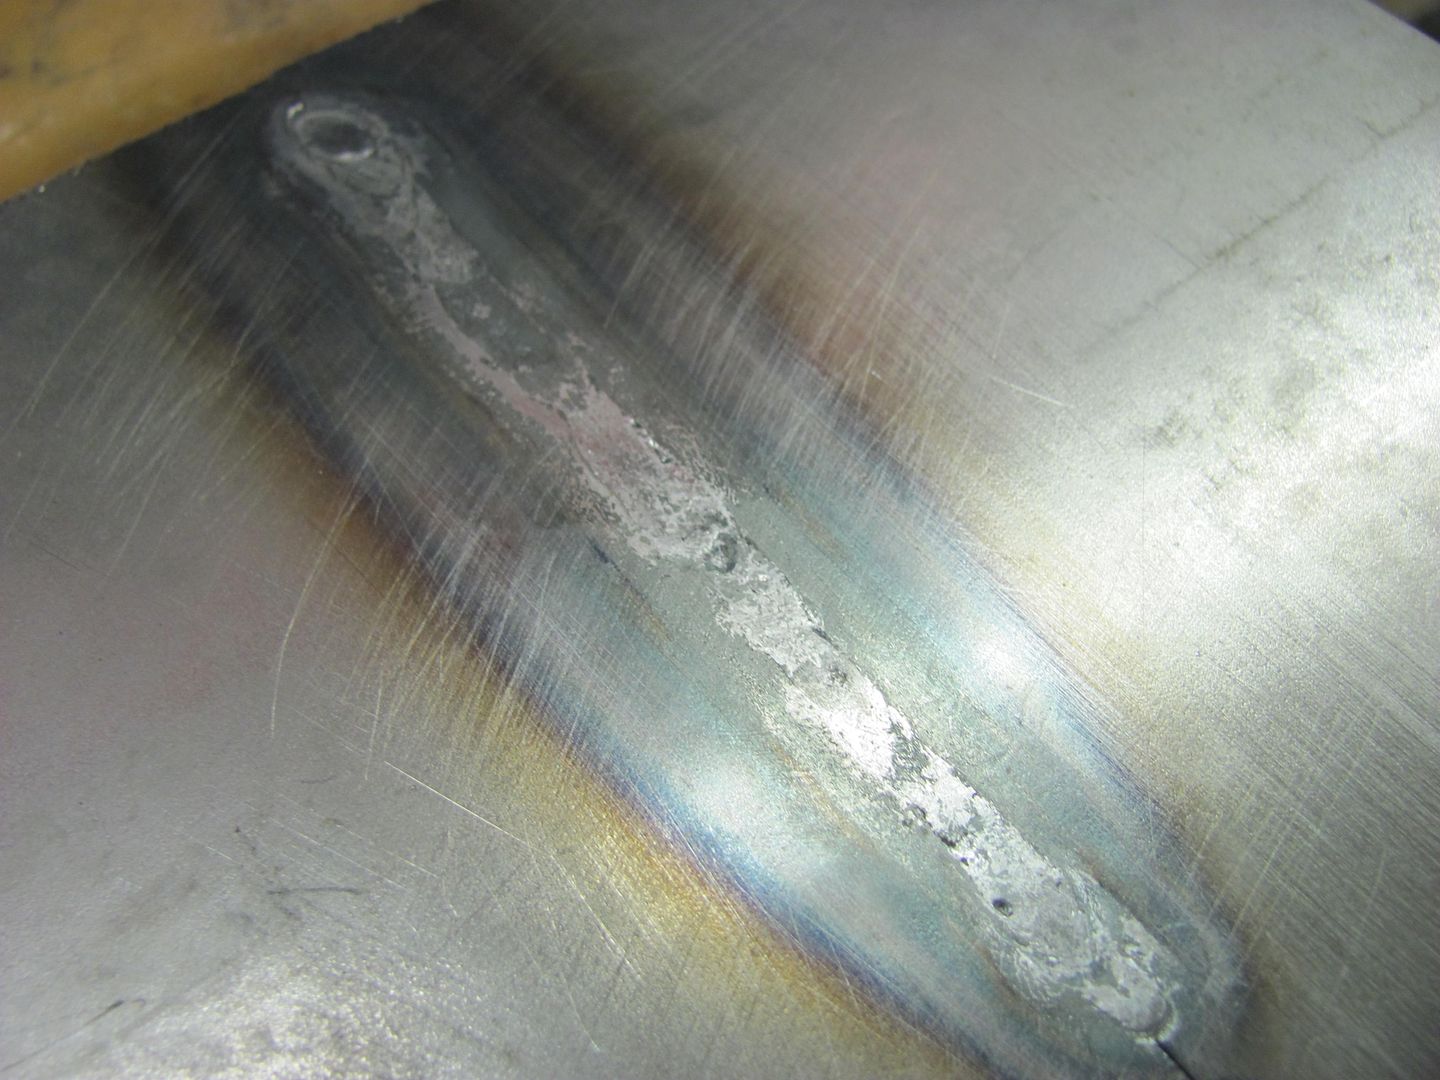
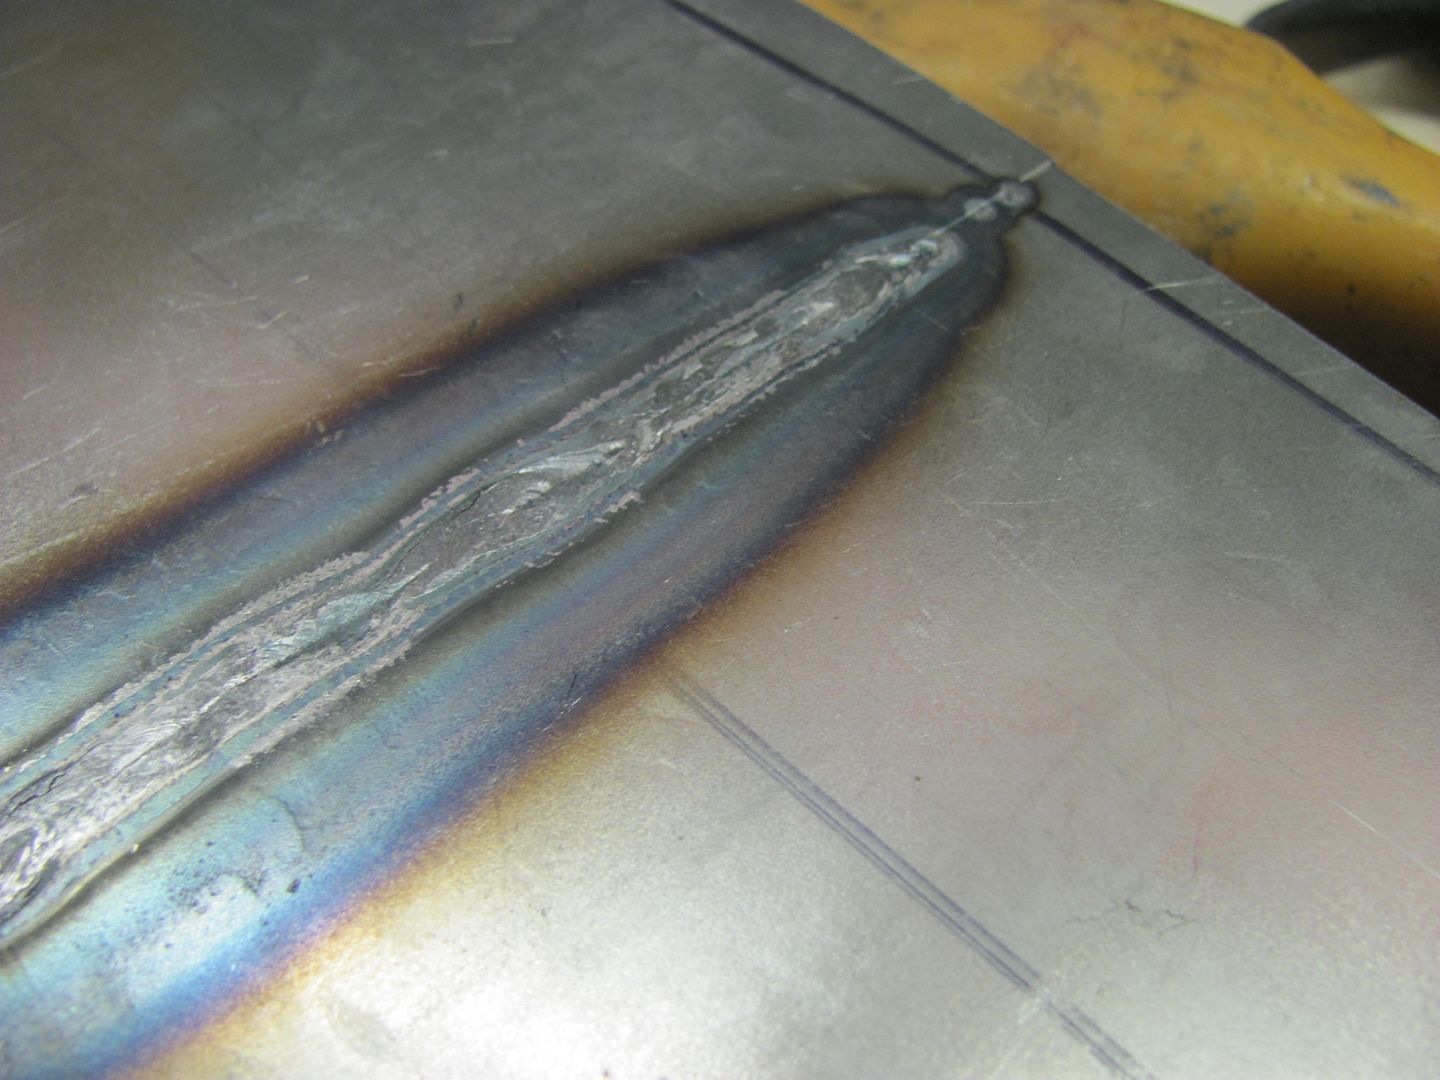
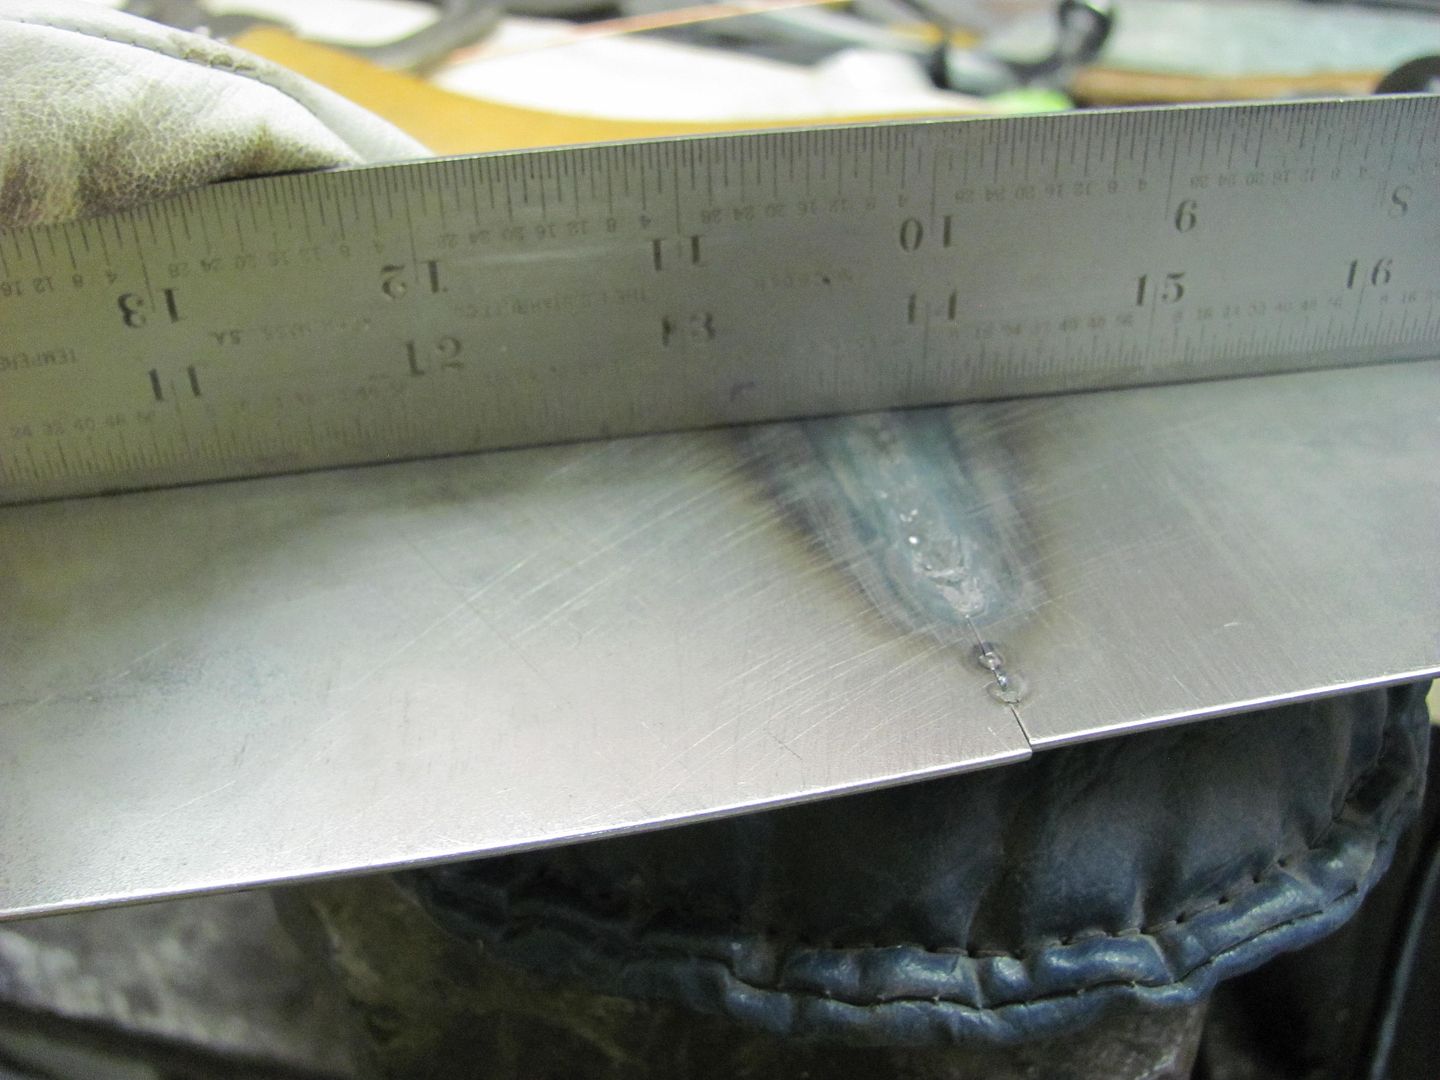
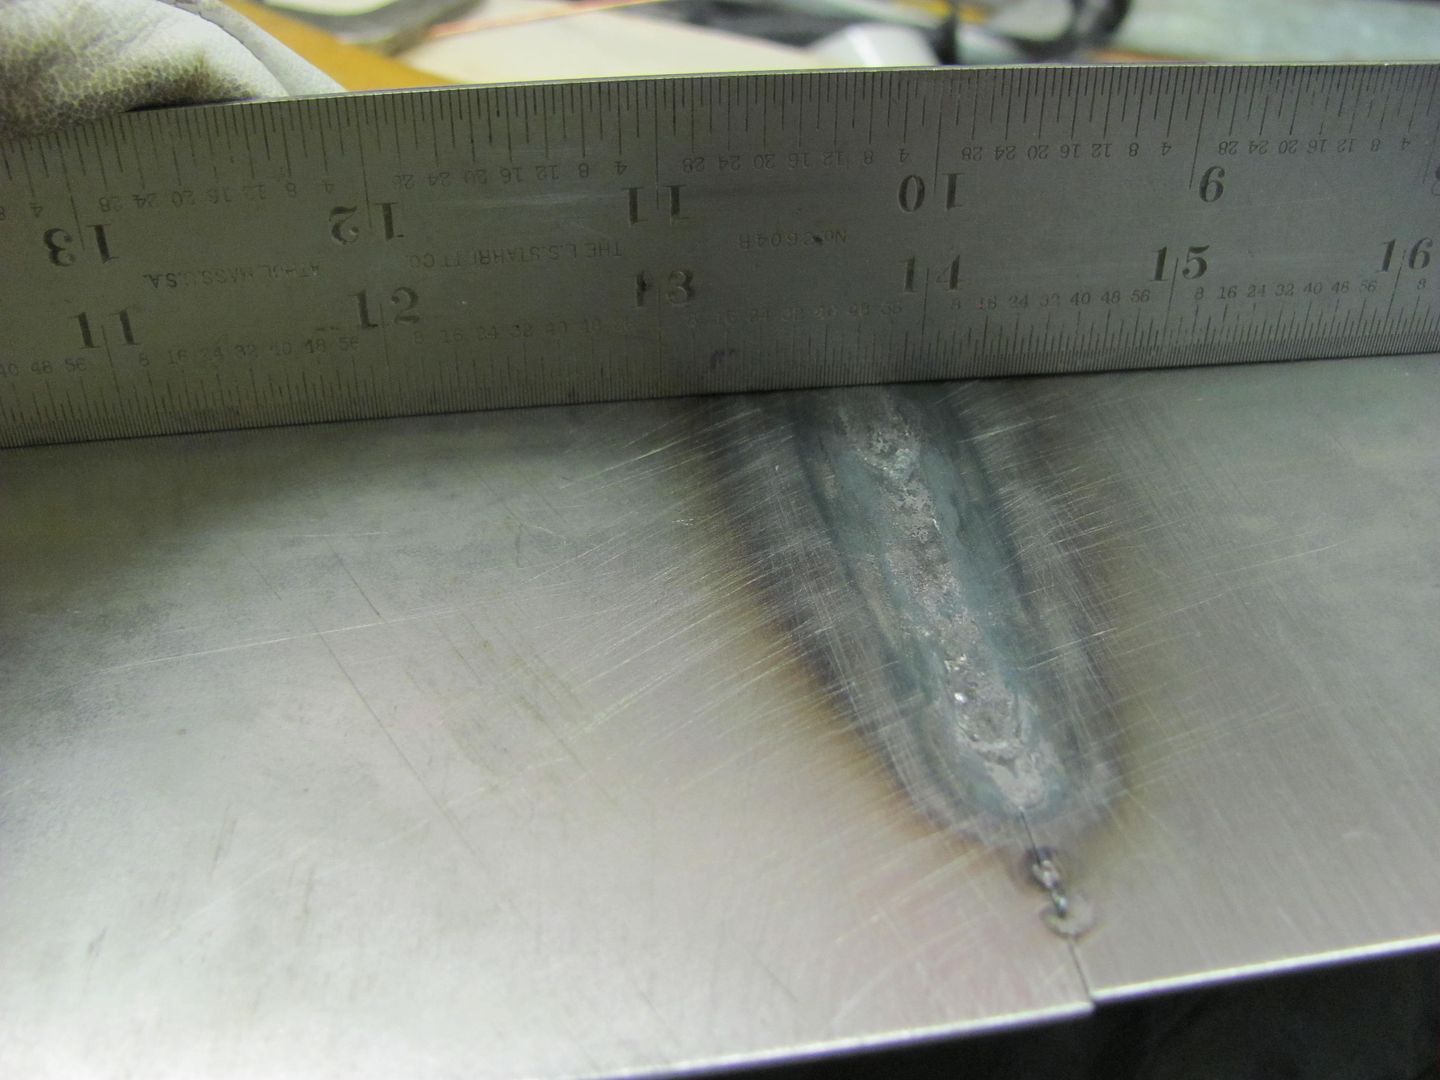
Blew fricking holes through it, didn't get penetration you name it :mad:

I figured I better come back and read this from the beginning even thou I have been following it from day one, sigh...

Thanks again, someday I will learn.

Joe
 

Mush07071

Active member
Joined
Jul 24, 2012
Messages
41
MP&C, I have to thank you for all of this information and sharing a real ability to explain to us a really great knowledge of the art of metal repair that you have. Really great.
 

Doug_B_928

Member
Joined
Nov 6, 2012
Messages
12
Location
Winnipeg, Canada
This is my first post. I'm a newbie to welding. Before Christmas, I bought a Lincoln MIG 180 Dual. I've been playing with it in my spare time in preparation for my first car restoration. I have been struggling with how to weld sheet metal. I found this thread yesterday, read the whole thing with great interest, and it inspired me to spend the afternoon giving it another crack. In months of reading forums, this is the best instructional information I've found on welding sheet metal. The tips provided here resulted in a big improvement over my previous attempts. However, my welds still did not come out as shown in this thread.

Background: 20 gauge cold rolled sheet; .025 Lincoln MIG wire; 75/25 Argon/CO2; heat and wire speed set significantly higher than the chart would indicate ( I think even hotter than indicated for 16 gauge); using 110V power; pre-cleaned weld areas with a scotch-brite style pad on the die grinder followed by rubbing alcohol.

I was not able to get as much penetration as the images shown earlier in this thread (i.e., significant weld dots on the back side of the weld). But I think the penetration was sufficient. The weld seems quite strong.

I tacked, grinded the tack with a 1/16 cut-off wheel, planished, repeat with overlapping tack etc. When the tacking-planishing-grinding was done I used an 80 grit sanding disk on the die grinder, then ran a flat metal file over the weld area, then a DA with 150 grit. The result is shown in the pics below. As you can see from the side view, the weld bead is level with the parent metal. But it still doesn't look like the examples shown in this thread where you can't even see the weld seam. If anyone has any suggestions on how I can improve this I would really appreciate it.
 

Attachments

  • Sheet Metal Practice Feb. 18 017.jpg
    Sheet Metal Practice Feb. 18 017.jpg
    30.4 KB · Views: 185
  • Sheet Metal Practice Feb. 18 018.jpg
    Sheet Metal Practice Feb. 18 018.jpg
    28.4 KB · Views: 2,122

projectPONY

Well-known member
Joined
Sep 25, 2008
Messages
83
Location
Dallas, TX
By you mentioning that you are setting heat and wire speed significantly higher than the chart would indicate leads me to suggest that you check your machine's polarity.
 
Last edited:

MP&C

Well-known member
Joined
Oct 21, 2009
Messages
4,396
Location
Leonardtown, MD
attachment.php


This picture shows the weld has been sanded/ground down. To properly critique your welds, we need to see them, both front and back, before you do any sanding or grinding..
 
Last edited:

Doug_B_928

Member
Joined
Nov 6, 2012
Messages
12
Location
Winnipeg, Canada
Robert, thanks for your tutorials and for your willingness to help me :).

Below are the only pics I took (should have taken more). I did two welds at the same time. The one on the left was with a tight fit with a bevel on the pieces (I think you had indicated in one of your early posts in this thread that you bevel sheet metal when you do a tight fit??) and the one on the right had no bevel but a small gap. I was playing with the heat and wire speed a bit, so the welds in the pics with the first four tacks were not as uniform as I'd like. In the pic of the backside you can see that there is not "full penetration." In my playing around with it to try to get it so that I could see a weld tack on the backside I'd simply get blow through. In the next pic you can see the completed tack-planish-grind procedure. In the pic they, deceivingly, look like chicken feces, but I ground each tack down with the 1/16 cut-off wheel as low as I could without hitting the parent metal. Notice, Robert, that I emulated your marker method for showing where I needed to add tacks :). The next pic is after I had sanded them with 80 grit on the die grinder and also run a flat file over them. The final pic is after 150 grit DA.
 
Last edited:

Doug_B_928

Member
Joined
Nov 6, 2012
Messages
12
Location
Winnipeg, Canada
The pics I've attached to my previous post keep disappearing when I post/edit my post. So, let's try again:
 

Attachments

  • Sheet Metal Practice Feb. 18 010.jpg
    Sheet Metal Practice Feb. 18 010.jpg
    27.1 KB · Views: 199
  • Sheet Metal Practice Feb. 18 011.JPG
    Sheet Metal Practice Feb. 18 011.JPG
    120.9 KB · Views: 204
  • Sheet Metal Practice Feb. 18 012.JPG
    Sheet Metal Practice Feb. 18 012.JPG
    116.6 KB · Views: 2,750
  • Sheet Metal Practice Feb. 18 013.JPG
    Sheet Metal Practice Feb. 18 013.JPG
    137.4 KB · Views: 198
  • Sheet Metal Practice Feb. 18 014.jpg
    Sheet Metal Practice Feb. 18 014.jpg
    28.9 KB · Views: 173
  • Sheet Metal Practice Feb. 18 015.jpg
    Sheet Metal Practice Feb. 18 015.jpg
    29.1 KB · Views: 168
To avoid these ads, REGISTER NOW!
Top Bottom