To avoid these ads, REGISTER NOW!

west of Philly - barn saving

OP
R

rieferman

Well-known member
Joined
May 18, 2009
Messages
2,586
Location
Collegeville PA (30 min west of Philly)
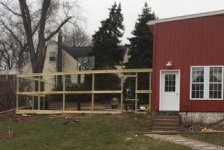
In post 885 I mentioned re-fencing about 1/2 of my yard.

Basically half of my yard is newer cedar privacy fence, and the other half was old split rail that was rotten at the ground.

We like the look of this 1/2 and 1/2 mix as the needs on each side of our yard are different... The fire pit and swimming side of the yard needs privacy, and it's nice to talk to neighbors as they walk past on the ball playing side of the yard. Therefore, the goal was to re-do the rotten split rail fence better this time.

The other goal was to evolve the basketball court fence.

Here's what I've done over the last week or so:
- Removed all old fencing
- Disposed of all old fencing
- Marked and dug (by hand) all holes (23 in total)
- Ordered all supplies and had them delivered
- Installed new locust posts and rails (except at basketball court)
- Installed post sleeves (with concrete) around basketball court
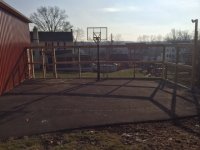
- Built basketball court fence and gate

Still to do:
- Wire mesh added to split rail and finish last section
- Finish trimming out basketball court, install gate, add electrical

TIRING WORK!

:beer:
 

Attachments

  • fence project in progress.jpg
    fence project in progress.jpg
    36.2 KB · Views: 169
To avoid these ads, REGISTER NOW!

BuickFarmer

Well-known member
Joined
Apr 5, 2006
Messages
1,415
Location
Athens, Georgia
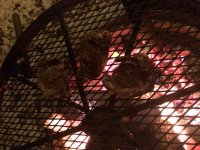
Man you have a lot going on. Managing the house renovation even with a good contractor can get trying I am sure. Look forward to seeing the hood installed over the fire pit. I am thinking the height will be just right and will not need lowering. The metal fabricator is good. You should consider having him construct a "grill" for the pit. We cook out on ours all the time.
 

Attachments

  • IMG_4322.jpg
    IMG_4322.jpg
    137.4 KB · Views: 126
  • IMG_4323.jpg
    IMG_4323.jpg
    143.8 KB · Views: 114
OP
R

rieferman

Well-known member
Joined
May 18, 2009
Messages
2,586
Location
Collegeville PA (30 min west of Philly)
Hey BF! Those steaks look awesome! My appetite is through the roof right now after 5 consecutive marathon work-in-the-yard days, so I zoomed right in on those and am hungry now.

I should be done with the fence project today (just some punch list items and finish electrical to go) and the fire pit ring was delivered yesterday... so there's a light at the end of this particular tunnel. Hope to post pics later today.
 
OP
R

rieferman

Well-known member
Joined
May 18, 2009
Messages
2,586
Location
Collegeville PA (30 min west of Philly)
Whew! One last marathon day yesterday, and the yard projects are complete.

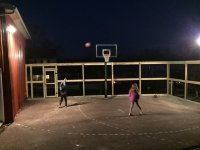
My buddy helped me with electrical work on the court - which we have now named "The Cage Court" - and I finished a series of punch list tasks. Both the court and the split rail fencing turned out great. Lighting on the court is excellent with no shadows.

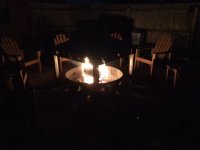
The fire ring was also delivered this weekend, so we test drove that with a few celebratory beers. The ring helps the fire draft better due to air holes near grade, and some wind blocking. I'm going to go through a lot of wood :thumbup:
 

Attachments

  • fire pit done.jpg
    fire pit done.jpg
    38.6 KB · Views: 198
  • cage court done 2.jpg
    cage court done 2.jpg
    61.9 KB · Views: 213
  • cage court done 1.jpg
    cage court done 1.jpg
    65.3 KB · Views: 181

captain14

Well-known member
Joined
Dec 19, 2012
Messages
7,069
Location
Near College Park Maryland 20740
I spoke with 3 contractors...

1) I know one guy's work very very well...
2) One was sort of a "control" selection - a larger / more corporate selection.
3) And the third was based on seeing his signs show up at several local houses repeatedly over the years.


I ended up going with #3 after visiting several of his other local jobs that are similar scope of work. He and I got along great, my wife feels comfortable with him, I liked his work, I love that locals in my area are using him on a repeat basis, his office is 2 miles from my home, and I liked his quality of work. His pricing was right in line with what I anticipated (I used to sell construction projects, so I usually have a pretty good feel for pricing) and in the same ball park as the other two quotes. In all, details checked out and the "gut feel" did too.

His crew is doing soup to nuts on this project (edit: except the chimney work). I am separately managing some of my own subs for pieces of the project not listed above (edit: e.g. electrical and HVAC).


That's how I decided on the contractor that did my roofing and siding work last year. No advertising, just word of mouth among neighbors and repeat jobs at those houses.

We did talk about his "subs". All three were ones he has used repeatedly on other jobs. Two have them talked about how he kept them in work all winter on inside jobs too.
 
OP
R

rieferman

Well-known member
Joined
May 18, 2009
Messages
2,586
Location
Collegeville PA (30 min west of Philly)
A couple "free from scrap lumber and materials hanging around" projects to help bring the court to life.

A table made from the basketball backboard that I used growing up. I literally logged THOUSANDS of shots on this hoop and became a pretty darn good player in the process. So it's sentimental to be able to use it still, and functional place for us to put the water jug for the kids.

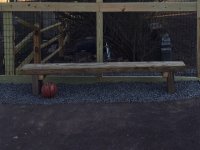
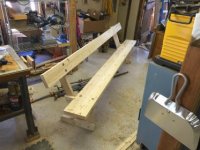
A bench made from some 4x6 lengths that previously edged our driveway. Sanded it down. Heavy as can be, perfect place to "ride the pine" between games.

A simple scoring system using some golf tees. We play with "practice pinnies" that are yellow... so the Y = Yellow, and the NY = Not-Yellow.
 

Attachments

  • score board.jpg
    score board.jpg
    99.2 KB · Views: 189
  • court bench.jpg
    court bench.jpg
    87.5 KB · Views: 163
  • backboard table.jpg
    backboard table.jpg
    77.5 KB · Views: 182

Lyndon

Well-known member
Joined
Aug 11, 2014
Messages
2,535
Location
Sydney, Australia
.
.
.
.
.
.
.
.
A simple scoring system using some golf tees. We play with "practice pinnies" that are yellow... so the Y = Yellow, and the NY = Not-Yellow.

Great projects there, but when I saw the scoring system, my first thoughts were Y = "You", NY = "Not You". Thought you had it nailed with that..... :bounce: :) :lol_hitti

Lyndon
From far away at a ridiculous time of the morning. :confused:
 

BuickFarmer

Well-known member
Joined
Apr 5, 2006
Messages
1,415
Location
Athens, Georgia
A table made from the basketball backboard that I used growing up. I literally logged THOUSANDS of shots on this hoop and became a pretty darn good player in the process. So it's sentimental to be able to use it still, and functional place for us to put the water jug for the kids.

That is COOL. Consider hinging the top, putting a bottom in it and use it to "display" your and the kids other old sports memorabilia?
 

BuickFarmer

Well-known member
Joined
Apr 5, 2006
Messages
1,415
Location
Athens, Georgia
Tha's HOT. So how is it working? how is the height working. Seems it might could even be higher off the ground and still draw well and allow more exposure to the flame=heat
don't you just hate second guessers
 
OP
R

rieferman

Well-known member
Joined
May 18, 2009
Messages
2,586
Location
Collegeville PA (30 min west of Philly)
Hey Guys!

BF - hinging the top of the bball backboard table... not a bad idea! It's really not fine furniture (just slapped together with screws, made of scrap lumber in about 15 minutes) but that could be a fun spot for Band-Aids, ball pump, etc.

BF - fire pit is working much better with the addition of the fire ring. The ring blocks a bit of the wind, and the air inlets create a air movement path that keeps the smoke contained long enough for it to get caught in the chimney draft.

The lower setting of the chimney was a good call too - it's at 30 inches (where I originally estimated in my design drawing) which is close enough to the fire to capture much of the smoke, low enough that you can see around it to talk to others at the fire, and high enough that you get to see/feel the fire really nicely.

Smoke still escapes, don't get me wrong, but it's much better than no chimney at all, plus there's a cool factor.

I'm going to ask Doug (aka "the fabricator") to bend up an extension piece for the chimney to see if an extra foot of length increases the draw significantly.

I'm also splitting firewood smaller/thinner to make it burn brighter, smolder less.


Kev - Thanks for the intro to Doug! Super cool guy, did a great job on the fabrication!
 
OP
R

rieferman

Well-known member
Joined
May 18, 2009
Messages
2,586
Location
Collegeville PA (30 min west of Philly)
Here's the truck!


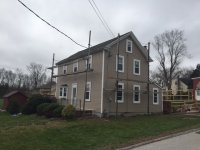
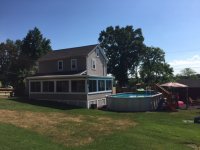
And here's the beginning of our big home renovation. Windows, siding, chimney work, roofing, porch to sunroom conversion.
 

Attachments

  • new truck 3-2016.jpg
    new truck 3-2016.jpg
    79.1 KB · Views: 158
  • home renovation 1.jpg
    home renovation 1.jpg
    69.5 KB · Views: 164
  • home renovation 2.jpg
    home renovation 2.jpg
    67.1 KB · Views: 138
Last edited:
OP
R

rieferman

Well-known member
Joined
May 18, 2009
Messages
2,586
Location
Collegeville PA (30 min west of Philly)
What a crazy couple of weeks! Renovating a 1902 farm house is not for the faint of heart.

Our budget got shot to hell during siding removal.. lots of prep work and some rot repair needed to make the new siding look good.

Budget got further shot to hell when a chimney re-stucco turned into a complete chimney removal. It turns out the chimney was completely built improperly, was rotting out, and basically swaying in the wind.

The GC and I worked it out to be fair all around, so the work continues. They're tearing into the porch now.

More pics soon.
 
OP
R

rieferman

Well-known member
Joined
May 18, 2009
Messages
2,586
Location
Collegeville PA (30 min west of Philly)
Well, our GC had a vacation on the books for a long time, so he left one of his crews to working on our porch...

Now, we're re-using the existing roof, and about 80% of the floor/footer structure, so this was not an easy effort. At times, your tape measure and level are useless, at other times they are essential. Takes a lot of judgment.

In any case, the crew was in over their heads without their top guy's guidance. Windows were at the wrong height and not centered, one door was misaligned, one wall was set in about 2 inches from where it should be etc.

I finally stopped work on Wednesday. I was very nice about it with the crew.

The GC returned from vacation Wednesday night and came over at 7 a.m. on Thursday morning. He saw exactly what I saw, and agreed 100%. He was very apologetic and cool about it.

Based on our phone conversation before his visit, he'd already planned to triple up his crews at our place to get the project back on track. They arrived shortly after his visit on Thursday morning, and removed all work and rebuilt it all. Now things look as they should, and the wife and I are much happier.

Things don't always go smoothly... good business men make their reputation on how they handle mistakes. I give this GC and A+ on doing the right thing in this case.
 
OP
R

rieferman

Well-known member
Joined
May 18, 2009
Messages
2,586
Location
Collegeville PA (30 min west of Philly)
Thanks Buick Farmer!

edit: And I'll update my feelings about the GC above... Freaking joke. Had I not project managed the entire effort, this would have been a major fail. In the end, it looks great, but I was ON TOP of the crew like white on rice and saved many major problems as a result. He was very rarely on site, and the crew was consistently overmatched. Very stressful, and glad to be to the portion where I do the interior - I know and trust my own work. Sigh... hard to find good work these days.

All electric, trim, painting, blinds installation is done now. Flooring gets installed this week. Mini-split next week (or week after possibly). Furniture (except what I'm building) and TV and everything else on order.

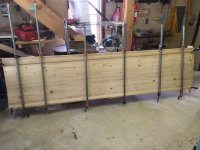
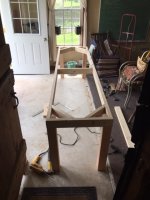
And, I made some progress on what I'm calling the banquet table. It will measure 30" wide x 30" tall x 9' long. 6 chairs surrounding three sides, with a full length bench on the fourth side. Very simple (yet STRONG) design. I just used construction lumber this time around to keep cost down and make it speedy to build. I removed the rounded corners from five 2x6's and glued up the top. 2x4's make the skirt board. 4x4's were planed to desired thickness, and shoulder cut for legs. Entire thing will be stained to match exposed beam in the space. Not bad so far for about $100 in materials and fasteners.
 

Attachments

  • banquet table 2.jpg
    banquet table 2.jpg
    75.1 KB · Views: 110
  • banquet table 1.jpg
    banquet table 1.jpg
    88.2 KB · Views: 92
Last edited:
To avoid these ads, REGISTER NOW!
OP
R

rieferman

Well-known member
Joined
May 18, 2009
Messages
2,586
Location
Collegeville PA (30 min west of Philly)
Hey Guys!
I'm going to ask Doug (aka "the fabricator") to bend up an extension piece for the chimney to see if an extra foot of length increases the draw significantly.


Forgot to update on this... I had a 2 foot extension fabbed and added to the chimney. The draw is MUCH improved. Love the fire pit!!!!!!!


edit: top of new page! previous page has new banquet table build pics
 
OP
R

rieferman

Well-known member
Joined
May 18, 2009
Messages
2,586
Location
Collegeville PA (30 min west of Philly)
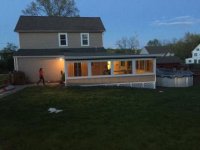
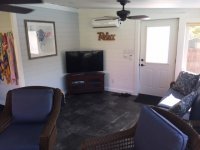
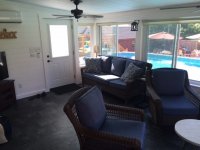
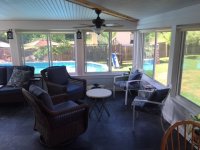
Yay! I'm basically finished with the sunroom, which I will also use as my home office frequently (such as today). We love it!

To recap, I paid a GC (who ended up needing to be babysat constantly, but it all ended well enough) to do siding and windows for the whole house, some roofing, and structural work on the old porch (now the sunroom).

I then managed a sub to do spray foam in the sunroom ceiling. I did all electric/sound/AV, insulation (other than ceiling), bead board ceiling, ship lap walls, all trim work, window treatments. I brought in pros to install the HVAC and flooring.

Along the way, I built the banquet table and bench, and we stained to match chairs found on craigslist.

I still have to build a bench for under the towel hooks. I have the design and materials list ready and hope to do that this week. I also need to figure something out for storing the volumes of basketballs and other sports gear that my kids deposit in our house on a daily basis.

But, I couldn't resist posting pics. I'm calling this one "done".
 

Attachments

  • sunroom finished 4.jpg
    sunroom finished 4.jpg
    57.4 KB · Views: 304
  • sunroom finished 3.jpg
    sunroom finished 3.jpg
    63.3 KB · Views: 316
  • sunroom finished 2.jpg
    sunroom finished 2.jpg
    77.9 KB · Views: 328
  • sunroom finished 1.jpg
    sunroom finished 1.jpg
    81 KB · Views: 360

920kip

Well-known member
Joined
Aug 11, 2011
Messages
168
Location
Titletown USA
What a great thread. I have been reading for a week, and have come to the end.
You have done a wonderful job on so many projects. I hope you continue posting anything else you are working on.
Happy Holidays,
Kip
 
OP
R

rieferman

Well-known member
Joined
May 18, 2009
Messages
2,586
Location
Collegeville PA (30 min west of Philly)
Well it's been a longggg while since I have had a chance to do an update. Mostly because a lot of our work is done and I'm just using spaces now. Thank god.

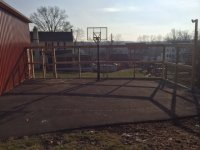
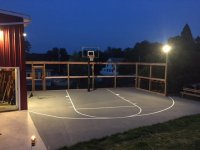
But, we did hit a new milestone last week... The existing basketball court has been redone!!!!!!!!!!!

Instead of a gravel apron, and gravel drive leading towards a deteriorating and too-pitched asphalt court area, we now have concrete throughout. Everything was re-graded, all water managed away from the barn and yard.

After the contractor left, I waited 30+ days and then acid etched the court area, applied 100% acrylic tennis court surface (with grit/traction), and painted lines.

Now, the basketball clinics that I host each week are at a whole new level!

Before and after pics included here
 

Attachments

  • cage court done daytime 2.jpg
    cage court done daytime 2.jpg
    73 KB · Views: 220
  • court finished 2017.jpg
    court finished 2017.jpg
    61.8 KB · Views: 247

Brian R

Well-known member
Joined
Dec 1, 2009
Messages
591
Location
Chestertown, MD
As a kid that spent way too much time on neighborhood courts - that's a good one. I want to hoop it up at your place!

Enjoy and great job.
 
OP
R

rieferman

Well-known member
Joined
May 18, 2009
Messages
2,586
Location
Collegeville PA (30 min west of Philly)
Thanks Brian! I was also a hoops junkie growing up, always at the local park or on my own driveway. Having a space like this right outside my workshop, and about 20 steps from the pool, has been awesome. We host competitive games for the kids (boys travel ball players... going into 6th grade at this point) on a weekly basis. Worth every dollar spent.
 
OP
R

rieferman

Well-known member
Joined
May 18, 2009
Messages
2,586
Location
Collegeville PA (30 min west of Philly)
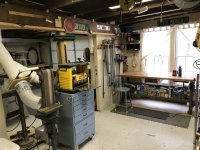
I've been spending considerable time in the shop lately making some upgrades and getting ready to try my hand at some small scale side-business work (mostly for fun).

- Re-worked the shelving above / below the miter saw
- Built a new and improved shop cart
- Built a scrap bin to keep cutoffs nicely organized
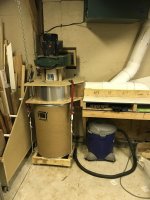
- Rebuilt my dust collection system with 6" PVC (rather than 4")
- Built a new "cyclone" (aka Thien Baffle) to accommodate the 6" pipe

Once the shop is back in order, I'll share a few pics.

Hope everyone is doing great

Thanks,

Bob R.
 
Last edited:

kjdhawkhill

Well-known member
Joined
Jan 19, 2015
Messages
822
Location
Flyover state #4
Glad to see this is back towards the top of the page... I'll have to do some catching up, as its been a few years since I've gone through it.
 

borgdog

Well-known member
Joined
Jan 8, 2011
Messages
109
Location
Spokane, WA
Looks nice.

May have been answered earlier, but does your dust collection just exhaust outside after the Thien seperator? I get so very little past mine could probably do that as well and save some space; have wynn filter and dust bag after currently.
 
OP
R

rieferman

Well-known member
Joined
May 18, 2009
Messages
2,586
Location
Collegeville PA (30 min west of Philly)
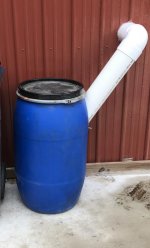
Hey! Sorry for the delay. The top hat style thien separator drops probably about 85-90% in the barrel that you see in the above picture. The exhaust then goes outside through the wall behind the machine. Since we have neighbors right there, I built an exterior "muffler" that cuts the noise wayyyy down and also captures the remaining fine dust in a filter bag. The muffler has a louvered vent on the backside.

Note: if my top hat thien was a bit taller I think it would capture 99% of the dust thus eliminating the need for the exterior dust bag. The 6" pipe modifications that I made throughout the entire setup just created such velocity that I miscalculated.
 

Attachments

  • IMG_4062.jpg
    IMG_4062.jpg
    56.5 KB · Views: 79

borgdog

Well-known member
Joined
Jan 8, 2011
Messages
109
Location
Spokane, WA
Cool, thanks for the details and photo. 6" made a big difference? I debated doing a main 6" run when i put mine in, might have to think about it again for the shop redo... whenever I can get enough projects out of the shop to work on the shop itself.
 
OP
R

rieferman

Well-known member
Joined
May 18, 2009
Messages
2,586
Location
Collegeville PA (30 min west of Philly)
I had read everywhere (sawmillcreek, pentz website etc.) that 6" was a BIG difference....

...and WOW they were right!!!!

Now... to be clear, I didn't just take the easy route and use 6" pipe for the mains. I instead modified my dust collector (I literally removed plates) so that both intake and exhaust are 6" pipe. I also made the thien separator with 6" pipe. All my piping throughout the shop is 6", and I only dropped to smaller diameter in couple instances (such as above the table saw blade is 1.25" since I additionally capture below the table with 4").

With all of these adjustments, I would be comfortable saying that I DOUBLED the suction throughout the shop.

Do I still get some dust on the floor? Sure... some cuts are just messy. But, it's far better than before.

With the air cleaner running, and due to the fact that I usually work with a face shield / respirator (3M model), my healthy lungs are nicely protected... and the shop is easier to keep clean too. :)
 
Last edited:
OP
R

rieferman

Well-known member
Joined
May 18, 2009
Messages
2,586
Location
Collegeville PA (30 min west of Philly)
Update...

I've been doing a ton of woodworking. My interior barrel is now nearly full, and the exterior dust bag has about a coffee can's worth of dust in it. Outside of my building is nice an clean. Good indicators that the separator + exterior "muffler" system is working nicely!
 
OP
R

rieferman

Well-known member
Joined
May 18, 2009
Messages
2,586
Location
Collegeville PA (30 min west of Philly)
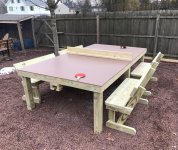
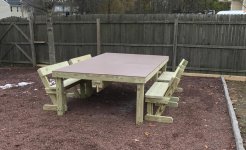
Always wanted an outdoor ping pong table. Built one that doubles as a picnic table. Azek top over pressure treated plywood and PT lumber. Storage under and benches that nest between the legs.
 

Attachments

  • IMG_4261.jpg
    IMG_4261.jpg
    161.5 KB · Views: 129
  • IMG_4251.jpg
    IMG_4251.jpg
    156.1 KB · Views: 128
  • IMG_4250.jpg
    IMG_4250.jpg
    158.1 KB · Views: 123
  • IMG_4248.jpg
    IMG_4248.jpg
    149.1 KB · Views: 117
  • IMG_4246.jpg
    IMG_4246.jpg
    156.4 KB · Views: 122
OP
R

rieferman

Well-known member
Joined
May 18, 2009
Messages
2,586
Location
Collegeville PA (30 min west of Philly)
We are in the process of registering our small business name, and launching our website.

Our business goals are very modest as I don't expect this side-hobby-level business to displace my existing job, but we are setting it up so that it has room to grow as needed.

We will sell:
1) Items that I have designed and built
2) Items that I have designed but have had others manufacture on my behalf
3) Items that are custom / built-to-order
4) Design/consultation services
5) Woodworking classes

This past weekend, I was able to test the woodworking class service with 4 of my coworkers. Over the course of a 4 hour period of time, they were taught shop flow, tool and shop safety, lumber milling, and how to walk through a woodworking project plan from start to finish. They all walked away with their very own "one board toolbox" of my design, and reported having a very fulfilling day.
 

Attachments

  • pic2.jpg
    pic2.jpg
    85 KB · Views: 132
  • pic11.jpg
    pic11.jpg
    94.7 KB · Views: 138
To avoid these ads, REGISTER NOW!
Top Bottom