To avoid these ads, REGISTER NOW!

west of Philly - barn saving

To avoid these ads, REGISTER NOW!

rbonitz

Well-known member
Joined
Oct 25, 2012
Messages
140
Great work with the Barn... Really a cool project. - I'm just a little west of you (Elverson) and have an old bank barn that I'd guess is a bit older than yours, but similar in a lot of ways.

If you're ever over this way, stop by.

ray
 
OP
R

rieferman

Well-known member
Joined
May 18, 2009
Messages
2,586
Location
Collegeville PA (30 min west of Philly)
Hey shopnut! Thanks for stopping in! Glad to see you've been back on your feet after that injury! I've been taking special care on my ladder ever since.

Eric wrote:
I think I'd be hanging out in that upstairs.

If you notice the beer bottle evidence, I agree.. I started the hanging out already. Although, as a safety note, the beer always waits until power tool time is over.

Omphaloskeptic wrote:
I know it's early in the remodel for the upstairs, but has the new siding made the space seem warmer even without insulation?

Good question. I have noticed (or at least I think I have) that my woodshop is more easily heated now (that space is insulated already), presumably because wind infiltration is way down. Upstairs also benefits from the wind factor, and possibly from radiating warmth from the sun - even in 30 degrees, the siding is warmer than that because of the dark red color soaking in the sun.

rbonitz wrote:
have an old bank barn that I'd guess is a bit older than yours, but similar in a lot of ways.

I envy and pity you at the same time :)
 

Kevin54

MEMBER EMERITUS
Joined
Jan 12, 2005
Messages
29,341
Location
Urbana, Ohio
riefer....You've got the place looking great!!! :thumbup::thumbup:

And you do need to change your avatar now to the new look.

I don't know what show it was on, whether ManCaves or HGTV or wherever, but they took one of those tabletop shuffleboards and made the bar counter out of it. You could always have a couple pieces of tempered glass to cover it when using it as a bar, then remove it when using as a shuffleboard. Dual purpose and a spacesaver.

Looking forward to your project pics on the upstairs. :rocker:
 

Bull

Super Moderator
Joined
Dec 12, 2005
Messages
16,189
Location
MA
Great work with the Barn... Really a cool project. - I'm just a little west of you (Elverson) and have an old bank barn that I'd guess is a bit older than yours, but similar in a lot of ways.

If you're ever over this way, stop by.

ray

You (and Bob!) should join the new Just Barns forum, here: http://justbarns.proboards.com/

And Bob, that upstairs is looking awesome. I am so jealous of the fact that you are just being the MAN and banging this all out.
 
OP
R

rieferman

Well-known member
Joined
May 18, 2009
Messages
2,586
Location
Collegeville PA (30 min west of Philly)
Hey Kev! Thanks for dropping in. I think I remember seeing recently that you just recently added a new pup to your household too, so congrats on that! We just started obedience classes with Buttercup this past weekend, and she's really taking to it nicely. It's really more of training us how to train than anything else though.

Bull! Great to hear from you my friend! And thanks for the props! It almost makes my back and hamstrings not hurt!!! lol
 

larry_g

Well-known member
Joined
Apr 28, 2007
Messages
16,892
Location
oregon
The new red looks very good. I do think that you need to replace the star though as it is a distinguishing mark on your building.

lg
no neat sig line
 
OP
R

rieferman

Well-known member
Joined
May 18, 2009
Messages
2,586
Location
Collegeville PA (30 min west of Philly)
Hey Larry! Thanks for dropping by!

I thought about putting the star back up but it was running some rust down the side of the building before, and I was concerned about it scraping the protective coating off the steel during high winds. For now, the plan is that the star will be above the bar that I'm building upstairs (side note: the old trap door to the 2nd story that I'd built out of barn board, but will not be needed with my new floor plan, is being repurposed as the front of my new bar. I can picture it already!)
 

crazytrain

Well-known member
Joined
Mar 4, 2011
Messages
1,550
Location
Amish Country, Pa
Wow, It took me a few hours worth of reading but I got through this entire thread. Great work on the barn and woodworking. Subscribed :thumbup:

I am fairly close to you, I live in southern Lancaster County, But was born and raised in Pottstown. I still have a lot of family in Pottstown and My wife has family in Chester County. I also work in southern Chester County.
 

J-man67

Well-known member
Joined
Aug 10, 2012
Messages
218
Location
Delaware
I did IT! I finished what I will call my FAVORITE read on the internet. Right up my alley. I have always loved seeing old buildings restored. Honestly, you can make a movie with the content you shared with the world over the years. The end result leaves me almost speechless. I've done nothing but admired your hard work and skills as I read through this thread over the last 2 weeks or so. You started out as a new home-owner with some sweet skills and evolved into what I would call a pro! You literally started with nothing, and I only say nothing b/c of the many that suggested tear-down. You started with nothing and ended up with an AWESOME, and most important, a useable/practical space for you and your family. This barn has even helped shape your career(s) haha. Amazing work and you honestly should feel like a million bucks as I feel that is what your work is worth. I am almost 30 and just bought my first home. Not as old as yours (1956) but doesn't mean I didn't want it to be. Anyway it has a detached 2 1/2 car garage on the back of the lot and I plan to use a lot of the tips/tricks that I learned just by reading your thread. I want to make the space my own, obviously on a different level, but like you have done. Nothing but respect and admiration man...again, good work. I have enjoyed the ride thus far and look forward to seeing/learning more. Everything you have done (Jim too) has come out great. Good luck with future projects and endeavors!
 
OP
R

rieferman

Well-known member
Joined
May 18, 2009
Messages
2,586
Location
Collegeville PA (30 min west of Philly)
Wow, you guys just gave me such a huge jolt of enthusiasm and energy all I can say is THANK YOU. I've enjoyed sharing here over the years, and do my best to keep up on others' updates so that I can try to encourage them (although I need to improve in that area lately), but these last few posts really just made me smile.

And, I'm especially happy with your shout out to Jim!!!!! Jim is one of my best friends, and I met him right here on GJ. In fact, I was over at his house last weekend figuring out a deck project for him, and he's coming here tomorrow to help me with some electrical in the barn. We have opposite skills (he's mr. mechanical, I'm mr. carpenter) so it works out really well. Plus, we both like a cold beer after. ha ha.

Yesterday, I got all my electrical shopping done, and also was able to pick up a sweet door at Habitat Restore. Then the wife helped me move all the framing lumber upstairs so that I can start framing today and tomorrow. More pics soon!

Thanks again guys, what an energy boost!!!!!!!!!!!!!!!!
 
Last edited:
OP
R

rieferman

Well-known member
Joined
May 18, 2009
Messages
2,586
Location
Collegeville PA (30 min west of Philly)
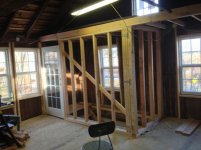
Well, speaking of Jim, he came over today (with his son Franky) and we got some serious framing work completed. Pretty much the only framing job I couldn't easily do by myself was finished today.

We framed to enclose the top of the stairwell for HVAC / Dust control purposes. Due to a very tight turn at the top of the stairs, we had to make the entire wall hinge outwards to allow for future deliveries (couch, carpet, etc.). That took some "engineering" but we got it done.

Since the enclosure created a nice shelf above it to begin with, I decided to make a long beam and create a 4' wide x 18' long loft up there for the kids. We have it all joisted out and the plywood is up there ready for me to complete next weekend. The plan is to have a small TV up there for the kids to enjoy. Plus, it's always fun to be up in a "fort".

Under the loft by the right hand window is where the kids arts and crafts table will be. A fun little nook for kid activities. That entire side of the room will have linolem flooring for ease of cleanup, and the other 2/3 of the room will have carpet for warmth.

Tired and sore and satisfied.
 

Attachments

  • Loft framing.jpg
    Loft framing.jpg
    131.1 KB · Views: 316

J-man67

Well-known member
Joined
Aug 10, 2012
Messages
218
Location
Delaware
Entire wall, hinged! Im diggin it! When you guys are all done working on your places, im about an hour away....

Sent from my SGH-I747
 

Omphaloskeptic

Well-known member
Joined
Oct 11, 2008
Messages
2,346
Location
Ultima Ratio, Wa.
What a great idea; an 'indoor' fort for the kids. Don't forget to build a stout 'kid korral' up there so no one accidently 'bails' out of the loft; you might even want to add safety bars across that window. Of course, you want the window to still be operable; how else can they conduct their water balloon bombing on Dad? :evil:

I've mentioned this idea to others; you might want to do it also. I looked back to the first page pics (Man - you have come a long way since then! :beer:), and you should get a set of 8"x10" color glossy pictures made up of the 'as found' state of the barn. Frame them and mount them next to the man door, so each time you pass through, you can see them and SMILE! :thumbup:
 

NUTTSGT

Super Moderator
Staff member
Joined
Sep 14, 2009
Messages
51,081
Location
Northern Central Ohio
I'm digging the enclosed stairway and how it hinges for large items.

Did you think about mounting a single caster on the stairway side (basically out of sight) to aid in opening the large wall and taking some stress of the hinges ?
 
OP
R

rieferman

Well-known member
Joined
May 18, 2009
Messages
2,586
Location
Collegeville PA (30 min west of Philly)
J-man, yup a hinged wall :) I'm quite pleased with the execution on this one. Without that solution, I wouldn't be able to get building materials or furniture up there later. Btw, my current client engagement is in Wilmington, so I do that drive frequently.

Ompha - Yes, there will certainly be a railing on the loft/fort, but I'm waiting until the end of the project to do that so that I can easily use the loft as my "scaffolding" for that side of the room until then. The gable window is fixed-pane (doesn't open) so sadly no water balloon bombings, and gladly no risk of falling kids!

Love the idea of the framed pic. My wife did make me a coffee table book (that now needs more updates) which people have enjoyed, but I like the framed pic idea too!


edit: Just saw your question Eric (about the caster). I had the same idea, but the floor slopes down and away from that wall pretty quickly, so the caster will soon be off the floor when being opened. Since the wall will only be opened a couple of times per year, my solution is just to have a flip down support block that I can rest the door on in the open position in those rare cases.
 
Last edited:

intimadatorsquizz

Well-known member
Joined
Feb 12, 2010
Messages
245
Location
Telford,PA
Always good hanging out and working with you Bob. the loft and the wall turned out great. it took some planning but we got it done. My son enjoyed working with us. I miss working with him.
 
OP
R

rieferman

Well-known member
Joined
May 18, 2009
Messages
2,586
Location
Collegeville PA (30 min west of Philly)
Ugh, not the most productive barn session I've ever had today. So that we can maximize useful space in the rec room, I'm doing built ins for kid storage, fridge and TV components. Since the area I'm building into (the storage room) is unheated (but insulated) I want the structure of the built ins to be like a normal, insulated wall. Sounds simple from here right? Well, remember, the floor and all other surfaces are all crooked in opposite directions... So to get just ONE of the built ins completed, took me about 3 hours today. Ugh. Admittedly, I built this one entirely out of scrap wood and some cool painted boards I found awhile back, so that added to the time burn. I'll post pics when I've finished the entire wall. Hopefully next weekend.
 

Kevin54

MEMBER EMERITUS
Joined
Jan 12, 2005
Messages
29,341
Location
Urbana, Ohio
I'm impressed. I would have never thought of hinging an entire wall to get large items up there. Great idea for sure. :thumbup:
 
To avoid these ads, REGISTER NOW!

J-man67

Well-known member
Joined
Aug 10, 2012
Messages
218
Location
Delaware
J-man, yup a hinged wall :) I'm quite pleased with the execution on this one. Without that solution, I wouldn't be able to get building materials or furniture up there later. Btw, my current client engagement is in Wilmington, so I do that drive frequently.

Nice, came out great. Wilmington huh? Thats cool. Im in the city a couple times a week. I live about an hour south now.
 
OP
R

rieferman

Well-known member
Joined
May 18, 2009
Messages
2,586
Location
Collegeville PA (30 min west of Philly)
Got a lot of barn time in this weekend. I've been really busy and we just prioritized barn work this time around. It felt great to de-stress and make a ton of progress too.

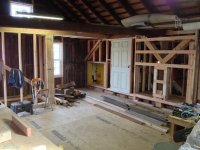
The most difficult part of the framing is finished now. The built-ins wall (book shelf for the kids' area, an area for the mini fridge, and another for the tv components etc.) turned out really well. I snagged another door from Habitat Restore ($10 including a brand new knob set!) and framed to fit.

I also got the air hockey nook framed out. Also not easy because the roof is pitched not quite evenly, and the floor is crooked too. A plumb bob, a roll of string and a 4 foot level are very useful during these exercises.

Next up, finish the easy part of the framing, install the collar ties. That should take me about 2 weekends, then on to electrical work!
 

Attachments

  • air hockey nook framing.jpg
    air hockey nook framing.jpg
    130 KB · Views: 310
  • framing almost done.jpg
    framing almost done.jpg
    134.4 KB · Views: 315
  • built ins wall.jpg
    built ins wall.jpg
    138.2 KB · Views: 319
  • barn dog.jpg
    barn dog.jpg
    133.6 KB · Views: 333
OP
R

rieferman

Well-known member
Joined
May 18, 2009
Messages
2,586
Location
Collegeville PA (30 min west of Philly)
Buttercup is only allowed in the shop or barn when I'm not actively woodworking or doing carpentry. I'm probably overly paranoid, but I feel like all that noise and dust just can't be good for a puppy. But, she's definitely a good companion for drinking a beer and staring at my day's work! LOL
 

CNGsaves

Well-known member
Joined
Sep 26, 2012
Messages
13,233
Location
KS and OK
You're doing GREAT things in saving that old barn. Nice work!!

Makes me dream "What Could Be" if my grandparent's farm were closer. It's 65 miles away and has sat empty since the 80's when grandpa died and grandma moved to town. My dad has no inertia so barn and house just sits there with no improvements. Barn is like 50' x 50' with 9 feet concrete walls, then giant peaked roof and hay loft opening in front. So much potential just frittering away.

Bravo to the work you've done to yours. Keep up the good work!!
 
OP
R

rieferman

Well-known member
Joined
May 18, 2009
Messages
2,586
Location
Collegeville PA (30 min west of Philly)
Thanks CNGsaves! I actually hit the proverbial wall this weekend while working way too many hours, so a little shot of encouragement is about what I needed!

So, this weekend, I finished almost all of the framing. I still have the collar ties and the "easy" gable left. But finished all the lower wall surfaces as well as the loft gable.

I also screwed down the plywood in the loft and spent considerable time up there while framing the gable.

In several areas, I did interior framing "pole barn" style with horizontal re-girts. This was a big time saver in those areas.

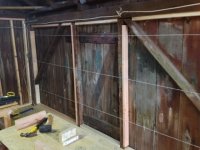
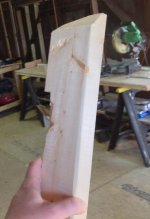
In other areas, my desire to allow the big beams and posts to show through required me to piece in vertical studs. The cuts in one stretch were such a PITA due to twisting and leaning and dipping surfaces. It was a curse fest. Attached, see a picture of the oddest cut I've ever made. Notched, and 3 angles cut in the end to make it fit. Plus, I had to use string to line everything up. Got it done, but damn was that a lot of hours for not much progress!

The loft work was brutal. Hot and cramped up there. The other gable will be much easier working in comfort from on top of the scaffolding Jim let me borrow.

Also, included a picture of the wall/door in the open position. Made it much easier to bring in a load of 2x4's!
 

Attachments

  • strung out.jpg
    strung out.jpg
    114.2 KB · Views: 289
  • wonkiest cut ever.jpg
    wonkiest cut ever.jpg
    129.6 KB · Views: 317
  • bob does work.jpg
    bob does work.jpg
    129.5 KB · Views: 272
  • wall door in open position.jpg
    wall door in open position.jpg
    129.6 KB · Views: 272
OP
R

rieferman

Well-known member
Joined
May 18, 2009
Messages
2,586
Location
Collegeville PA (30 min west of Philly)
I finished framing today, with only a little bit of blocking work to do so that I have places to fasten the sheetrock.

The biggest part of today's work was adding in the collar ties. The style of building doesn't really need collar ties per se, but they certainly won't hurt the strength of the structure. I also installed gussets while I was up that high anyways.

The other reason for the collar ties is to make a nice place for can lights and ceiling fans. At over 11' in the air, the effort didn't reduce the vaulted feeling at all.

Again, you'll notice string in this picture. I set collar ties at opposite ends, and pulled the string between them to make it easy to set the rest. The collar ties were set with 4' of exposure to make sheetrock work easy, and to allow clearance for ceiling fan blades.

However, the rafters all wonky as can be, so sheetrock will be a fun process.

And, by fun, I mean hell. ;)
 

Attachments

  • collar ties.jpg
    collar ties.jpg
    63.2 KB · Views: 281

Omphaloskeptic

Well-known member
Joined
Oct 11, 2008
Messages
2,346
Location
Ultima Ratio, Wa.
"However, the rafters all wonky as can be, so sheetrock will be a fun process.

And, by fun, I mean hell."


Hey, you're making progress and that's what counts!

Just consider the work you are doing now to be exactly like 'beating yourself with a stick - it feels so damn good when you stop!' LOL
 
OP
R

rieferman

Well-known member
Joined
May 18, 2009
Messages
2,586
Location
Collegeville PA (30 min west of Philly)
HA HA! The reason I so obsessively work through projects like this is that I need it to be over! While it's fun at first, and rewarding throughout, it's really tiring (and in remodel instances, frustrating) work. Much respect to those in the trades for a full time living!!!!!!!!
 
OP
R

rieferman

Well-known member
Joined
May 18, 2009
Messages
2,586
Location
Collegeville PA (30 min west of Philly)
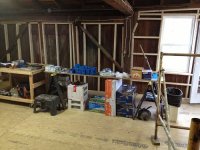
Mini work day today before heading off for family time.

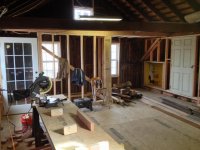
I finished all the nailer/blocking for sheetrock work, and was therefore able to break down the chop saw station. We'll need that at Jim's next weekend, so that's good timing.

Then wifey helped me clean up a bit and re-set for electrical work that Jim (and his son Franky) and I are doing tomorrow.

For some reason, the re-set between stages of the project is always a feel good moment.
 

Attachments

  • reset for electrical.JPG
    reset for electrical.JPG
    92.4 KB · Views: 182

Red Leader

Well-known member
Joined
May 15, 2011
Messages
2,689
Location
Denver, CO
The cuts in one stretch were such a PITA due to twisting and leaning and dipping surfaces. It was a curse fest. Attached, see a picture of the oddest cut I've ever made. Notched, and 3 angles cut in the end to make it fit. Plus, I had to use string to line everything up. Got it done, but damn was that a lot of hours for not much progress!

Haha...I can relate! I know that that feels like. There is not a single 90 degree angle anywhere in our house:lol:

I go to make a cut in a corner or something of the garage walls, and I line it up in the saw perfectly right...there is precision work happening. A beautiful cut. I go take the piece and put it up against the wall and there is 1/4" of sunlight shining through. "What the....." A precise piece ain't nothing if ain't nothing precise gonna fit in there!:D:lol_hitti
 
OP
R

rieferman

Well-known member
Joined
May 18, 2009
Messages
2,586
Location
Collegeville PA (30 min west of Philly)
Ugh, I'm SORE. Jim, Franky and I put in about 10 hours of electrical work yesterday. We got the majority of it all completed, and just have a few hours left coming up in a couple weeks. We got the circuits wired, most of the lighting, all of the receptacles finished. We still need to wire the exterior lights (although they're mounted) and the bar (which I have to build first.. but that will have to wait until after sheetrock).

I also figured out in my sleep last night how I am going to approach sheetrocking the place. Because the building is crooked in every direction, but my framing is plumb, it's a nightmare to get each puzzle piece to fit while also cutting in for outlets etc. I think my plan of attack is a good one, and if that's true, I'll post about it later. If untrue, I'll never mention it again.

No pics this time, sorry!
 

J-man67

Well-known member
Joined
Aug 10, 2012
Messages
218
Location
Delaware
Still great progress and the plans sound great. Thats going to be an AWESOME space, that is for sure!
 
OP
R

rieferman

Well-known member
Joined
May 18, 2009
Messages
2,586
Location
Collegeville PA (30 min west of Philly)
Happy Easter!

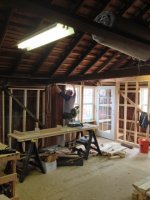
This past weekend I had Friday and Monday off. Most of the weekend was family time, but I did manage to get some serious progress on the rec room project in the barn.

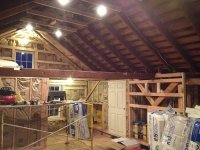
Friday and Saturday, I got most of the space insulated, except the ceiling. It went pretty well really.

Then, on Monday, Jim, Franky and I worked ALL day finishing up the last electrical tasks, and installing some supplemental floor joists. I also found the time to get up onto the roof to install a powered vent to keep the underside of the roof well ventilated once I finished insulating.

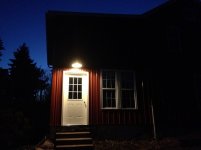
Having 6 recessed lights upstairs makes a huge difference now, and seeing the exterior pie pan lights turned on was really cool too.

Should be sheetrocking within the next week or two!!!!!!!!!!!!
 

Attachments

  • lights.JPG
    lights.JPG
    98.1 KB · Views: 340
  • lights 2.JPG
    lights 2.JPG
    46.8 KB · Views: 242
  • lights 1.JPG
    lights 1.JPG
    49.1 KB · Views: 247

Kevin54

MEMBER EMERITUS
Joined
Jan 12, 2005
Messages
29,341
Location
Urbana, Ohio
Riefer....You have done a hell of a job on saving that structure. I think back to when you first started. Every time I look at my neighbors barn I think of yours. Her wasn't in real bad shape a few years back, but over the last few years the elements have taken it's toll. It needed a roof on it, but with money constraints, she has neglected it. This winter a main beam across the sliding barn doors broke and let most of the front of the structure cave in. I did see on CL where an individual buys up old barns to salvage the lumber out of them. I may see if she wants to go that route before someone gets hurt in there.

I know that when you started your barn, yours and hers were about in the same condition. It sure doesn't take long for Mother Nature to reclaim things.
 
OP
R

rieferman

Well-known member
Joined
May 18, 2009
Messages
2,586
Location
Collegeville PA (30 min west of Philly)
Hey Kev! Thanks :) It feels great to be getting this close to the finish line after multiple years working at it. And boy am I glad that I got to it before someone else - surely I'm among a small percentage that would be crazy enough to try to save it, and it would have been sad to have had the building torn down. Should be good to go for another 50 years or so.
 
To avoid these ads, REGISTER NOW!
Top Bottom