Derald Rice
Member
What I did this summer..............
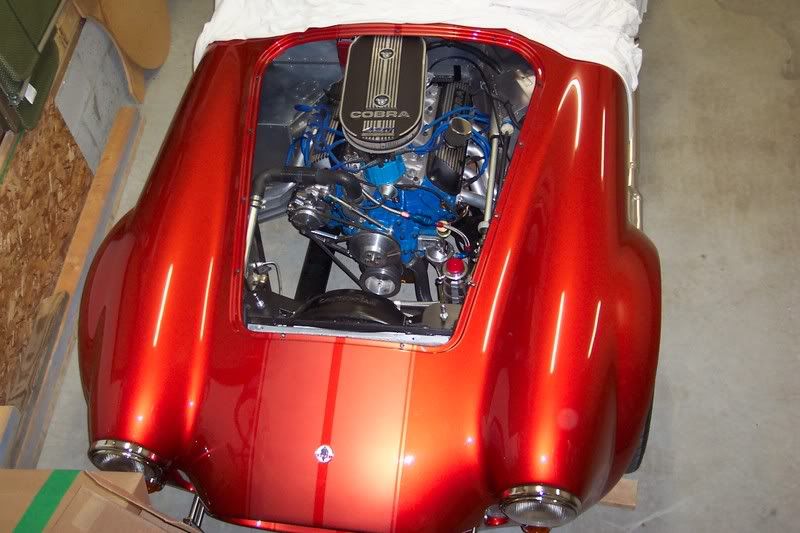
I found this forum last spring, and started to give this project some thought. After seeing some of the inspirational showrooms here, and finally getting tired of moving two project to work on another, we proceeded with it. Hopefully it can hold it’s own against the garages on this forum that inspired me . This was something that I have always wanted to do this ever since the house was built in 1977. Never had the funds or time to do it until now.
In the beginning........The existing garage was 24 x 24, and from the photos you can see that I even used the ceiling for valve cover storage. It was cramped to say the least. But even so, I have managed to build several toys over the years. On May 12th, ground was broken for a 24 x 18 foot addition. This was the max that the city would allow me, and I had to get an set-back variance to do this. The new garage is now 24 x 42. Height was limited, so the ceiling is still 8 feet. A lift would have just gotten me into more trouble anyway. One of my primary objectives was to have the addition look as though it was here from the beginning. I can now get four cars in, my three toys and the wife’s DD. After 39 years of putting up with my projects, she will finally be able (for the first time) to get her car inside. My truck will still have to stay out, but I will manage.
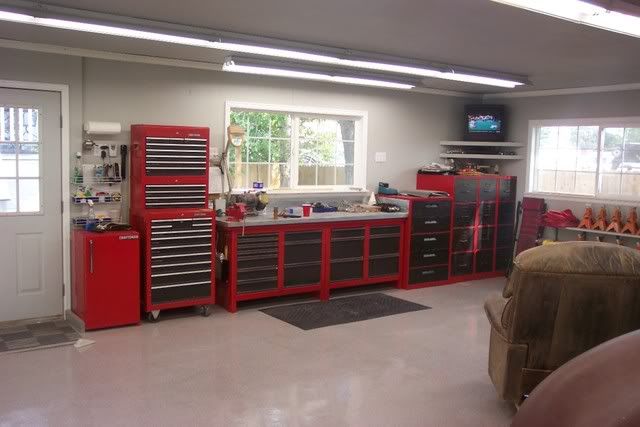
ELECTRICAL: In the past, I never had enough outlets, and was tripping over extension cords. There are now 48 outlets at my disposal. The compressor would also come on at odd hours, and the wife heard it every time. The compressor is now wired into a relay from the overhead lights. When I turn out the lights, the compressor circuit is dead. No more sore ribs.
HVAC: 60,000 btu Hot Dawg, I will probably set the thermostat at 60 or so with the ability to raise it on demand. Also picked up a 25,600 btu window AC to help with our hot days, it works great.
FLOOR: Wolverine products, light grey with the small 1/16th inch chips.
FRAMING: I hate OSB, so all sheeting was done with ply. For durability, I also used ply instead of sheetrock for the interior walls behind the work areas.
LIGHTING: There are 13 eight foot 4 bulb fixtures. 52 t-8 bulbs. At first, I thought that I had made a serious mistake because of how bright it was. Now that I have had some time with it, don’t know how I managed without. The lighting is good enough to paint with. These lights are also on three circuits, so I don’t usually have them all on at once.
STORAGE: The walls opposite the workbench are sliding doors concealing floor to ceiling shelving. I still have a lot of “stuff” but now you don’t get to see it. The empty space between the cabinets where the lumber is stored. will be a 9 foot display cabinet for the die-cast and antique toys. Display cabinet is in storage, just need to clean out the storage unit so that I can get to it.
And if anyone ever thinks that a project like this is done, after the garage was built, the driveway was showing its age, and was replaced. Enough talking, here are some before, during and after shots.
Thanks for the inspiration.
Before..........


During............


After............


I found this forum last spring, and started to give this project some thought. After seeing some of the inspirational showrooms here, and finally getting tired of moving two project to work on another, we proceeded with it. Hopefully it can hold it’s own against the garages on this forum that inspired me . This was something that I have always wanted to do this ever since the house was built in 1977. Never had the funds or time to do it until now.
In the beginning........The existing garage was 24 x 24, and from the photos you can see that I even used the ceiling for valve cover storage. It was cramped to say the least. But even so, I have managed to build several toys over the years. On May 12th, ground was broken for a 24 x 18 foot addition. This was the max that the city would allow me, and I had to get an set-back variance to do this. The new garage is now 24 x 42. Height was limited, so the ceiling is still 8 feet. A lift would have just gotten me into more trouble anyway. One of my primary objectives was to have the addition look as though it was here from the beginning. I can now get four cars in, my three toys and the wife’s DD. After 39 years of putting up with my projects, she will finally be able (for the first time) to get her car inside. My truck will still have to stay out, but I will manage.
ELECTRICAL: In the past, I never had enough outlets, and was tripping over extension cords. There are now 48 outlets at my disposal. The compressor would also come on at odd hours, and the wife heard it every time. The compressor is now wired into a relay from the overhead lights. When I turn out the lights, the compressor circuit is dead. No more sore ribs.
HVAC: 60,000 btu Hot Dawg, I will probably set the thermostat at 60 or so with the ability to raise it on demand. Also picked up a 25,600 btu window AC to help with our hot days, it works great.
FLOOR: Wolverine products, light grey with the small 1/16th inch chips.
FRAMING: I hate OSB, so all sheeting was done with ply. For durability, I also used ply instead of sheetrock for the interior walls behind the work areas.
LIGHTING: There are 13 eight foot 4 bulb fixtures. 52 t-8 bulbs. At first, I thought that I had made a serious mistake because of how bright it was. Now that I have had some time with it, don’t know how I managed without. The lighting is good enough to paint with. These lights are also on three circuits, so I don’t usually have them all on at once.
STORAGE: The walls opposite the workbench are sliding doors concealing floor to ceiling shelving. I still have a lot of “stuff” but now you don’t get to see it. The empty space between the cabinets where the lumber is stored. will be a 9 foot display cabinet for the die-cast and antique toys. Display cabinet is in storage, just need to clean out the storage unit so that I can get to it.
And if anyone ever thinks that a project like this is done, after the garage was built, the driveway was showing its age, and was replaced. Enough talking, here are some before, during and after shots.
Thanks for the inspiration.
Before..........
During............
After............