Andy Griffith
ALLIANCE MEMBER
I have more vertical space in my shop than horizontal space so I made this steel storage rack. I generally buy the steel in 20' lengths and cut it in two when I get it home. The rack can hold 10' lengths and clear most everything above. The shelves on the backside hold smaller pieces.
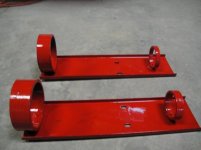
Because of limited space in the shop my general rule is to put everything on wheels/casters that can be done safely. Took a bit of experimenting to find the right angle that would hold the steel securely and not make the rack tip prone. As it turned out, when the rack is unloaded I am unable to tip it over even when hanging my big **** off the back, and of course when the rack is loaded it is even more stable. I put two pieces of chain on the back near the top with the idea that I could fasten them to the wall which may provide 'some' stability in the event of an earthquake.


Because of limited space in the shop my general rule is to put everything on wheels/casters that can be done safely. Took a bit of experimenting to find the right angle that would hold the steel securely and not make the rack tip prone. As it turned out, when the rack is unloaded I am unable to tip it over even when hanging my big **** off the back, and of course when the rack is loaded it is even more stable. I put two pieces of chain on the back near the top with the idea that I could fasten them to the wall which may provide 'some' stability in the event of an earthquake.

")


 !
!