To avoid these ads, REGISTER NOW!

Wilton C1 Rusted Solid - Disassembly Advise, Please

straightcut

Well-known member
Joined
Jan 24, 2013
Messages
340
Location
Phoenix, Arizona
First, I apologize for the lack of pictures. I can't seem to get into my photobucket account.

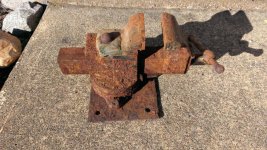
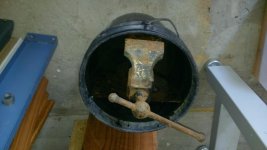
This vise was sitting on the back of a utility truck and became rusted solid. Someone tried to open the vise shearing the three horseshoe washer screws (which are now also well rusted and will need to be extracted). I set up and ran the vise (without the handle/spindle) in an electrolysis tank for 12 hours. It did an excellent job of removing rust and at least two layers of old paint.

My question is how best to free up the dynamic jaw. I have a HF 12 ton hydraulic press, but envision using chain and a Hi Lift jack to pull the vise apart. Any good advise on how not to damage the vise or myself would be most appreciated! I honestly don't think the vise is rusted that badly, so I think it'll come apart relatively easily, but I'd like to start with the best approach.

Thanks for the tips!
 
To avoid these ads, REGISTER NOW!

bluebolt

Well-known member
Joined
Dec 28, 2008
Messages
5,466
Location
Benton LA
I had a stuck 9500 that had sat outside, after doing a basic wire wheel cleanup I put it in the bead blast cabinet and blasted it. It then unscrewed no problem. I figure the vibration from the blasting helped loosen it up.

For you I would wire wheel it, blast it, electrolysis it again or at least a day. When it stops discoloring the solution only then would I try force to get it apart.
 

drivesitfar

Well-known member
Joined
Oct 23, 2013
Messages
36,183
Location
Pacific Northwest
if your electrolysis tank didn't free it up you can buy 3 gallons of vinegar and pour it in a 5 gallon bucket then put your wilton in the vinegar and let sit for a maybe a week or two. diesel works too, but a little more spendy and smells pretty bad if you have an enclosed area.

here's a rusty Prentiss vise i had that might have sat outside in the rain for maybe 80 years of it's life and after it came out of the vinegar a couple weeks later.

don't use a press unless last resort on your bullet because you might break the vise instead of just freeing it up.
 

Attachments

  • WP_20140228_003.jpg
    WP_20140228_003.jpg
    159.6 KB · Views: 145
  • WP_20140324_008.jpg
    WP_20140324_008.jpg
    160 KB · Views: 147
  • soaking in 3 gallons of vinegar.jpg
    soaking in 3 gallons of vinegar.jpg
    111.3 KB · Views: 159

Tim338

Well-known member
Joined
Apr 6, 2013
Messages
91
Put it back in your electrolysis tank and leave it in there for a few days it won't hurt anything and should free it up in time.
 

n8n

Well-known member
Joined
Mar 11, 2014
Messages
3,608
Location
Curtis Bay, MD
no, don't do acid on cast iron. Tried that on a Packard water manifold once, it was unusable as it ate the iron before all the rust was off.
 

autopts

Well-known member
Joined
Jul 4, 2009
Messages
2,268
First, I apologize for the lack of pictures. I can't seem to get into my photobucket account.

.

My question is how best to free up the dynamic jaw.

Thanks for the tips!

If you have the back nut assembly off, you will have access to the back of the channel bar. Place it on end on the front Dyn jaw and soak in some PB Blaster or WD 40 or anything you have around circular edge of the channel bar and let it soak in overnight. Tomorrow, knock it out from behind. Take 2 pills and call me in the morning.
 

yhprum

Well-known member
Joined
Jul 27, 2006
Messages
1,409
Location
Brisbane Australia
Could try submerging ina bucket of molasses and water. I saw it used once to free up a stuck cast iron piston in a stationary engine. It took a few weeks though.
 

Packard V8

Well-known member
Joined
Mar 16, 2009
Messages
7,380
Location
Spokane, WA
FWIW, as an experiment, I suspended a Wilton vertically over couple of pieces of angle iron over a bucket of water, with movable jaw submerged. Then, took a large rosebud torch and poured the heat into the fixed jaw/base casting. The water conducted the heat away from the moveable jaw and the outer casting expanded sufficiently that by the time it was smoking hot, a couple of taps on the exposed end of the moveable jaw and it dropped free into the water.

Your results may vary.

jack vines
 
OP
S

straightcut

Well-known member
Joined
Jan 24, 2013
Messages
340
Location
Phoenix, Arizona
I'm humbled by all of the helpful responses! When I ran the e-tank, I used baking soda. Realizing after the fact that I might have gotten better results with washing soda, I picked some up this evening. I think I'll drop it in the tank for another run, then see how it looks.

I've been looking for an excuse to mix some acetone & automatic transmission fluid to use as a rust penetrant. If the next dip in the tank doesn't free up the jaw, I'll follow your advise, Autopts, and hope to call you in a couple of mornings! :beer:

Thanks for the excellent advise!
 
To avoid these ads, REGISTER NOW!

Carla

MEMBER EMERITUS
Joined
Nov 27, 2010
Messages
672
First, I apologize for the lack of pictures. I can't seem to get into my photobucket account.

This vise was sitting on the back of a utility truck and became rusted solid. Someone tried to open the vise shearing the three horseshoe washer screws (which are now also well rusted and will need to be extracted). I set up and ran the vise (without the handle/spindle) in an electrolysis tank for 12 hours. It did an excellent job of removing rust and at least two layers of old paint.

My question is how best to free up the dynamic jaw. I have a HF 12 ton hydraulic press, but envision using chain and a Hi Lift jack to pull the vise apart. Any good advise on how not to damage the vise or myself would be most appreciated! I honestly don't think the vise is rusted that badly, so I think it'll come apart relatively easily, but I'd like to start with the best approach.

Thanks for the tips!

Assuming that the jaws are open, even 1/2" inch or so.

First, glass-blast the entire vise, to have it externally clean, its much easier to handle when as clean and bright as may be, generally.

If this is the common variety of round-beam Wilton, you might try drilling out the two pins which hold the nut at the back end of the stationary jaw. (you can always replace the nut with over-size pins later. If you can get enough motion to free the nut, remove it, and you will be able to remove the screw and press directly on the beam.

The press setup may be a bit tricky, but if you can put pressure on the front jaw and get it to move, even slightly, clean the rusted exposed area, add some penetrating-oil, and press it back, as far as it will go.

Any repeated motion, with a good penetrating-oil, will eventually bring out a 'rust-slurry' as the part slowly frees up.

Be patient, and gentle.....this is a project which is really not worth doing, if your time is worth anything......but seen as a 'hobby amusement', its an interesting challenge.

(about five or six years ago, a friend and I salvaged a Reed 404-1/2 vise which was similarly rusted solid......after heating the stationary jaw, letting it cool and draw in the penetrating-oil, and then heating again, it came free about 1/4" at a time, running the front jaw back and forth whilst the rust came out as a slurry in the oil.....eventually, it freed up, and we could glass-blast the parts clean........but that one was a 'hobby amusement challenge', to be sure, it wasn't cost-effective in terms of working time to recon that one.)

cheers

Carla
 

Fretters

Well-known member
Joined
Jan 25, 2014
Messages
4,217
Location
South Yorkshire, England
First, glass-blast the entire vise, to have it externally clean, its much easier to handle when as clean and bright as may be, generally.

If this is the common variety of round-beam Wilton, you might try drilling out the two pins which hold the nut at the back end of the stationary jaw. (you can always replace the nut with over-size pins later. If you can get enough motion to free the nut, remove it, and you will be able to remove the screw and press directly on the beam.

Barring the blasting, which is somethng I wouldn't suggest doing, getting the rear off and nut and handle out as you suggest would be simplest for persuading it apart. Rubber mallets, block of wood and hammer etc., pretty much anything subtle can also be used for doing the back and forwards shimmy for loosening the slide from the body.
 

Kenwc

Well-known member
Joined
Aug 7, 2007
Messages
603
Kroil is the next best thing to acetone and ATF. It's worked on everything I've thrown at it.
 
OP
S

straightcut

Well-known member
Joined
Jan 24, 2013
Messages
340
Location
Phoenix, Arizona
Carla, thank you for your comments!

Though I do have a blast cabinet, that is a separate project before it'll be operable. Fortunately, this vise is in pretty decent shape. Indeed after the first run in the e-tank, it looks much better! Really, for anyone who hasn't tried this, I'd encourage setting one up - very impressive results!

I'll readily admit that I started on this just for entertainment purposes and to try out the e-tank. The first bath was with baking soda. The second will be with washing soda. I have a couple more vises to run through the bath as well as some rusty car parts, so these are initial trial runs. One more run with the e-tank, then I'll take the tail off to press on the beam.

As a side note, I had a three inch Wilton mechanic's vise with all four jaw screws sheared off. I was able to get three of the four out with a punch and hammer - teasing them around until I could grasp with a plier and turn them out. The last was recessed into the jaw making it difficult to reach with a punch. I drilled a 1/8" hole using a reverse twist drill, but that didn't get the broken stud to turn. Then, following Carla's advise, I procured a set of Proto square screw extractors and drove one into the hole. I applied some Kroil, but it wouldn't budge. I decided to be patient this time, so left it sit for a week and tried again. Still nothing, but the Kroil had soaked in, so applied more and left it for a week. It was still solid, but eventually, I did get it to budge. Immediately, I gave it some more Kroil and worked it back and forth the little I could. Within a minute or so, out it came!

Carla, thanks for the tip on those Proto screw extractors! A month earlier, I'd had a bad experience using a Craftsman set - albeit, made in China!:mad:
 

Carla

MEMBER EMERITUS
Joined
Nov 27, 2010
Messages
672
Barring the blasting, which is somethng I wouldn't suggest doing, getting the rear off and nut and handle out as you suggest would be simplest for persuading it apart. Rubber mallets, block of wood and hammer etc., pretty much anything subtle can also be used for doing the back and forwards shimmy for loosening the slide from the body.

Hello, Fretters,

I would, if I may, try to induce you to reconsider your opinion regarding salvage cleaning of rusted ferrous parts by media-blasting, particularly the use of 'ultra-fine' glass beads.

There are far too many bad examples of this class of work, done by those who won't take the time to learn the optimal techniques, and so leave the workpieces looking like the proverbial 'moon-scape'.

Blast-cleaning is a bit of a 'fine art', when done properly, with respect for the nature of the workpiece, and does require some care.

I've taught good technique to a great many of unskilled workers over the past thirty years' time, with those who are willing to be careful and patient achieving excellent result.

Its ever so simple, actually. The common form of blast system, which 'entrains' the media into the air blast stream, is not suitable for other than the 'rough' blasting commonly done for automotive cylinder heads and manifolds, where surface-texture is not a consideration.

The optimal blast system uses a 'pressure-pot', with air valving set up with regulators, so that the main blast stream may be varied down to 10-15psi., the feed air line above the media in the pot varied, and the density of media in the blast stream varied by a media valve at the bottom, or 'media feed' end of the pot, allowing for fine regulation of the media density in the blast-stream.

By varying the blast air pressure at the work-nozzle, and the density of the media in the blast-stream, one can adjust the actual abrasive quality of the blast-stream to suit the nature of the workpiece, and use 'just enough' media and pressure to remove surface rust or corrosion without pitting the surface of the workpiece.

One of the best examples of this work is the reclamation of the common older style of American carburetters, the Rochester, Stromberg, and Carter makes.

With varnish and dirt previously removed in a bath of ! part acetone to 1 part methylethylketone, water-rinsed, and dried, the various ports and bores are plugged, and the die-cast zinc-alloy bodies and air-horns gently blasted with ultra-fine glass beads, resulting in the parts looking 'bright' as new, with the smooth finish of the die-cast surfaces preserved. This is necessarily a slow and gentle process.

For cast iron and steel parts, indeed such as vices, one must use a higher blast pressure, and a higher density of media in the blast-stream. Again, done carefully, the original machined finishes are preserved, if not already rust-pitted. The blast cleaning will leave a bit of a 'frosted' appearance, which will clean up nicely with a gentle rub, using 400 or finer emery-paper, with some light oil/paraffin mix.

(yes, there are methods to artificially patinate a cleaned steel or iron surface, for an image of age and preservation, and fool all but the very knowledgeable, but such things are just not discussed in polite company)

It may be the case that, for example, a vice may have no rust, and a nice 'patina' on the machined surfaces, but many coats of paint of varying qualities and colours, often 'gummy' military enamel. To blast-clean the painted areas, one must first mask the machined areas with two or more thicknesses of masking-tape, then apply the strongest available 'paint-stripper' to the existing paint.

Allowing the paint-stripper to fully dry, and neutralise as much depth of paint as it will, the part is gently blasted to remove that layer of paint, and the stripper re-applied. Sometimes, with very thick paintwork, it may take several 'cycles' of stripper and blasting before the part comes clean.

This is easy work for an unskilled helper, who will work carefully, and always use suitable protective gear as provided, the best commercial paint-strippers being quite hazardous to human skin and especially to eyes.

cheers

Carla
 
Last edited:

Fretters

Well-known member
Joined
Jan 25, 2014
Messages
4,217
Location
South Yorkshire, England
Cheers for that rundown Carla. :) It's not that I have anything against blasting per se, but simply that I'm one of those weird types who tries to do the minimal necessary to counter the ravages of the years. :D I merely tend to prefer the fine level of control from something like electrolysis, where the rust can be removed or neutralised but without necessarily removing evidence that it was there, or making the surface look too clean. It's the same reason I'm a bit loathe to use citric acid on anything but nonplussed stuff. It works, but it can be erratic in result and is nigh on impossible to control to a fine level.

Granted, I've never tried blasting myself, so I'm not overly familiar with how fine grained a control can be had with the finish. It's something I've thought of playing around with, but you know what it's like. Always more projects to deal with than there are hours in a day. :D
 

yhprum

Well-known member
Joined
Jul 27, 2006
Messages
1,409
Location
Brisbane Australia
Regadring the electrolysis method for this, there are two disadvantages. This method only works when there is a direct line of sight between the parent material and the other side (cathode or anode, dont recall). So it wont help internally rusted areas.
It will also have the potential for causing hydrogen embrittlement (google), which you dont want on a vise.
 

Fretters

Well-known member
Joined
Jan 25, 2014
Messages
4,217
Location
South Yorkshire, England
Regadring the electrolysis method for this, there are two disadvantages. This method only works when there is a direct line of sight between the parent material and the other side (cathode or anode, dont recall). So it wont help internally rusted areas.

That one is, to all intent and purpose, pretty much along the lines of a common myth. The process does have various intricacies, but line of sight is just something which is oft mentioned but is quite misleading. The process is merely optimal at the point which is closest to the anode, in theory, but the process still occurs across the piece as a whole, wherever the solution can penetrate.


It will also have the potential for causing hydrogen embrittlement (google), which you dont want on a vise.

That is indeed correct, but that is only a temporary concern. Within a day or so of a piece being cleaned, any hydrogen which may be there will have dispersed.
 

Carla

MEMBER EMERITUS
Joined
Nov 27, 2010
Messages
672
Regadring the electrolysis method for this, there are two disadvantages. This method only works when there is a direct line of sight between the parent material and the other side (cathode or anode, dont recall). So it wont help internally rusted areas.
It will also have the potential for causing hydrogen embrittlement (google), which you dont want on a vise.

I don't have any first-hand experience with de-rusting by electrolysis. As noted above, I prefer media-blasting, but I've heard stories of embrittled steel parts.

So the stories go, one must bake the parts after de-rusting, 450deg. F, for at least four hours time, to drive the hydrogen atoms out of the metal.

This was told me by a local gentleman who did electrolytic de-rusting commercially, and had both a large electrolysis tank, and a large industrial oven.

He was willing to de-rust cast iron parts, such as engine blocks, but would refuse to de-rust stressed steel parts, particularly thin section parts, saying that some would remain brittle even after baking. I will say this.....he could make really nasty old engine blocks look 'pretty', after 'cooking' them long enough, then baking them.

cheers

Carla
 
To avoid these ads, REGISTER NOW!
Top Bottom