ChristopherLutz
Well-known member
All,
I've just completed my first cabinet build....and *surprise* it's out of square.
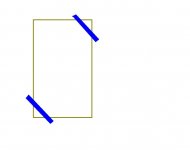
I check and checked along the way but I suppose that somehow while assembling and clamping, I "completed" the thing....and I'm now nearly 3/4 inch out of square on an 85'' by 42'' cabinet.
Since I had so much invested, i went ahead and completed it, putting the face on, etc.
I'm concerned now that when I put the doors on it's going to look terrible. (NOTE: it's not noticable now..and it's even level - which confuses me)
Any tips for the doors? I "think" I can cut them square and put them on, but will end up with the hinges at different depths on the faceplate. I plan to use 1/2'' MDF for the doors and use an overlay style.
I have more cabinets to build - how to I get them square for assembly...and keep them that way as I add shelves, etc.?
I've just completed my first cabinet build....and *surprise* it's out of square.
I check and checked along the way but I suppose that somehow while assembling and clamping, I "completed" the thing....and I'm now nearly 3/4 inch out of square on an 85'' by 42'' cabinet.
Since I had so much invested, i went ahead and completed it, putting the face on, etc.
I'm concerned now that when I put the doors on it's going to look terrible. (NOTE: it's not noticable now..and it's even level - which confuses me)
Any tips for the doors? I "think" I can cut them square and put them on, but will end up with the hinges at different depths on the faceplate. I plan to use 1/2'' MDF for the doors and use an overlay style.
I have more cabinets to build - how to I get them square for assembly...and keep them that way as I add shelves, etc.?
") Put a piece of trim so that it is square to the opening and make the doors fit to that dimension. You can band the cabinet on three sides and it can add some visual interest while helping to make the opening square again.
Put a piece of trim so that it is square to the opening and make the doors fit to that dimension. You can band the cabinet on three sides and it can add some visual interest while helping to make the opening square again.